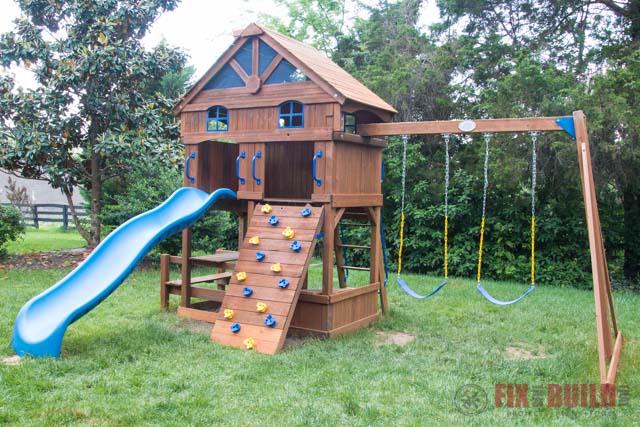
DIY playset restoration and refinishing is not as hard as the job sounds if you have the right tools! Today I’m going to show you how to restore a swing set or playset that’s seen its better days. After a few days of work the swing set looks almost brand new and it can be a feature point of the backyard again vs an eye sore.
I’m using the new Elite3300 Gas Pressure Washer from Briggs & Stratton to do the majority of the heavy lifting on this playset restoration. Briggs & Stratton is sponsoring today’s post and I’ve gotta say, I’m super happy we connected. It was my first time every using a pressure washer and it was almost as fun as it was effective!
If you don’t own a pressure washer yet, don’t worry. You can rent them at the home center or borrow one from a neighbor. But be forewarned, you’re going to want to buy one after you use it 🙂
Affiliate links are used on this page. See my disclosure page for info on affiliate programs.
DIY Playset Restoration How To
- Remove the Playset Hardware
- Pressure Wash the Playset
- Update the Accessories
- Repair Boards on the Swing Set
- Stain the Wooden Playset
- Reassemble the Playset
When we moved into our house the playset in the backyard wasn’t in the best shape. And after 5 more years without any maintenance it was really showing its age so it was time to do something about it.

1. Remove the Wooden Playset Hardware
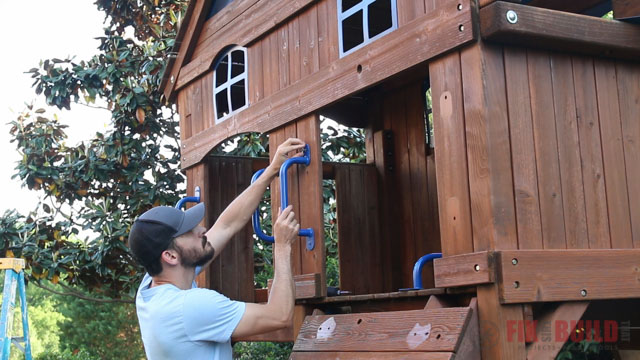
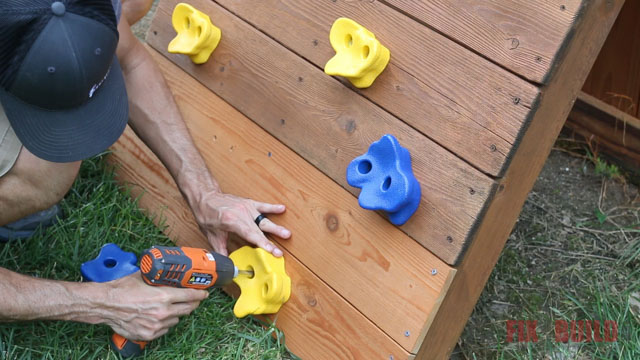
I started by taking off all the different accessories on the wooden playset to prep for cleaning. The climbing hand holds were bolted into threaded inserts and most came off easily. But on a few I had to break out the grinder and cut off the rusted insert to remove them.
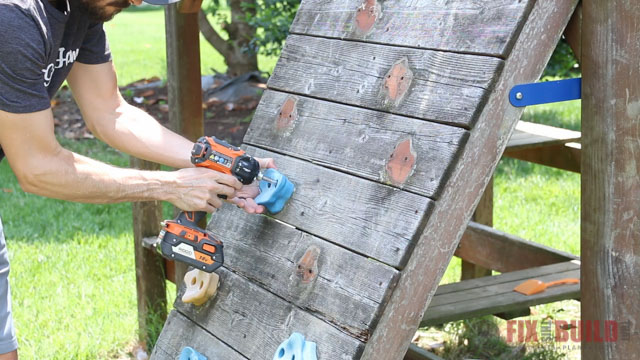
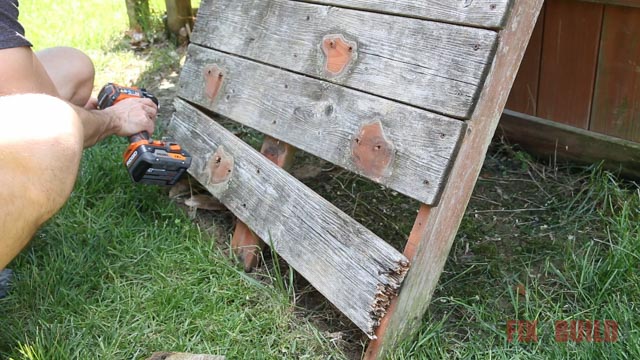
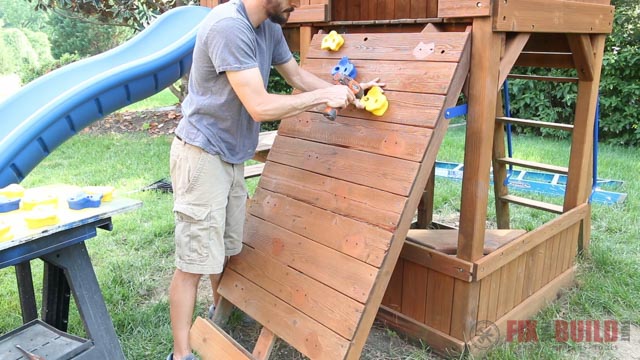
I also removed some rotted boards on the bottom of the climbing wall that I’ll replace with new cedar boards later.
Most everything else was just screwed in so I removed the handles, screen and windows easily. And my younger son jumped in to help and we removed the slide and all the swings from the playset and put them aside.
The hardware holding the swings was all rusted up so I wanted to refurbish them as well. They were held on by long through bolts and I backed them all off and was ready to start cleaning the playset.
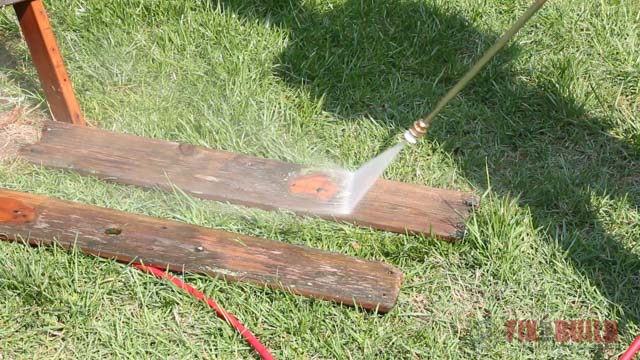
2. Pressure Wash the Wooden Playset for Refinishing
To make cleaning the wooden playset a lot faster I’m using a pressure washer. I mixed up some multi-purpose cleaner concentrate to help cut through the mildew and grime. I mixed it in a one to one ratio for normal cleaning though I probably should have used the straight concentrate for heavy cleaning.
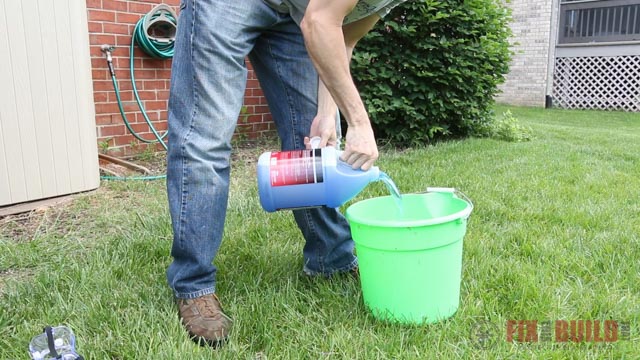
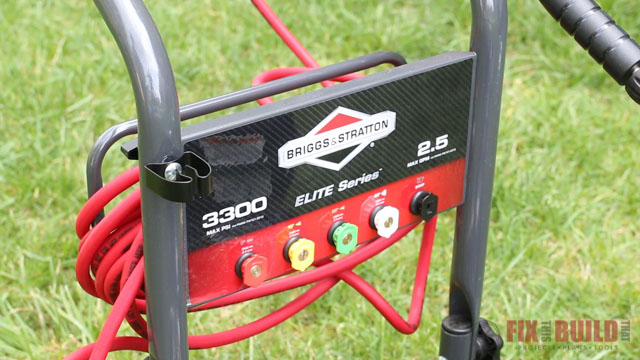
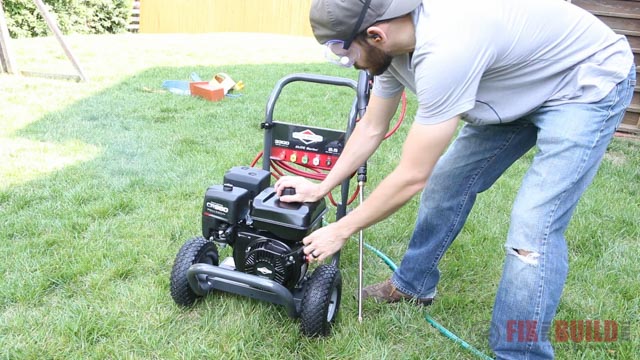
The pressure washer I’m using is the Briggs and Stratton Elite3300 Gas. It can go up to 3300 psi and it has 5 quick-connect spray tips and one made specifically for applying soap and cleaner at low pressure. So I plugged in the soap spray tip then hooked up my hose to supply the water.
Of course whenever you’re using a pressure washer you want to wear safety goggles to protect from overspray. I started up the pressure washer and dropped the siphon tube into the bucket of cleaner which pulls the soap through the line into the sprayer.
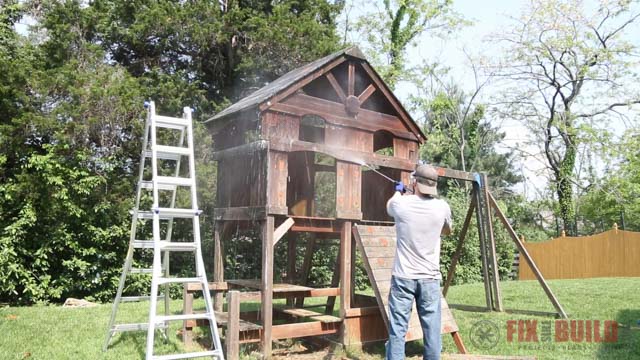
To begin the playset refinishing prep I started at the top of the swing set and hosed everything down with a good dosing of the cleaner then let it sit for 5 minutes to do it’s thing.
While I was waiting I switched the quick-connect tip out to the 40 degree white tip which is the least aggressive of the bunch. I’d never used a pressure washer before so I tested it out on the rotten boards I removed from the climbing wall. I turned up the pressure until it did a pretty good job of removing gunk without stripping the wood.
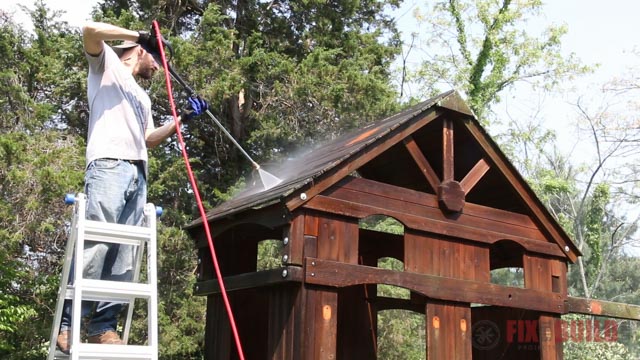
Then the fun began! I started with the roof and was watching the grime and mildew get blasted away. The Elite3300 Gas has an upgraded 30 foot EasyFlex™ hose that made moving around the playset a breeze.
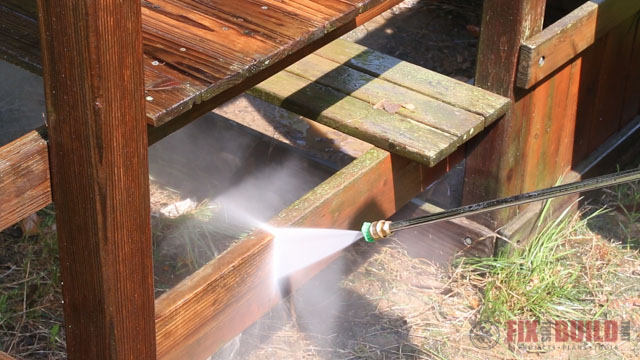
After cleaning the bench though I noticed some mildew still hanging on the lower boards. So I switched over to the 25 degree green tip to get a little more aggressive spray pattern. This did the trick perfectly and the mildew came right off on the second pass.
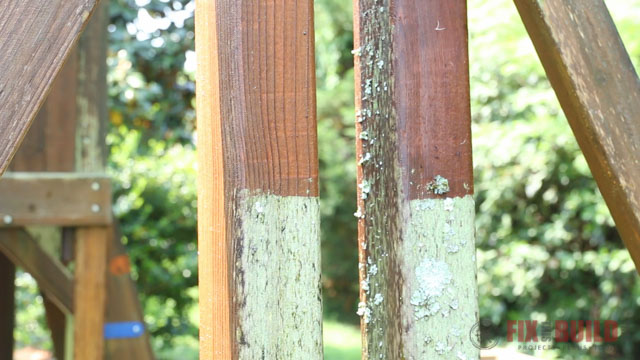
I worked my way around the playset blasting off years of dirt and debris. But some areas of the playset had a ridiculous amount of mildew and fungus on them. The outer swing set posts were absolutely disgusting. I gave them the business though and I was amazed how quickly the pressure washer cut through the funk. I got pretty aggressive with the spraying, but it was worth it to not have to scrub that mess off.
You can check out some more ideas and tips for using your pressure washer over at the Briggs and Stratton blog as well. I finished up my fun by spraying off the mesh screens and the climbing pulls then let everything dry out for a couple days.
3. Update the Playset Accessories
A key part of playset restoration is sanding and updating the accessories. Pressure washing the wood does leave it a little rough so I went back and sanded the edges and other places where little hands would be touching with a 150 grit sanding block.
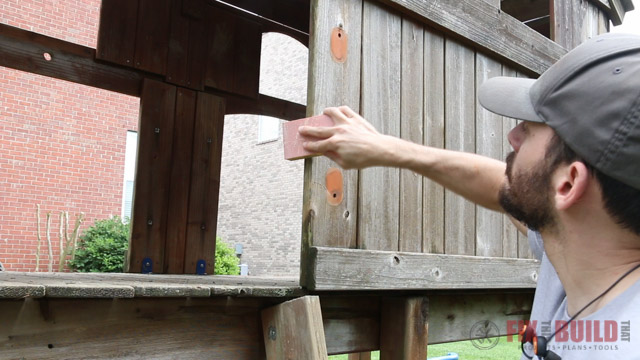
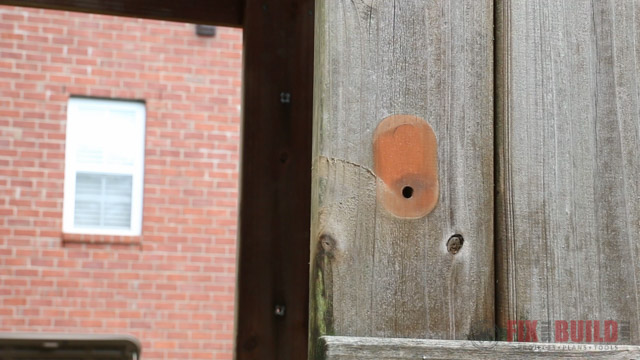
And here’s a great example of why you need to be careful with a high pressure sprayer. While I was spraying the floor of the playset I accidentally swung too far out and hit the side from only a couple inches away. You can see the gouge it took out of the wood at this close distance.
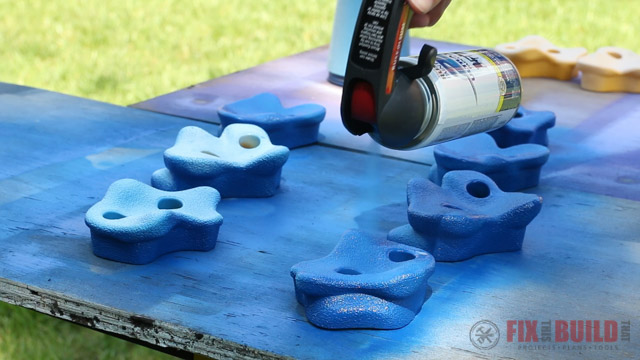
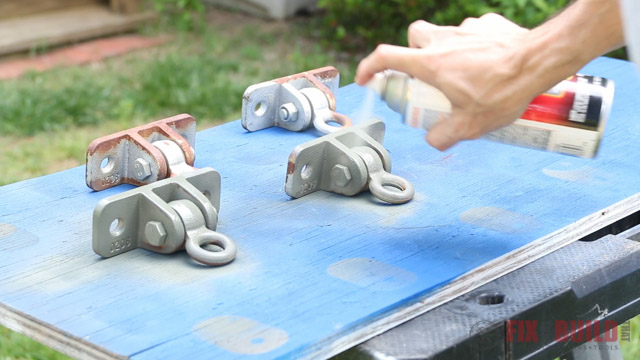
The climbing handholds and other plastic accessories were really faded from years of being in the sun. I found some matching spray paint and gave all the parts 3 coats of paint and then topped them off with 3 coats of gloss clear coat for protection.
For the metal handles I used some acetone to clean off any dirt and oils. Then I followed up with the same treatment as the plastic parts with 3 coats of paint followed by 3 coats of gloss clear coat. I hope this will hold up well and provide many years of protection.
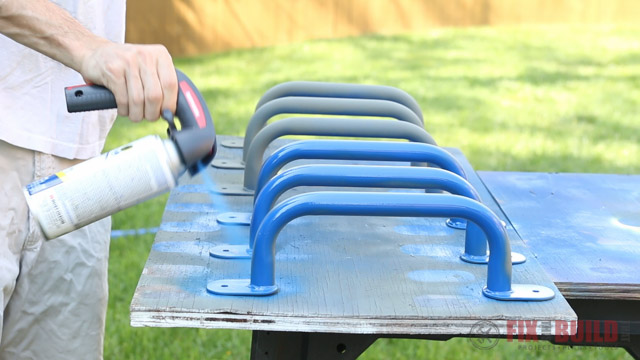
While I was spraying everything I moved over to the swing hardware. I sanded all the rusted parts to knock off the loose rust then primed with the self etching primer. I top coated these with some aluminum colored spray paint and they looked brand new.
I started trying to refurbish the old swings and bring them back to life with the spray paint. But as I was spraying them I quickly realized it wasn’t going to look great since the plastic was all cracked and the chains had a coating that was falling off. So I threw in the towel and ordered two new swings.
4. Repair Boards on the Wooden Swing Set
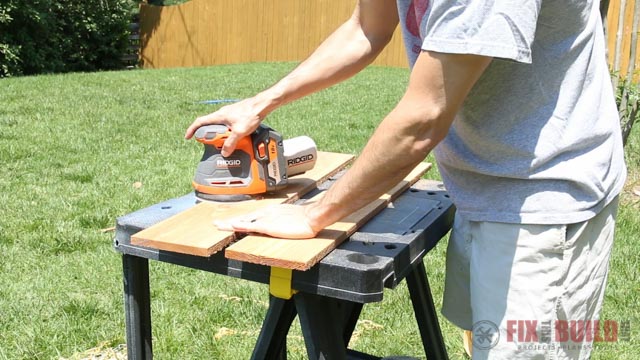
The last thing I needed to prep before applying the finish was to cut the replacement boards. I used some inexpensive cedar fence pickets from the home center and cut them to size. Then I sanded them smooth and rounded over the edges with my router.
5. Stain the Wooden Playset
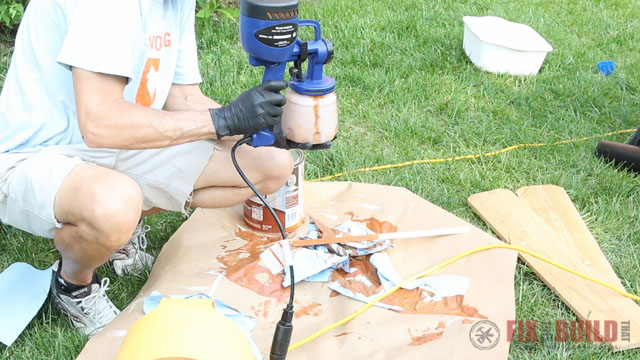
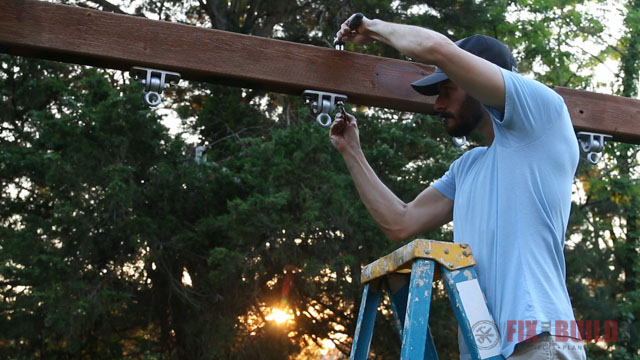
Now it was finally time in the playset restoration to put on the new stain and see this swing set transform! I started at the top and sprayed on a semi-transparent stain and sealer combo. I sprayed on a light to medium coat then backbrushed it with a chip brush to even out any puddling or drips.
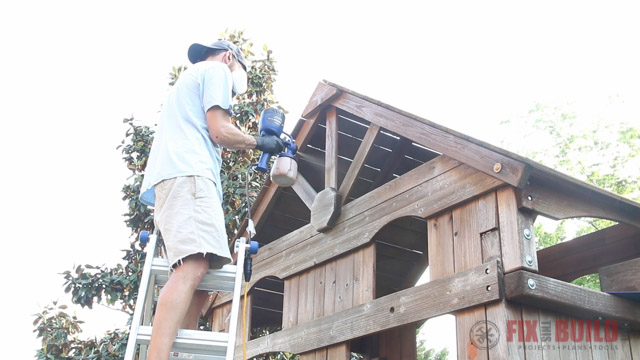
This approach worked really well and spraying the finish on went quickly with this sprayer. The sprayer I’m using is the Finish Max HVLP from HomeRight. It’s an inexpensive electric sprayer that runs off an extension cord. The material cup isn’t huge, so you do have to refill often, but that keeps it light and it’s perfect for jobs like this and puts down the finish fast.
You can see even from the first coat what a difference the stain made to the play gym. The wood was really dry and thirsty so the first coat soaked in fast. One thing to look out for is when you spray on top of hardware like bolt heads. If you don’t wipe it off quickly it will dry on and look bad.

6. Reassemble the Playset
I applied two coats in all and after a day of drying I started reassembling everything. When you disassemble I’d recommend using some zip lock bags and labelling all the fasteners. It would have made this part a lot faster as I had to figure out what went where out of the jumble.
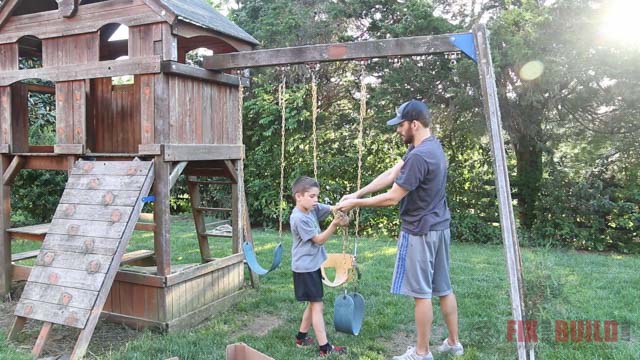
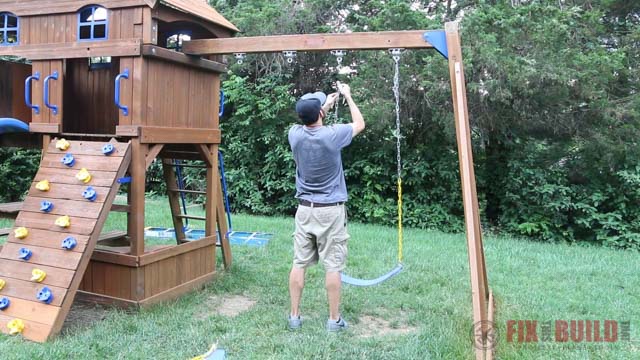
While I was waiting for the new swings to arrive I did some reading and found recommendations for swing set widths and distances from each other and from the structure. The three swings we had were waaaaay too close to each other so I drilled new holes to move the brackets and decided to only use two swings vs three.
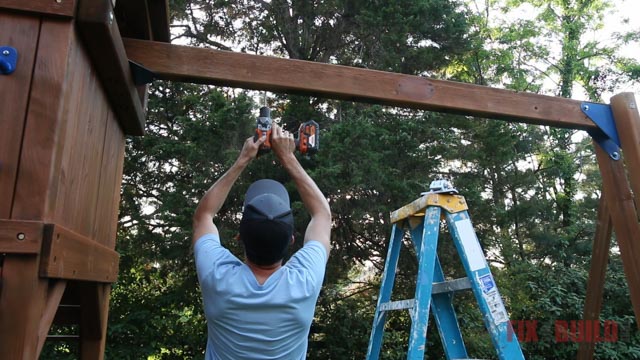
I reinstalled the hardware but only put four of them back up to hold two swings so they would have plenty of room between them.
The sun set on me that day, but the next day I finished up the final pieces. I reinstalled all the climbing wall hand holds and man did they look great against the fresh stain.
For the repair pieces at the bottom I drilled out two new holes in each one for the handholds. Then I hammered in the threaded inserts into the back and attached the boards to the climbing wall with deck screws. I finished it off by securing the handholds with new bolts and washers.
The swings arrived and I hung them on the set. The chain was a bit too long so I adjusted them up and I’ll come back and cut the excess chain when I can borrow some bolt cutters.
After looking at the before pictures I’m really amazed how drastic of a difference it is.
The playset really does look brand new from a distance.
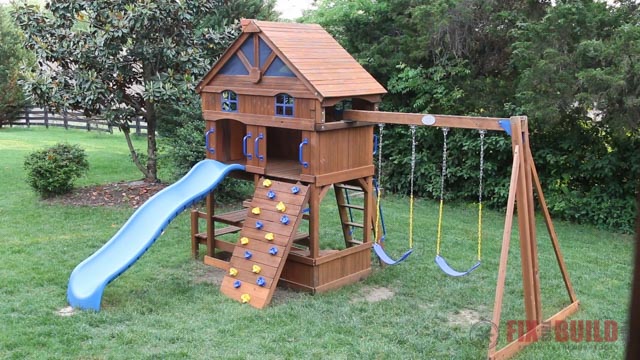
Close up there are still some chips and bruises, but the DIY playset restoration with stain, paint job and new swings have given this swing set a new lease on life.
If you want to check out some more of my outdoor projects head over to my Outdoor Projects page.
Briggs & Stratton and HomeRight provided me with product and/or monetary compensation as a sponsor of this build. All opinions are my own and are not filtered by the sponsor.


Hi I just got the exact play set and do not have the Manual to relocate it and rebuild it if you have it that would be greatly appreciated!
Our play set was here when we moved in so we don’t have the manual. Sorry!
Do you know where I can find the manual for that exact playset?? I just was donated one and it’s not put together. I found your video and it just so happens to be the same!! Thanks!
Thank you for sharing this can you tell me how the handholds that you repainted held up and now given hindsight if there’s anything that you would do differently.
P. S. When can I come over and play ???
You’ll have to fight my kids off it first 🙂
Hello Brad, What a great tutorial. It could be anything needing restoration, not just a play set. Besides your DIY and woodworking skills, you can add “great content creator” to your resume. All the best.
Thanks, Steve!