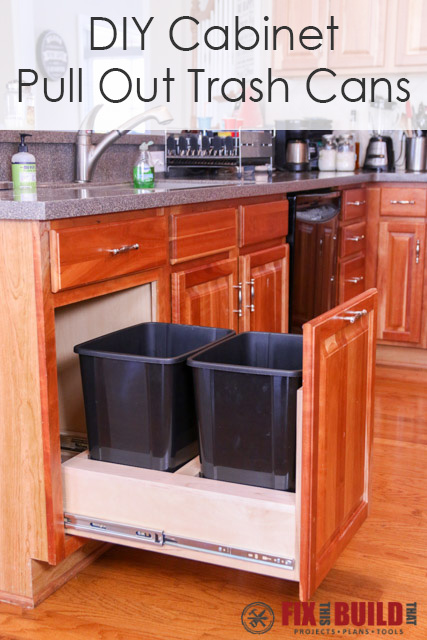
Today I’m going to show you how to put a DIY Pull Out Trash Can in any kitchen base cabinet! Have an easy accessible garbage bin in the kitchen is almost a must. Since we don’t have the floor space, we’ve been using a rollout drawer of a base cabinet to store our trash and recycling bins. The problem with a regular cabinet is it takes multiple movements to open, and you have to use your foot or pull on the trash can to slide them out. We wanted something easier and cleaner so I thought this would be a great DIY project.
The materials for this project are pretty minimal and if you have some leftover plywood you’ll be halfway there. Other than the wood I just needed the drawer slides and used a few jigs from Rockler Woodworking & Hardware, who is sponsoring this project. The build went really quickly and now we have a major upgrade to our kitchen cabinets after this project!
Materials/Supplies
- (1) 24″ x 24″ 3/4″ plywood
- (1) 24″ x 24″ 1/4″ plywood
- (1) 8′ 1×4 pine or poplar
- (1) 8′ 1×3 hardwood maple
- 22″ drawer slides
- 1-1/4″ Pocket Hole Screws
- Water Based Polyurethane
Affiliate links are used on this page. See my disclosure page for info on affiliate programs.
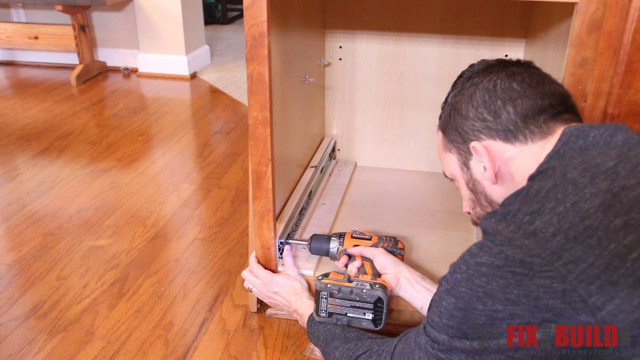
Mounting the Cabinet Drawer Slides
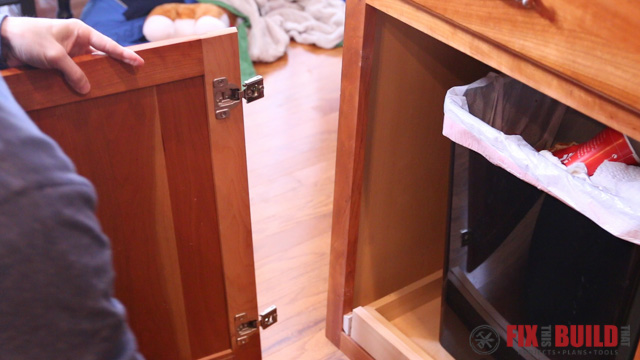
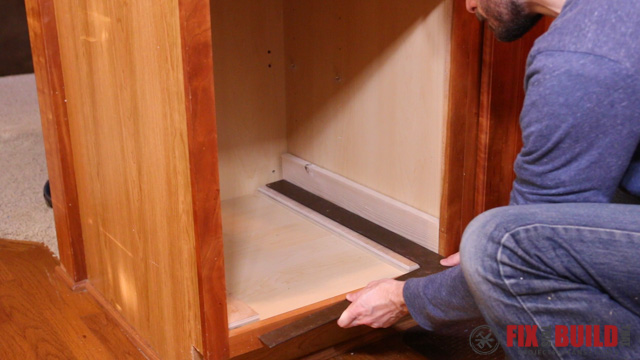
I started by taking out the innards of the cabinet and removing the door.
I quickly realized I wouldn’t be able to attach the slides to the side of the cabinet because the sides are only 1/2″ thick and the left side is an end cabinet. So it would be too risky to blow through side when mounting them on a cleat.
Instead I made L-shaped cleats for to attach to the base of the cabinet. I ripped a 1×6 into 2 pieces for the uprights and then used a plywood offcut for the base. I had these materials on hand so I used them, but you could make both cleats from an 8′ 1×4 or from 3/4″ plywood.
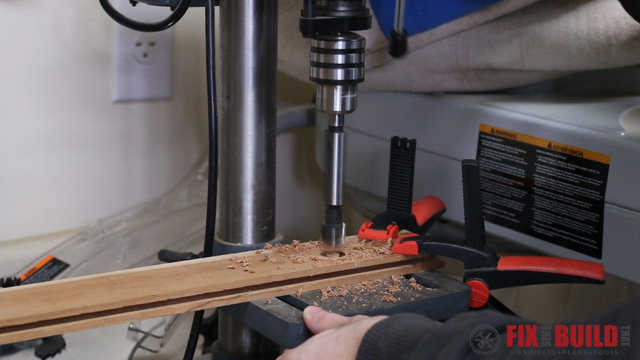
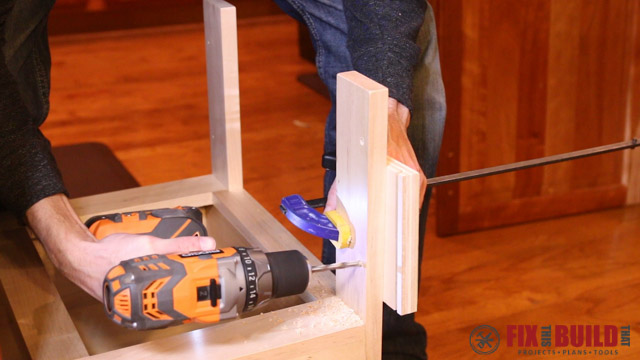
I cut the parts to 22″ long then drilled pocket holes into the uprights with my pocket hole jig.
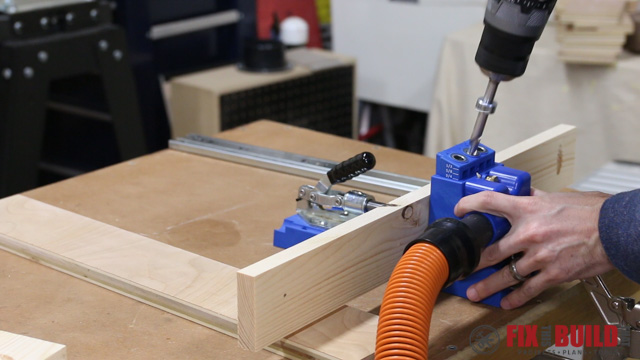
I assembled the L-shaped cleats with pocket screws and glue making sure they were at a consistent 90 degrees.
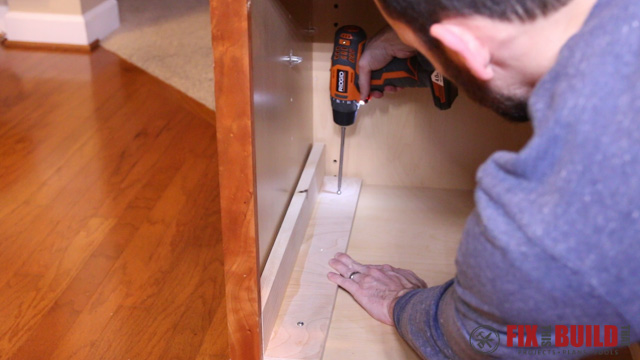
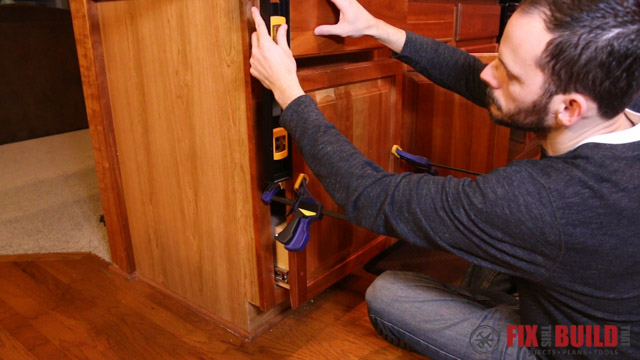
I took the cleats inside and drilled 1/4″ mounting holes in each one. I lined up a framing square with the front and inside edge of the face frame then referenced the cleat to the square. Then I predrilled the holes and attached the cleat with pocket screws. The oversized holes in the cleats leave a little room for adjustments if needed.
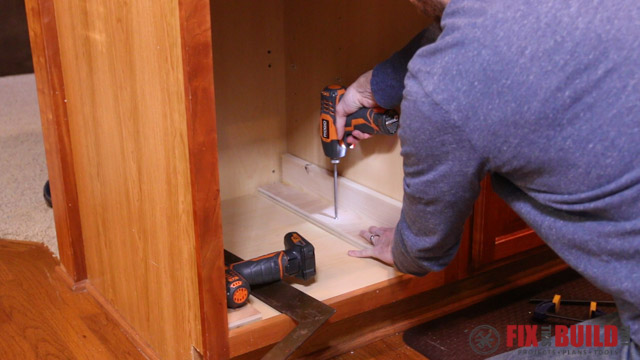
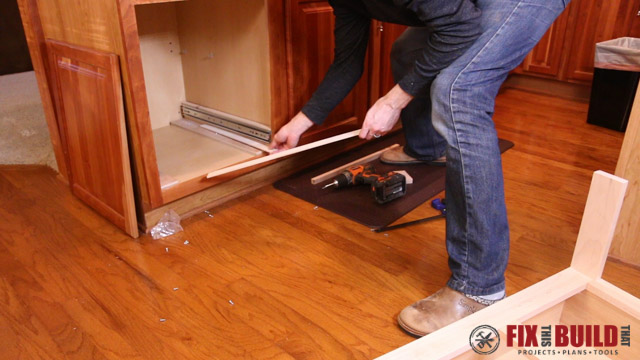
I repeated the same process on the other side of the cabinet. Then I used a scrap of plywood cut to 18” (which is the width of my face frame opening) and slid it down the length of the cleats to make sure they were evenly spaced. I made a few minor adjustments and the cleats were done.
Building the Pull Out Trash Can Drawer
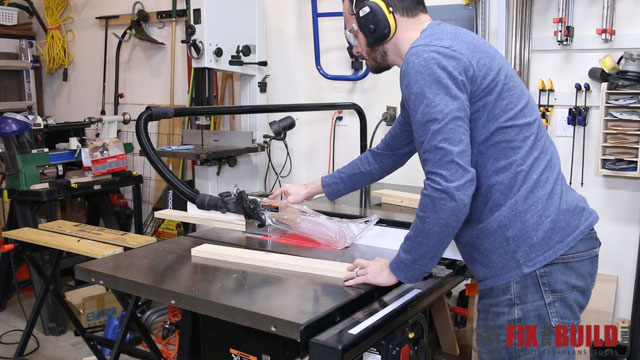
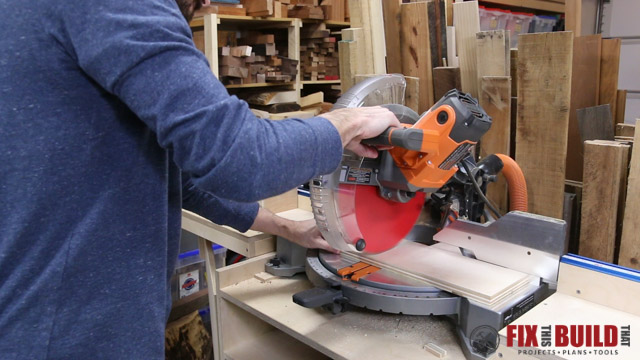
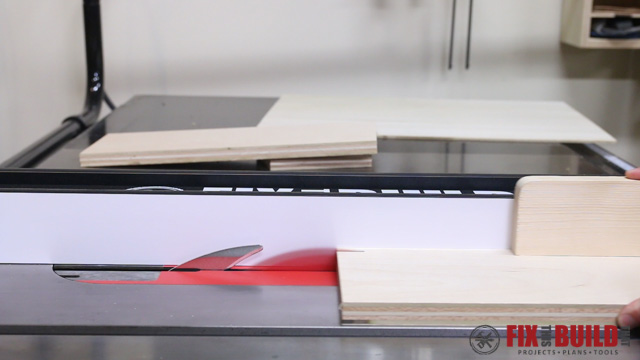
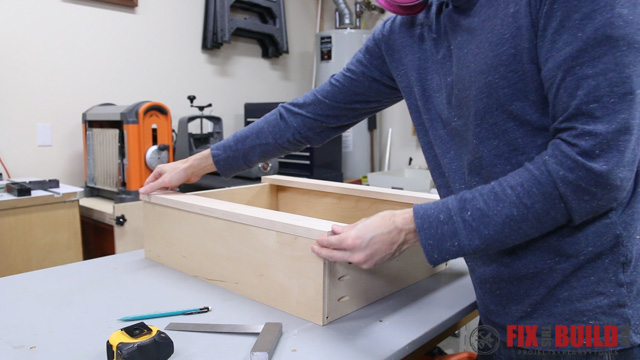
Next I moved on to making the drawer box that will hold the cans. I used ¾” plywood for the drawers and ripped 4 pieces to 5-1/2″ wide from a 24″ x 24″ sheet. Then I took them to the miter saw and cut the sides to 22″ and the front and back to just over 15-1/2″. Basically you want the whole drawer to be 1″ smaller in width than your face frame opening (the drawer slides take up the other 1″), so size your drawer accordingly.
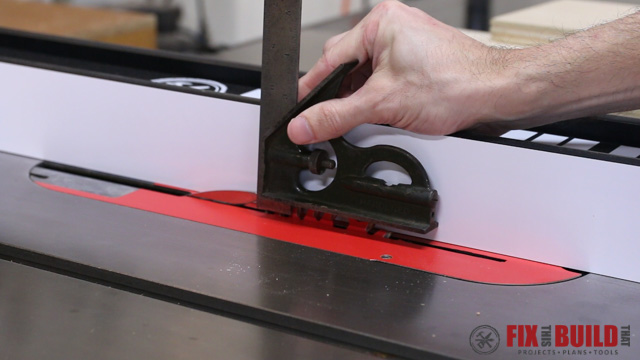
I set the tablesaw blade to ⅜” high to cut grooves for a ¼” bottom
panel. I made one pass on each board which gave me an ⅛” groove. Then I moved the fence over and ran a test board to get the right fit for the ¼” plywood thickness. After tuning in the cut I ran the sides and the front through at this setting.
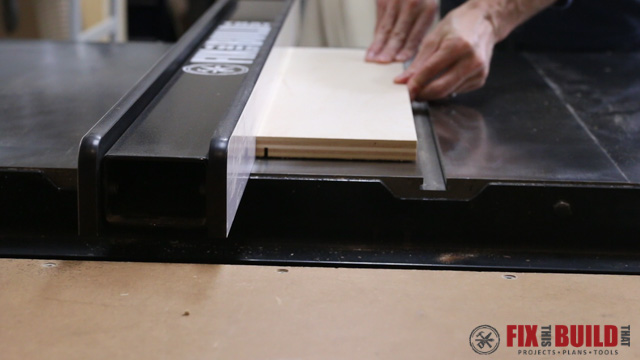
For the back piece I kept the same fence setting but raised the blade up and made a through cut on the board. I’ll show you why in just a minute.
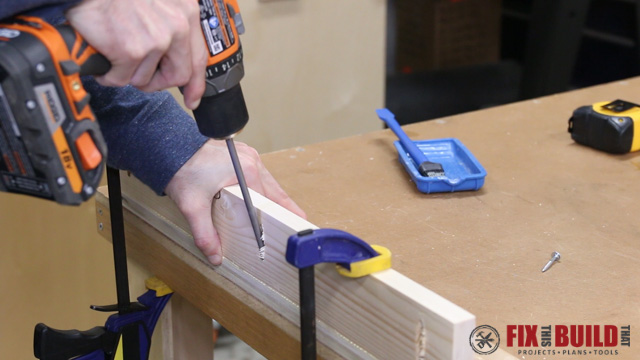
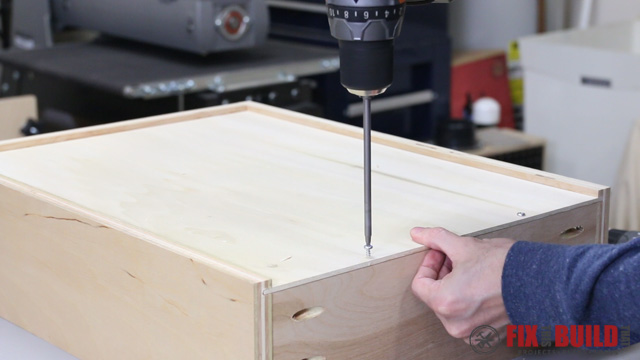
The last thing I did before assembly was drill pocket holes in the outside of the front and back pieces.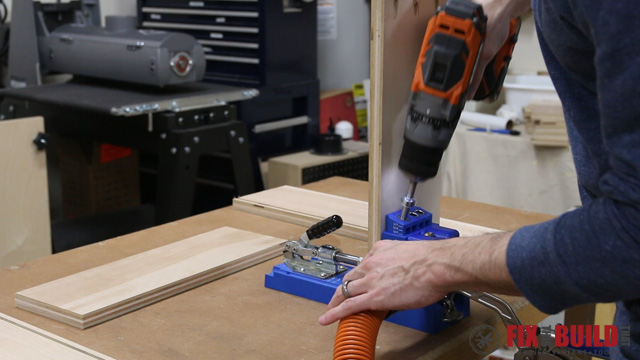
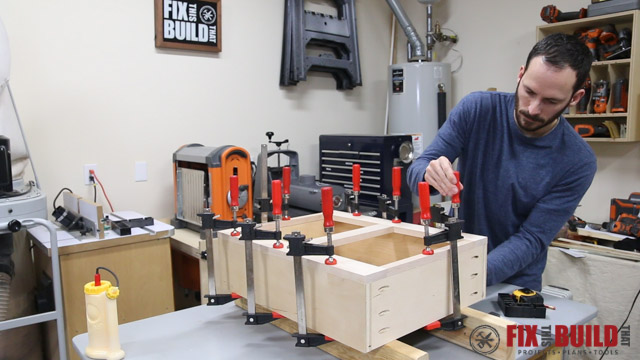
To assemble the drawers I started with the sides and the front and turned the pieces upside down. I squared up the parts, clamped them together and attached the front to the sides with pocket hole screws.
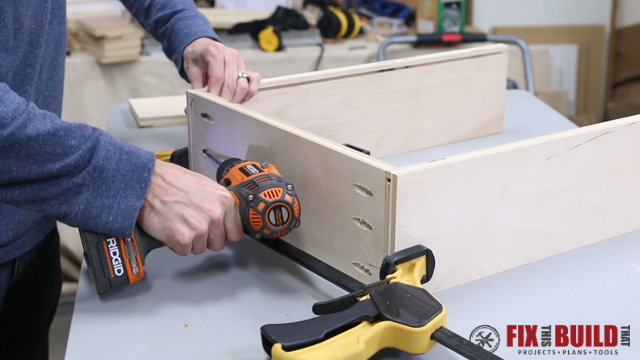
Then I put the shorter drawer back in place and attached it as well.
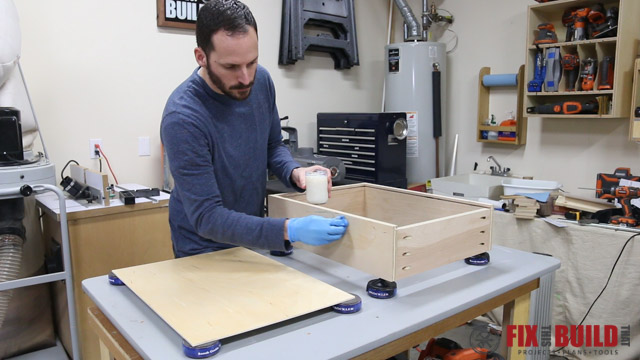
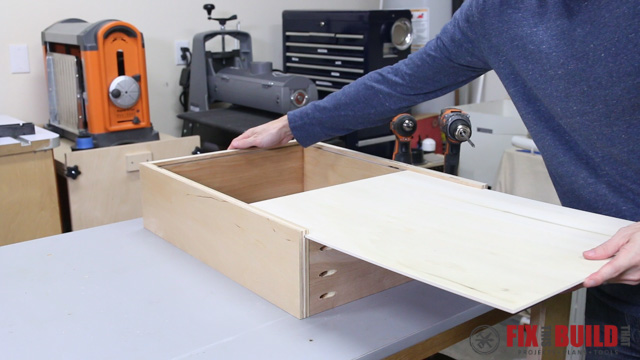
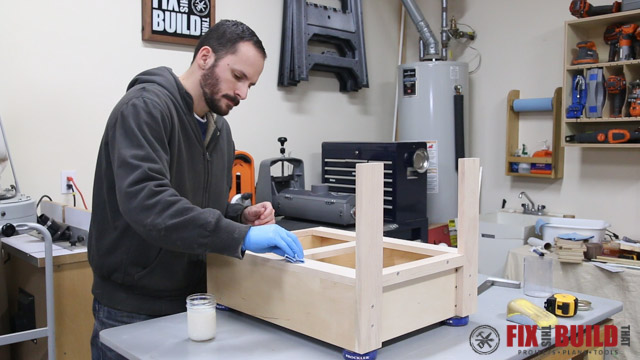
The back of the drawer stops right where the groove in the sides starts. I cut a bottom panel to size it to fit the drawer ~ 16″ x 21-1/2″. Before final assembly, I always finish the inside of the drawers and the bottom panel. I used water based polyurethane and put on 3 coats.
When the parts were dry I slid the bottom panel into place in the drawer grooves then predrilled and attached the panel to the back rail with some panhead screws.
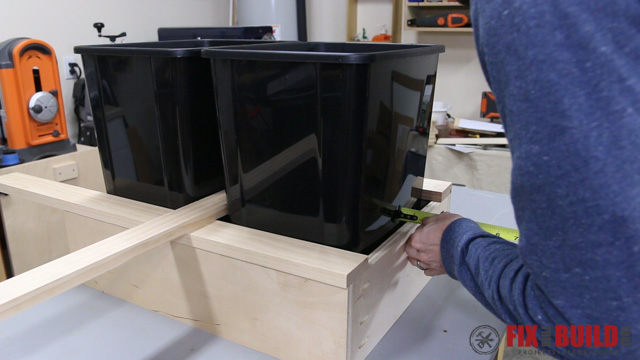
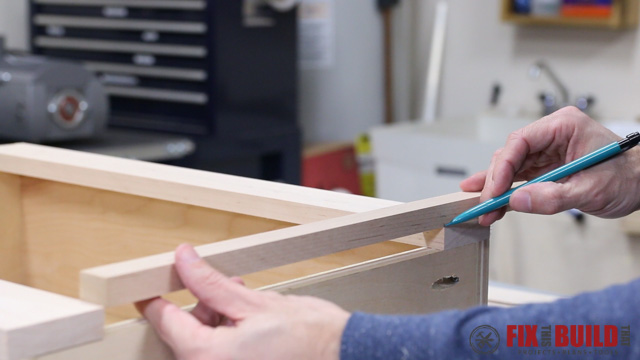
Now I needed to size the face frame so I put the trash cans in the drawer and laid some 1×3’s along the top edge of the drawer and between the cans to mock up the spacing. You want to make sure your factor in the narrower base of the cans vs. the wider mouth when you cut the frame parts.
Instead of using the pine 1×3’s I decided to go with maple hardwood for the face frames for better long term wear. I cut the pieces to width on the tablesaw then cut the long rails to size on the miter saw. I set the rails in place, marked the width for the end and center dividers, then cut them to final size back at the miter saw.
I drilled pocket holes on the ends of the dividers then laid out all my face frame pieces for assembly. I started by attaching the dividers to one side, clamping the pieces together and attaching them with pocket screws. Then I worked my way around making sure everything was square along the way.
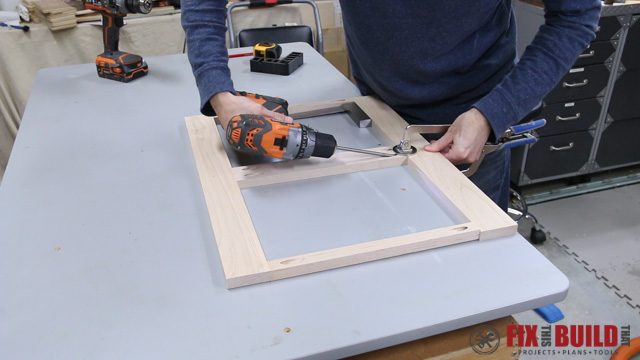
I didn’t want any fasteners showing on the face frame so I just glued it and clamped it in place on the drawer. After the glue was dry I came back and flushed up the edges with my block plane.
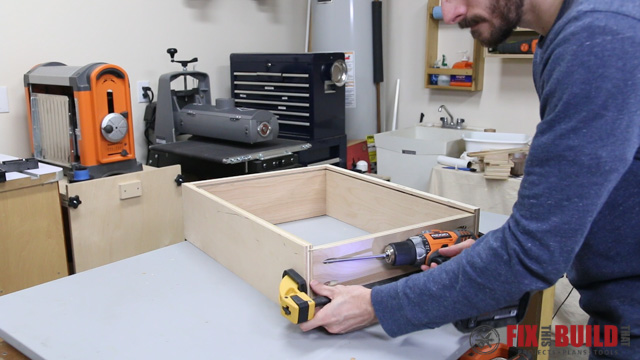
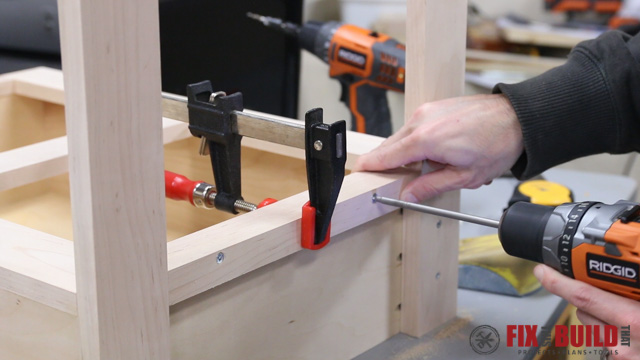
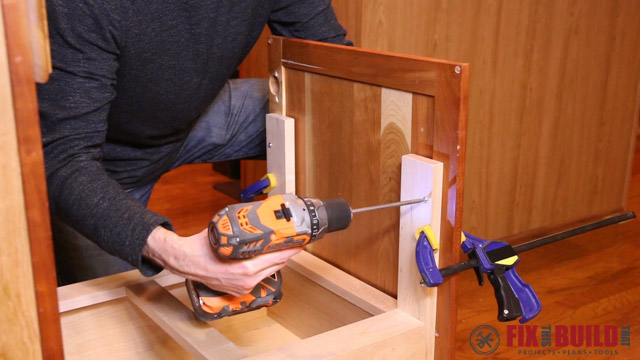
The last piece the drawer box needed was the vertical supports to attach the cabinet door. I used maple again for these and cut two wide supports to 2-1/2″ x 15″ and a 3/4″ filler strip to go in between them. I cut the supports to length then took them over to the drawer box and attached them with two screws, predrilling and countersinking for each screw.
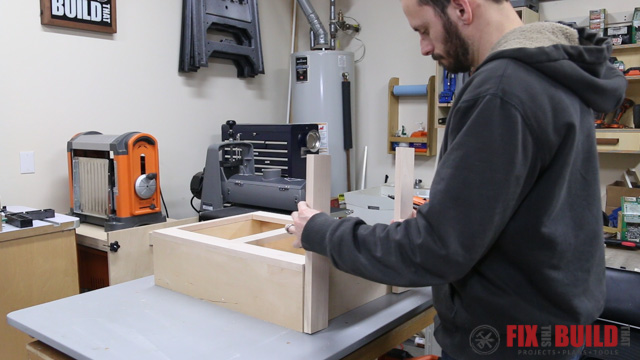
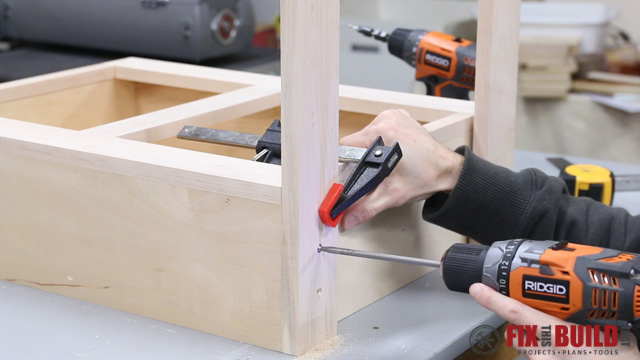
Then I cut the filler strip to fit between the supports and attached it with countersunk screws as well.
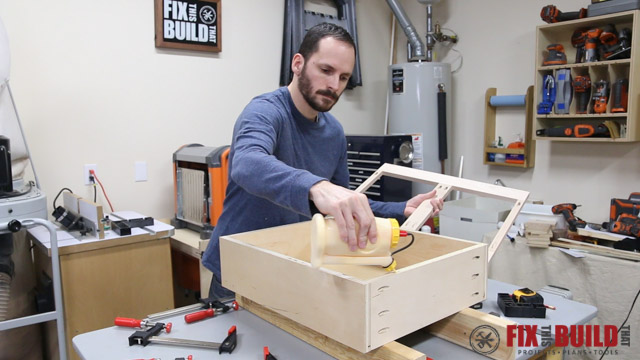
With the drawer box complete I sanded everything to 220 grit and rounded over any sharp edges. Then I applied more of the waterbased poly to all the maple parts I just installed.
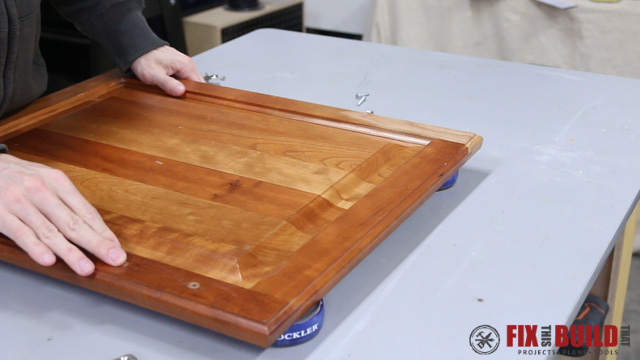
Modifying the Kitchen Cabinet Door
Alright, now it’s time to deal with the cabinet door. I removed the hinges and pull from the door and I was left with these mounting holes on the front I had to deal with.
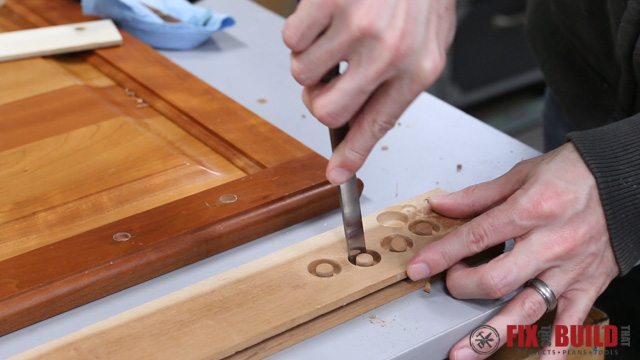
I decided to enlarge the holes with a forstner bit and plug them with a cherry dowel. I drilled a hole in a 1/4″ plywood scrap and used it to guide the forstner bit. If you don’t do this the bit will wander and give you jagged edges since the center spur has nothing to dig into.
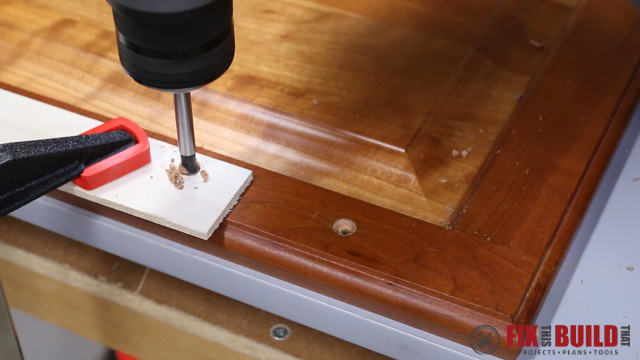
I found a piece of cherry for the plugs that looked similar to the door rail with finish on it and took it to the drill press to cut the plugs out. I used a 3/8″ plug cutter and cut several plugs from the board in case I needed more for backup.
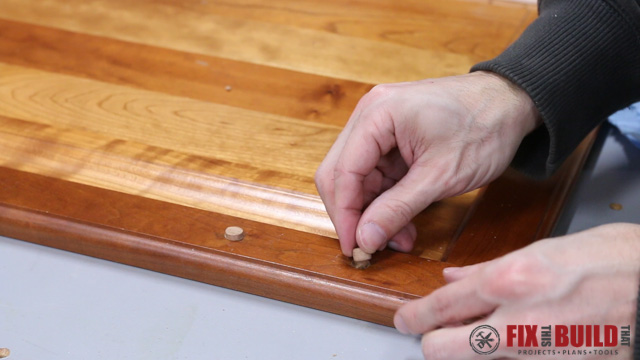
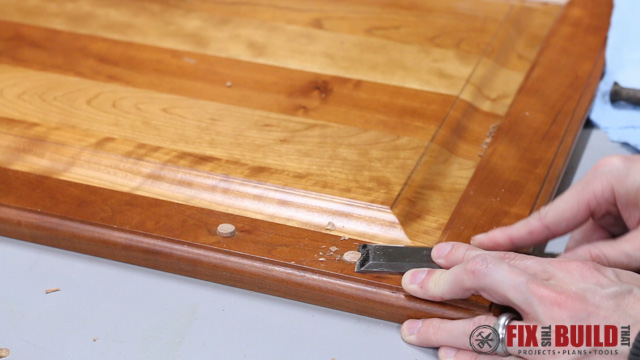
I hammered the plugs in with a small finish hammer until they bottomed out, then I came back with a chisel and pared them down until they were flush.
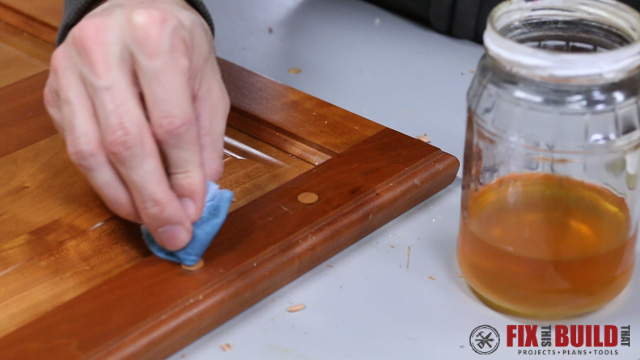
After a light sanding I applied some finish to the plugs. You can see the plugs aren’t nearly as dark as the surrounding wood and that’s because as I pared them down it exposed new wood. They’ll darken over time and eventually blend much better but I’ll also flip the door vertically to help hide the repair.
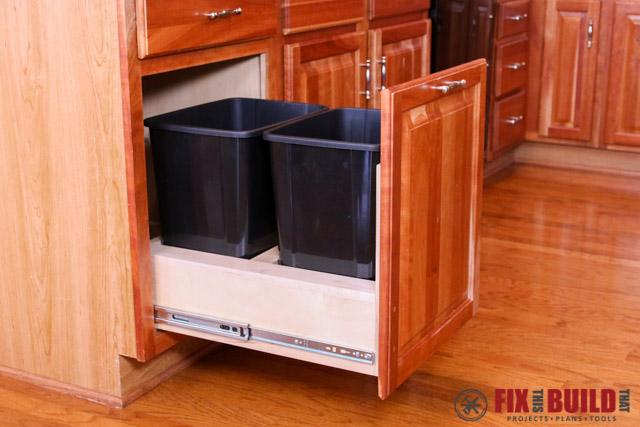
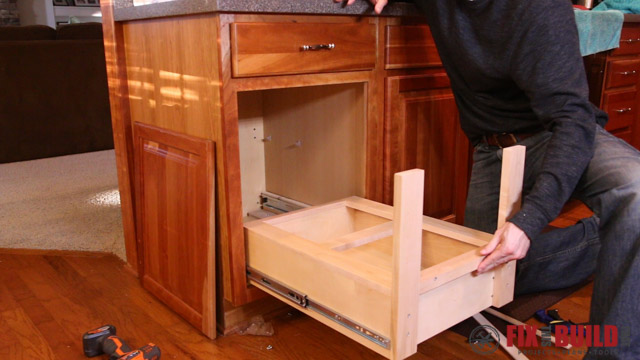
Installing the Pull Out Trash Bin Drawer
I moved back inside for final install of the pull out drawer and started by mounting the 22″ drawer slides. I used a 3/4″ spacer to raise them off the cleats and secured them with the included screws.
To install the drawer box I put down 1/4″ spacers to keep the drawer from dragging on the bottom and pushed the box all the way in.
Then I pulled the drawer and the slide arm out a little to expose the mounting holes. I lined the slide up against the vertical support predrilled and screwed it to the drawer.
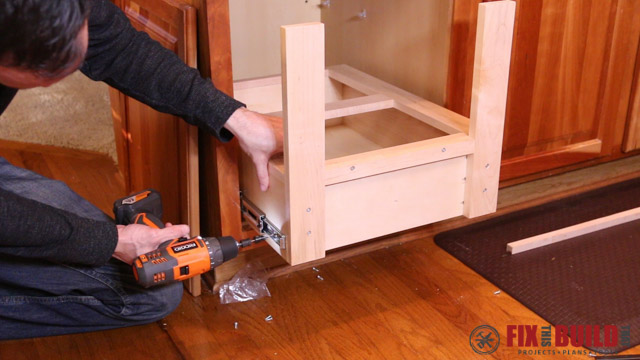
I pulled the drawer out a little more and secured another screw then attached one more screw in the further back mounting holes I could access.
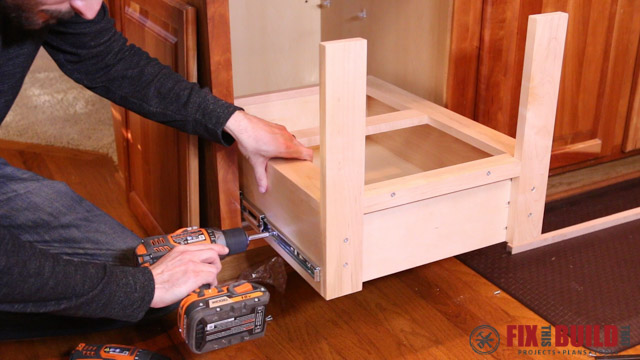
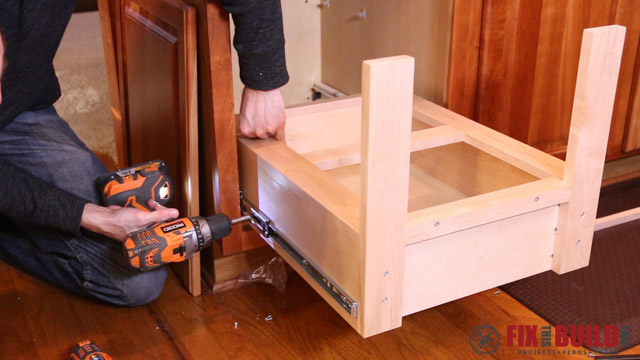
I did the same thing on the other side working my way down the slide. To attach screws to the back end of the drawer slides I used the release levers and pulled the drawer out then installed the screws on the back of both sides.
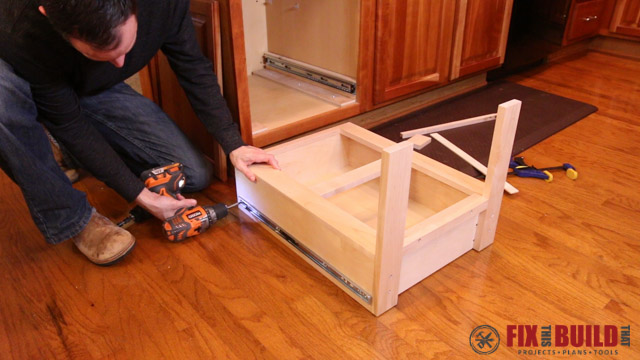
I put the drawer back in place, locked in the slides and gave it a few test pulls. Yeah, that’s the ticket!
Mounting the Cabinet Door and Door Pull
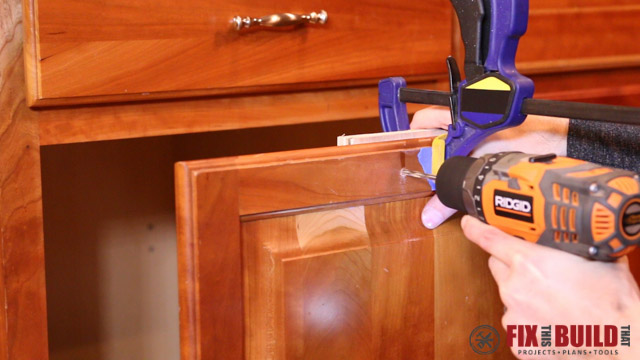
To install the cabinet door to the pull out drawer I clamped the door in place to see where the rails overlapped the vertical supports. I marked a couple holes on each support then drilled 1/4″ mounting holes.
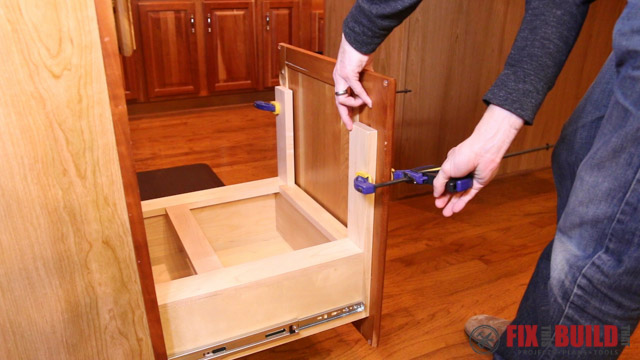
To mount the door I clamped it in place again and used a level to position the door in line with the drawer above it and the door to the right of it. I predrilled the holes then attached the door with pan head screws.
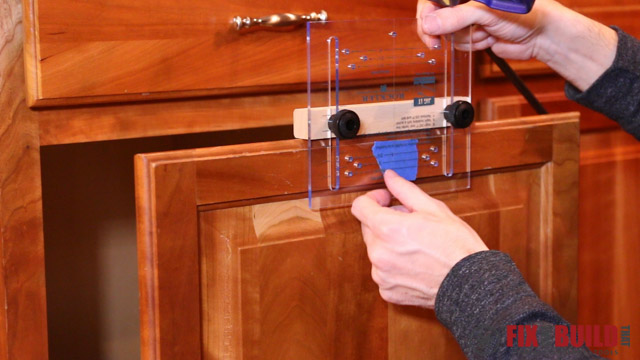
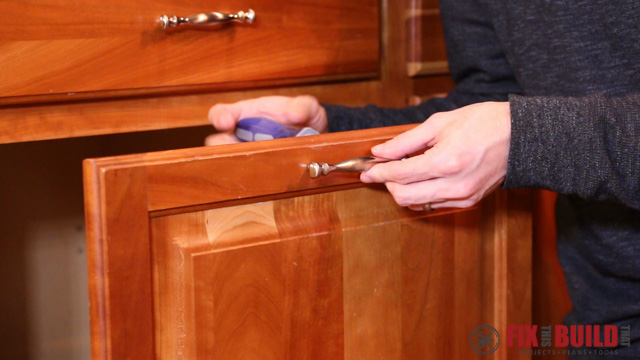
The last piece of the build was to relocate the drawer pull to the top of the door. I marked the center line of the door on the top frame then I used the Rockler Drawer Pull Drilling Guide to make indents 3” apart from each other on the center of the top rail to match my pulls. The automatic center punch is pretty cool, it makes a conical indent to keep the bit from wandering when drilling the holes.
I installed the handle, and put the bins back in place to finish it off.
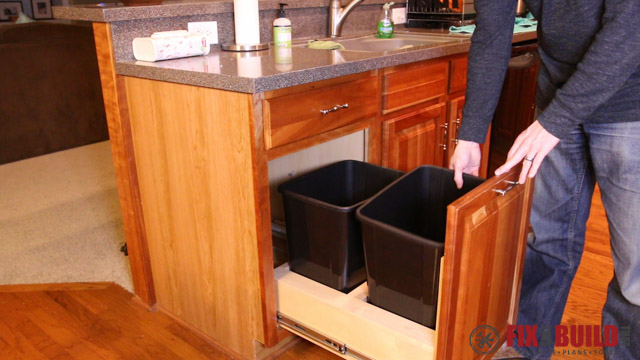
This pull out feature is a huge improvement over what we started with and it’s way easier for the kids to use too. If you want more awesome projects go check out my Projects Page for other great home ideas.
Rockler Woodworking & Hardware provided me with product and/or monetary compensation as a sponsor of this build. All opinions are my own and are not filtered by the sponsor.


Hey Brad. Great article. I think I may go after this project. I have had tall kitchen cabinet cans in the past so the height of the cans in this instance was the only counter intuitive aspect to me. It would probably just take some getting used to. That or I could probably sacrifice the drawer above if it really bothered me that much. My question is, do you have a reference (size, where you bought them, etc.) for the cans themselves? Seems like that would be a starting point for the drawer. I may have other questions as I start to build. BTW I bought and am building your flip top tool cart and XL clamp rack. Thanks much.
This is great. Thank you. We bought one of the metal ones about a year ago, but I’ve wanted to move our trash cans to a larger sized cabinet that wouldn’t work with any pre-made one. Also, the one we bought feels like it’s going to break any day now.
Glad it could help, Cliff!
very nice. thank you.
Thanks!
this is great, I’ve been looking for instructions in adding pull outs under a staircase and I think this will be perfect with some modifications. Thanks!
Glad to hear that, Jessica! Post a pic here when you make it. Thanks!