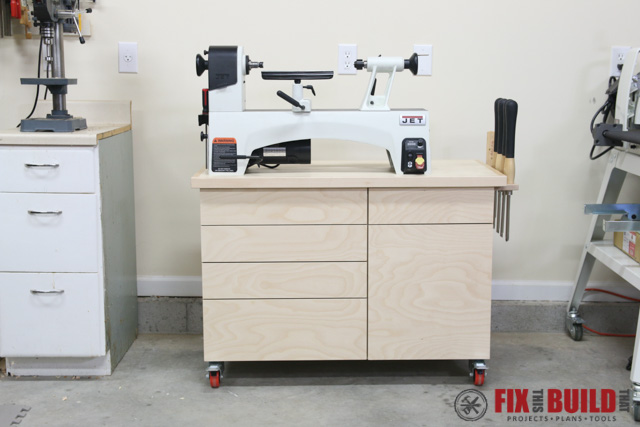
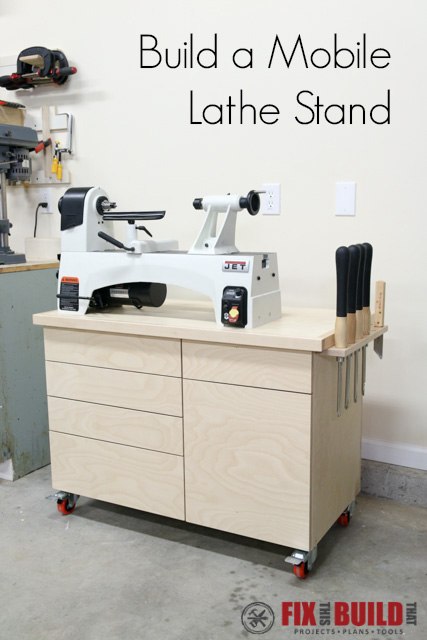
What’s up guys! Today I’m going to show you how to build this Wood Lathe Stand. It has a ton of storage for all your lathe tools, accessories, kit hardware, and turning blanks. It will work with all bench top models like a mini lathe or a midi lathe. It’s a great way to go to the next level in shop organization and get everything related to your lathe all in one workstation that you can move anywhere around the shop.
I’m partnering with JET Woodworking and I’ll be putting my new JET 1221VS lathe on the stand. It’s a heavy duty midi lathe so I made this workstation nice and beefy to hold it. This lathe is a huge upgrade over my old mini lathe and this new lathe stand is the perfect home for it to live! To help you build your own, the lathe stand plans and an accompanying video are available below.
Materials/Supplies
- (2) 4′ x 8′ 3/4″ Plywood
- (1) 4′ x 8′ 1/4″ Plywood
- (1) 6′ x 3-1/2″ x 3/4″ Maple
- (5) 18″ Full Ext. Drawer Slides
- (1 pair) Full Overlay Euro Hinge
- (4) 3″ Locking Casters
- 1-1/4″ Pocket Hole Screws
- 3/4″ Panhead Screws
- Waterbase Polyurethane
Affiliate links are used on this page. See my disclosure page for info on affiliate programs.

Building A Mobile Lathe Stand with Storage
- Build the lathe stand cabinet
- Build full extension drawers for storage
- Install the drawers and door for the cabinet
- Build a top for the lathe stand
- Install top and add lathe tool storage
1. Build the lathe stand cabinet
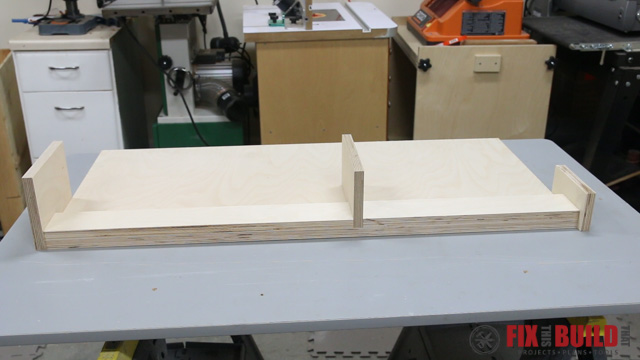
The lathe stand is built mainly from 2 sheets of ¾” plywood. I broke down the plywood in my driveway into manageable pieces per my cutting diagram before I brought it into the shop. The Mobile Lathe Stand Plans include the cutting diagram and detailed step-by-step instructions for this project.
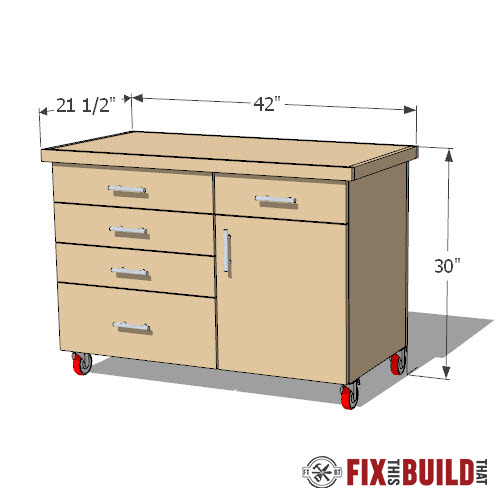
I cut the bottom and the sides of the lathe stand to width first then to length. I designed the cabinet to be 30″ tall, but this can easily be altered a few inches up or down by the type of casters or feet you use.
Since the center divider rests on the bottom and the sides don’t, I used the parts together to marked the divider length. I’ll be using this referential measuring method vs.a tape measure throughout the build to keep things perfectly aligned.
Next I ripped strips for the top supports which will hold the sides and the center divider together. The lathe cabinet has a side of 19-¼” drawers on the left and a 13-½” drawer and a door on the right. I cut the top supports to size for the left side first.
Then I used the pieces to mark the cut for the right side supports so it would fit just right.
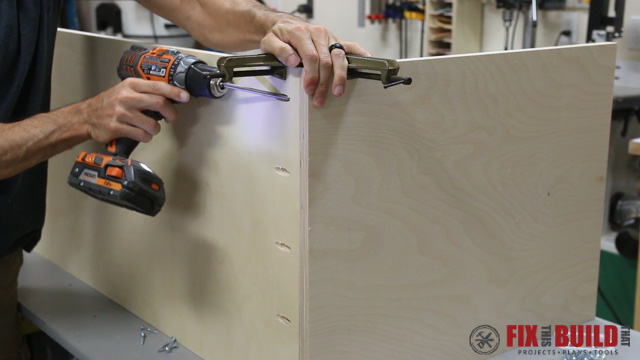
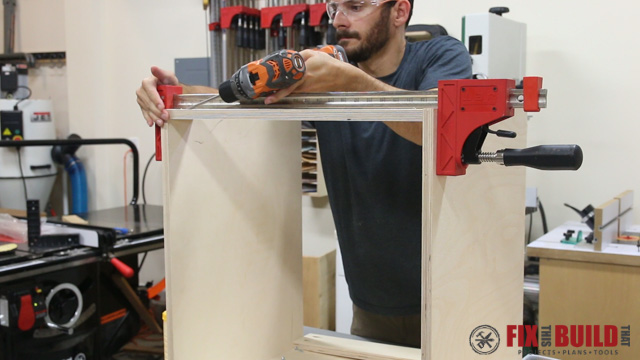
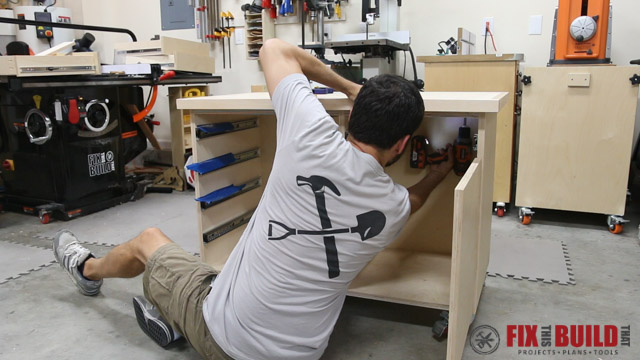
I used a pocket hole jig to make joints for the case like I do for most shop furniture. I clamped the pieces in place and attached the sides to the bottom using glue and screws.
Next I laid the top supports on the bottom of the cabinet to position and hold the center divider in place while I secure it to the base.
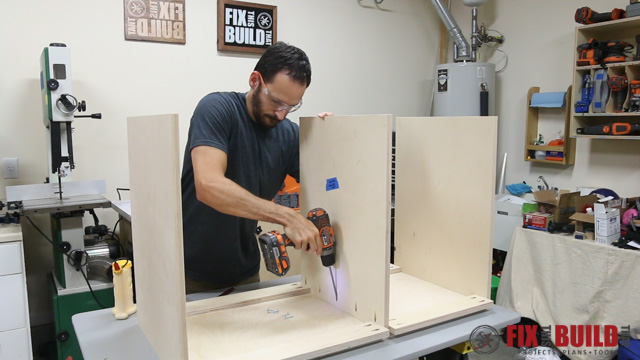
Then I attached the top supports to the sides and center divider. And as a side note, make sure to offset the pocket holes on the left and right supports where they meet the center divider.
I used a full ¾” plywood back to add weight and strength to the stand. It also gave me a reference to pull the case into square while I worked my way around the cabinet driving in the screws.
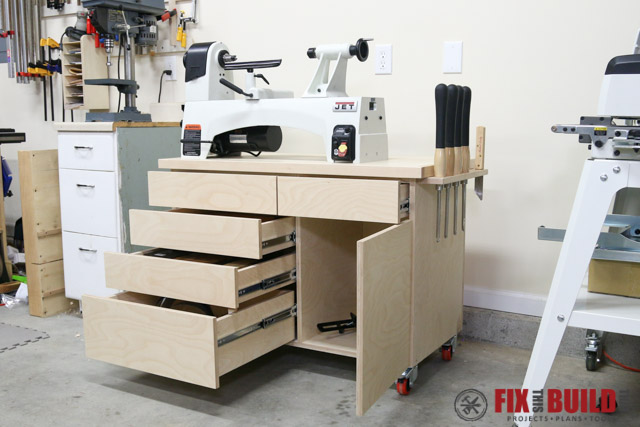
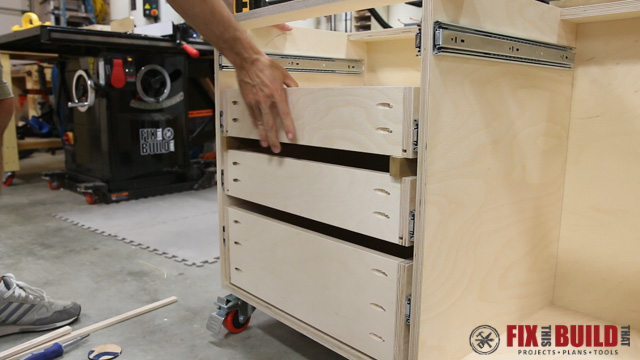
2. Build full extension drawers for storage
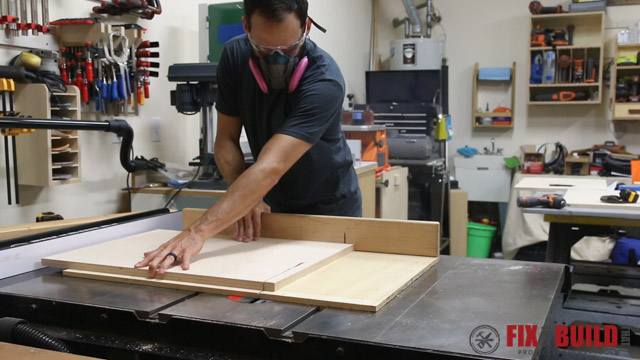
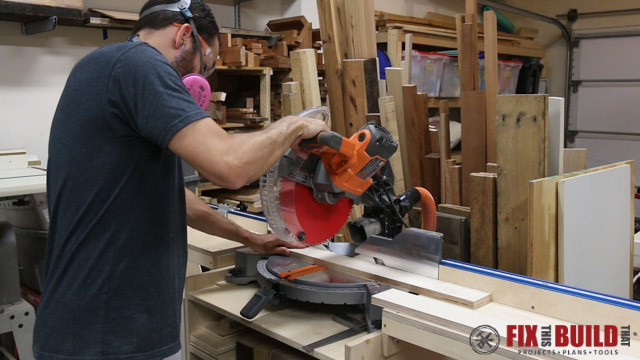
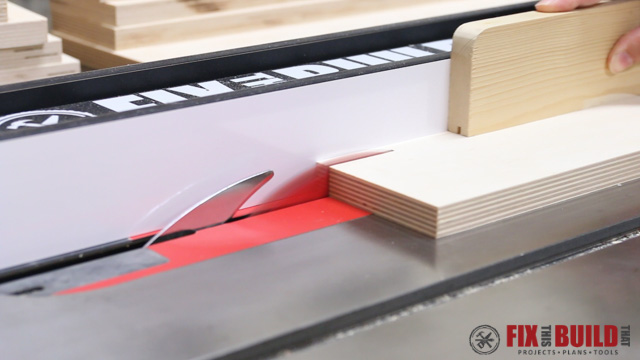
With the base complete I moved on to the drawers. The lathe stand has four 4” tall drawers and one 7” tall base drawer. I started by ripping all the drawer parts to width on the tablesaw. The drawers are all 18” deep so I cut each of the sides to length at the same setting.
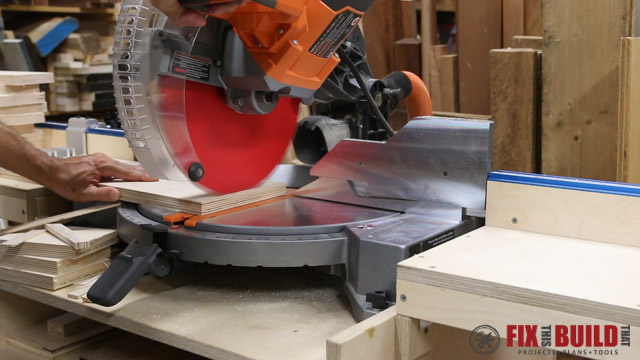
To get the exact size for the drawer fronts and backs I measured the left side cabinet opening. I subtracted 1” for the thickness of the drawer slides and set my miter saw stop to just under 20-¾”. Then I put two pieces of plywood against the stop to represent the thickness of the sides. Now I can cut using this setup and get the exact width I need.
I took the pieces over to the cabinet for a test fit and it worked out great. I cut the rest of the front and backs for the left side then repeated the same steps to cut the front and back for the right side drawer.
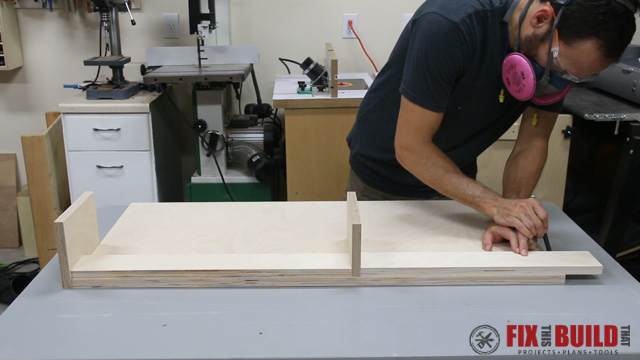
With all drawer parts cut to size I went back to the tablesaw to cut the grooves for a ¼” bottom panel. I started with the blade raised 3/8″ and the fence set to ¼” and ran all the fronts and sides through. I moved the fence over to the right to get a groove that fit the plywood then I ran all the fronts and sides through again.

For the drawer backs I kept the fence at the same final setting and raised the blade to cut through the whole piece. This will let me slide the bottom panel in from the back during assembly.
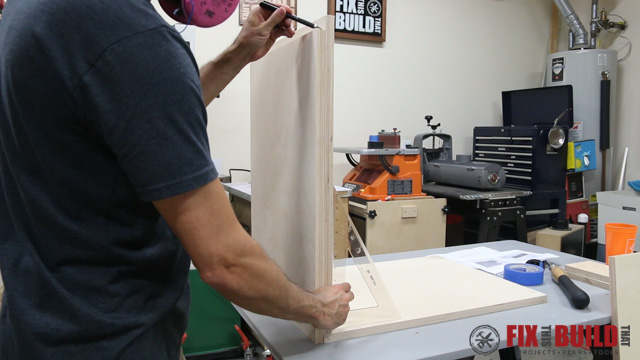
To assemble the drawers I glued the sides, tightened down the clamps, and drove a couple screws in each side.
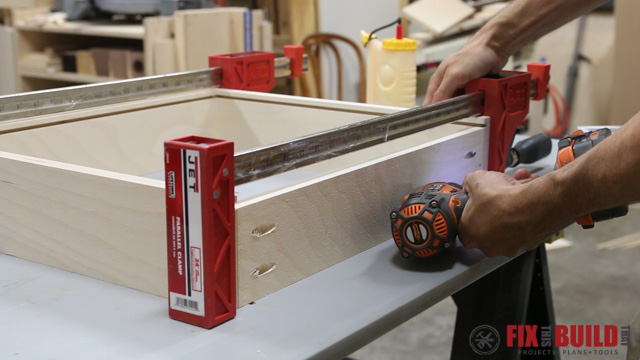
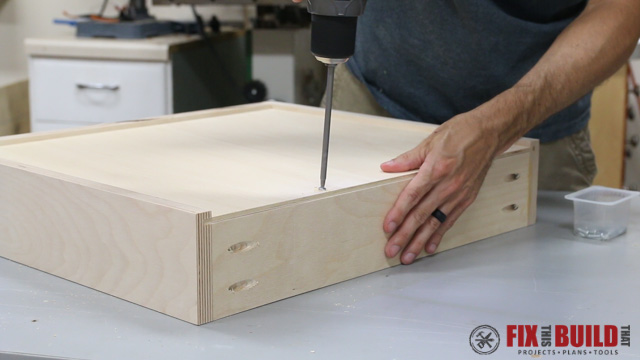
I assembled all five drawers then went back and cut the bottom panels to size on the tablesaw. Then I finished off the drawers by sliding in the panels from the back and attaching each one with pan head screws.
Before installing the drawers I attached 3” casters to the cart. You could also use leveling feet if you don’t want yours mobile.

3. Install the drawers and door for the cabinet
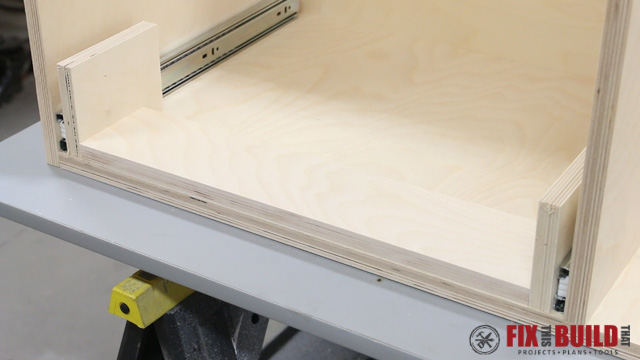
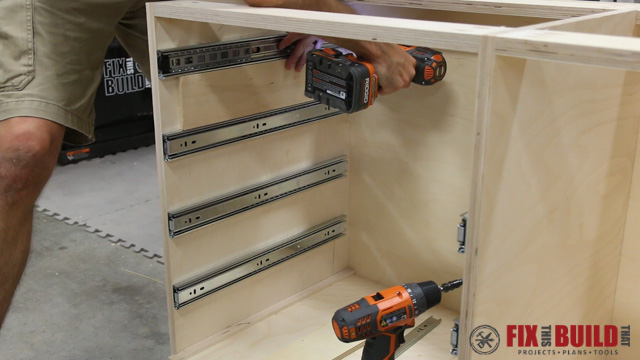
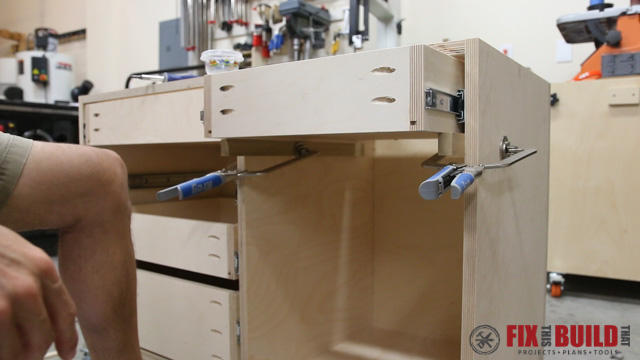
I used 18″ full extension drawer slides for the drawers. To install them I used a series of spacers to help me out. For the first slide on the bottom I used a ⅜” spacer along with a large 3-⅜” spacer to position the drawer slide. I predrilled and attached the slides with the included screws.
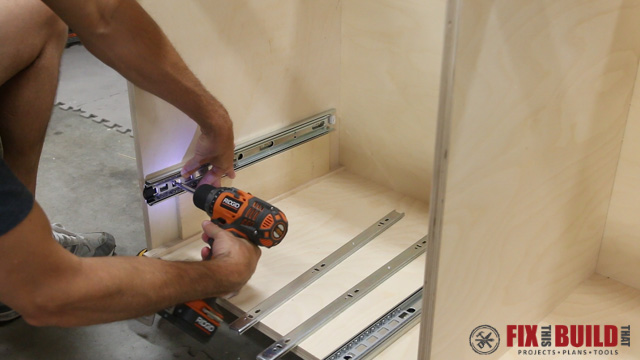
After that I used the large 3-3/8″ spacer on top of the slide I just installed to position the next 3 slides.
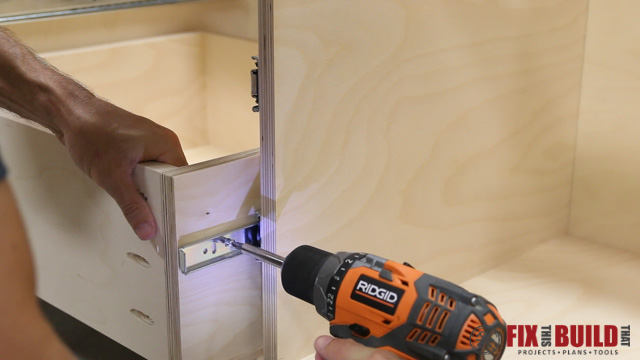
With the slides in I attached the drawers starting with the ⅜” spacer to get the bottom drawer off the base.

I pulled out the drawer and the slide and attached the first screw then pulled it out further and attached a screw in the middle.
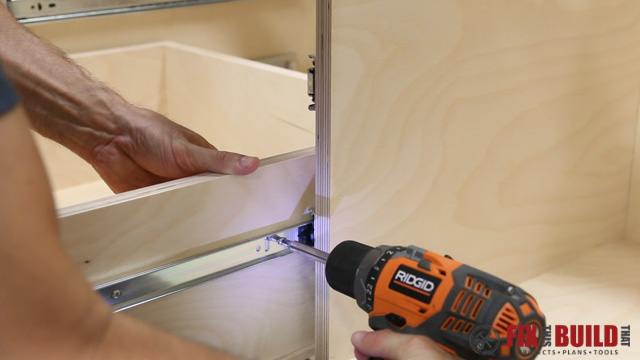
With two screws the slide was locked into place so I removed the drawer and secured the 3rd screw in the back.
I used the 1-⅛” spacer to position the next drawer and repeated the process all the way up until all the drawers were in.
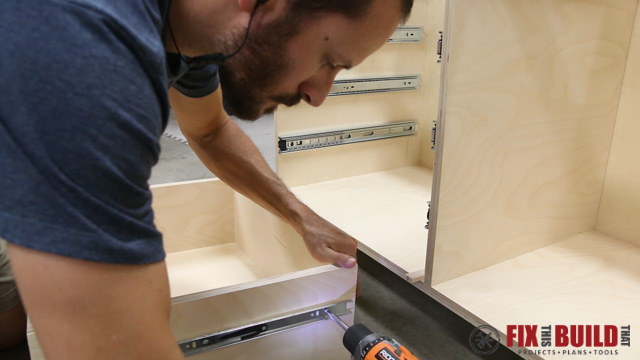
For the drawer on the right I clamped on some supports and positioned the slide and drawer even with the one on the left.
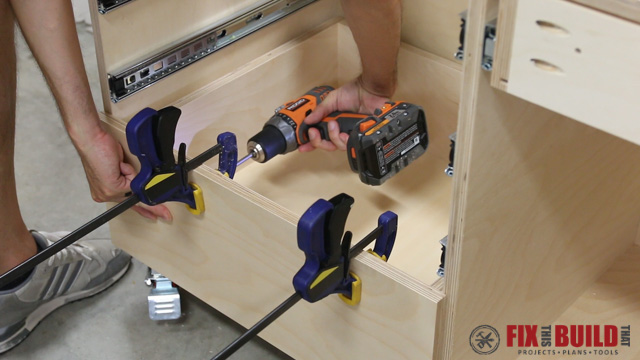
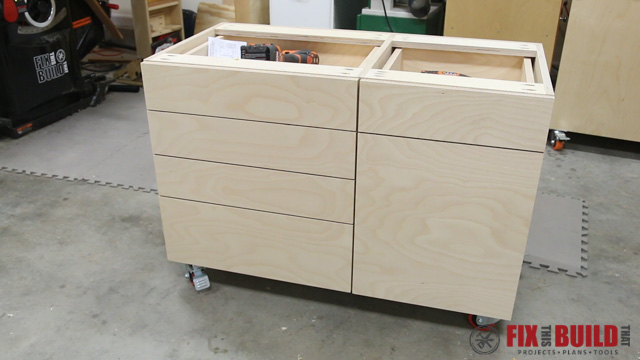
Next I cut the false drawer fronts. I cut a piece of ply to the size of the cabinet front then cut each individual drawer and the door out in order for a continuous grain look.
To mount the drawer fronts I drilled oversized holes in each drawer. I wanted an ⅛” reveal around the drawers so I cut another spacer to help me out. I used the ⅛” spacer to position the bottom drawer front, then I clamped the piece in place and secured it with two screws. I repeated the same process all the way up the cabinet until I had all 4 drawer fronts attached.
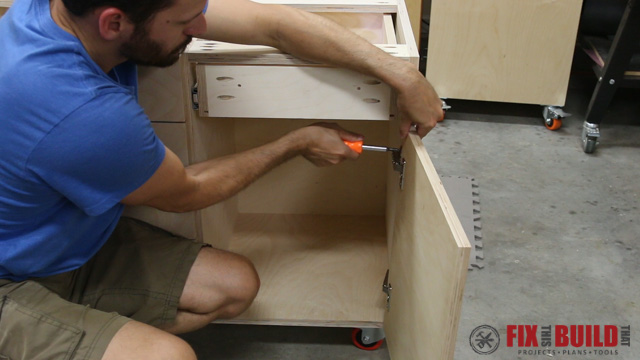
I used concealed hinges to mount the door on the lathe stand. You can use templates included with the hardware to install the hinges, but I used a concealed hinge jig to make drilling the cups for the hinges a little quicker.
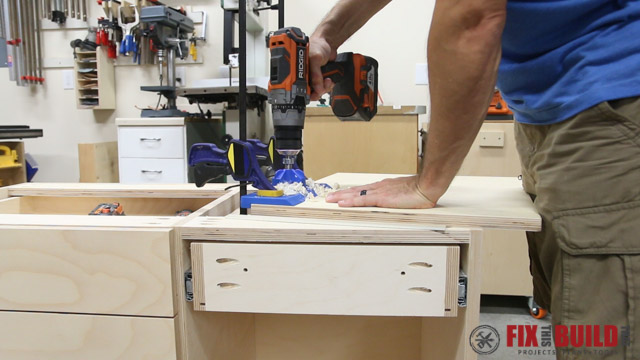
I installed the hinges to the door, predrilled the side and secured the hinge and the door to the cabinet. And yes, I had at least 10 minutes of fidgeting with the door to get the spacing and reveal just right..
I really love this continuous grain, so much so that I couldn’t decide on drawer pulls, so I’ll add those at some point down the road. Now it was time for the top.
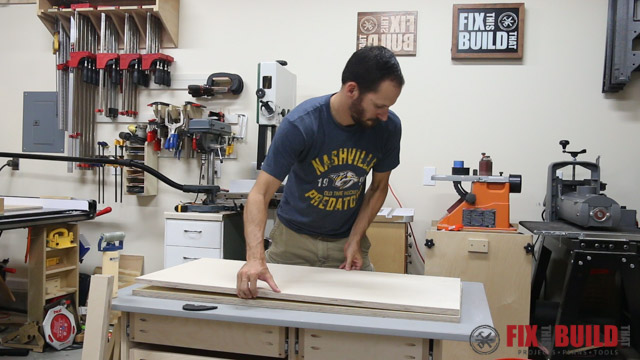
4. Build a top for the lathe stand
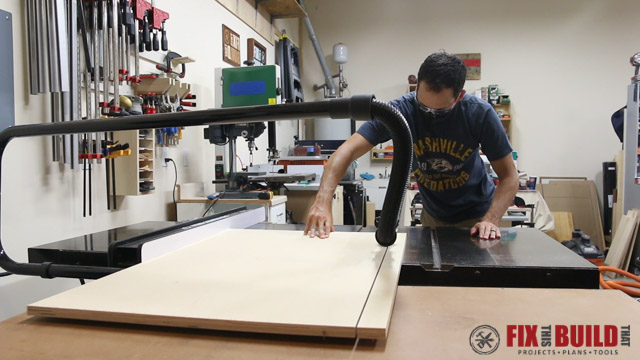
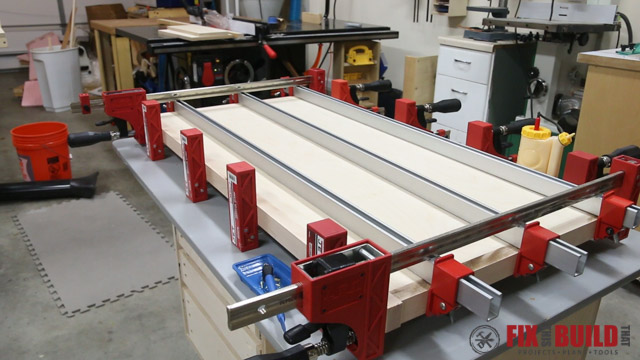
I made the top from a double thick lamination of ¾” plywood. I cut the parts to size, leaving the bottom sheet about ¼” larger than the top on all sides. To laminate the pieces I used regular wood glue and spread it evenly across the bottom then dropped on the top piece.
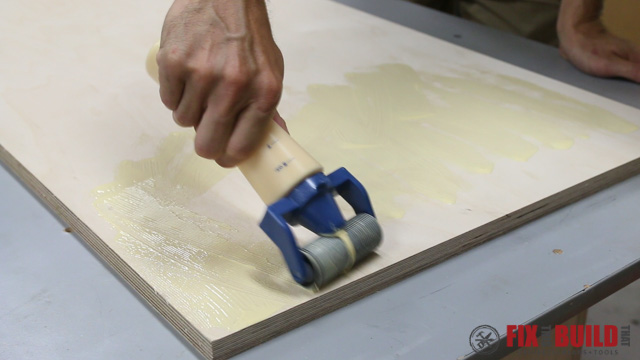
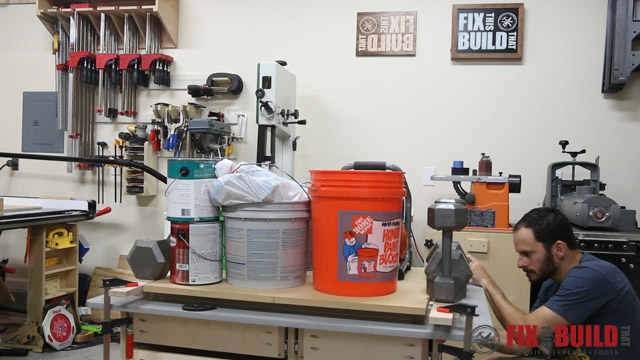
Then I grabbed everything that wasn’t bolted down and threw it on top to weigh down the sheet. I also threw a few clamps on there for good measure. Looking back, I would have left the top oversized and secured the bottom to the top with screws which I could remove afterwards if needed.
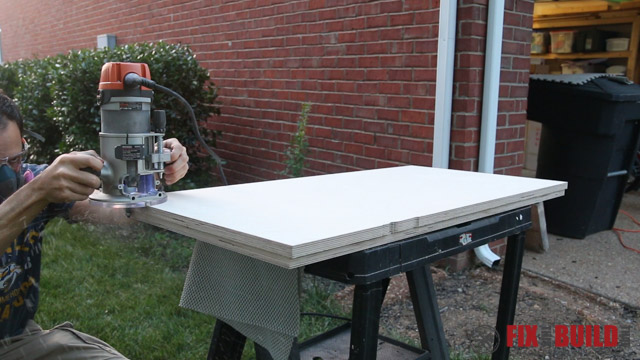
After the glue was dry I took the top outside and trimmed the bottom piece even with the top using a flush trim bit on my router.
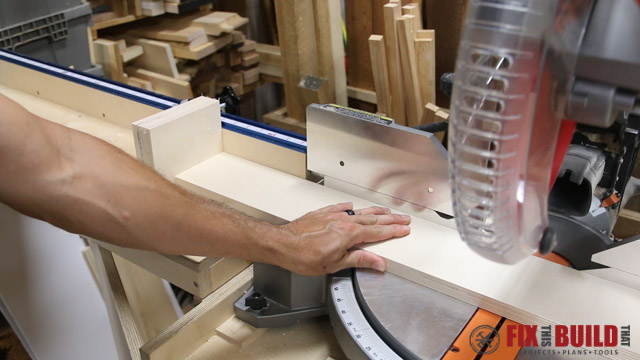
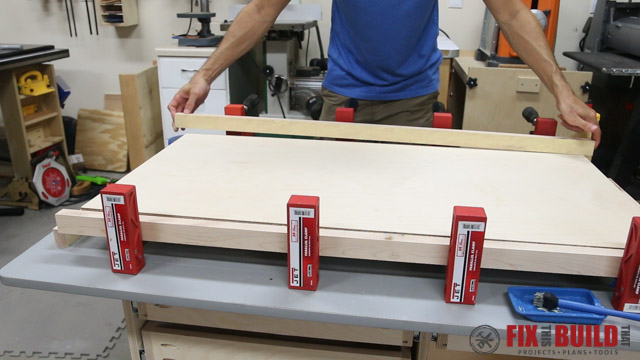
To trim out the top I cut some maple hardwood into 1-½” wide strips. I cut the strips to length on the miter saw but left the front and back pieces a little long to be trimmed off later.
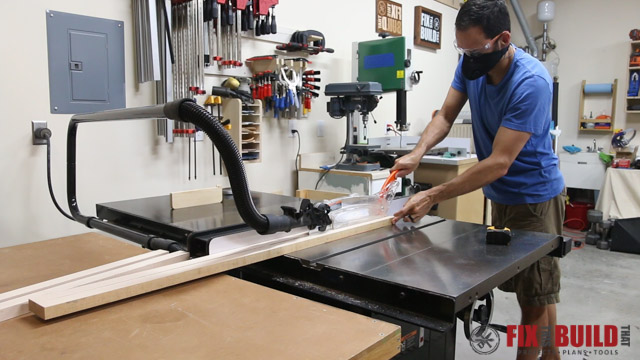
I cut the short sides to fit then glued and clamped everything together. An extra pair of hands or some dowels or biscuits would have been nice to position the end pieces, but after a hectic few minutes I got it all clamped up.
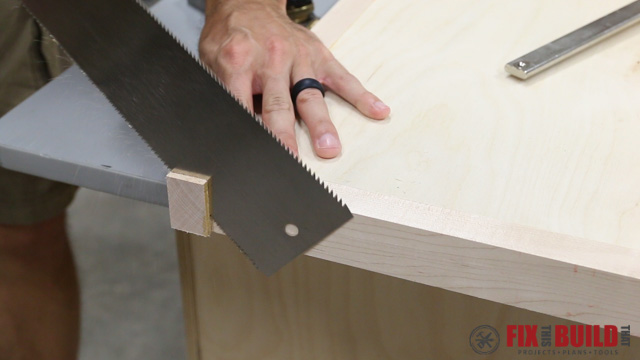
When the glue was dry i cut the overhanging trim even with a flush cut pull saw. I sanded the the top flush where needed and I also put a small rounder on the edges.
5. Install top and add lathe tool storage
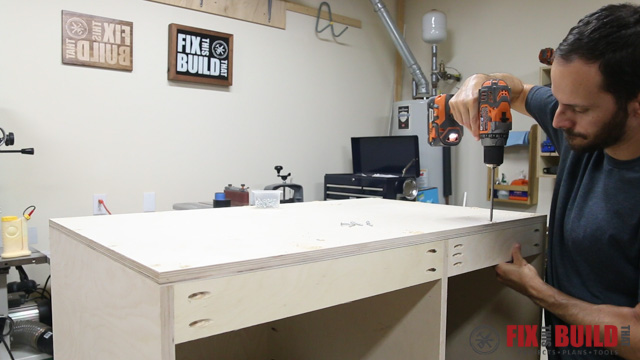
I sized the base so it would have an overhang on all sides for some accessories later. I positioned the top, clamped it in place and screwed it to the base through the top supports.
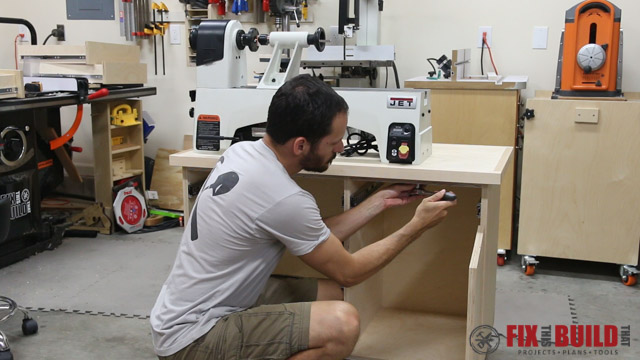
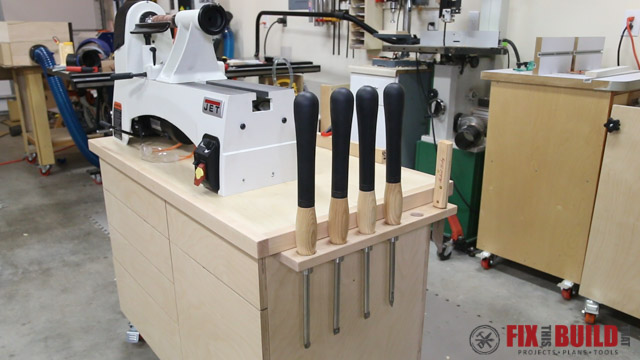
I laid out where I wanted the JET 1221 lathe to go and drilled mounting holes using the measurements from the manual. Then I secured it with bolts from underneath.
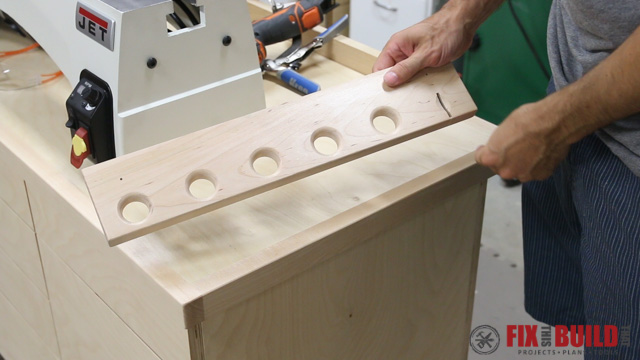
To hold my turning tools I grabbed a piece of leftover maple and drilled holes for the carbide tools and a slot for my parting tool. This will work great for now and I can always make a new one down the road if my tools or needs change.
I loaded up the drawers with some of my turning accessories and blanks. I’ll come back in a later video and make some dividers and organizers for everything.
If you want to see some other shop projects like my Flip Top Tool Cart or my Mobile Miter Saw Stand you can see them on my Shop Projects page.
JET Woodworking provided me with product and/or monetary compensation as a sponsor of this build. All opinions are my own and are not filtered by the sponsor.


I put another board between boards E and E and cut a small slot in N then added a set of full extension drawer slide so this board could come in and out when I used my add on extension bed for my laythe. it adds another 25″ But I do not always need it, So this works perfect for me..
Ernie, that’s a great idea. Nice mod!
I bought the matching Jet stand when I bought my lathe, but I really like the extra storage and overall aesthetic of your wood stand. I’m also thinking that it is probably a lot more sturdy than the Jet stand. Would you agree? If so then I think I will get to work on one.