Hey, guys! Today I’m covering Part 2 of the Mobile Miter Saw Station build. If you haven’t checked out the first post, I’d recommend heading over now and checking it out to see how I built the base and side wing supports.
Mobile Miter Saw Station Part 1 : Base and side wing supports
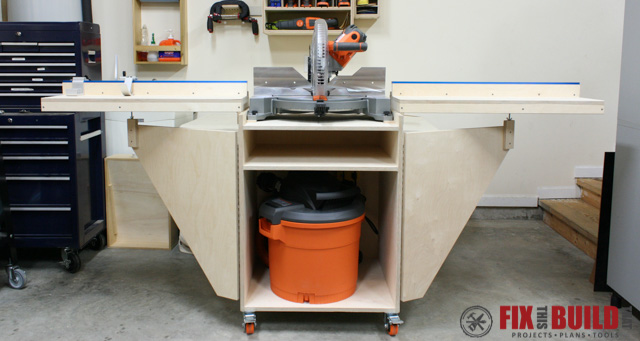
This post will cover the Side Wings, Fences, and Upgrades. The upgrades to the Mobile Miter Saw Station plan take this build to the next level and it will be a project that will transform how you work in your shop.
Materials/Supplies
- (2) 4’x8′ 3/4″ Plywood
- 1-1/4″ pocket hole screws
- 1-1/4″ wood screws
- 5/8″ wood screws
- 72″ long 1-1/2″ piano hinge
- (2) 1/4″-20 20mm threaded inserts
- (10) 2-1/2″ 1/4″-20 bolts
- (2) 1/4″ wingnuts
- (8) fender washers
- (8) 1/4″ flat washers
- (8) 1/4″ lock washers
- (8) 1/4″-20 threaded knobs
- See Upgrade list
Affiliate links are used on this page. See my disclosure page for info on affiliate programs.

And if you want to get a great deal on two spacing-saving shop plans, check out the Flip Top Tool Stand and Miter Saw Station Combo Plan pack and save 33%!

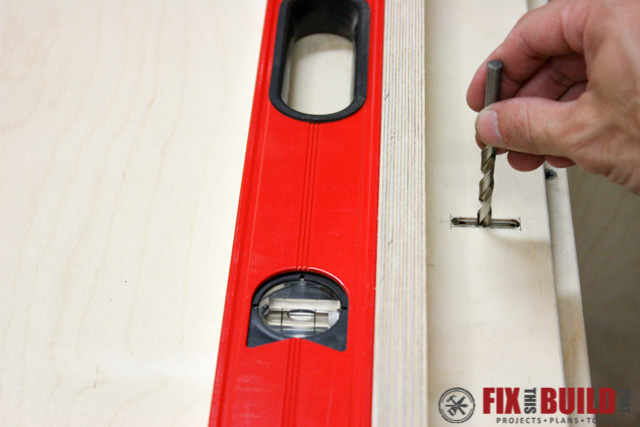
As a reminder, all parts are ¾” plywood unless otherwise noted and screws should be predrilled and countersunk before installing. We’ll pick up after finishing the base and side wing supports.
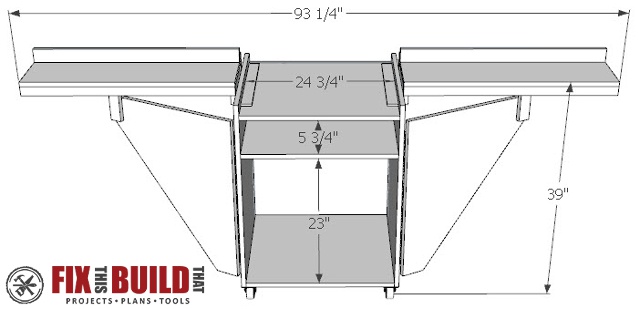
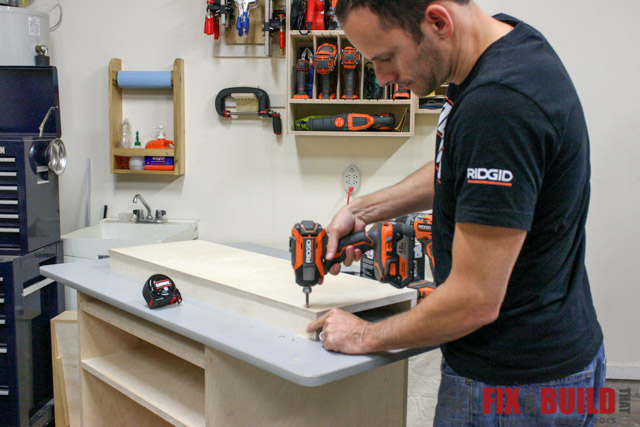
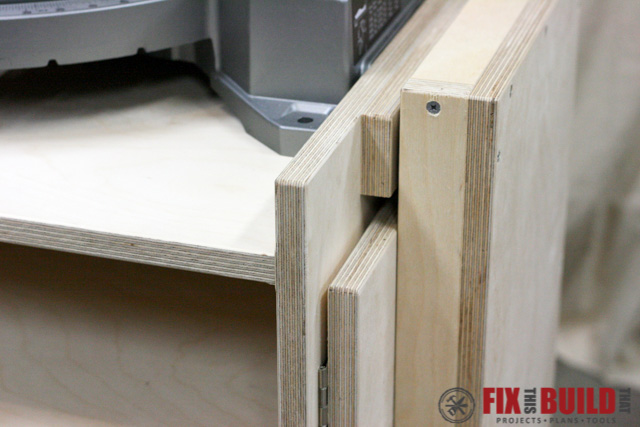
You’ll now make and mount the side wings. Cut two side wing mounting cleats to 12” by 2”. Fasten the cleats to the sides of the base 4” back from the front and flush with the top. (And don’t worry, the side wing supports didn’t disappear, I added this cleat earlier in the build, but it makes more sense here).

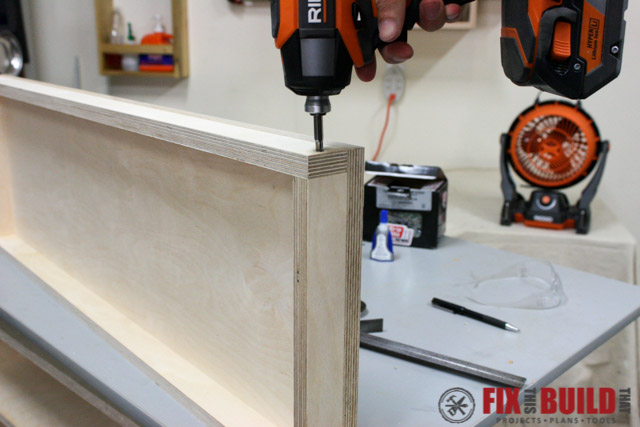
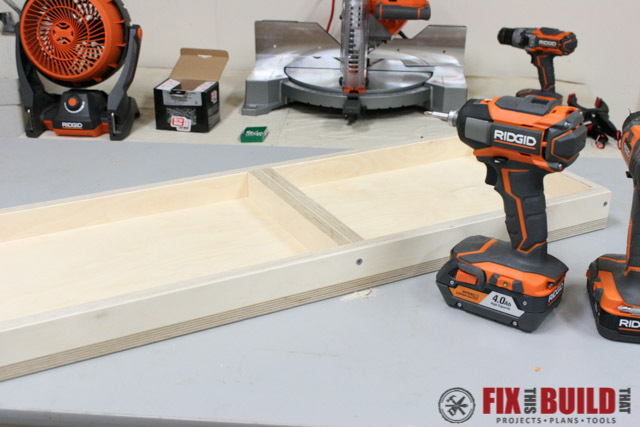
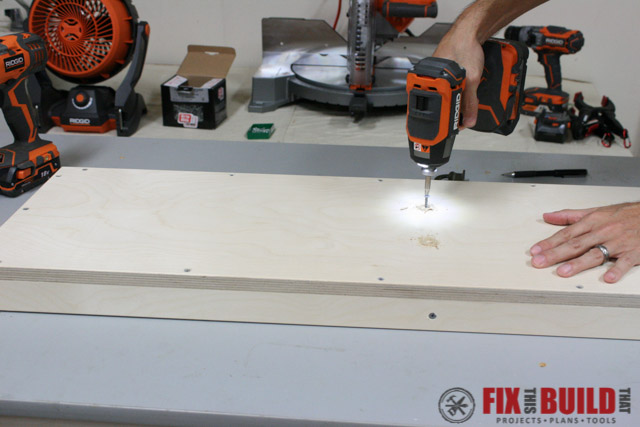
The side wings are made of a 33-½” by 12” top piece and 1-½” wide frame support pieces around the edge with a doubled up support piece underneath. Attach the top to the 33-½” long pieces with 1-¼” screws.
Secure the 10-½” short frame supports on both ends from the top and sides with 1-¼” screws.
Glue or screw together two more 10-½” pieces for support blocks. Place the center line between the two boards 20-¼” from the outside edge of the side wing. Secure with 1-¼” screws from the top and sides. These supports blocks will rest on the leveling bolts of the support wings.
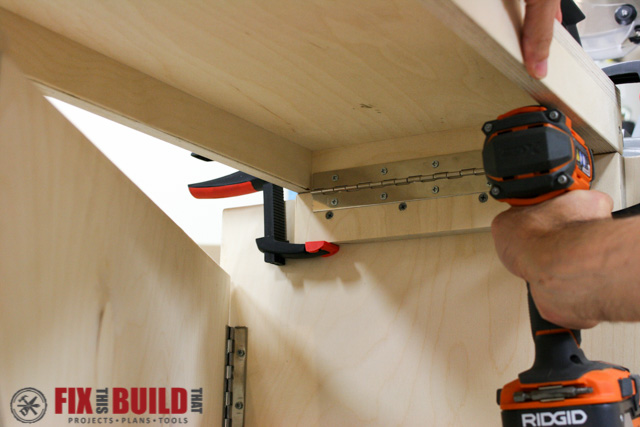
Cut two 10-½” pieces from the 1-½” piano hinge. Attach the hinges to the inside face of the short frame. The hinges should be installed on the end furthest from the doubled up support blocks.

Test fit the side wings by opening the side wing supports and placing the hinged ends of the side wings on the 12” support cleats and resting the support blocks of the side wings on the leveling bolts. Securely clamp the side wings to the 12” support cleats.

From under the side wings, mark where the support bolts are centered on the support blocks of the side wings. Remove the side wings and, using a flat bottomed bit, drill a ⅝” hole ⅛” deep where you marked. This makes a pocket for the bolts to sit in and keeps the wing supports from moving during use.

Put the side wings back on top of the support cleats and wing supports. Clamp in place and from under the side wings, screw the hinges into the support cleats using ⅝” screws.
The side wings should now fold into place over the folded support wings.
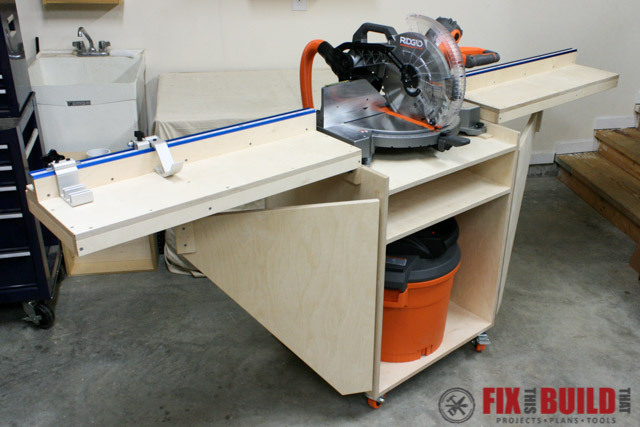
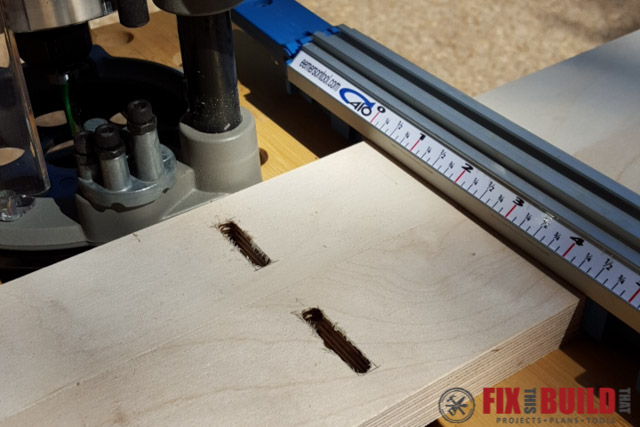
Nice work! Up next is making and installing the fences. Cut four pieces 33-½” long by 2-¼” wide. If you want adjustable/removable fences, cut ¼” wide 1-¼” long slots on two pieces before assembly. The slots are 10” from each end and centered front to back. They can be cut with a straight bit in a router or by drilling ¼” holes along the slot and cleaning up the edges of the slot with a chisel.
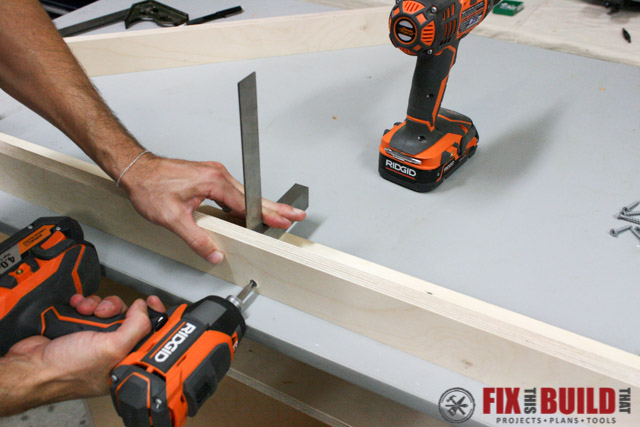
For each fence, lay one board flat and turn another board on it’s edge. Use a right angle square for reference and fasten the boards together using 1-¼” screws.
Now put the saw on the base and push it back until it’s even with the back of the base. Extend and the side wings and place a 4’ or longer level across them. Level the wings and measure the distance from the bottom of the level to the miter saw.
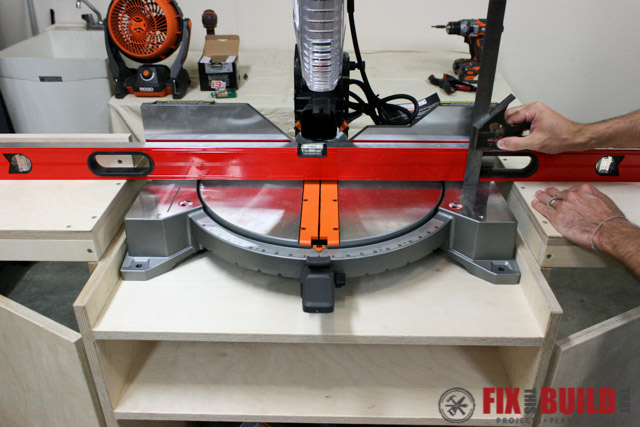
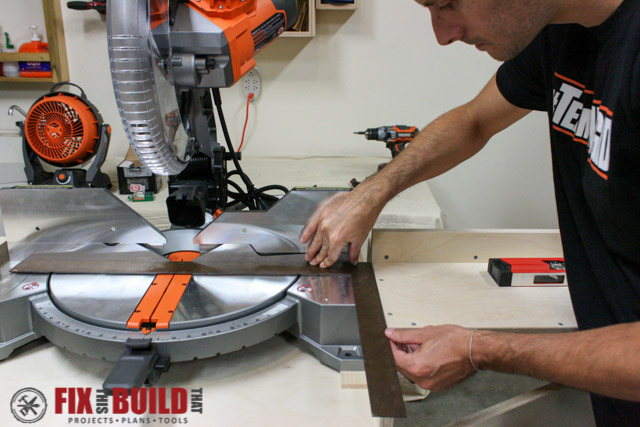
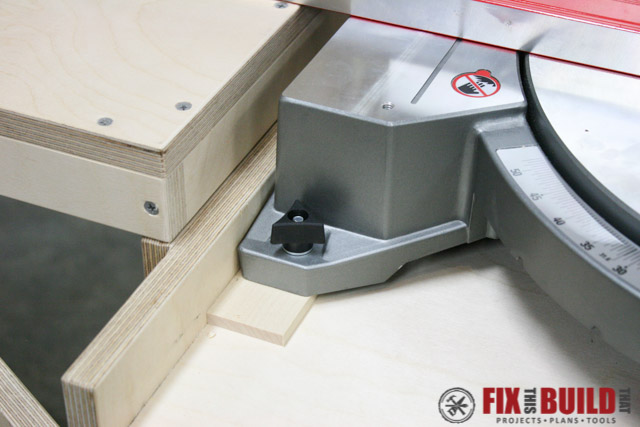
Cut hardwood spacers to raise the miter saw the needed height. My spacers were maple at 5/16” thick, 18-½” long and 1-½ wide. Put the spacers under the feet of the saw.
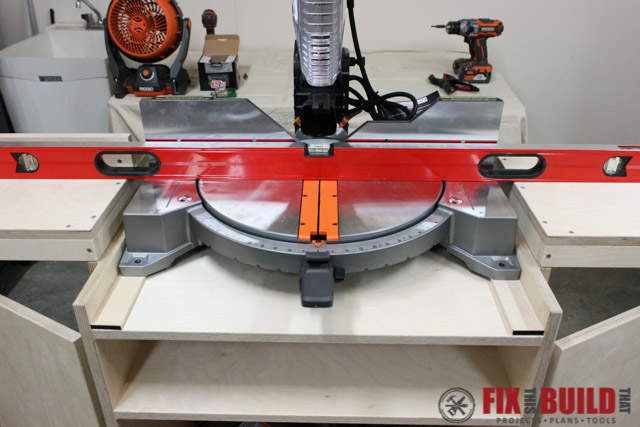
Square the saw to the side wing using a carpenter’s square.
I mounted the saw with 2-½” long ¼”-20 bolts, lock washers, fender washers, ¼” washers, and threaded knobs from an INCRA Build-It Knobs 8pc kit I bought online.

Drill a 5/16” hole through the spacer and top shelf. Put the lock washer and fender washer on the bolt and push it through from below. Then put the ¼” washer and knob on the bolt and tighten securely. Repeat on the other 3 corners.
Next align the side wing fences to the miter saw fence with a straight edge. For adjustable fences, clamp the fences down and mark a hole in the center of each slot on the fence. Remove the fences and drill 5/16” holes through the side wings.

Replace and realign the fences and use the same bolt and washer combo from above and install the locking knobs. If you are permanently mounting the fence then secure with 1-¼” screws.

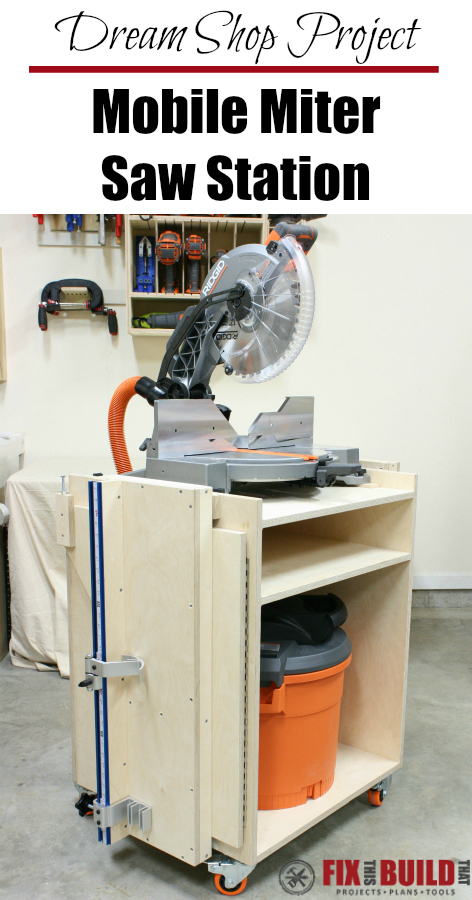
The only things left from here are adding a few upgrades. Here is what I added:
Upgrades
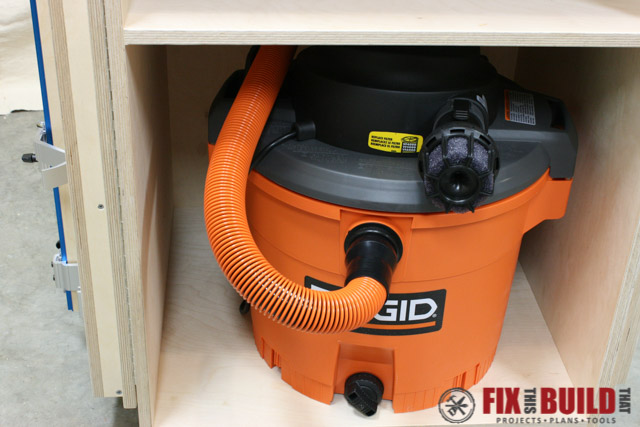
- (1) RIDGID 12 Gal Shop Vacuum
- (1) RIDGID Pro-grade Hose Kit
- (1) RIDGID Vacuum Muffler
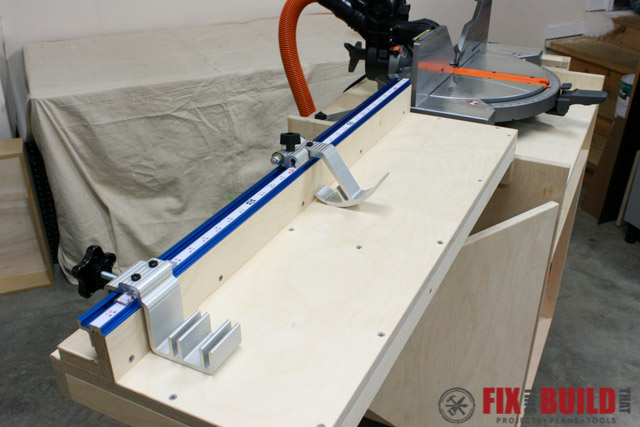
- (2) Kreg 4′ Top Trak
- (1) Kreg Right to Left Adhesive Measure Tape
- (1) Kreg Left to Right Adhesive Measure Tape
- (1) Kreg Swing Stop
- (1) Kreg Stop Block
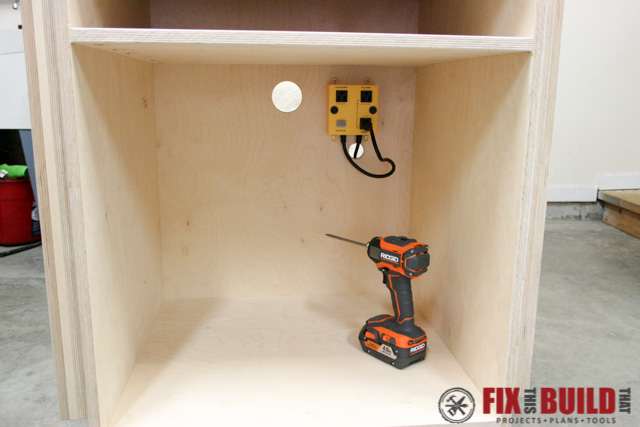
- (1) iVac Automated Switch
I added an aftermarket fence stop system from Kreg including a mounting track with adhesive tape measures, a flip stop and stop block. I bought the 4’ track and cut it down to 33-½” vs buying the kit with four 2’ track pieces. Mount and install these per the manufacturer’s guidelines.

I added dust collection from a RIDGID 12 gallon vacuum with an upgraded VT2570 pro-grade hose, and VT2525 muffler. I installed an iVac automated vacuum switch in the back of the cabinet as well.
The saw and vacuum are both plugged into the switch which is plugged into the wall or an extension cord. When the saw is turned on the vacuum comes on and continues to run for a couple seconds after the vacuum is turned off to clear the dust. How cool is that!?!

I hope you’ve enjoyed the build! For more great shop project plans head over to my Shop Project gallery.
RIDGID provided me with tools and/or monetary compensation as a sponsor of this build. All opinions are my own and are not filtered by the sponsor.


Hi Brad, I built the cabinet a while ago, and it has worked great. At the time, I didn’t do any of the upgrades. Now I’ve bought the track, and the measuring tape stops, etc. When I look at the video, it looks to me like you have the tape installed, so it is the actual cut measurement. Meaning you didn’t start the tape at zero in the track but from the blade. I’m I correct?
Really appreciate your videos and plans.
I just built this today but i added a zero tolerance fence to mine with 1/16th gap between the 2 fences
Brad, I purchased your plans, they look great. One question: have you come up with a design mod that doesn’t require cutting the Kreg 4′ tracks? I’d like to have the extra length capacity. Perhaps the cabinet could be wider, and the wings hinged 12″ from the wing ends?
I thought about it for a while but decided not to try and extend the wings by any other means. I think the solid piece is the best and most stable approach.
Does the original hose for the vac not work? Just trying to save a little here…that fancy hose is expensive if one comes with the vac.
Where are the modified plans for the flip top modifications?
Hi Brad,First, I love this. I want to make one, but combine it with the flip top tool send to make it even an more multi purpose room saver. Do you have any suggestions on doing this?
Jon, it is definitely doable. I would use the flip top base and add the miter stand wings to it. Check my instagram account and I’ve posted a while back of people doing exactly this!
Hey Brad- Is there a specific reason you went with the 4′ track vs the kit? Steve
Steve, I like clean lines. Which means buying 4 two foot sections and cutting 2 of them to 1 foot was a no go. I’d rather buy 2 four foot sections and cut them down to 3 feet. No breaks in the track that way. Slightly more, but it satisfies my OCD 🙂
I would make little modify… Those switch on/off are far back in vac storage. I would have add switcher on/off at top next to miter saw station.
Brad I’m a new sub to your channel and really love your video and the plans you draw up for us. I am having a little problem with building and installing the fences. I will be buying the kreg top track with both stops so how do to I need to build the fences? Thank you so much for the videos and plans I have bought 2 in the last 3 days so I can a lot to work on over Christmas break… God Bless…
Hey, Moody! What part are you having issues with? Between the plan and this blog post it should give you everything you need to set it up properly. Let me know if you have any specific questions for me! Brad
What’s the benefit in having the adjustable fence? I don’t have a router to make the cuts you did so I was going to just have permanent fences… I could just screw them from the bottom right?
Just allows you to easily realign the fence if needed. You can definitely just screw it down to the wings instead.
Hey Guys – I’m a bit late to the game, but while flailing toward plumb and level, I stumbled upon an improvement. Instead of shims under the saw base to bring it to the height of the side wings, I mortised two vertical channels in the cleats (to which the side wings are hinged). I attached the cleat(s) to the sides of the main box with two 1/4″ carriage bolts, with washers and nuts on the outside. Now I can slide up/down the side wings to be level with the top of the saw base table. This may also “future proof” the stand, and allow me to adjust the side wings’ height to my next miter saw (although I think my spiffy new Makita will outlast me:-)….Bob
Bob, that’s a great idea! if I ever change saws I’ll have to come back to this post and remember that!
I’m a music producer. Have learned how to run with plan B’s 🙂
Plan B sounds like a great band name! 🙂
What is the measurement from the base to the top of your deck on that particular miter saw? I don’t have a rigid saw but I wanted to see if your measurements are the same as mine (3-9/16″)
Bruce, mine is 3-3/4″ and I have it shimmed up to 4″. So yours should work fine with no adjustment to the plans, just ~7/16″ shims.
Where did you get the 1/4″ -20x30mm threaded inserts?. I’ve looked everywhere
I got them from Home Depot. Everbilt brand I believe, on the bagged hardware wall.
I have a couple of sheets of 1/2″ plywood laying around. Do you think that it would be possible to make this project at that thickness?
Plywood is pretty darn strong. You’d have to use different joinery methods and measurements, but I think you could pull it off. Do some test fits of the base and see if it holds up like you want it to.