Today I’m going to show you how to make a segmented bowl with epoxy resin rings. This was my first time turning a bowl and including epoxy resin in the mix was a bit of a challenge. But I learned a lot about segmented turning and some tips and tricks to turning epoxy resin.
Thank you to JET Power Tools for sponsoring this video! Check out the JET 1221VS Lathe that I used with this project.
Tools Used
Materials/Supplies
- 2:1 Clear Epoxy
- Silicone Round Mold
- Sealing tape
- Metallic Pigments
- Sanding Strips
- Micro Mesh Sanding Pads
- Hardwood of your choice
Affiliate links are used on this page. See my disclosure page for info on affiliate programs.
How to Make a Resin and Wood Bowl
- Mill the Wood
- Cut the Segments
- Glue and Clamp the Segmented Rings
- Make the Epoxy Resin Rings
- Glue Up the Bowl Blank for Turning
- Turn the Segmented Bowl on the Lathe
- Sand and Finish the Bowl
1. Mill the Wood for the Segmented Bowl
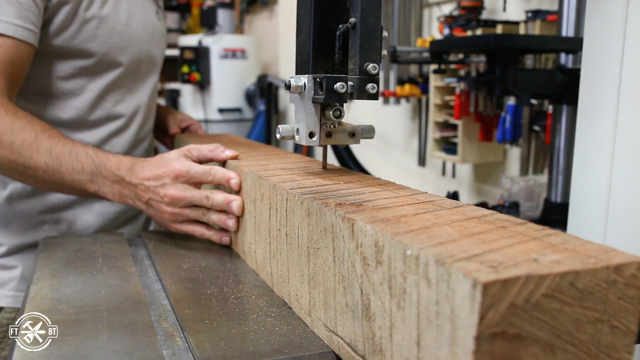
This is my first time turning a segmented bowl on the lathe and I started the project out with a cherry 4×4 I’ve been wanting to use. It had some defects in it, so I decided to mill it down into thinner boards for my bowl.
I setup my bandsaw for resawing then used one flat face against the bandsaw fence and the other against the table and ran the 4×4 through three times to get four boards out of it. This is a great way to get perfect grain matching in a project.
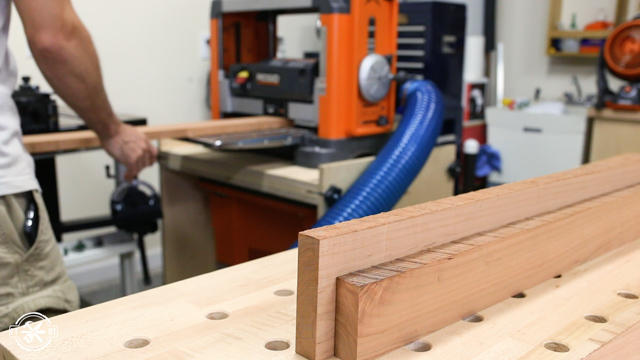
I finished off the rough milling at the planer and got my boards smooth on both sides and a consistent thickness.
2. Cut the Segments for the Segmented Bowl
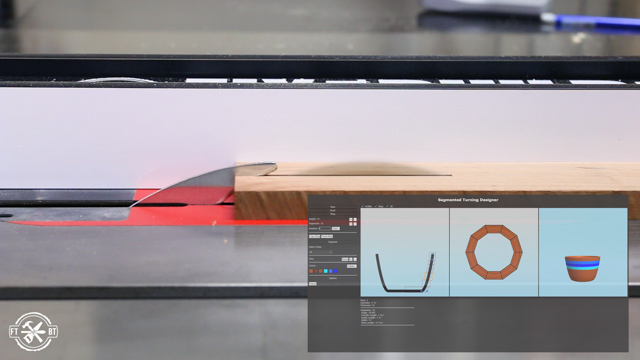
I designed the bowl to be made from 4 segmented wood rings and 3 epoxy rings (spoiler, that design didn’t work). Each wood ring is based on the width and length of the segments. I used an online tool to plan out my bowl and it told me exactly how wide to make each strip that I’ll cut into segments.
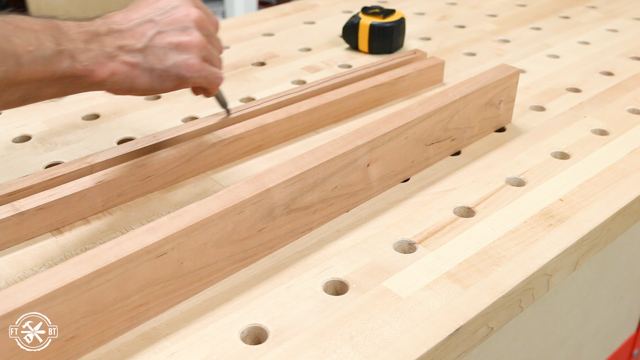
With each strip cut to size I made a pencil line down one face a marker down one side of each board. This will help keep the segments organized later.
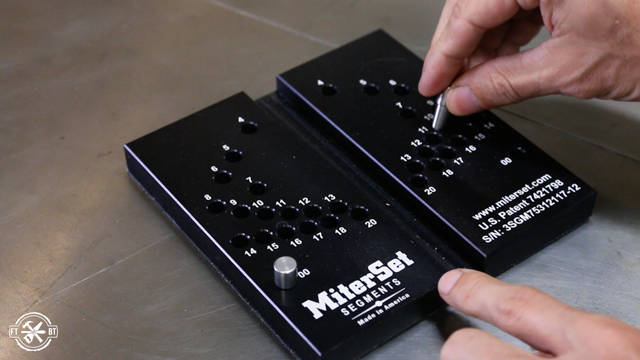
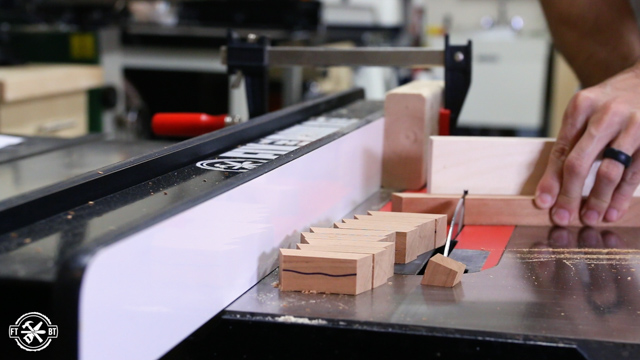
I’ll be cutting the segments on my table saw so I started by switching out to a fresh sacrificial fence on my miter gauge. Then I used a nifty miter setup block made specifically for cutting segments. I set one pin to the home location and the other to the number of segments I wanted in each ring. It sets the angle of the miter gauge for perfect cuts with no math.
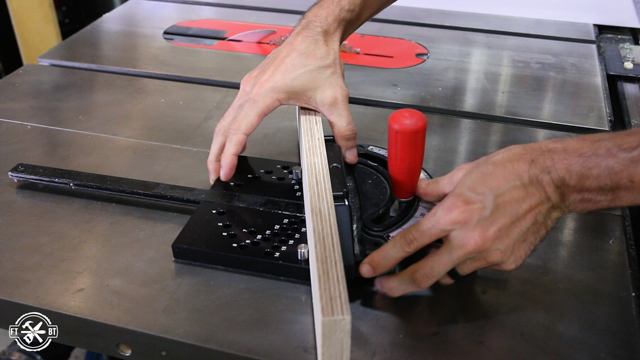
I ran the miter gauge over the blade at this setting to see exactly where the blade would hit the miter fence. Then I clamped a stop block to my table saw fence and set up for my first segment cuts using the numbers from the online tool.
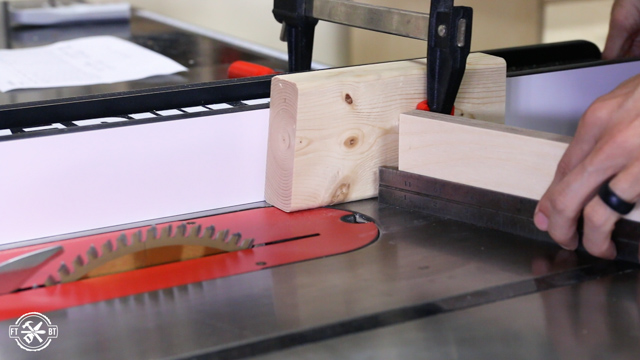
Cutting the segments is pretty easy. I just butted the board against the stop block, made the cut, then flipped the board over and repeated that until I had my 10 segments.
3. Glue and Clamp the Segmented Rings
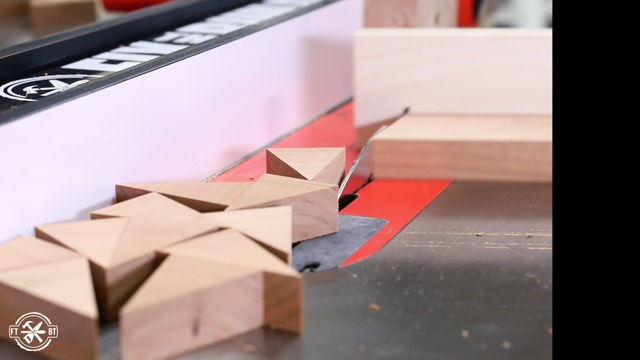
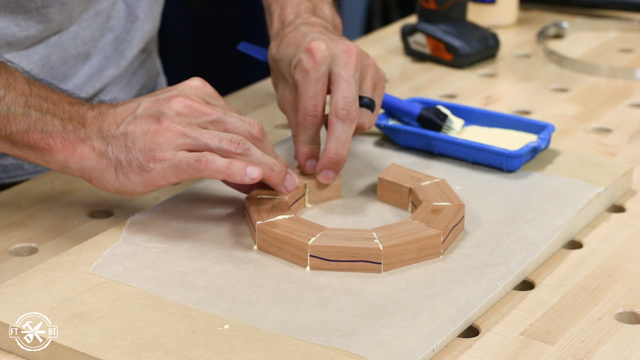
Since this was my first time doing segments I wanted to glue the base up before cutting the rest to get a feel for it. I used the marker and pencil lines to alternate the segments to help cancel out any variation in the cuts.
Then I applied a liberal amount of glue to each piece and fit them together like a nice pizza pie. And using a wax piece of paper under the glue up will help keep your bench nice and clean.
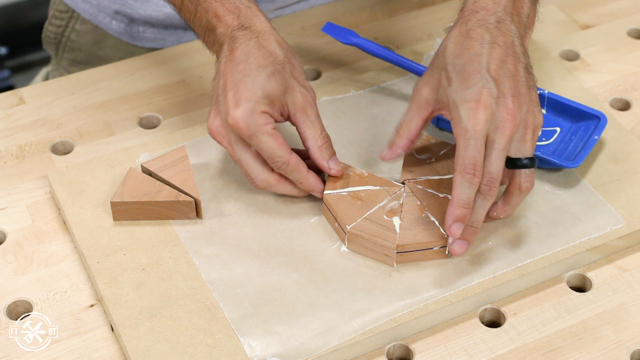
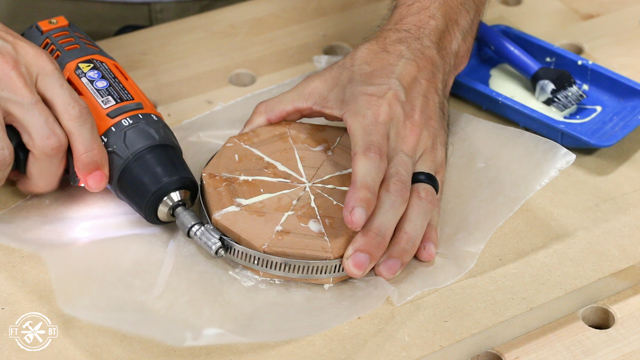
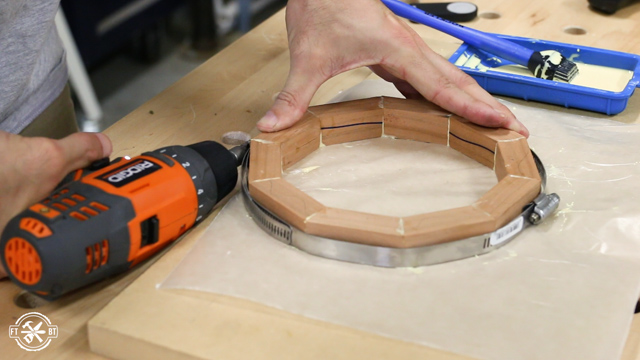
To apply pressure I used a hose clamp and tightened it down with with my drill. This works really nicely.
I felt pretty good about the process so I went back to the table saw and cut the segments for the other rings. Each ring going up the bowl gets wider so the the segments get progressively longer as well. If you used more segments in the upper rings this wouldn’t be true, but I used 10 segments for all the rings.
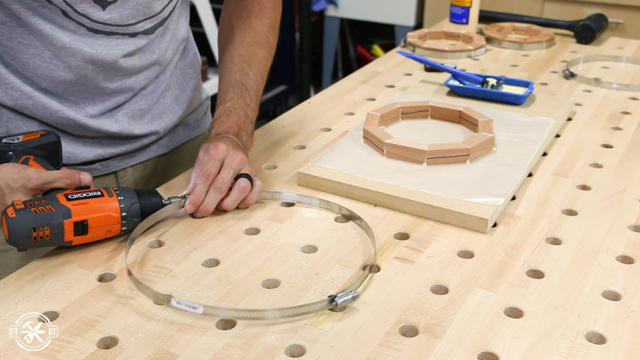
The glue up for the rings is slightly trickier than the base since there isn’t a middle point to reference all the segments on. But I rubbed each piece together as I added it to the ring and this helped hold everything together until I could get them all in place and clamp them with the hose clamp.
I repeated the process with the other rings but had to make a quick adjustment for the top one. The 7” hose clamp I had was just a little too small, so to extend it, all you have to do is disassemble two of them then thread them back together into one ring. This is a great hack to not have to buy a ton of different sizes too.
4. Make the Epoxy Resin Rings
Next I moved on to making the epoxy resin rings for the segmented bowl. Instead of making resin strips and cutting them into segments I bought a silicone cake mold to make one piece rings. I laid out a circle on a piece of ¾” plywood to give me a ¾” wide ring.
I cut the circle to size on my bandsaw. It doesn’t have to be super exact, so I just got close to the line and freehanded it the best I could.
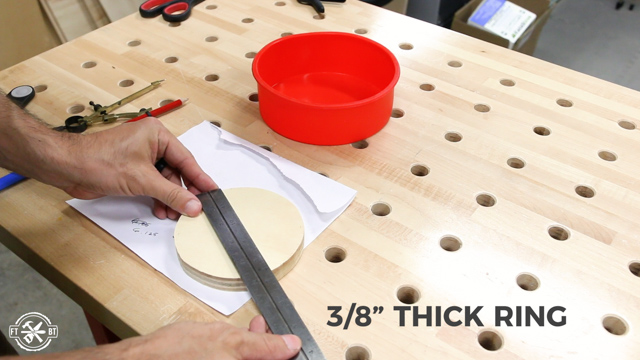
I wanted a ⅜” thick finished ring, so I figured I’d pour a ½” thick ring to get there. I used the good ole pi R squared equation to find the area of the base of the mold then subtracted the area of the wood circle. This gave me the area of the ring. Then I just multiplied it by ½” to get the volume of the ring in cubic inches and converted that to ounces (or milliliters for all my metric friends).
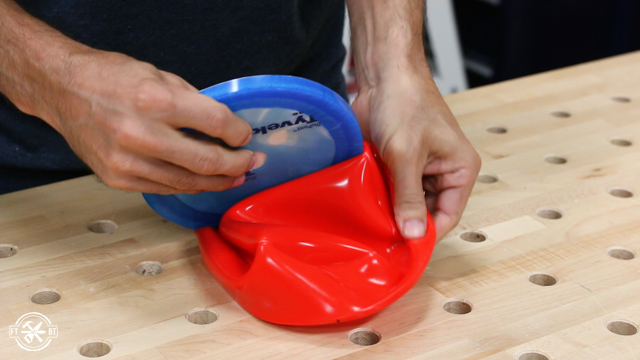
To keep the epoxy from sticking to the wooden circle I covered it in a sealant tape around the bottom and sides. Then I used hot glue to stick it to the bottom of the silicone mold.
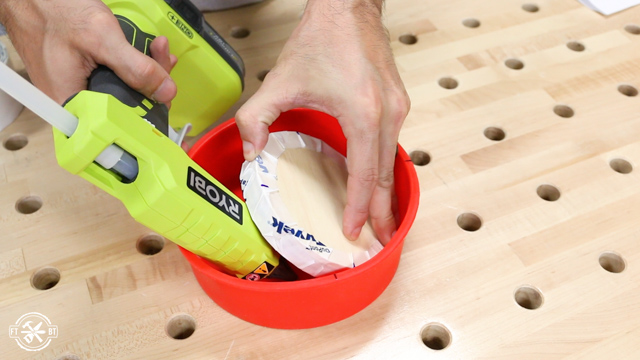
The pour was 4 ounces of resin. I used a mixing cup and a two part epoxy to get the right mixture. Then I added in some blue pigment for coloring. I mixed the pigment in until it was an even color and poured the resin into the mold around the circle.
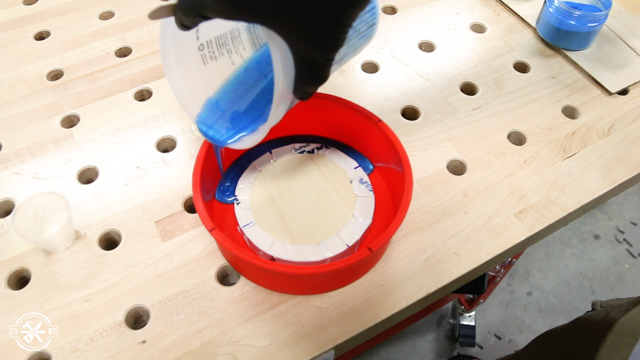
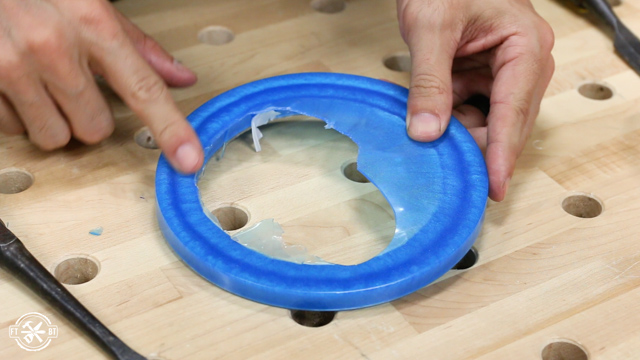
The epoxy setup overnight and the resin came out easily.
The metallic pigments left a cool design in the ring as it cured.
I repeated the exact same process with a lighter blue pigment for the next ring.
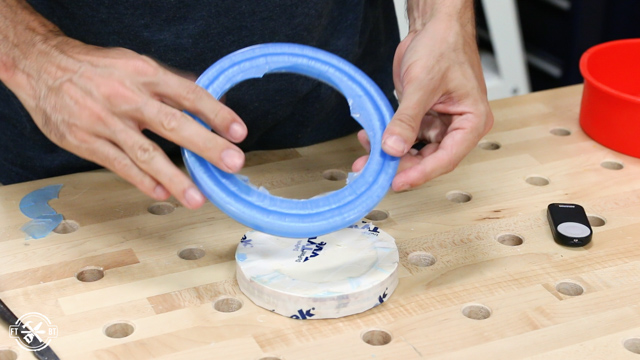
For the third epoxy ring I cut a smaller circle to make the inside of the epoxy ring smaller. This will allow me to have a sweep in the bowl and transition between layers.
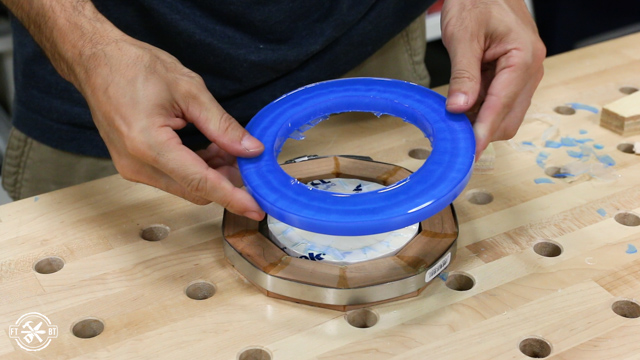
5. Glue Up the Bowl Blank for Turning
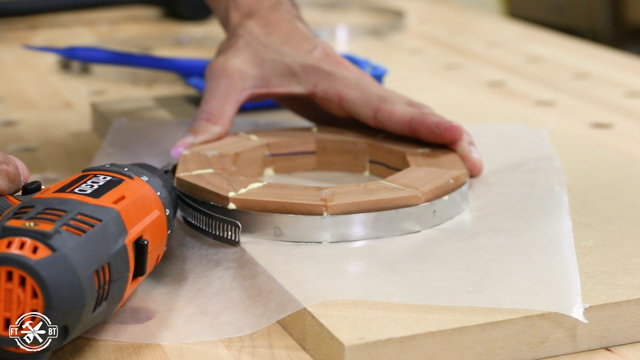
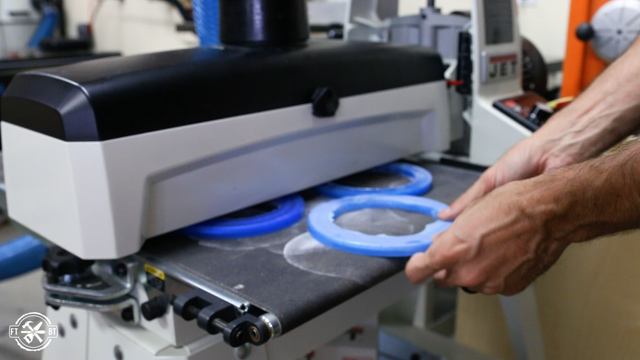
With the epoxy rings done I pulled out the segmented wooden rings from the clamps. Then I rolled out my 18-36 Drum Sander from JET, the sponsor of today’s video. It’s great for flattening delicate items like these epoxy rings.
I ran the rings and segments through and finished them off with a little hand sanding at a higher grit before glue up.
But at this point I also realized my design plan had gone south. The top wooden ring was too large for a good transition to the largest epoxy ring size. And when I tried to stack the three epoxy rings together it just didn’t look right. So I went with just two epoxy rings and three wood rings for the final design of the segmented bowl.
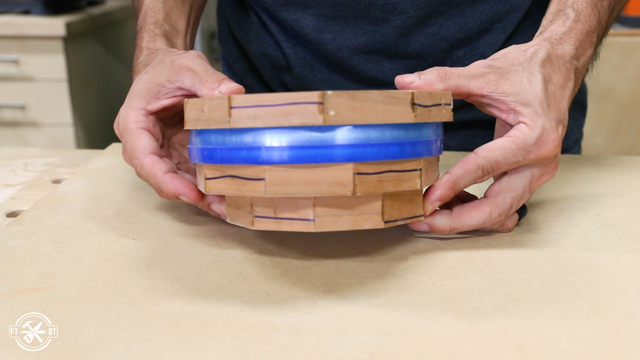
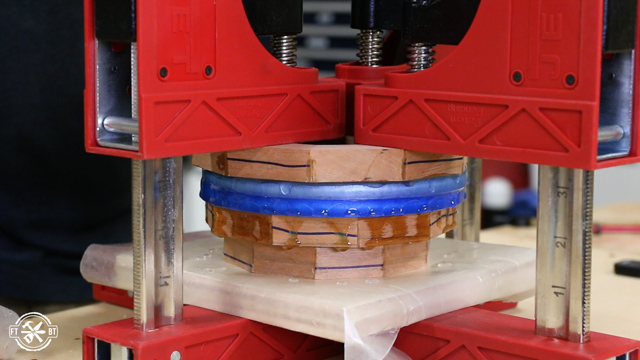
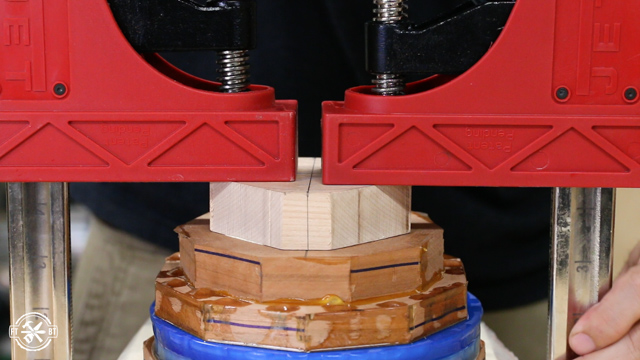
To bring all the pieces together I did a large glue up all at once. I used yellow glue for the wood to wood connection at the base, then used epoxy for all the other layers. This was a little tricky since epoxy just kind of slides and doesn’t tack up quickly like wood glue. But I got everything lined up and clamped in place, using my JET Parallel Clamps.
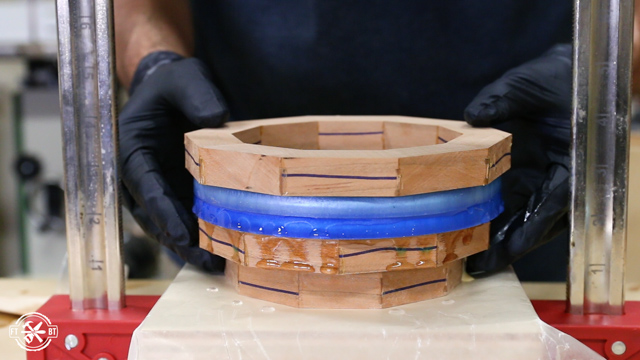
After the glue up was dry I took it out of the clamps and it was looking pretty sweet!
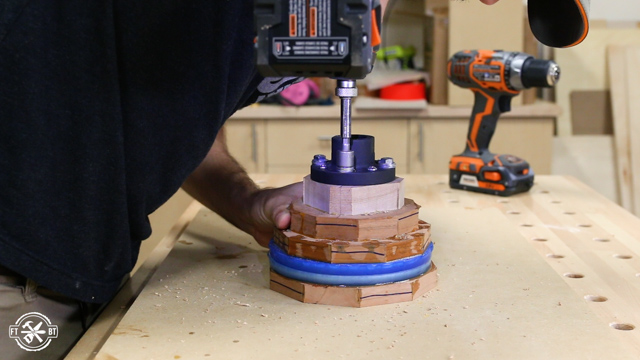
To turn the segmented bowl I’m attaching it to a face plate on my lathe. So I cut a small block and glued it to the bottom of the blank. This basically will just hold the screws from the faceplate and make sure everything stays put while turning.
I attached the face plate to the bowl blank and mounted it on the lathe.
6. Turn the Segmented Bowl on the Lathe
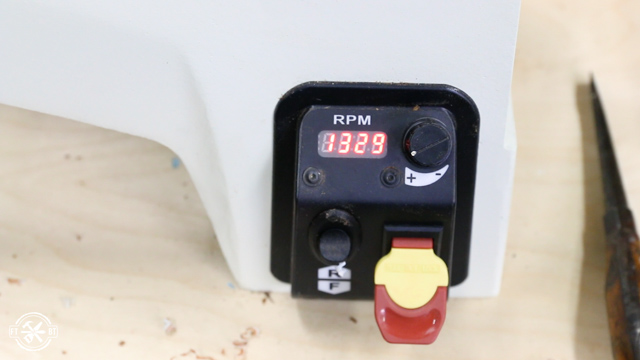
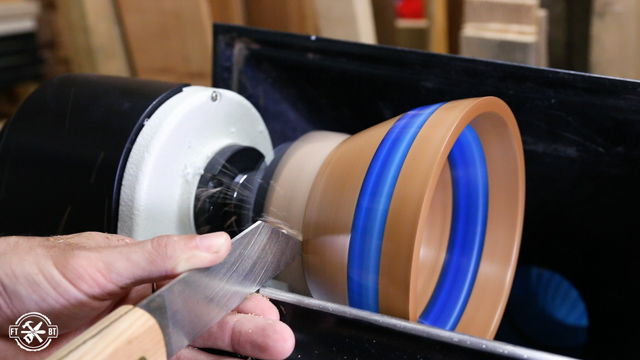
The blank was definitely out of round, but luckily I have the JET 1221VS lathe that has variable speed so I could easily control or adjust for any vibration due to wobbling.

I set the lathe to a little under 1,000 RPM and got my square radius carbide tool to do the roughing like I do on most turning projects to start out.
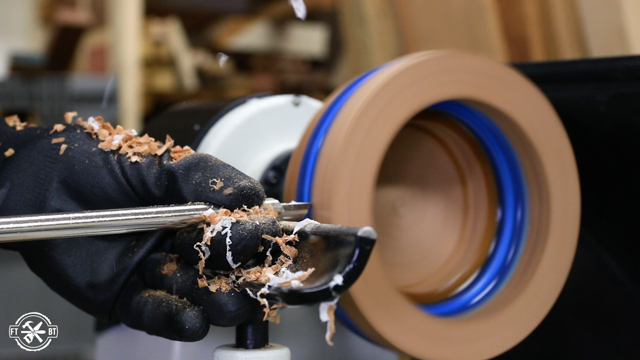
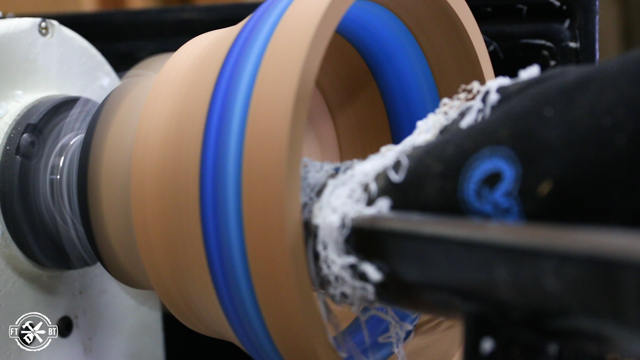
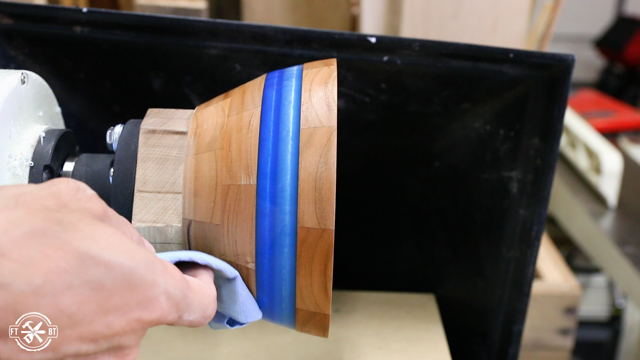
When I started in on the segmented bowl I quickly learned that turning epoxy is not like most turning projects. It chipped out like crazy. Look at these huge chunks that came out.
I switched over to a round tool and cranked the speed up to about 1,350 RPM and this made all the difference in the world!
The resin started shooting off in streams of white ribbons and it was actually really fun to turn. It makes a huge mess, but it’s definitely fun.
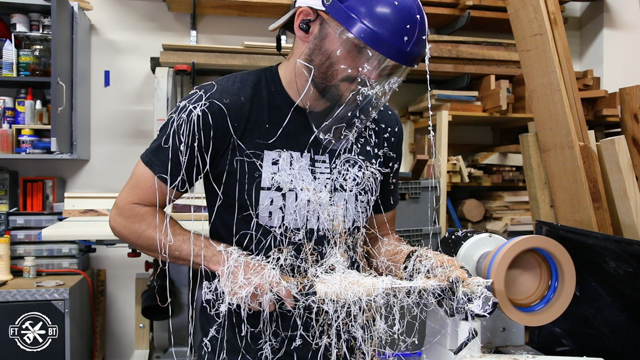
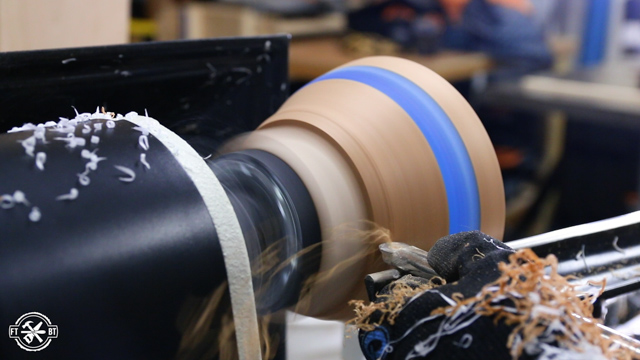
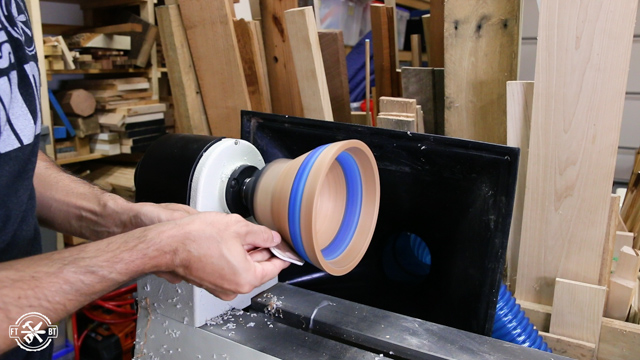
After roughing out the outside shape I moved the tool rest and started working on the inside of the segmented bowl. You’ll notice I’m wearing a glove on my left hand and that’s to protect it from the epoxy shards and fibers which can really irritate your skin. But always be very careful whenever wearing a glove around a lathe and keep your hand firmly on the tool rest away from the bowl.
I finished the inside shaping then went back to the outside to clean up the base of the segmented bowl.
7. Sand and Finish the Epoxy Resin and Wood Bowl
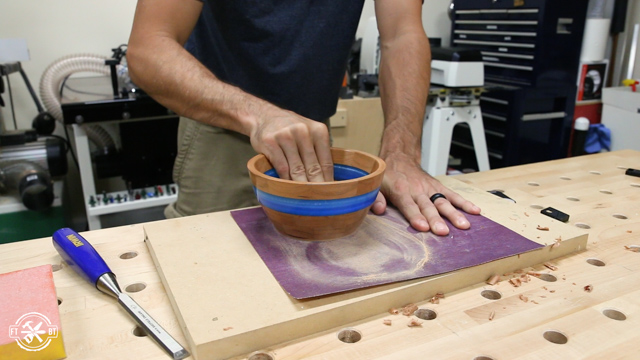
After that I was ready for sanding and I worked my way through the grits using woodturner sanding strips from 150 to 600. Then I came back with some micromesh sanding pads and went all the way up to 3600 grit.
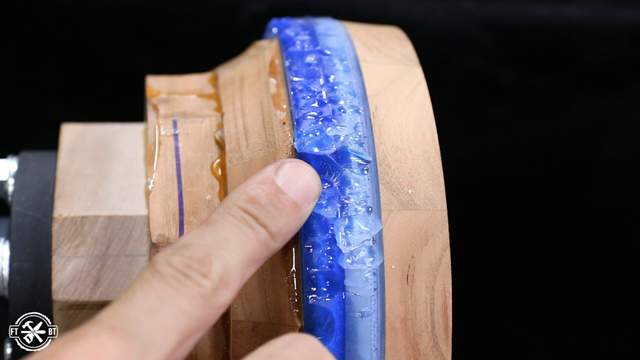
I used a water based finish on the segmented bowl and the epoxy really came to life. I applied 5 coats sanding with the micromesh in between each one until I had a nice sheen.
To remove the segmented bowl from the lathe I used a parting tool and cut right where I had glued on the face plate block. I finished it off with a hand saw so the bowl wouldn’t go shooting off and ruin all my work.
I cleaned up the bottom with a chisel then sanded it flat and after a little more finish I was done.
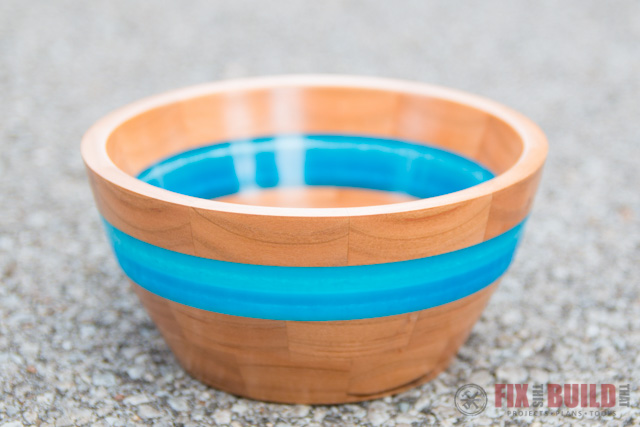
Even though this wasn’t my original design, I’m really happy with the outcome and I learned a lot about segmented turning and turning epoxy. I love the shimmer of the epoxy and the way the cherry segments compliment the blue sparkle in the rings. Working with epoxy is a blast.
If you’re looking for other great project ideas check out my Projects Page. I have woodturning, resin projects, and lots of other goodies!
JET Power Tools provided me with product and/or monetary compensation as a sponsor of this build. All opinions are my own and are not filtered by the sponsor.


