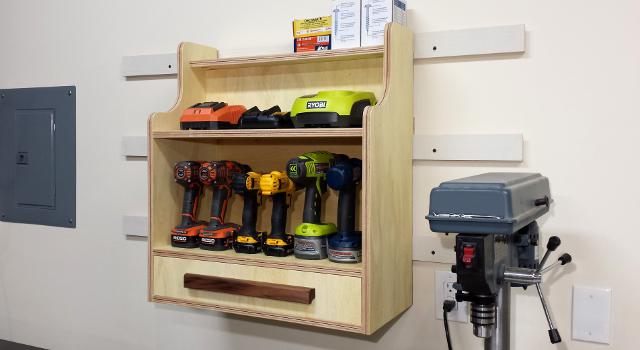
Okay, you know the drill…wait, where did I put that drill anyway? That’s right, we all do it, or at least I do. You put down your drill at the end of the day and come back to the shop and wonder where the heck you put it.
I decided it was time to put an end to that game, so in comes the Cordless Drill Charging Center. I had an idea of what I wanted, and then I searched around on the interwebs to see if anything jumped out at me. I wanted a place to store 6 drills with their batteries and chargers that had a couple different storage options and a spot for some of my most used drill accessories.
The whole thing is assembled with pocket screws for ease of building and to give my new Kreg Jig K4 a good break in. I took several design elements from Jay Bates who did a nice version of a charging station on his site. Thanks for the inspiration, Jay!

Here is what I used to build this project:
Affiliate links are used on this page. Refer to my disclosure page for more info on these links.
Tools
- Kreg K4 Master System
- Kreg Right Angle Clamp
- Tablesaw (or circular saw)
- Bandsaw (or Jigsaw)
- Oscillating Spindle Sander (or hand sand)
- Drill Press (or hand drill)
- Cordless Drill
- 18ga Brad Nailer
- 1 1/4″ Forstner Bit
Materials
- 48″ x 48″ piece of 3/4″ plywood
- 24″ x 48″ piece of 1/4″ plywood
- 14″ x 1 3/4″ x 3/4″ piece of walnut
- 1 1/4″ Pocket Hole Screws


First up is to cut down the 4′ x 4′ plywood into the pieces from the drawing. Start by cutting your 5 inner pieces which are all 22.5″ wide. There are 3 full depth shelf pieces at 11.5″ deep, the 7″ back riser for the “cord cavity” and a 5.5″ top shelf. Next cut the side pieces which are 27″ tall and 11.5″ wide. Your leftover piece will be used to make the drawer parts.

Next shape the pieces that need curves. I decided to put some curves on the sides so it didn’t just look like a big box…not that there’s anything wrong with that. I messed around in Sketchup and played with different radiuses…radii…curves until I liked the look. Then I had to find something to draw these curves.
The great thing about drawing curves is you can use whatever you have laying around. My advice here is to just grab some round things and start tracing curves until you find a size you like. I started with a tighter curve on the corners and went larger after I saw how it looked on the piece. Don’t be afraid to lay it our and change it if you don’t love it!
Layout the curve on the back riser now as well. This is where the cords will pass through and be hidden. After finishing the outlines cut them out on the bandsaw or with a jigsaw. Cut as close to the line as you can without touching it and then go back and sand to the line.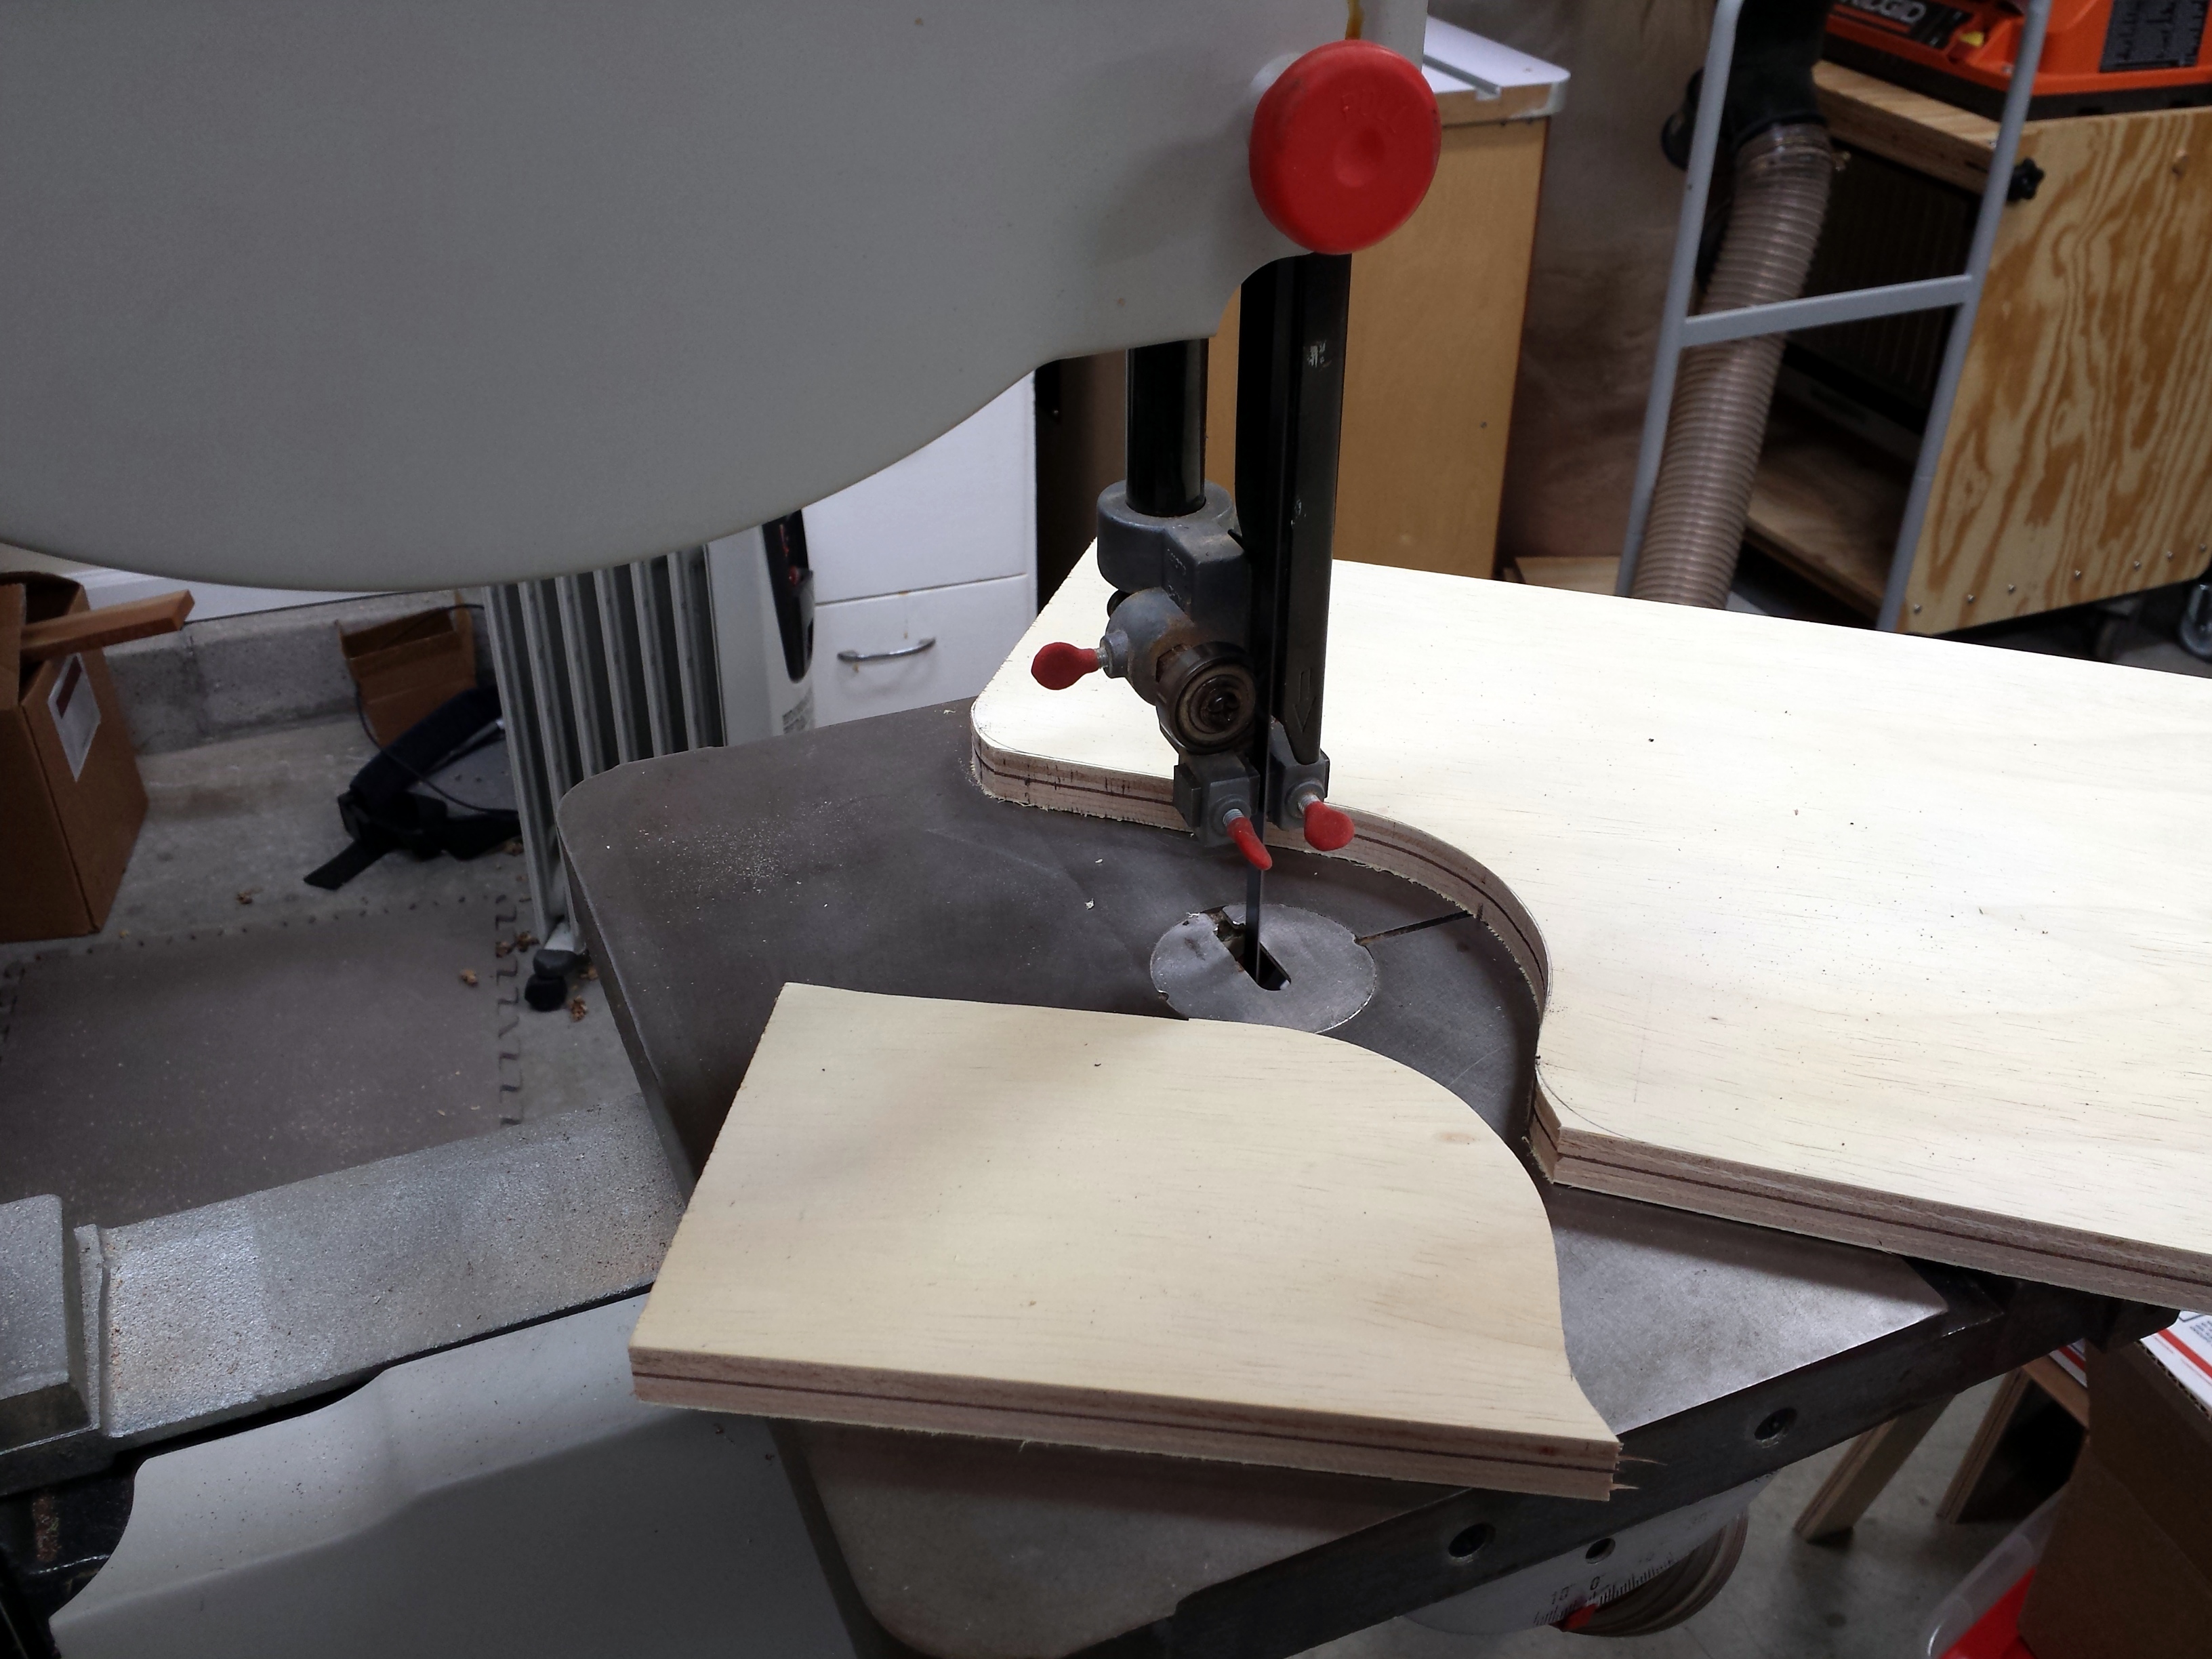
Next I taped together the sides to sand them exactly flush with each other. Looking back I would probably tape the sides before I bandsaw cut them too. I used the Ridgid Oscillating Spindle Sander for the sanding and it works like a charm.

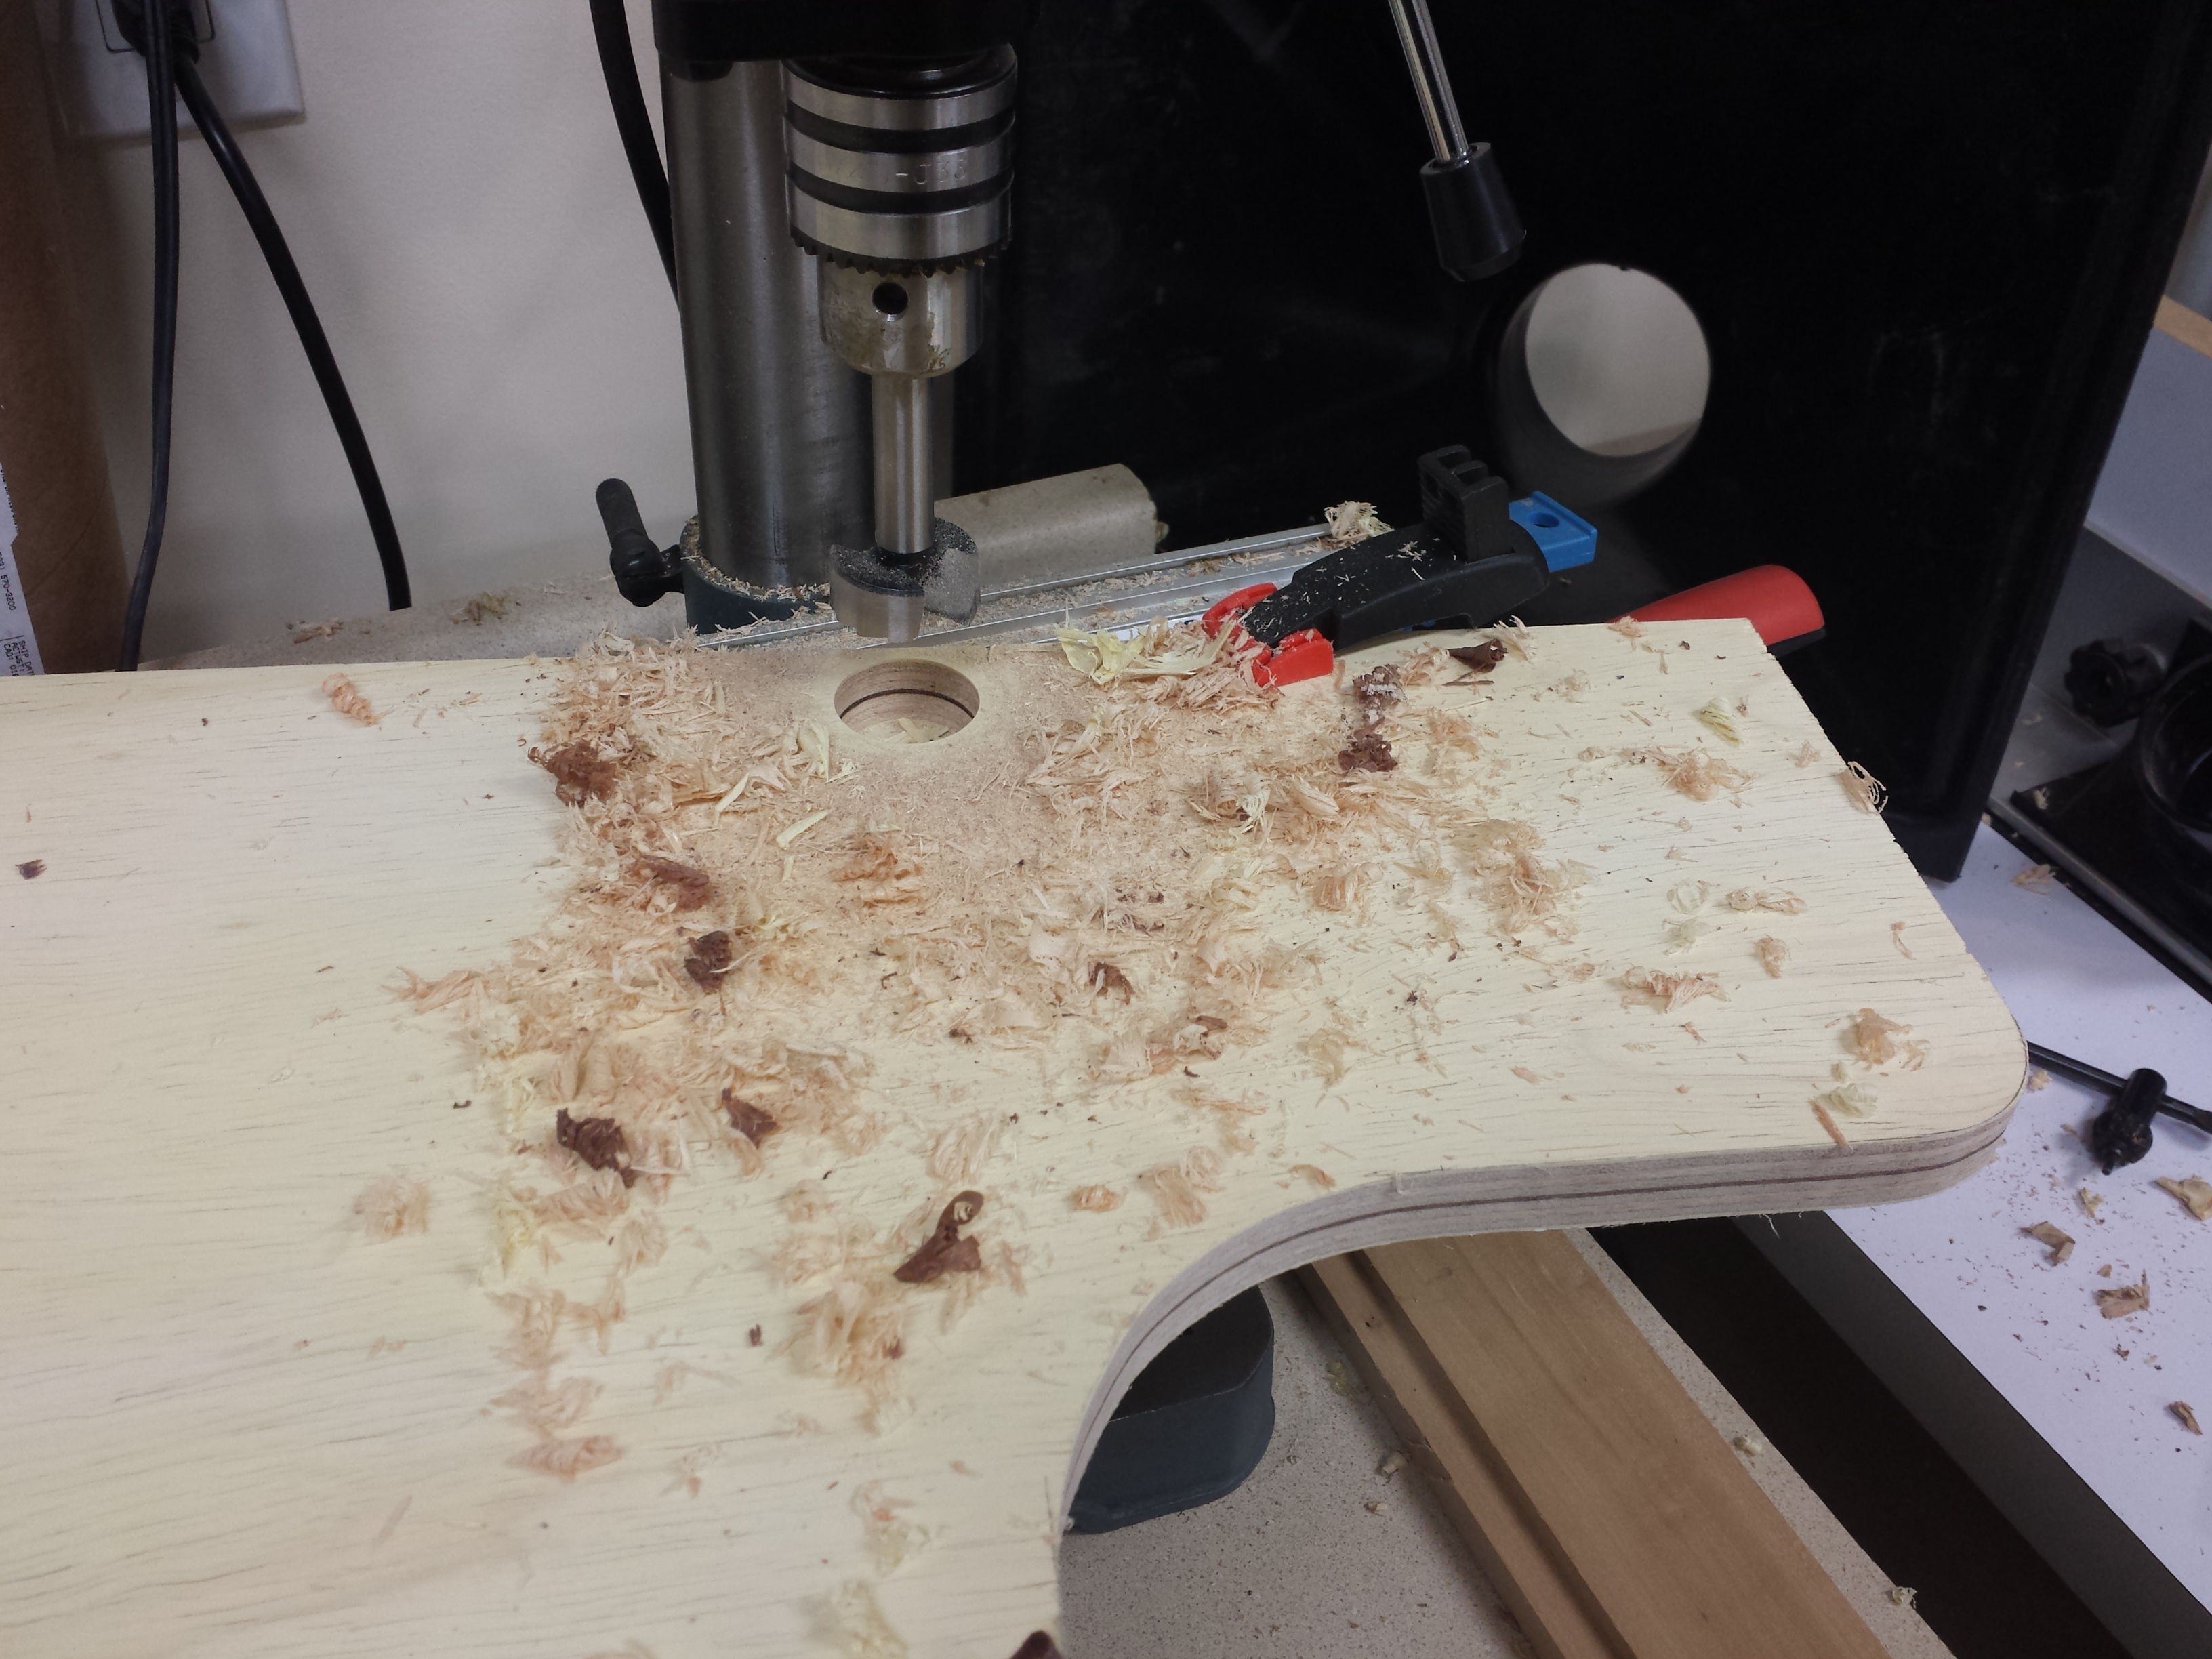
The last thing to do before assembly is to put a hole in the side for the power cord to go through. You’ll want to know where you are going to mount the charging center and put the hole on the appropriate side depending on where your power outlet is located. I made the hole 1 1/4″ which will accommodate all the power cord plugs. This will give access to the “cord chamber” where the wires will hide.
After shaping all the pieces I took them to the my Kreg Jig K4 and drilled pocket holes in all the pieces that go between the sides. I used 4 holes per end on the wide pieces to hold it nice and secure. The cord hiding riser got pocket holes on all 4 sides.
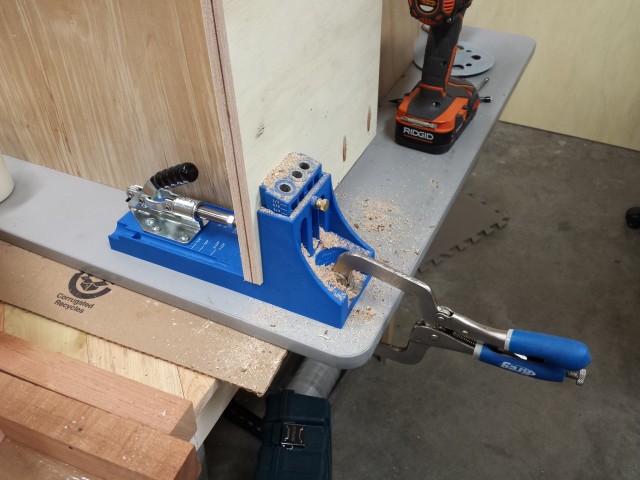
Now its time to start assembly! Start with the bottom shelf and work up the piece. Laying the cabinet on its back will ensure you have a flat back to attach the 1/4″ ply to. Use a square and the Kreg Right Angle Clamp to attach the bottom to both sides. The pocket holes should be facing down so the drawer will have a nice smooth surface to slide on.
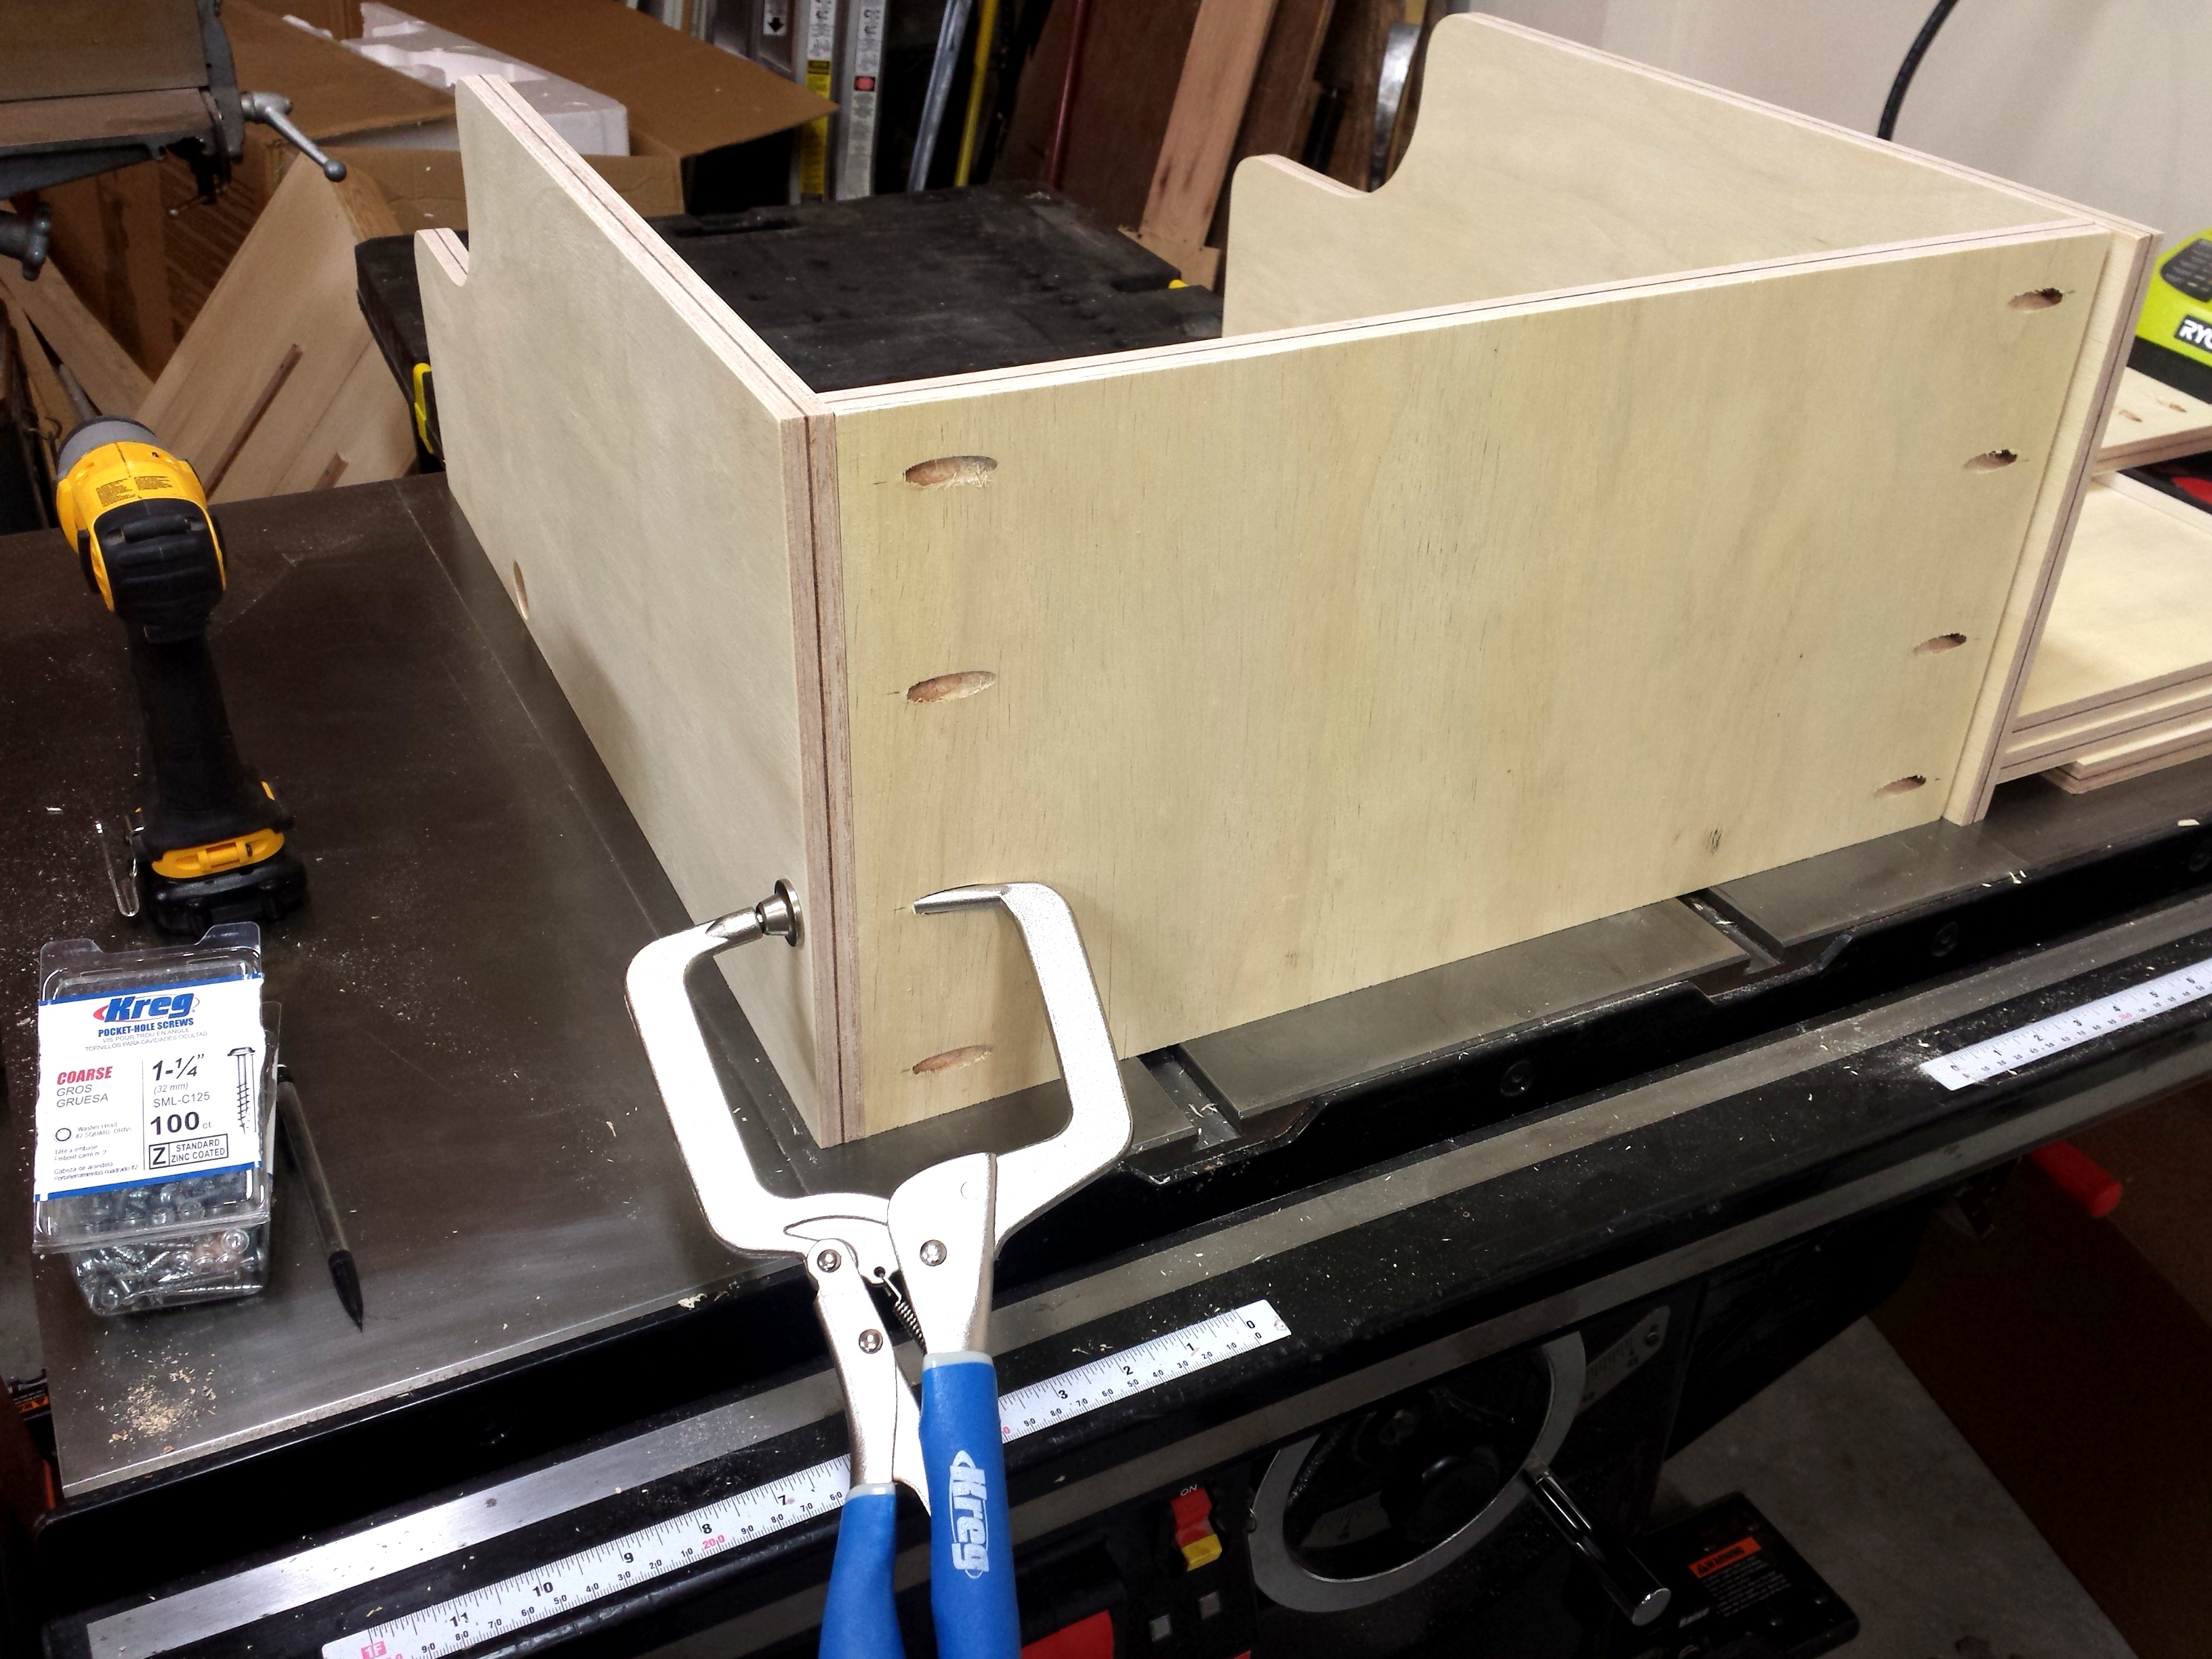
The opening for the drawer needs to be consistent to avoid uneven gaps, so I cut a couple 4″ spacers out of scrap wood. Butt them against the bottom shelf and flush up the next shelf to the spacers and attach with 1.25″ screws.

Note from Brad:
The 4″ opening makes a really tight space to work in since you are putting the pocket holes within the space. My 12v drill fit perfectly when I put the smaller square drive bit in it. If you have a larger drill you might need to attach this shelf first and then the bottom shelf.
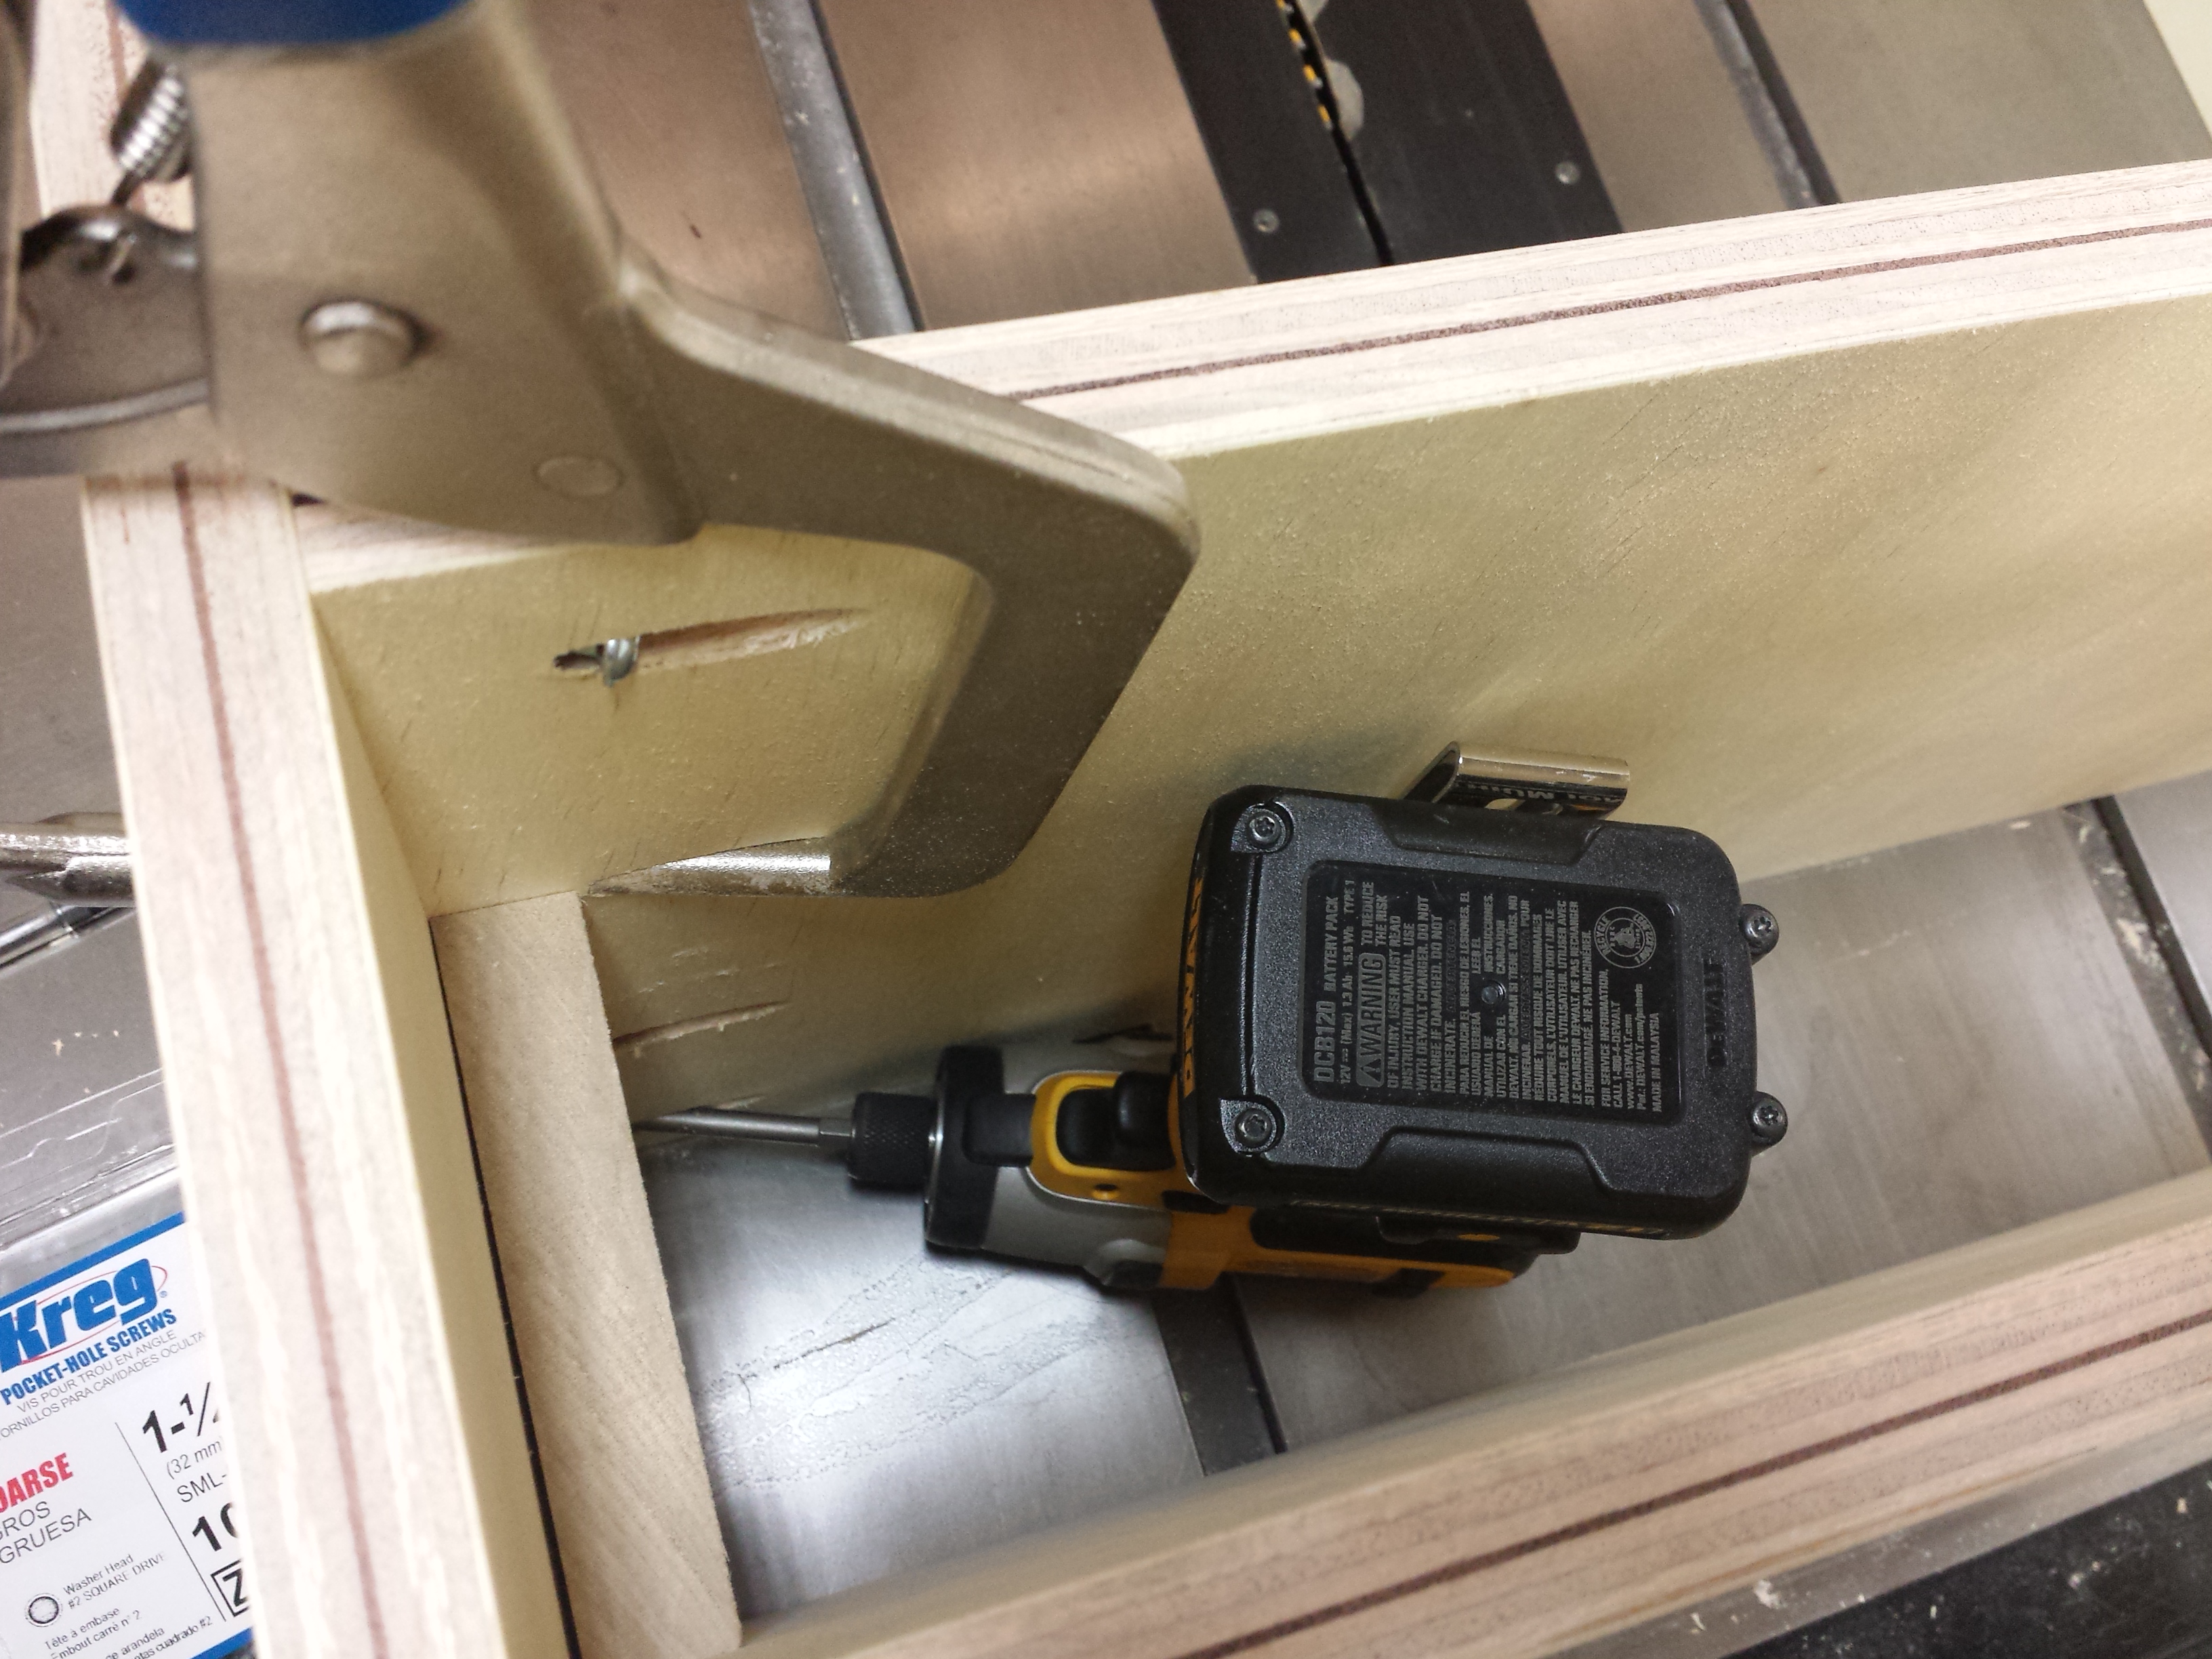
Next attach the shelf for the chargers to sit on. This one is fairly straightforward. The riser and the top mini shelf come next and are a little tricky. The riser shelf has pocket holes drilled on all four sides. Start by attaching it to the charger shelf, then screw it into the sides. Finally attach the top mini shelf. Then the Mini shelf can be attached to the sides as well. Now the carcass body is assembled!
Now it’s time to build the drawer. I used a 3/4″ piece for the drawer front and 1/2″ ply for the sides and back. I only did this because I had the extra 1/2″ ply and was trying to eek out the most width in the drawer. In retrospect I would have just used the 3/4″ as called for in the plans to make it easier and eliminate the need for another screw size.
The drawer front is sized so there will be a 1/16″ reveal on both sides and the top when the drawer is closed. Cut the pieces to dimension and then cut the drawer bottom. The drawer bottom is 1/4″ ply, so a 1/4″ groove (or smaller…fit to actual ply dimension) is needed on the front and sides. Cut this 1/4″ up from the bottom and 1/4″ deep. The back of the drawer is cut 1/2″ narrower than the other pieces and attached flush with the top of the sides. This allows the bottom piece to slide in from the back once the drawer is assembled.
I made a handle out of walnut to accent the dark layer in the middle of the ply. The handle is made from a 3/4″ x 1 3/4″ piece of walnut. Using the design idea of 5ths (things look better broken into 3rd or 5ths) I decided to make the handle cover the middle 3/5ths of the drawer or about 14″.
All that is needed is a 1/2″ roundover and a 1/2″ cove bit to make the profile. Run the roundover first then follow up with the cove bit. I cut the handle to length and put a 20 degree bevel on each end to give it an extra layer of depth…aka, it just looks cooler!
Drill some oversized holes in the drawer and then mount the handle with panhead woods crews and a washer. Have fun with the handle and make it whatever you want. I’ve seen people use wrenches, copper pipe, and PVC. You can also just as easily use a store bought handle as well.
To finish off the cabinet cut the 1/4″ backer board to size and attach with brad nails. Lay out where the inside plywood shelves are with a pencil line to avoid guessing and blowing a nail out through your beautiful new shop cabinet.
I’m using a french cleat system to attach the cabinet to the wall. The system uses 2 cleats with mating 45 degree bevels. My cleats are 3/4″ plywood, but any wood can be used. One cleat is attached to the back of the cabinet and the other is attached to wall, preferably into wall studs or other firm support structure.
Attach the cleat to the back of the cabinet behind the upper mini shelf. If the bottom portion of the cabinet won’t be resting against a lower wall cleat then you will need to attach a 3/4″ spacer at the bottom of the cabinet. The beauty of the french cleat system is how easy it is to rearrange. Simply lift the cabinet off the wall and move it 3″ or 30′ and put it on another cleat and you are good to go!
For power you have the option of running the cords to a power strip already setup or mounting a power strip to the cabinet. Just run the cords through the cavity behind the riser and out the side.
Now load it up with all your favorite drills, chargers and accessories! This project was an awesome addition to my shop and keeps all my drills and accessories in one place. Build one yourself and post pics on FB, IG or Pinterest and be sure to tag me! And go see other great shop builds on my Shop Projects page.


