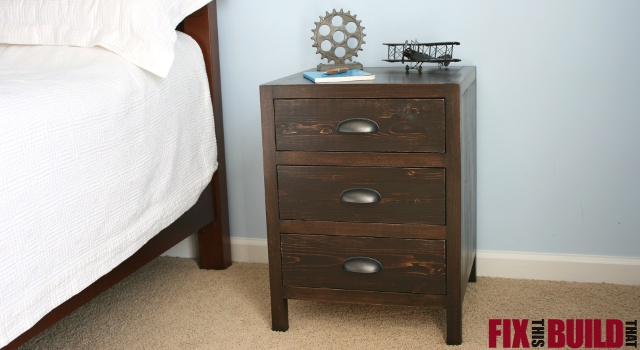
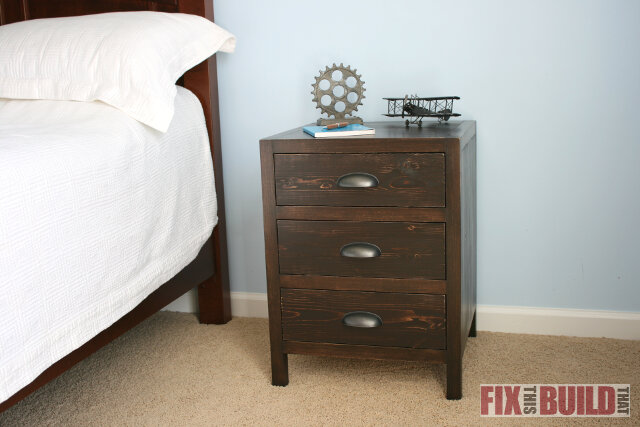
Today I’ll show you how to build a DIY Nightstand with 3 drawers and have some easy to follow build plans for you! I was cruising the Restoration Hardware catalog looking for some ideas for my next build, when I ran into the Printmaker’s Series. The Printmaker’s Side Table looked awesome, so I started working on a version of my own. I plan to use it in our bedroom as a nightstand.
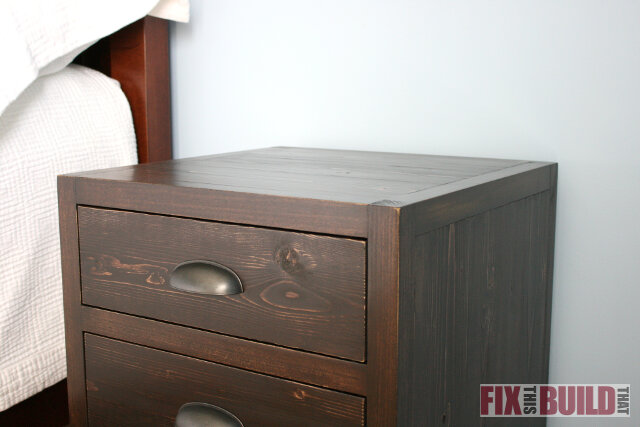
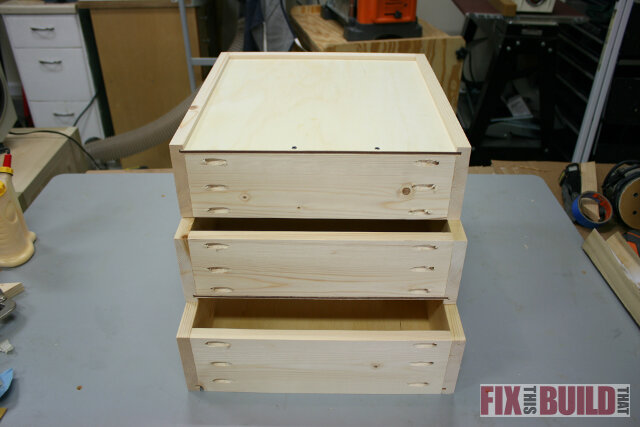
I love the shape of this piece, the flush top and sides give it a sleek feel with clean lines. The nightstand is distressed just enough to give a rustic feel, but has a modern look.
This DIY Nightstand is made with supplies and wood from the home center and has easy joinery. I used a poplar frame for a little added durability paired with pine panels and drawers. The FREE DIY Nightstand plans are available for this build by clicking here.

Tools
- Kreg Jig K4 Master System
- Kreg Face Clamp
- Tablesaw (or circular saw)
- Bandsaw (or jig saw)
- Miter saw
- Random Orbital Sander
- Ridgid Cordless Drill
Materials/Supplies
- (5) 8′ 1×6 common pine boards
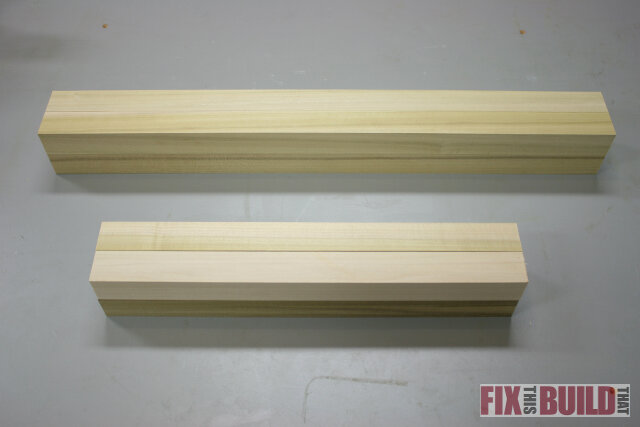
- (3) 8′ 2×2 poplar boards
- (1) 8′ 1×4 common pine board
- (3) pairs of full extension 16″ drawer slides
- (3) drawer pulls
- 1-1/4″ Pocket Hole Screws
- Rust-Oleum Kona Stain
Affiliate links are used on this page. See my disclosure page for info on affiliate programs.

How to Build a DIY Nightstand with Drawers
- Cut Parts to Size
- Assemble Sides
- Attach Back and Front Stretchers
- Make the Nightstand Drawers
- Attach the Drawer Slides
- Apply Finish and Install Drawers
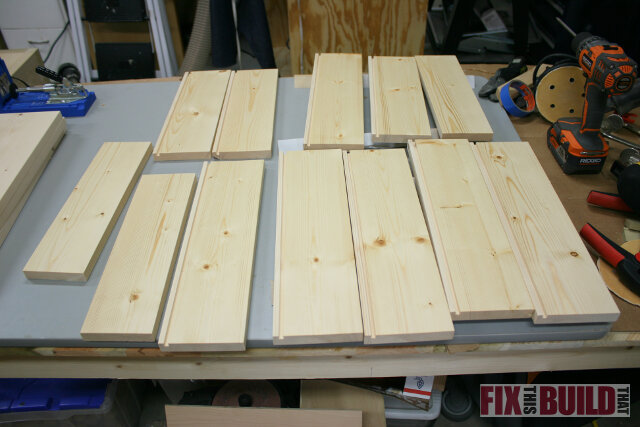
1. Cut the Parts to Size
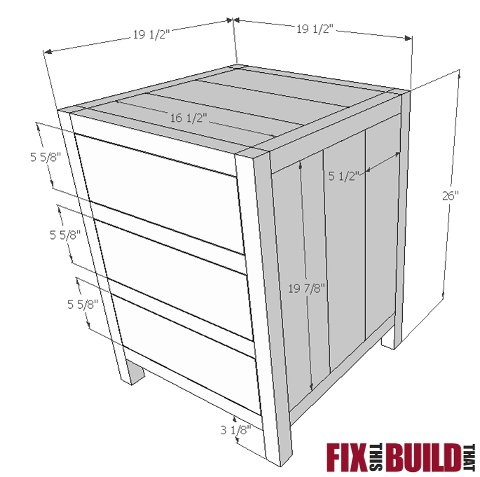
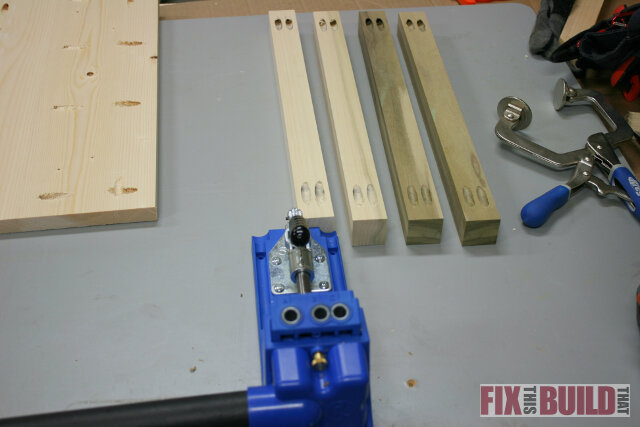
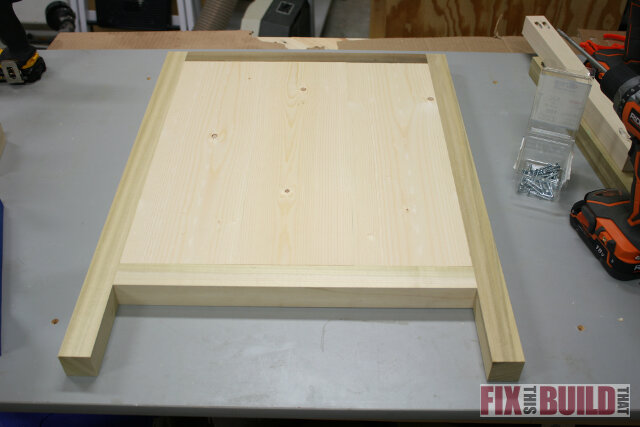
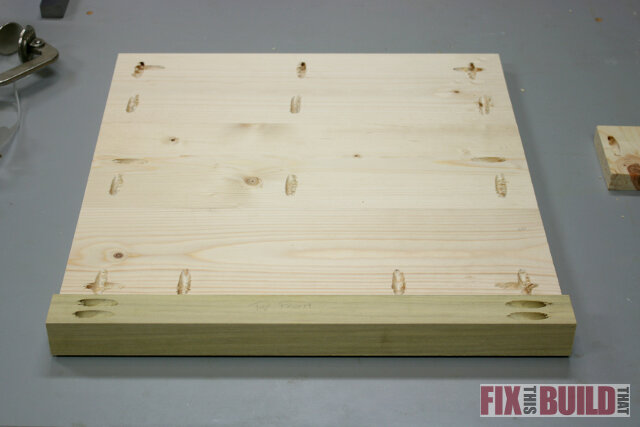
Alright, let’s start building this nightstand! Firstly cut the 1×6’s and 2×2’s for the side panels, top and back. Make sure all the pieces are consistent in length and width to get tight fitting panels without gaps. Each side panel is made of (3) 19-7/8″ 1×6’s surrounded by a 16-1/2″ top and bottom 2×2 and (2) 26″ 2×2’s for the sides.
Prepare one of the side assemblies by drilling pocket holes in the 1×6’s and 2×2’s. I use a Kreg K4 to drill my pocket holes. If this jig is out of your price range, Kreg also has lower priced models like the Kreg R3 and the Kreg Mini which give you the exact same holes but just take a little longer to use.
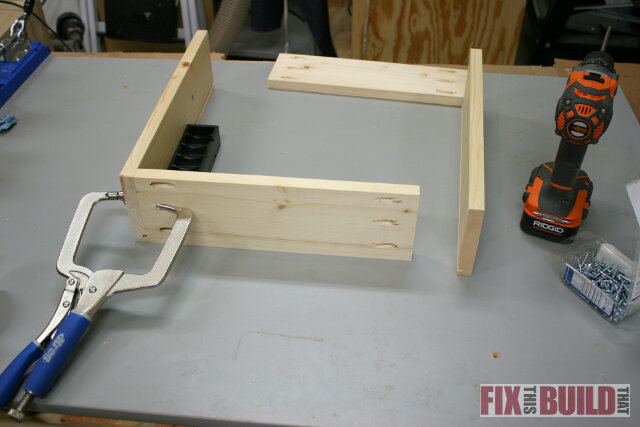
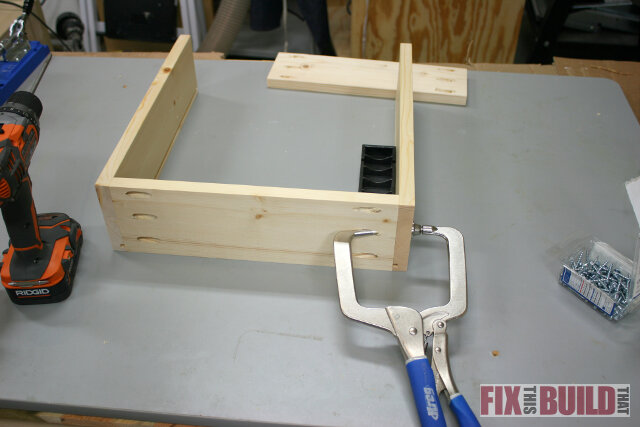
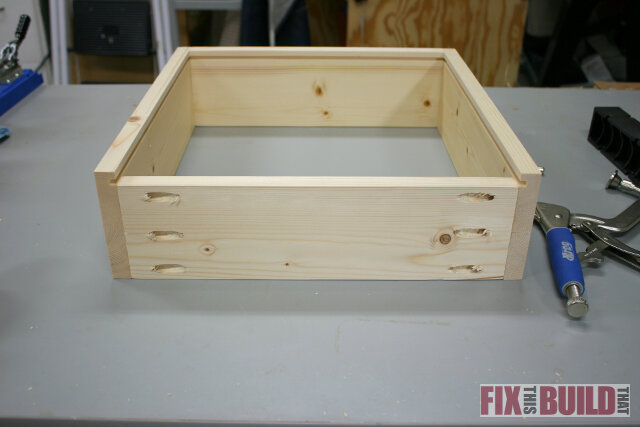
2. Assemble the Nightstand Sides
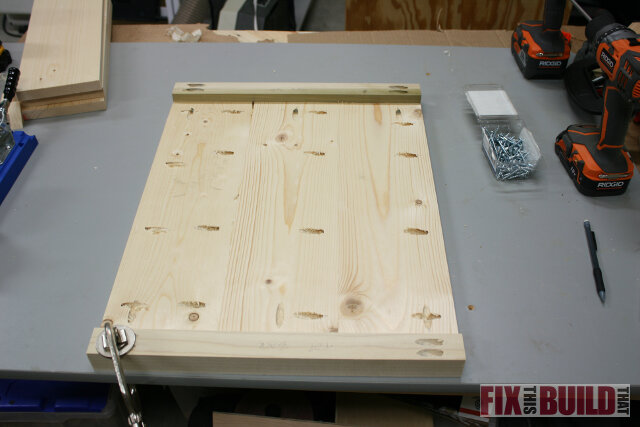
Assemble the 1×6 side panels using 1-1/4″ pocket hole screws. Use glue to really get a solid bond.
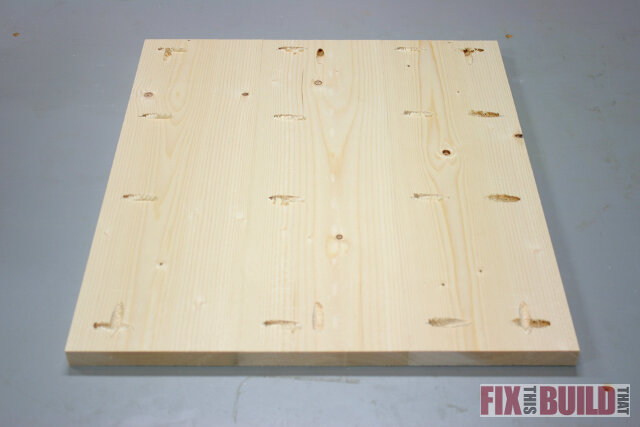
After joining the 1×6’s together, attach the top and bottom 2×2’s to the panel and then attach the side 2×2’s. I used a combination of the Kreg Face Clamp and the HART Quicktight C-Clamp to clamp together the different sized pieces during assembly.
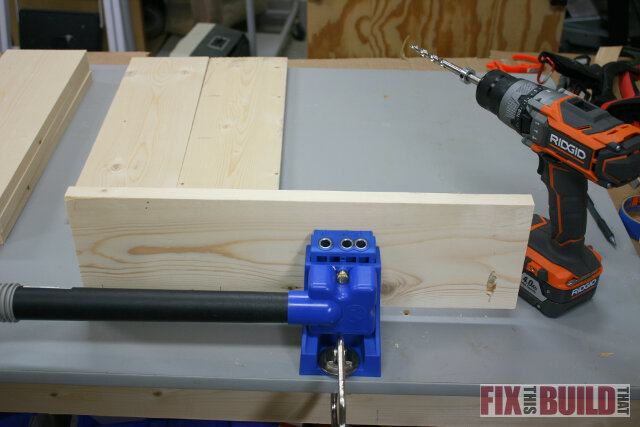
Next assemble the back of the DIY nightstand, which is exactly like the side assemblies you just made except it doesn’t have 2×2’s on the left and right.
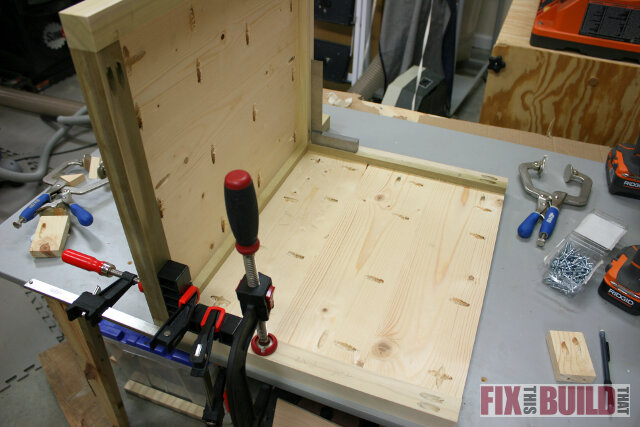
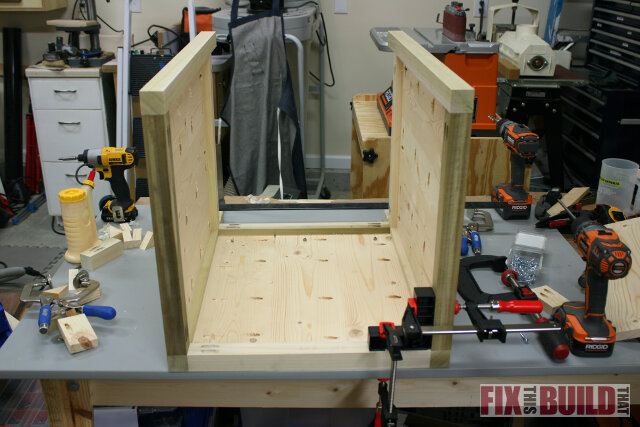
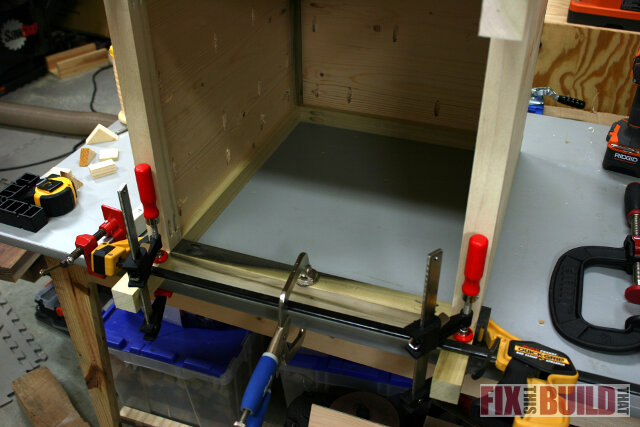
3. Attach the Back and Front Stretchers
Now connect the sides and the back together, clamping the pieces firmly together while assembling. Use a known right angle to check for square during assembly. I also used a Right Angle Square with clamps on each side to hold the pieces together while attaching them.
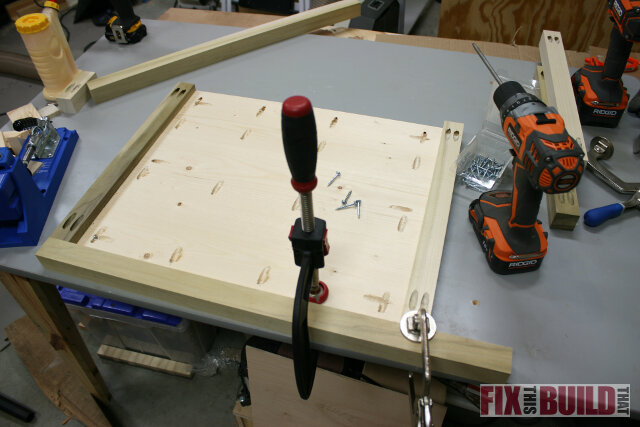
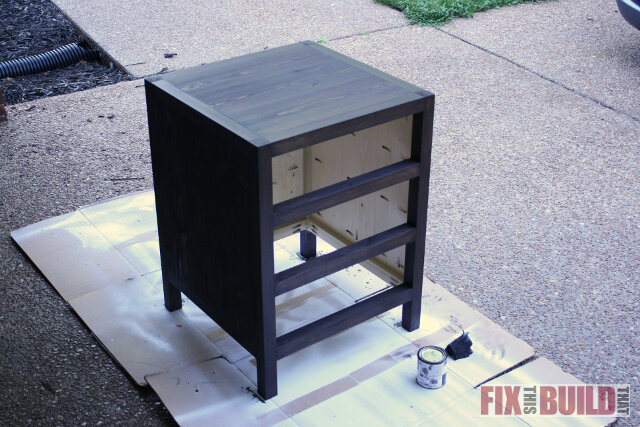
The last major assembly to build and attach is the top. It uses (3) 16-1/2″ 1×6’s with only 16-1/2″ 2×2 frame on what will be the front of the panel.
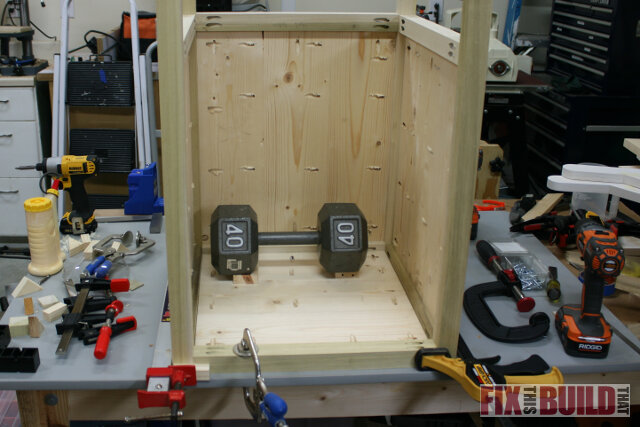
Now we’ll get a little creative to attach the top on the DIY nightstand. Flip it over and clamp everything firmly in place. Since you can’t effectively clamp the backside of the top, pull those dusty dumbbells or other heavy objects out and use them to hold the top down flush to the workbench.
Start by screwing the top to the back and then work your way down both sides and finish with attaching the front 2×2 frame.
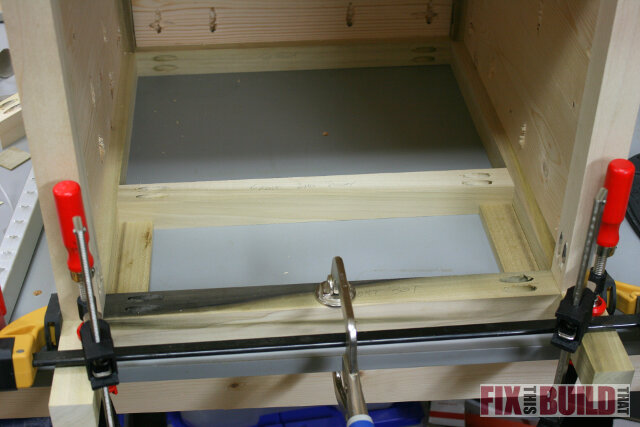
The last pieces of the 3 drawer nightstand to attach are the (3) remaining 16-1/2″ 2×2 front stretchers. Attach the bottom stretcher first and align it with the bottom 2×2’s of the sides.
Cut 5-7/8″ spacers and use them to position the 2nd and 3rd stretcher to get perfect spacing on the remaining stretchers. This sized opening will give your 1×6 drawer fronts a 1/16″ reveal on the top and bottom.
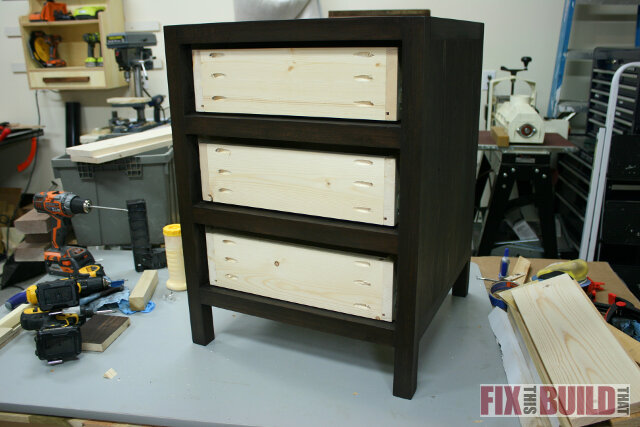
4. Make the Nightstand Drawers
Now that the body of the DIY nightstand is done, it’s time to make those 3 drawers. Before you start cutting the drawers, take the measurements of the drawer openings and adjust as necessary, leaving enough room for your drawer slides (1/2″ on each side for me).
Use 1×6’s for the draws and cut (6) side pieces at 16″ long and (3) fronts and (3) backs both at 14″ long. Then rip the (6) sides and (3) fronts down to 4-1/2″ in width and the (3) backs down to 4″ in width.
Now cut grooves in the sides and front to accept the bottom panel, the back pieces don’t get a groove since they will be ripped smaller later. The groove should be on the bottom of the inside face of each board and should be 1/4″ deep, 1/4″ wide, and 1/4″ up from the bottom.
Drill pocket holes in the outside face of the front and the back drawer pieces on both ends. Flip the pieces so the top edges are on the workbench and assemble the drawer with 1-1/4″ pocket hole screws. Make sure the grooves in the sides and front are all facing inward and are aligned where they meet in the corners. The Kreg Right Angle clamp is a lifesaver when building drawers.
When finished you have a U-shaped channel made by the grooves and open on the back. Cut a bottom panel to size so it will go into the channel and fully overlap the back piece. Slide the panel in and attach it to the back piece of the drawer with 3/4″ screws.
Here is a shot of my drawers all with views of (starting from the bottom) the front, back, and bottom back.
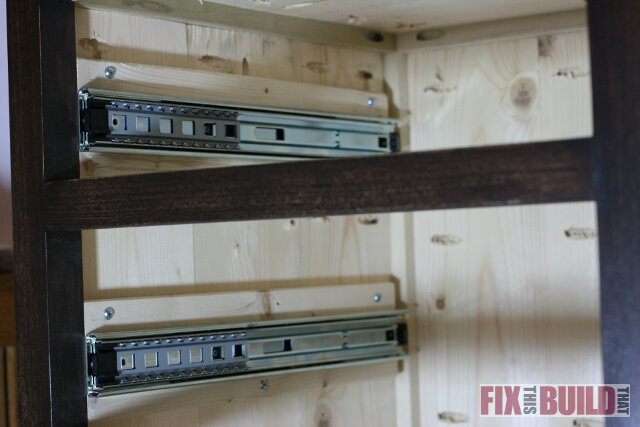
5. Attach the Drawer Slides
The last thing to attach are the drawer slides. Because the outside is flush with the frame, there is a 3/4″ difference between the frame and the inside of the panels.
Cut (6) 15-7/8″ cleats from the 1×4 (it’s okay they’re 1/8″ shorter than the drawer slide since it saves from using another board). Premount the drawer slides to 1×4 cleats and then attach the cleats to the inside of the panel. Using a jig to mount your slides will help with consistency.
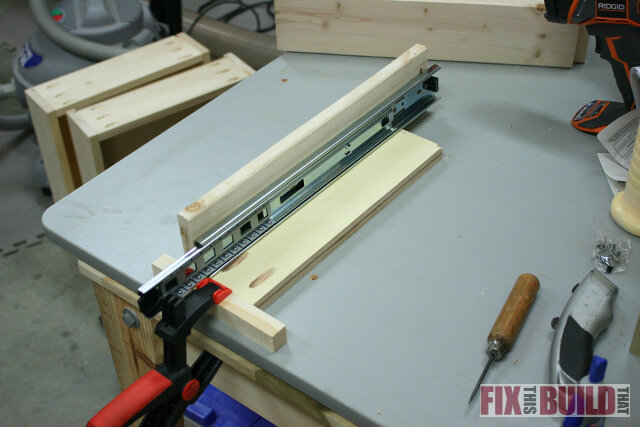
To mount the cleats to the nightstand body, predrill 1/4″ holes in the corners of the cleats. Locate them at the height recommended in your drawer slides instructions.
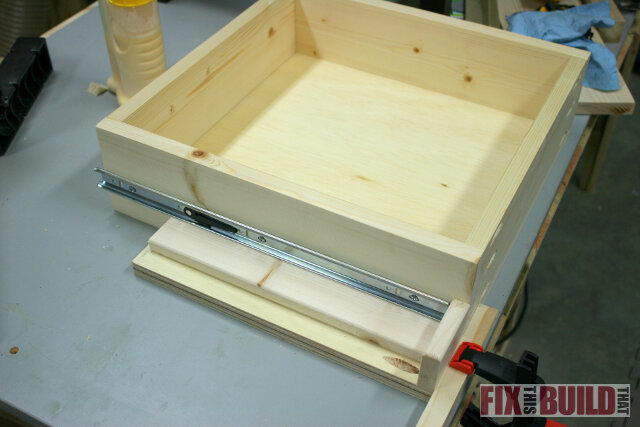
Now you can mount the drawer extensions to the drawers using the same jig from before. You’ll need to mount them 3/4″ back from the front of the drawer to account for the false drawer front and 2×2 frame. I used a scrap block the same thickness as the drawer front as a spacer for this.
6. Apply Finish and Install the Nightstand Drawers
Now all that is left is the staining and attaching the drawer fronts to finish up your DIY nightstand. I went with a Kona stain from Rustoleum.
Install the drawers so you can measure and adjust the fronts as necessary.
Cut the false drawer fronts to size and attach them from the back with 1-1/4″ pocket hole screws through 5/16″ holes. This gives you some wiggle room to adjust the drawer front just right for perfect reveals.
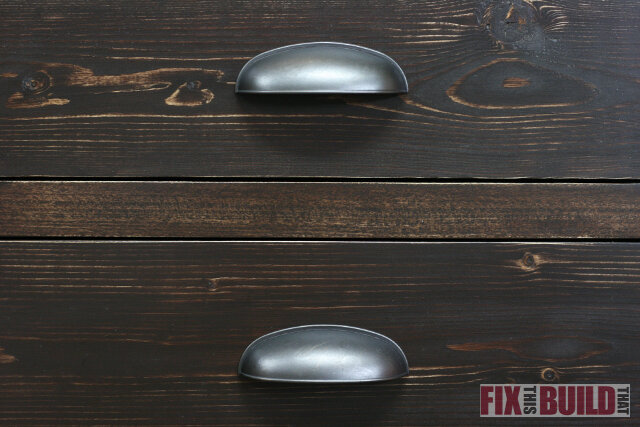
Before mounting the drawer pulls, I put three coats of General Finishes Arm-R-Seal. It’s a wonderful finish and easy to apply.
Lastly mount your drawer pulls by drilling through both the drawer box and the false front and using long bolts.

Now you’ve got yourself an awesome DIY Nightstand with drawers for a fraction of the cost of buying it at the store.
Head over to my Furniture Projects page if you want more great furniture projects!


1/4 laun plywood for draw bottem panels? It’s not in the material list. Is that what you used?
You didn’t mention draw panels in the materials list.
Any chance the plans will be added to the link again? Get a 404 error when trying to access them. Thanks.
Link is now updated!
The download link gives a 404 error
Thank you for the plans I used them to make two nightstands and plan on using the same general process to make a 6 drawer dresser. Had a few minor challenges (warped wood, imperfect cuts) mostly due to poor quality wood and bad craftsmanship..hahah. Wish I could justify buying a planer it would have made the end product a bit better!
Kent, that looks great! I love the two-tone look!
Hi Brad my very first project almost done with one, just need to stain it we went with Espresso. I have one question if I wanted to do mortise and tenon, and maybe spline joint, and butt joint for the 3 piece board. Should I be worried about wood movement? I guess what I’m asking is how would you tackle it without pocket holes? Thank you!
Also my first cabinet build, first dado cuts, and first drawers. A person asked me to build a 2 drawer cabinet with very specific dimensions (13″x24″x24″). I found this article, modified, and built it. Thanks for the help! Cost me about $130 for anyone interested, and about 5 hours total time. I went with $20/drawer hardware which brought the price up a bit. “Provincial” color Minwax stain with 3 coats of poly.Here are some pictures of my finished product.
Also my first cabinet build, first dado cuts, and first drawers. A person asked me to build a 2 drawer cabinet with very specific dimensions (13″x24″x24″). I found this article, modified, and built it. Thanks for the help! Cost me about $130 for anyone interested, and about 5 hours total time. I went with $20/drawer hardware which brought the price up a bit.
My first foray into furniture building. Thanks so much for the plans and inspiration. This was so much fun!
Here’s the finished product!
Mark, this looks great! Way to go on your first project!
Almost finished with my “copy” of your great plan. I’m wondering about the attachment of the drawer fronts. My case and fronts are stained and sealed and ready to mount but I have a slight gap (drawer front to false front) on one side of one drawer that I need to slightly shim, How many 5/16 holes did you drill and what was the hole placement on the false fronts? Also, did you glue and clamp? Thanks for the advice and for the great plan. I’m going to make a chest of drawers to match, following the basic plan!
Dennis, can’t wait to see it! I used just 2 5/16″ holes spaced about 3″ in from each side. I attach with 1-1/4″ Pocket screws and no glue. This lets you adjust the drawers as needed. If you need to shim then just shim near those screws.
Thank you! I’ll send you a pic of the result.
Nice build and thanks for the easy-to-follow plans.
Please excuse my ignorance. What did you use to cut the grooves for the drawers?
I used a tablesaw, Krissy. You could also just cut the panel a little bigger and nail it to the bottom as well if you don’t have a tablesaw.
Home Depot, at least in my area, carries 2x2x8 select pine. It’s less money than the poplar. In my area it was laying flat below the rest of the select pine…almost out of view.
Yeah, you could go with pine too for sure. The poplar takes stain much better and is a little more durable, that’s why I chose it for this.