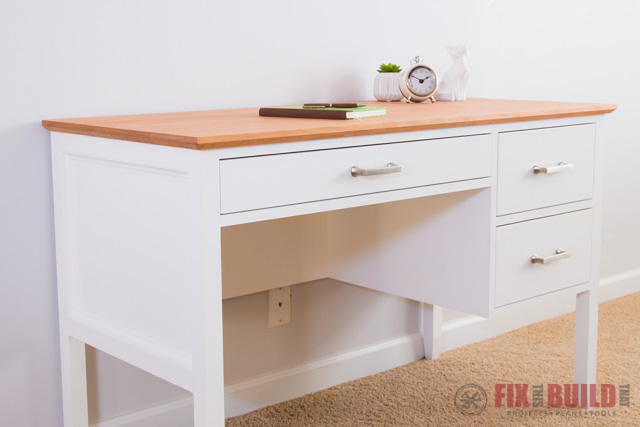
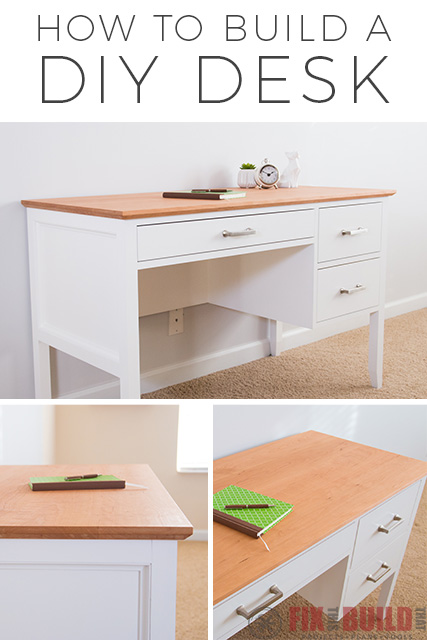
Do you need DIY desk plans? Whether you’re working from home or need a desk for online learning, you’ve come to right place. My daughter had been begging for her own desk ever since she saw the Desk with Hidden Wireless Charging. I wanted to make her a DIY desk with eye-catching details like tapered legs, cove molding, and a chamfered hardwood top. I’ll show you how I did it all, along with some tips to make it easier. And be sure to check out my DIY Desk Plans if you want to build your own DIY Desk!
Materials/Supplies
- 18” Drawer Slides
- ¾” Birch Edge Banding
- Z-clip Top Fasteners
- Cove Molding
- 1 sheet 3/4” Plywood
Affiliate links are used on this page. See my disclosure page for info on affiliate programs.

How To Build a DIY Desk With Drawers
- Cut the Desk Legs
- Create Desk Side Panels
- Attach Desk Side Panels and Legs
- Create Desk Top
- Make Desk Drawers
- Install Desk Drawers
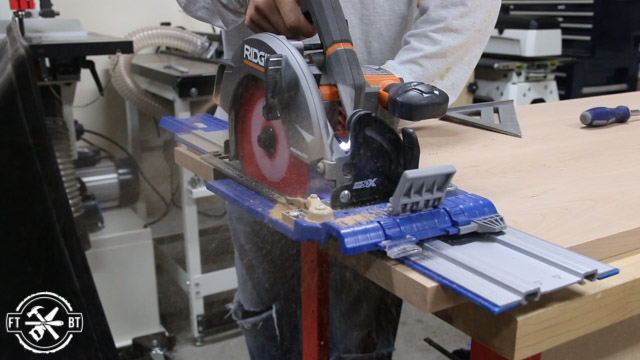
1. Cut the DIY Desk Legs
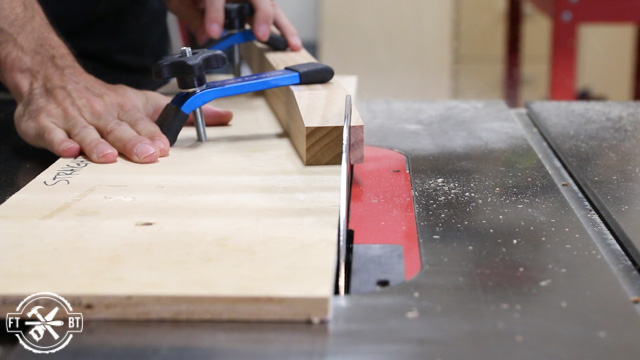
First I started by cutting the legs for the DIY desk to size and using my stop block on my miter saw stand which is great for repeatable cuts.
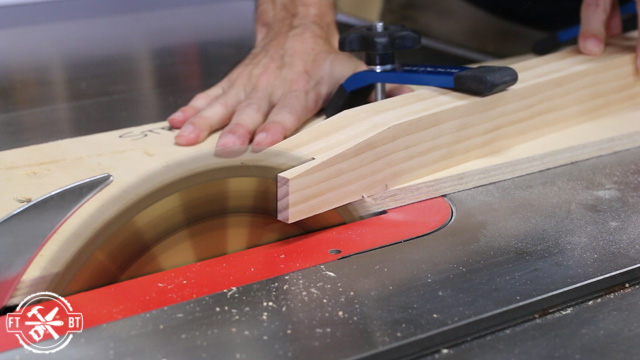
Using layout marks to keep the legs in order, I marked the bottom of the legs for a small taper. The taper will be on the inside two faces of each leg.
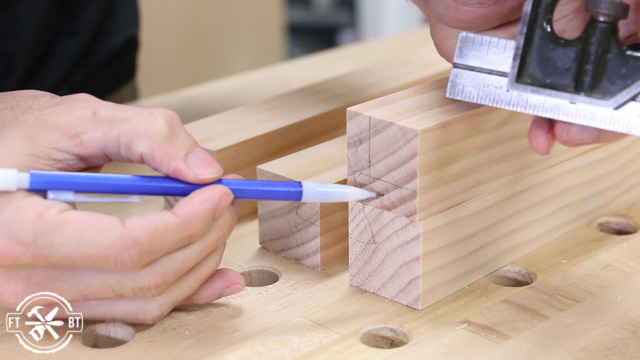
To cut the tapers I used a simple jig. The edge represents the cut line, but keep an eye on which taper you cut first. If I cut this side first I’d remove the layout line for the second cut. Always think about the second cut before making the first.

After clamping down the DIY desk leg and running it through I flipped it over and took a second pass for the other face.
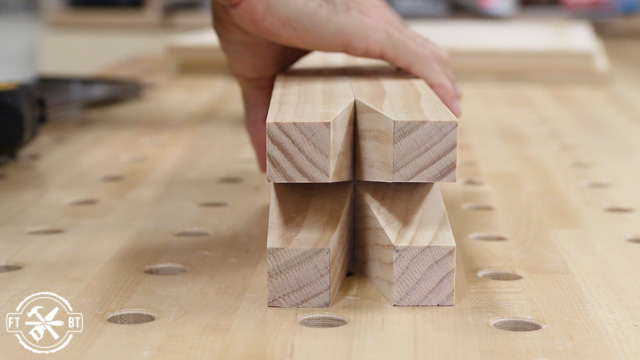
Finally I finished up the leg tapers on the other legs using my layout lines for guidance.
Back at the workbench I used the reference lines to reorder the legs. You can see how the tapers will look when assembled.
2. Create the Side Panels for the Desk
When considering how to build a desk you can use a floating or solid side panel. I decided to go for a solid side with a faux floating panel look. The sides of the desk have a plywood panel held between a pair of 2×2 legs. First I cut the plywood to size and then added pocket holes to the edges of the panels with my K4 jig.

Then I moved on to assembling the side panels. I laid out two legs making sure the tapers were oriented correctly for the outside facing down. Next I used two small ¾” scraps to prop up the panel even with the inside edge of the legs. This will give a flush surface for the drawer slides later.
The panel is attached to the legs using a small bead of glue and 1-¼” pocket screws. Clamping the parts tightly helps keep them from moving as the screws go in.
The outside of the side has a faux frame and panel look. I cut a top and bottom trim piece from a 1×2 to fit between the legs. Then I attached them with glue and brad nails.
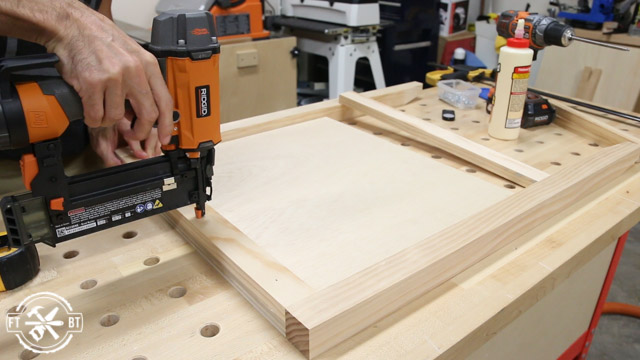
I wanted a nice finished look for the desk with drawers so I used cove molding around the inside of the panel. To fit the molding I cut a miter on one end of the trim then took it to the panel and marked it for the second cut. I continue this approach all the way around the panel.
Next I secured the molding in place with glue and pin nails then came back and filled all the nail holes with wood putty.
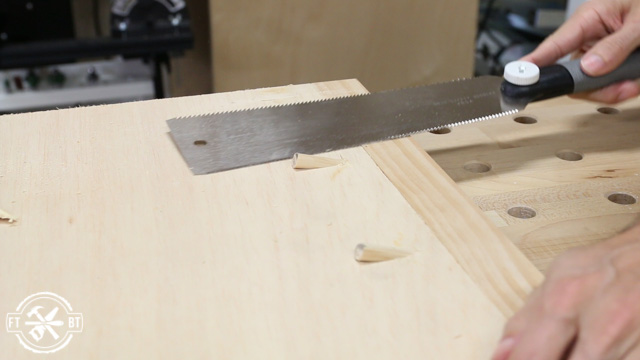
I needed to hide the pocket holes on inside left panel to prep for painting later, so I glued small sections of wood dowels into the holes. Then I tapped the dowels in with a hammer then after the glue has a chance to setup I cut them flush with a pull saw.
3. Attach DIY Desk Side Panels and Legs
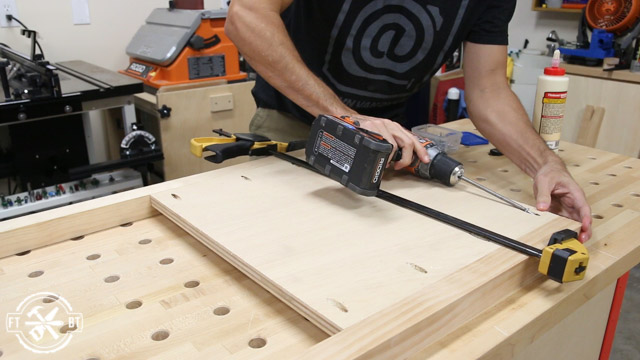
Next I cut the full sized plywood back to length on my table saw then drilled pocket holes on the edges. I clamped the back in place and attached it with pocket screws.
The front stretcher of the DIY desk is cut to the same length and is also given pocket holes for assembly. I attached the front stretcher with pocket screws.
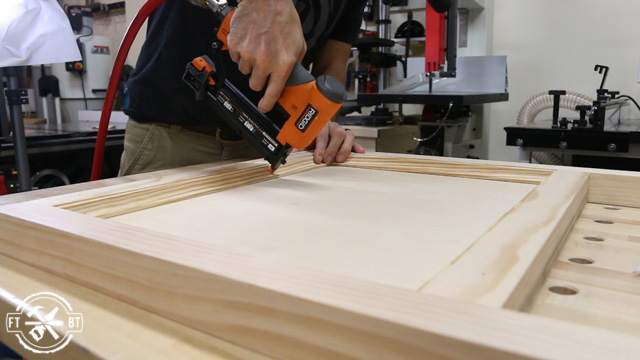
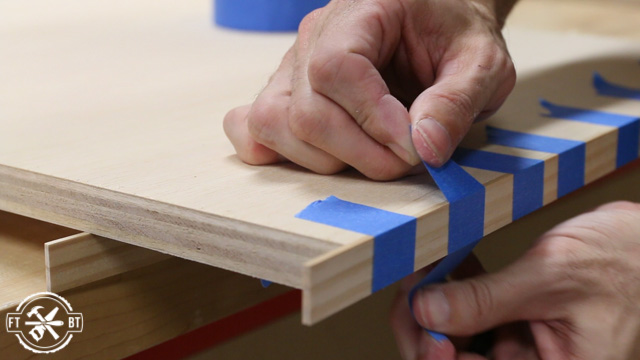
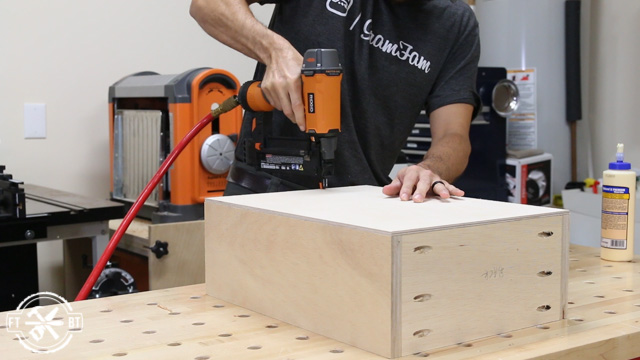
I cut the parts for the box that holds the drawers from my sheet of plywood. To clean up the edges of the plywood box I cut some solid wood edge banding from a piece of 1×4. I cut the strips long and used glue to attach the edge banding. It’s held in place to dry with painter’s tape. After the glue dries I cut the long strips flush with my pull saw.
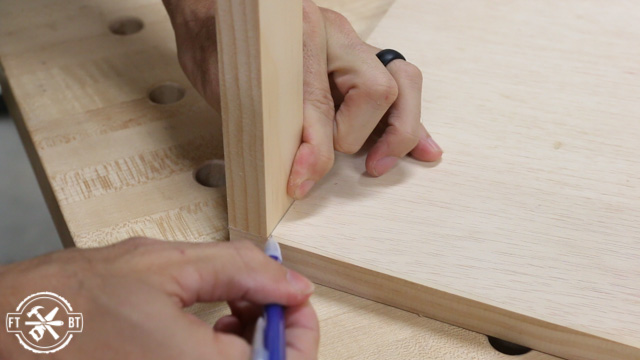
Next I cut the panels to proper length on the table saw. The vertical panel needed a notch for the front stretcher. I used a 1×2 to layout the notch and marked for the cut. This cut can be made with a bandsaw like I used or with a jigsaw or hand saw.
The cut face is rough afterwards and can be cleaned up with a chisel.

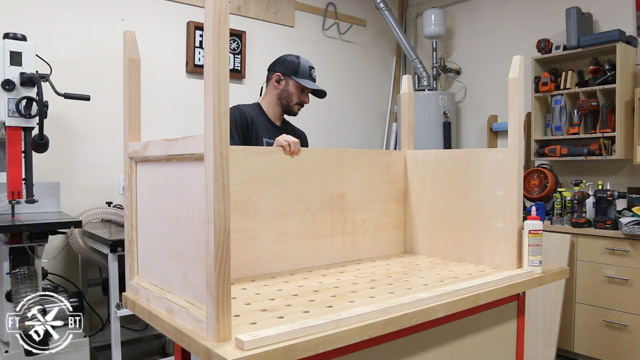
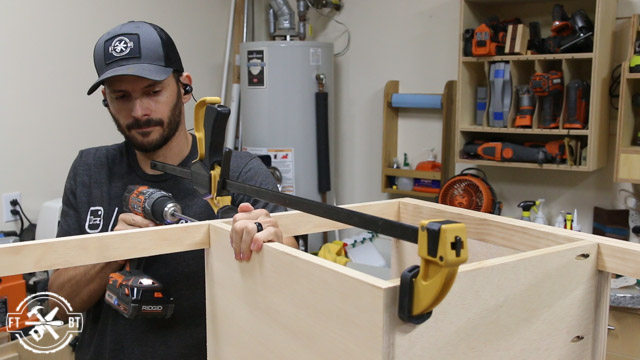
I assembled the two panels together first, then attached them to the desk side and back. I attached the panels to the side first then to the top stretcher.
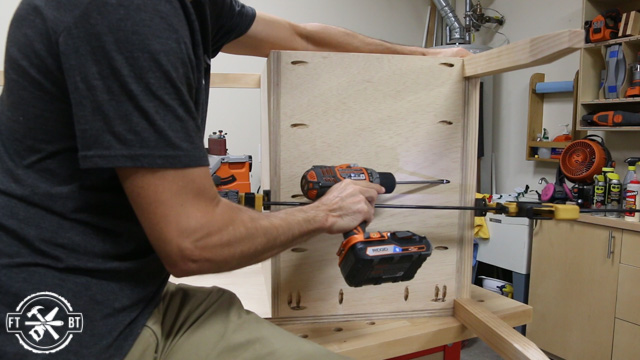
This establishes the squareness of the front of the box then I worked my way around the rest of the box.
A desk with drawers obviously needs a place for them to go so I added couple of dividers to establish the openings for the drawers. These are cut to size to fit the openings and attached with pocket screws.

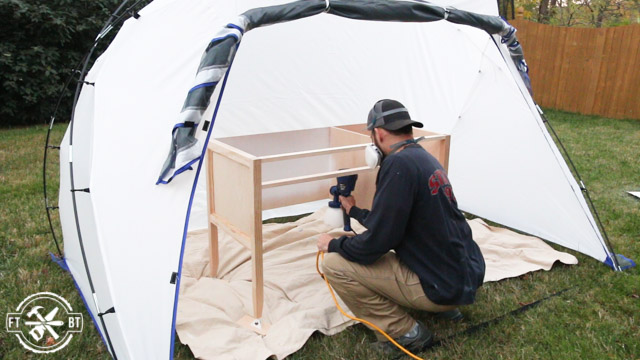
Next I started painting using a semi-gloss white enamel and applying it with a HVLP sprayer.
4. Create the DIY Desk Top
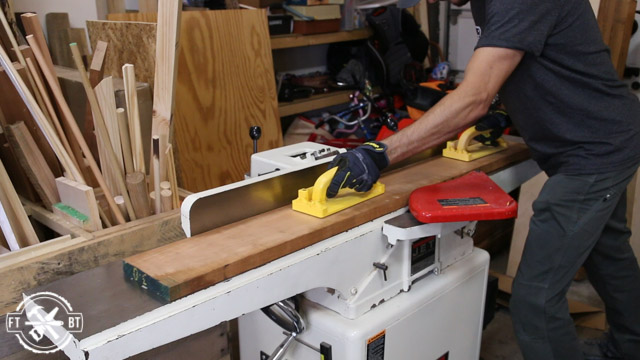
I started with rough lumber and took it through the milling process to get dimensioned boards for my top glue up. But if you don’t have these machines don’t fret, you can have wood dimensioned to your specs or buy it already cut to size at a variety of lumber dealers both brick and mortar and online.
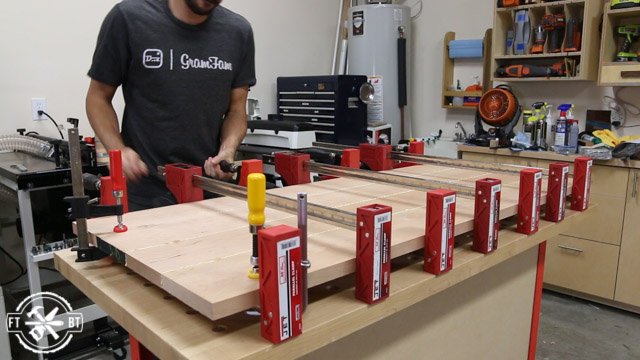
With all the boards dimensioned to size but left a little long I glue up the top. I used a good amount of wood glue to get a solid connection then clamped that top within an inch of its life. The more clamps, the better.
Next I took the top for the DIY desk out of the clamps. I knocked down the glue joints and got rid of any excess glue then started finish sanding. Drawing pencil lines on your boards is a great way to know when you’re ready for the next grit. Once the lines are gone you know you’re good.
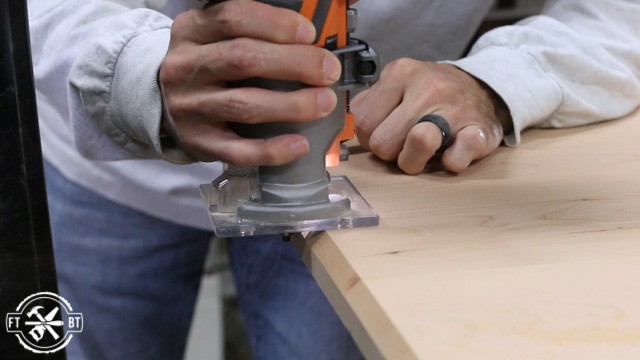
Then I put a chamfer on the underside of the front and sides of the top for the DIY desk. I used my compact router and made multiple passes to get to the size chamfer I wanted.
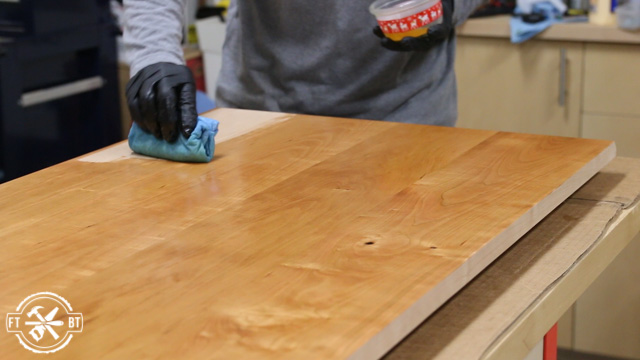
After a final sanding I applied a coat of oil based polyurethane. I ended up doing 3 coats in total to withstand the wrath of a 6 year old girl. And how bout that cherry, it’s looks amazing.
5. Make Desk Drawers
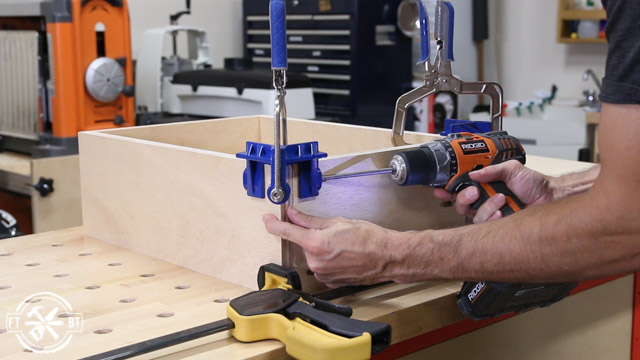
A desk with drawers add so much versatility, so now let’s build the three drawers. I have a whole post and video on How to Make Drawers in 6 Easy Steps so for more information check that out. But these new corner clamps from Kreg really work great to align the drawer.
I made the boxes and attached the bottom just like I show in the post referenced above. Then I apply veneered edge banding to the tops of the drawers to give them a little cleaner look. Each drawer will also get an inset false drawer front. I cut the fronts from a 1×4.
6. Install the DIY Desk Drawers
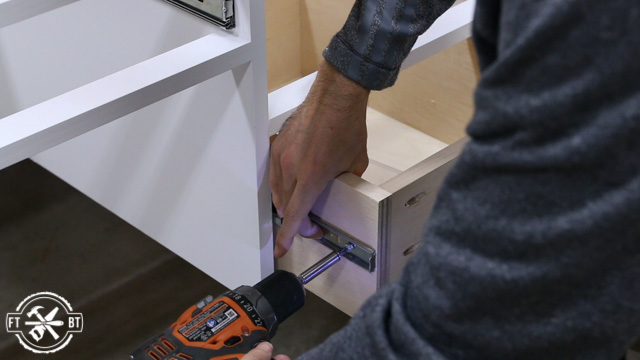
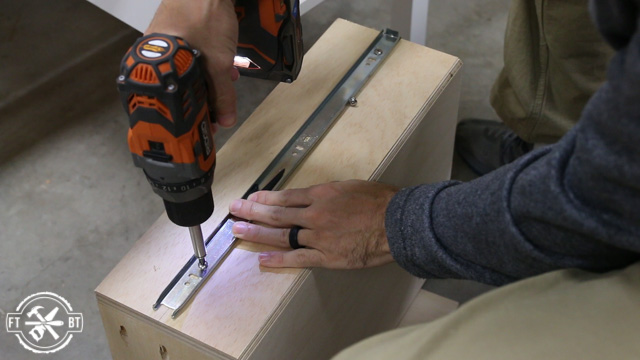
The full extension drawer slides need to be set back ¾” since the drawers are inset with a false front. I used a piece of 1×4 to position the slides and a spacer to hold them off bottom. Each slide is pre-drilled and attaches with screws to the sides.
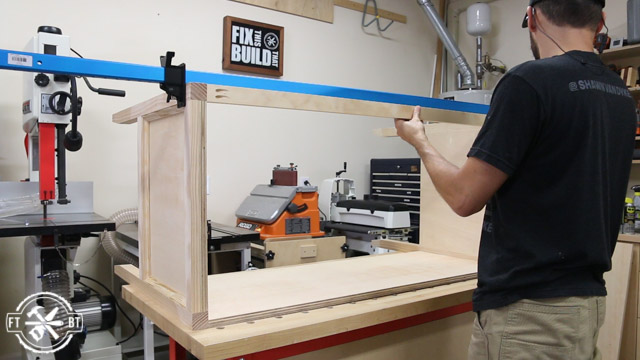
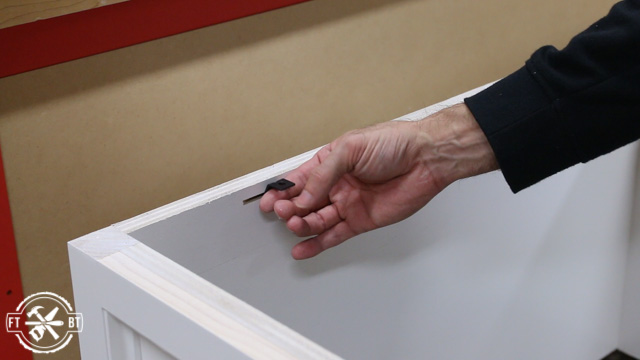
Before installing the drawers I used a biscuit joiner to cut slots into the sides, back and front stretcher. I’m using z-clips to attach the top to the desk.
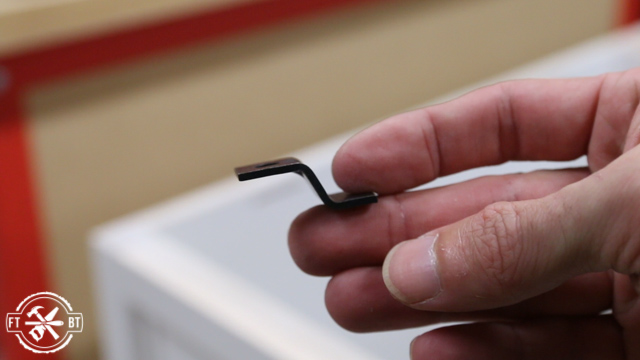
The clips fit in the slots and get screwed to the top.
To install the bottom drawer onto the slides I used a piece of ¼” plywood to raise it off the drawer bottom. Then I pulled the drawer and slides out and attached it to the box.
For the upper drawer and the narrow drawer I measured where I wanted the slides to hit on the drawer then drew a line across the side of the drawer.
I predrilled and attached the slides on the line making sure they were flush with the front.
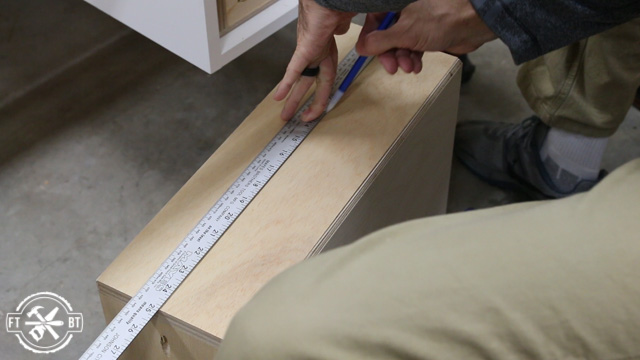
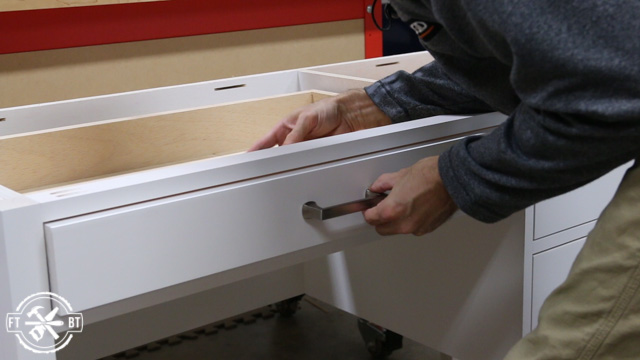
To mount the false fronts on the drawers I drilled two holes in the front of each drawer a few inches from the side.
Then I drilled the holes for the drawer hardware on the drawer fronts. I positioned the drawer fronts using my favorite playing card spacing method and put screws through the drawer pull holes into the box.
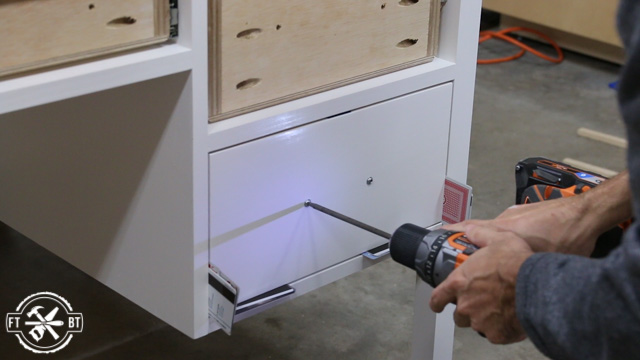
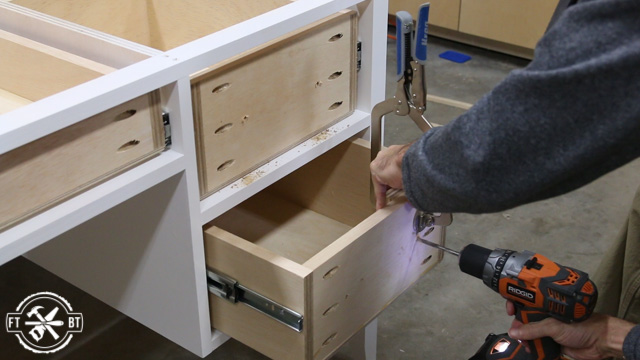
This holds the drawer perfectly and you can secure it from the inside through the holes drilled earlier.
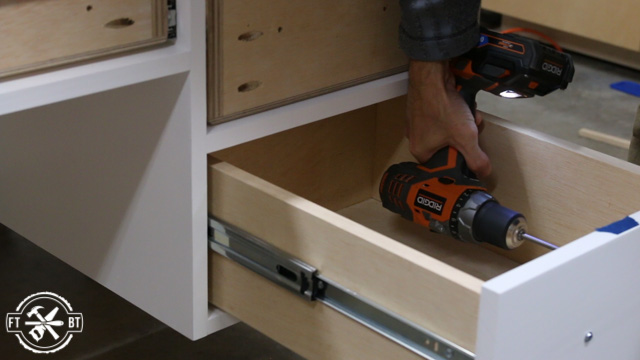
Now remove the screws from the front, drill through the box and install your drawer pulls.
This desk has just enough details to set it apart and my daughter is going to enjoy it for a long time to come.
Check out my other Furniture Projects for more builds!
Kreg Tool provided me with product and/or monetary compensation as a sponsor of this build. All opinions are my own and are not filtered by the sponsor.


