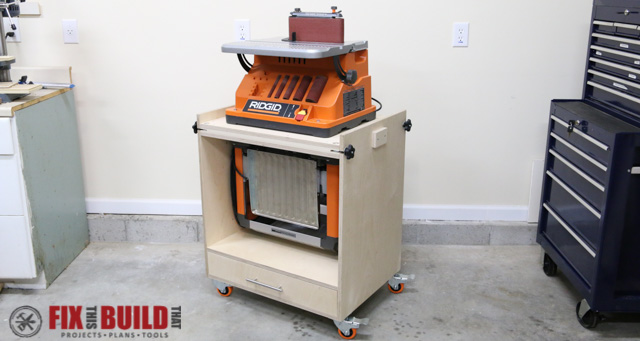
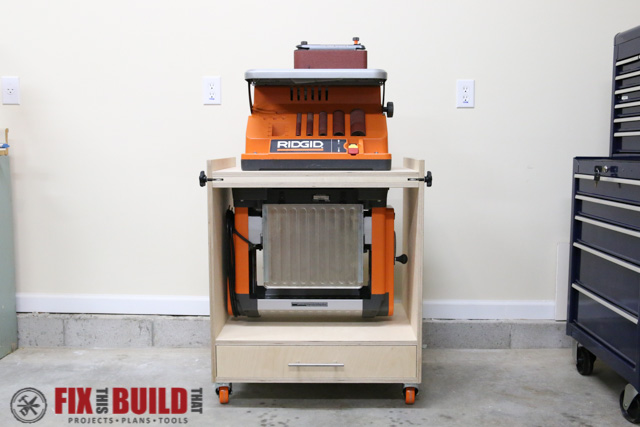
Do you have a small workshop with limited space? Want more benchtop tools,but don’t know where to put them? Today I’m going to show you how to build a flip top tool stand that is a great project to make your garage or basement workshop work harder for you. I’ve got full build details below and plans are available for download. This workstation pulls double duty with a portable planer and spindle sander all in one footprint. Instead of lugging tools from under your workbench onto a table, you can easily access either tool in a matter of seconds. This rotating tool cart gives you extra storage and ease of use all in one. I originally saw this idea of a flipping stand in Shop Notes Small Shop Solutions. I used that idea and made my own version with simple joinery, beefy and easy to install rotating parts and added some storage to boot. And you can make it out of just one sheet of plywood!
**UPDATE** – I’ve revised the plans for the flip top build to accommodate a wider range of planers (including the R4331 and DeWalt 735). I’ve also added some upgrades to the locking mechanisms and cord management. Make sure to check out my Flip Top Tool Stand 2.0 post when you’re done here.

Flip Top Tool Stand 2.0 Video
Below is the updated video for version 2.0 of the flip top. It goes over the build process in detail. The measurements in this blog post will not match the ones on the plan anymore. Refer to the plans for the best measurements.
Flip Top Tool Stand 1.0 Video
This is the original walkthrough for the project. Goes into a little more detail around how it works, but not the details of the build.
Materials/Supplies
- (1) 4’x8′ 3/4″ Plywood
- (2) 8′ 1×2 Poplar/Pine
- 1-1/4″ pocket hole screws
- 1-1/4″ wood screws
- 3/4″ wood screws
- 1/4″ lag screws
- (4) 5/16″ x 3-1/4″ eye bolt
- (4) 5/16″ fender washers
- (4) 5/16″ threaded knobs
- (1) 3′ x 3/4″ steel tube
- (4) 3/8″x 1-1/2″ hex bolt
- (8) 3/8″ flat washers
- (4) 3/8″ nuts
- (4) 3″ locking casters
- (1) pair 20″ full extension drawer slides
Affiliate links are used on this page. See my disclosure page for info on affiliate programs.

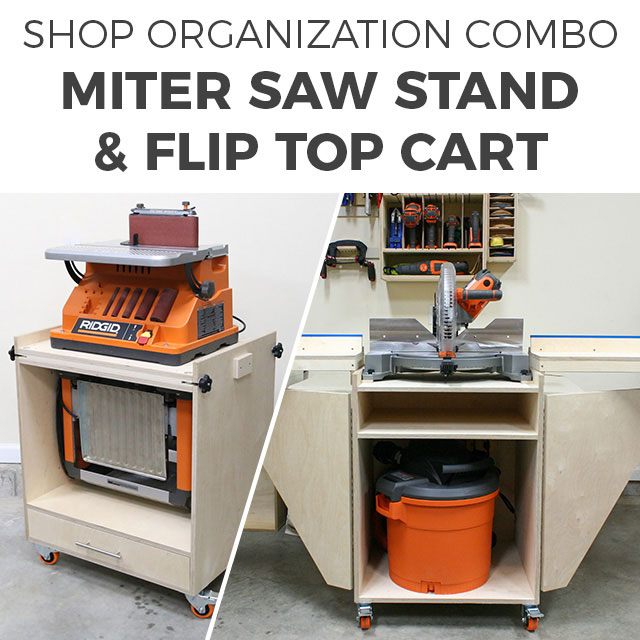
And if you want to get a great deal on two spacing-saving shop plans, check out the Flip Top Tool Stand and Miter Saw Station Combo Plan pack and save 33%!
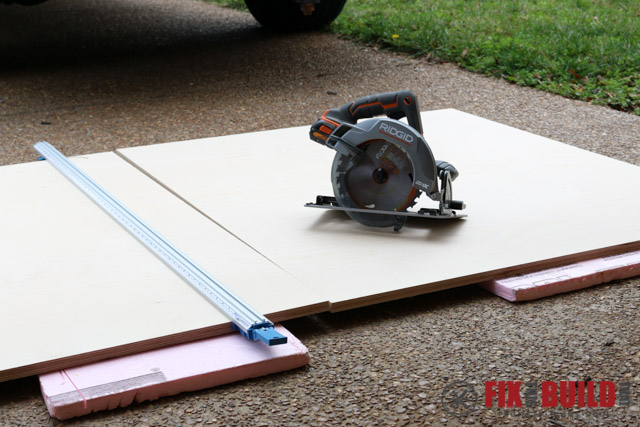
How to Build a Flip Top Tool Stand
Start by breaking down the sheet of 3/4″ plywood into 3 sections. I used my RIDGID cordless circular saw and cut the sheet in my driveway. With a straight edge clamp and the ply set on some 1″ foam insulation it’s a breeze to cut down the sheets and have manageable pieces to work with.
Assembling the Flip Top Stand Base
The base is made from 2 sides, a bottom and shelf. Cut the sides, bottom and shelf to size and drill pocket holes in the underside of the bottom and shelf to attach to the sides.
The sides have slots and holes in them to allow the flip top to spin and lock. Clamp the sides together and drill a hole through both sheets. **UPDATE** I don’t recommend drilling both side together anymore. Any error will be doubled at the end. Drill one side at a time.
I used a block with a hole in it that I drilled on the drill press. This helps keep the bit straight as you are going through the pieces. After drilling, put the 3/4″ steel rod through the holes and ensure they are straight and true, adjust as necessary.

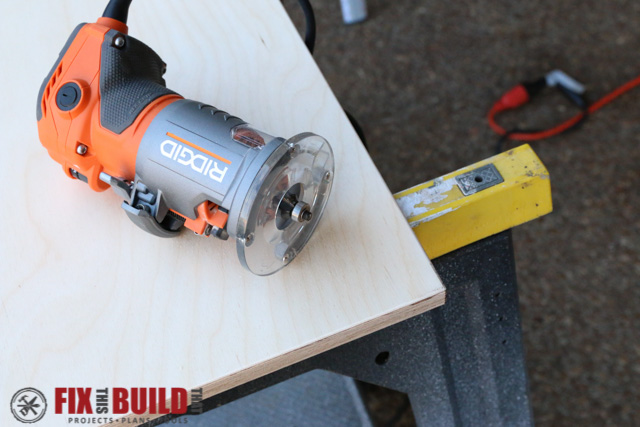
Round over the edges of the side with a small roundover bit in a compact router.
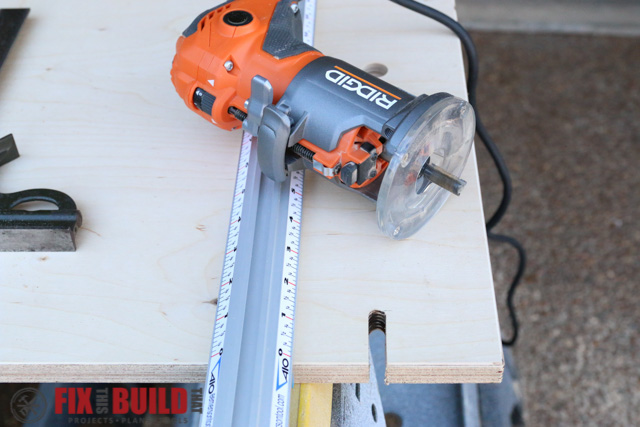
Next cut 2 slots in each side for the flip top locking hardware. Use a 3/8″ straight bit in a router and take 3 passes removing 1/4″ of depth each time.
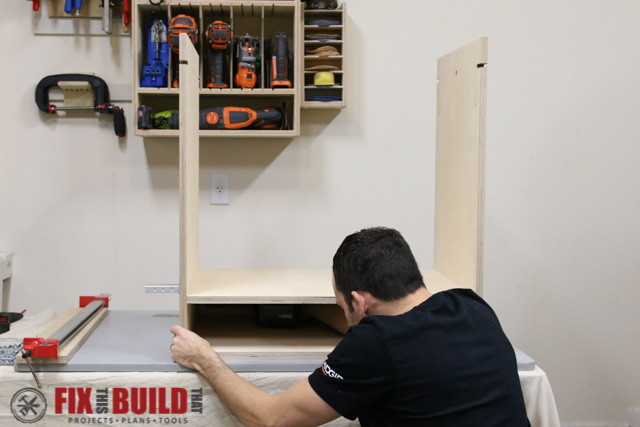
Clamp the sides and bottom together with the locking slots and hole away from the bottom. Attach the bottom with 1-1/4″ pocket screws.
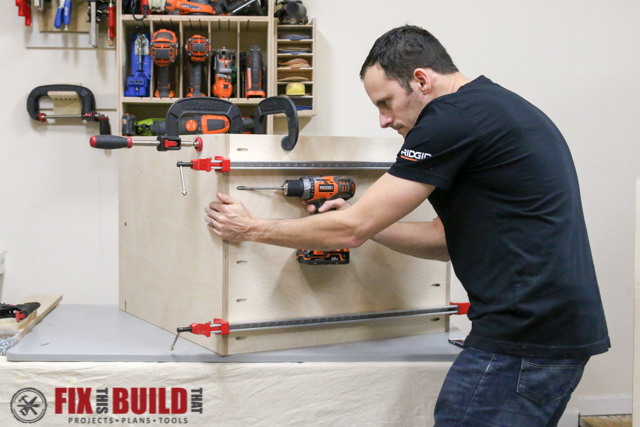
Set the base upright and put the shelf in place on top of spacers resting on the bottom. Clamp the shelf and attach it to the sides with 1-1/4″ pocket screws.
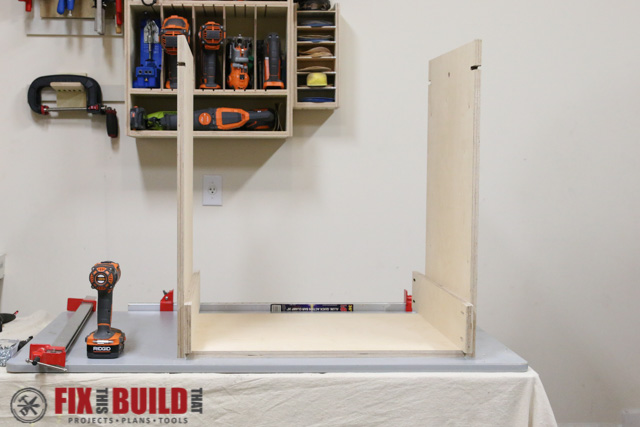
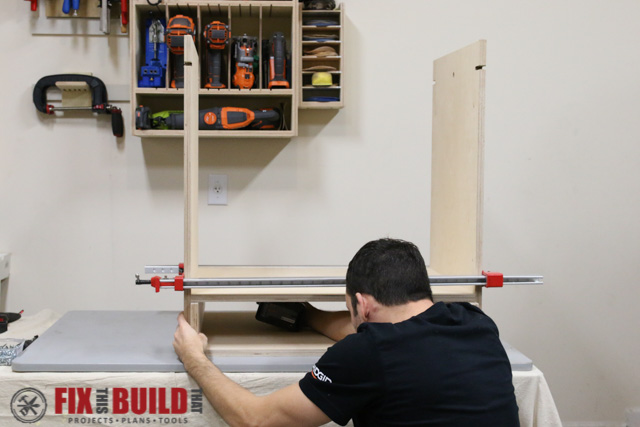
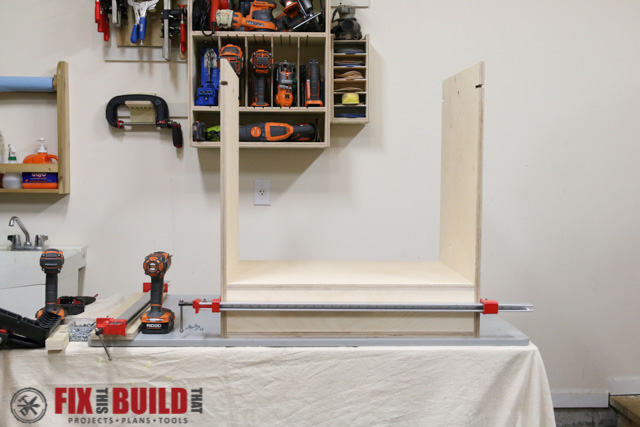
Cut a shelf back and drill two pocket holes on each end. Clamp the shelf back in place under the shelf, flush with the back. Reach under the shelf and secure it to the sides with two 1-1/4″ pocket screws on each end.
Add a Drawer and Casters to the Tool Cart
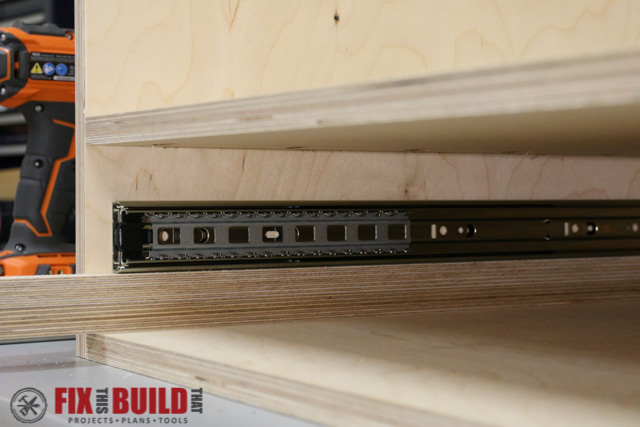
I used 20″ full extension drawer slides for the drawer. If you are using another type of drawer hardware than adjust measurements as necessary.
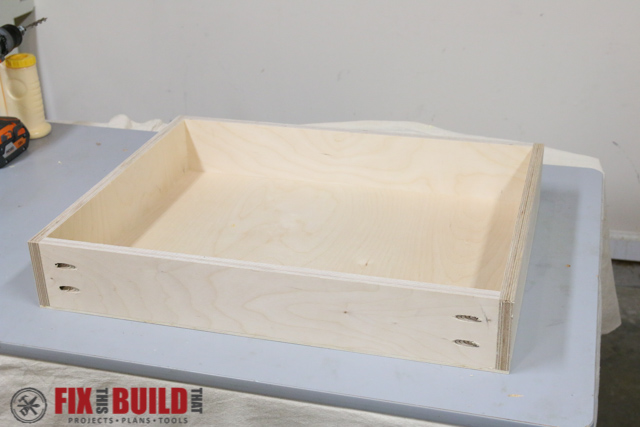
Cut 2 sides, a front and back. Drill pocket holes on each end of the front and back pieces.
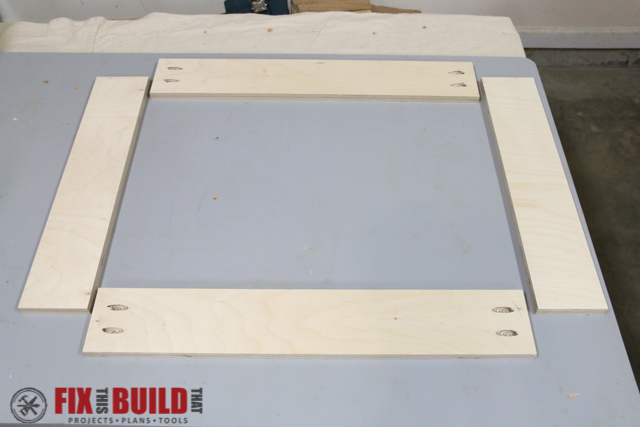
Clamp the drawer pieces together with the pocket holes on the outside of the drawer. Connect the pieces with 1-1/4″ pocket screws.
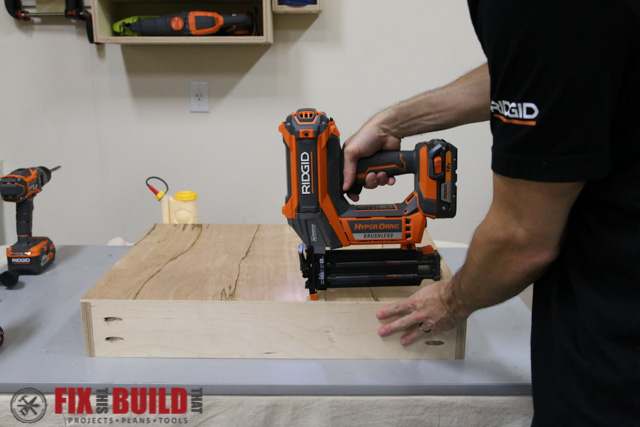
Cut a drawer bottom out of 1/4″ plywood. Square the drawers and secure the bottom with glue and a brad nailer or stapler.
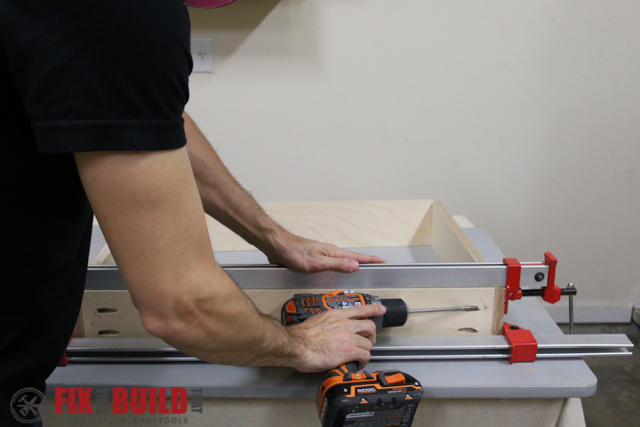
Install the drawer slide hardware to the sides using a spacer to hold the slide level.
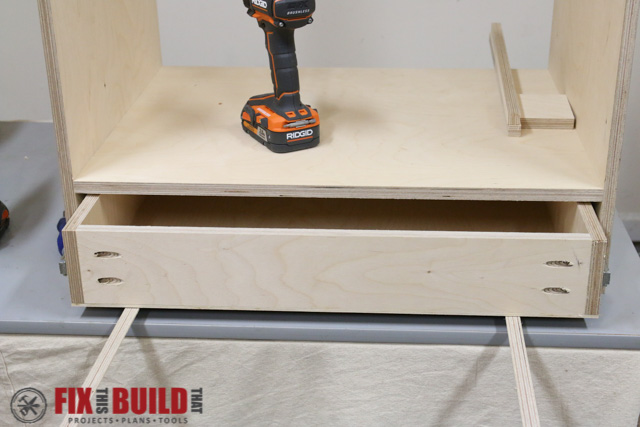
Put spacers on the bottom of the tool stand to position the drawer and then secure the slides to the drawer.
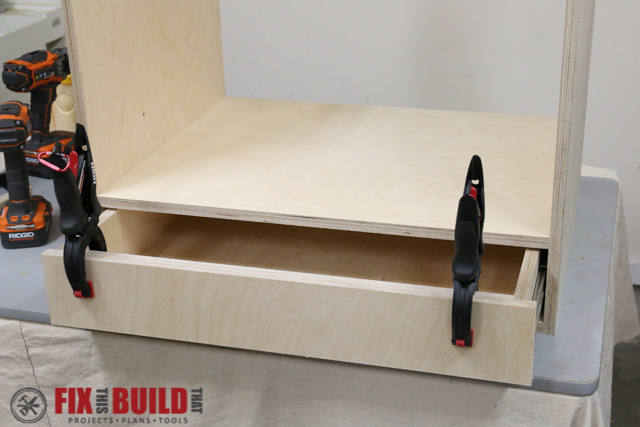
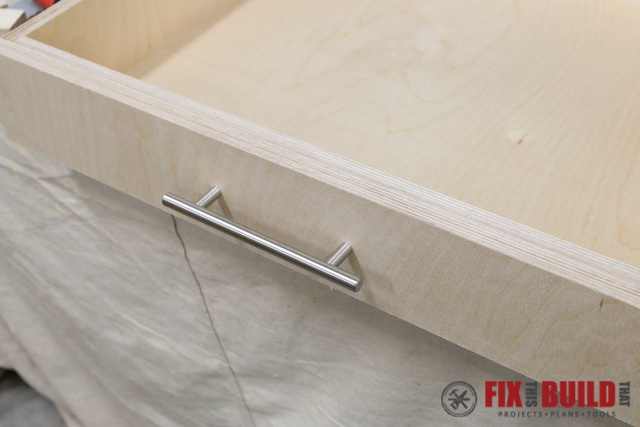
Cut a false front for the drawer. Drill two holes through the actual drawer front for attaching the false front. Clamp the false front to the drawer and secure it with 1-1/4″ pocket screws. Using the holes in the drawer will allow you to adjust the false front to get a consistent 1/16″ reveal all the way around.
Attach drawer pull hardware as desired. I used a 5″ bar style pull.
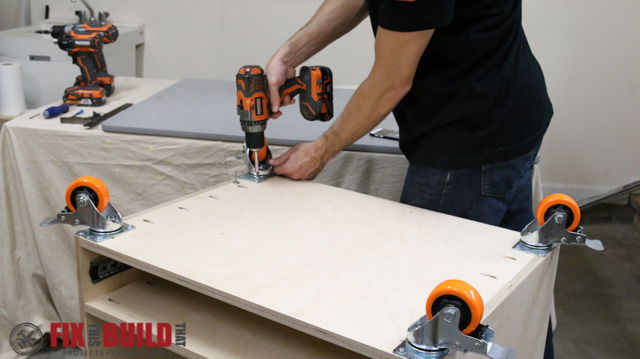
Turn the flip top tool stand upside down and attach casters. I used 3″ double locking casters for this build. Secure with 1-1/4″ screws into the sides and shelf back and 3/4″ screws into the bottom.
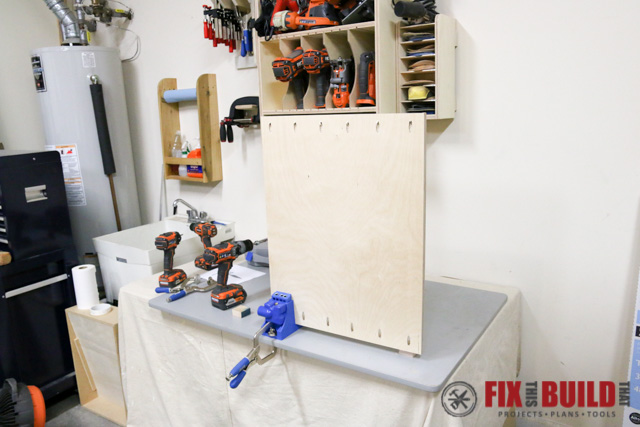
Assemble the Flip Top Tool Stand
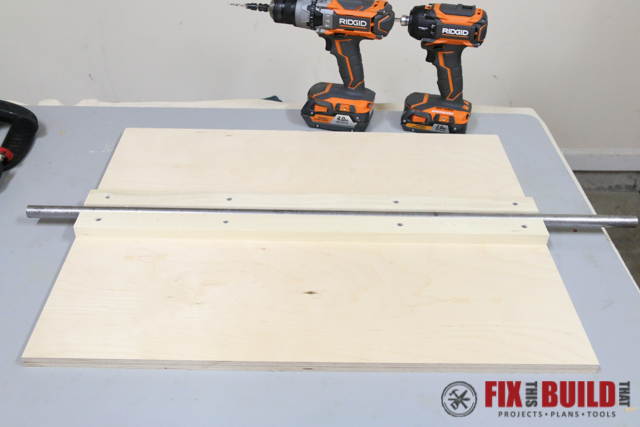
Cut 2 pieces of 3/4″ plywood and 4 pieces of 1×2. On one top piece layout a 3/4″ wide section that runs across the center of the top, this will be where the steel rod goes.
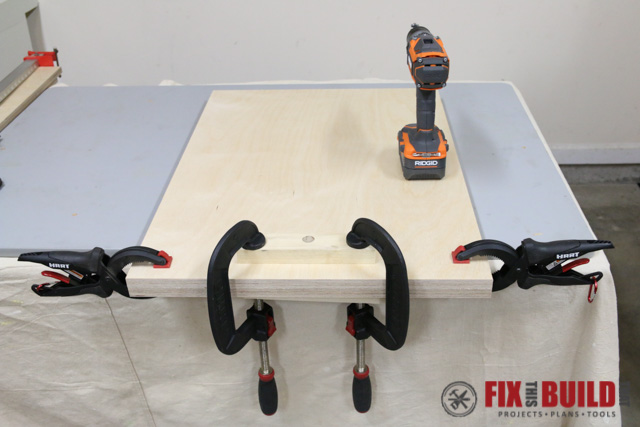
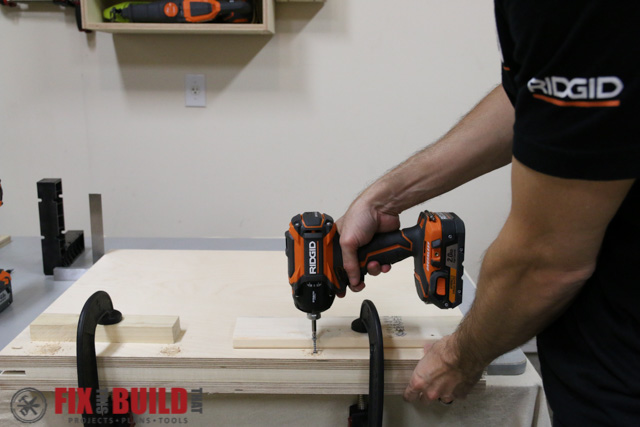
Fasten down one 1×2 on the edge of the 3/4″ outline with 1-1/4″ screws. Countersink these and all screws from here on out.
Add another 1×2 on the other side and place the 3/4″ pipe between them. Clamp the boards and the pipe together and secure the 1×2 with screws. This will give a tight fit for the pipe later.

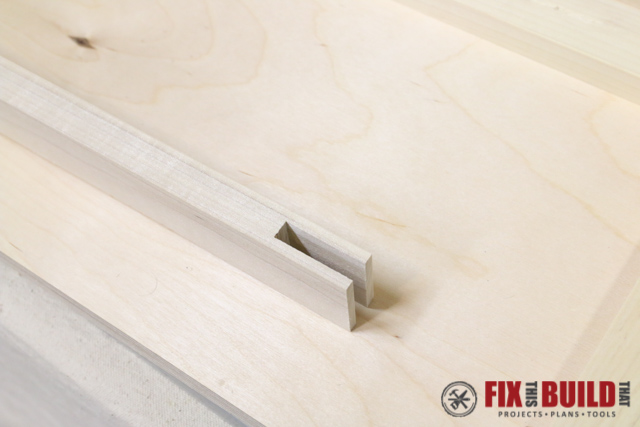
The other two 1×2’s will house the locking hardware for the flip top tool cart. Cut wide open mortises on the end of each 1×2. Have the eyebolts on hand and test fit to make sure they fit in the slot. This can be done with a handsaw and chisel or on the tablesaw.
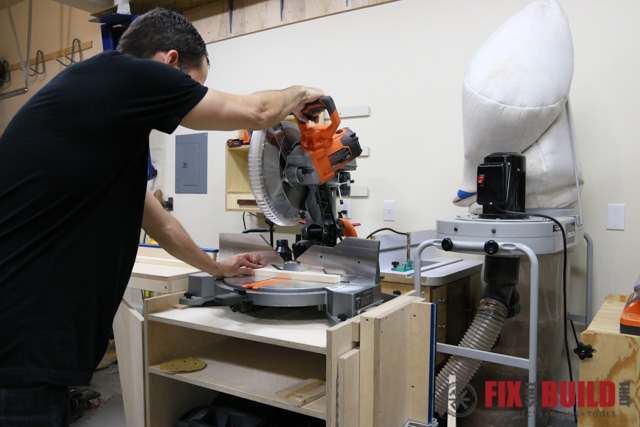
Cut 4 pieces of 1×2 blocking. I used my Mobile Miter Saw Station for these cuts. If you’d like to make one of your own there are plans available for this build as well.
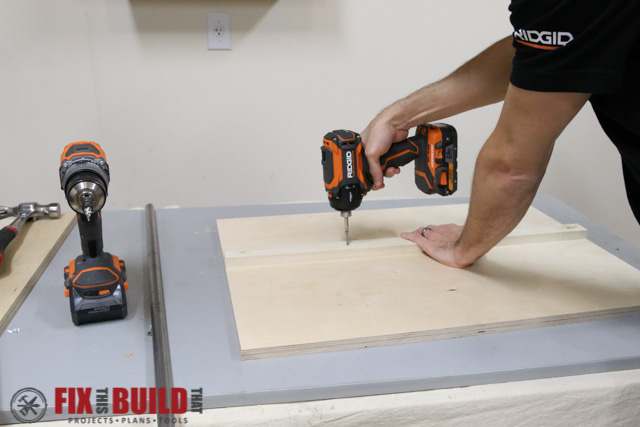
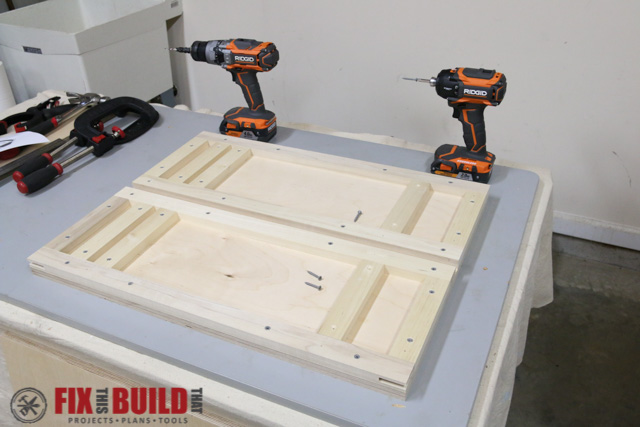
Line up the short blocking pieces along the edges of the top and secure with screws. Attach the long blocking pieces with the open mortises along the front and back of the top. This will form two rectangles on the top.
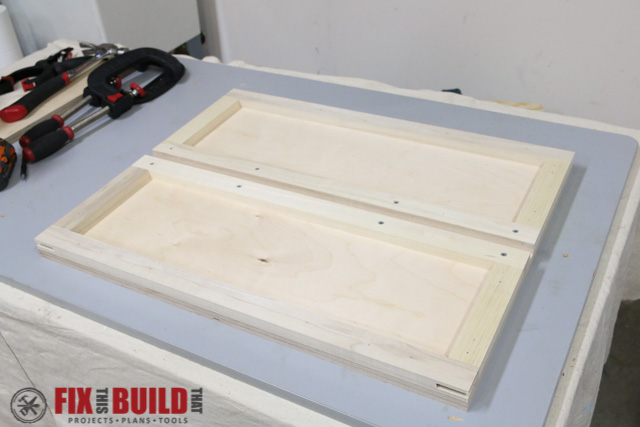
At this point you’ll want to layout your tools that you’ll be attaching to the top and find where the mounting holes are on the tools. Cut more short block pieces and position them where the lag screws for mounting the tools will hit.
I used 6 pieces of blocking for this. The pieces on the right of the picture will actually receive the lag screws from both the sander and the planer. The pieces on the far left will receive just the screws from the planer, and the pieces just next to that will receive the sander screws.
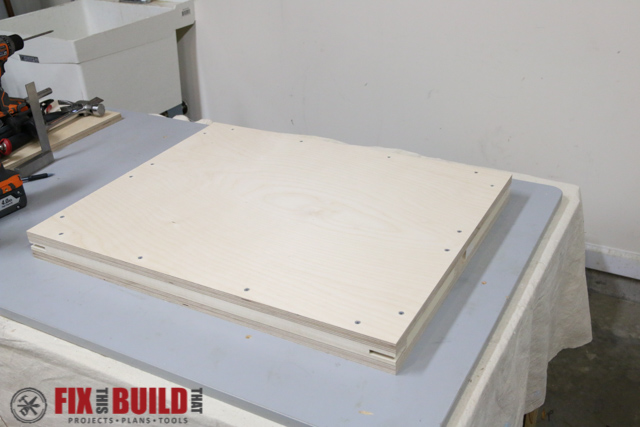
After all of the blocking is secured, place the second top piece over the blocking. Line up the edges very carefully here and check them with a square. Clamp the whole top together to make sure it doesn’t move and secure with 1-1/2″ screws around the perimeter.
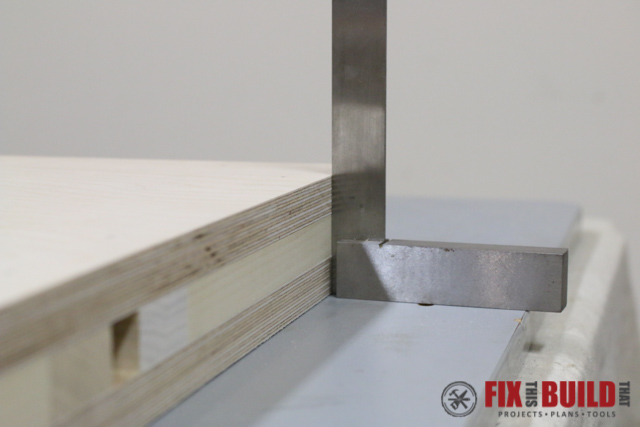
It’s a good idea to check where you placed the screws underneath so you don’t hit a screw in the blocking while attaching the second top piece.
Install the Locking Hardware to the Flip Top
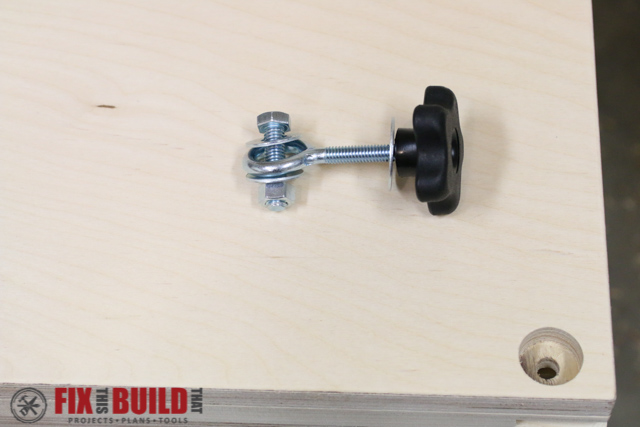
The locking hardware for the flip top tool cart is made up of 7 pieces. A 3-1/4″ long 5/16″ eyebolt with 5/16″ fender washer and 5/16″ star knob are held in place by a 1-1/2″” long 3/8″ hex bolt with two 3/8″ washers and a 3/8″ nut. This design idea came from a Shop Notes build for many years back.
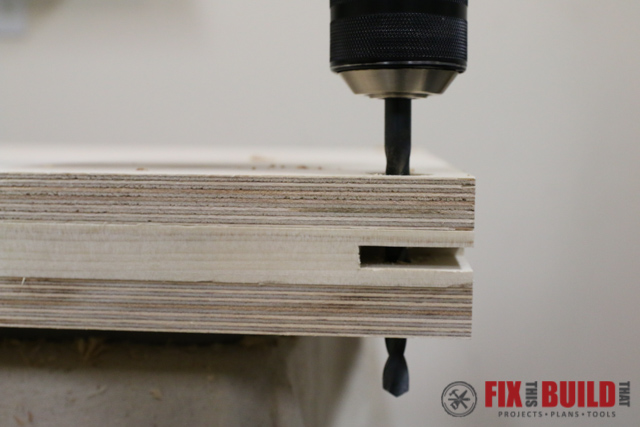
On each corner and each side, layout a mark and drill a 1/2″ deep hole at each spot, 8 holes in total.

Now go back with a 3/8″ twist bit and drill a hole through the entire top centered in the holes you just drilled.
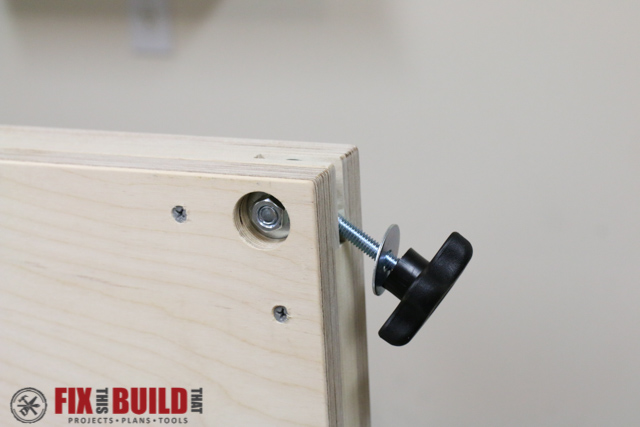
Install the locking hardware in each corner. Use loctite or nail polish on the 3/8″ bolt to hold the 3/8″ nut in place.
Install the Flip Top and Tools
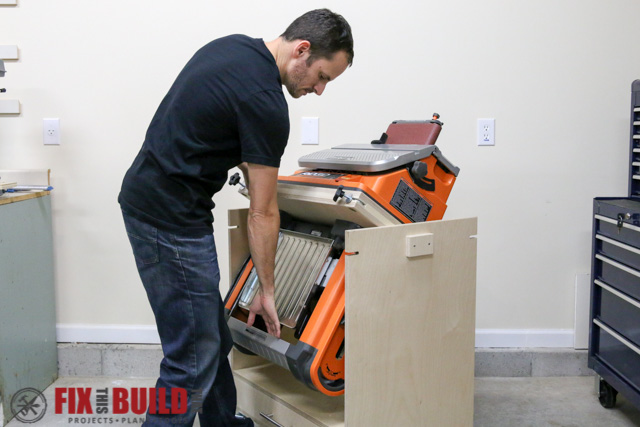
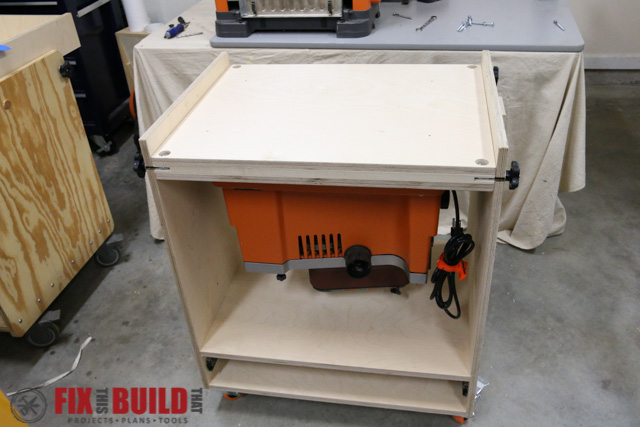
Here is the part you’ve been waiting for! With a helper, install the top on the base with the locking hardware. Line up the pipe chase in the top with the holes on the sides. Use a mallet to drive the 3/4″ steel pipe through the top.
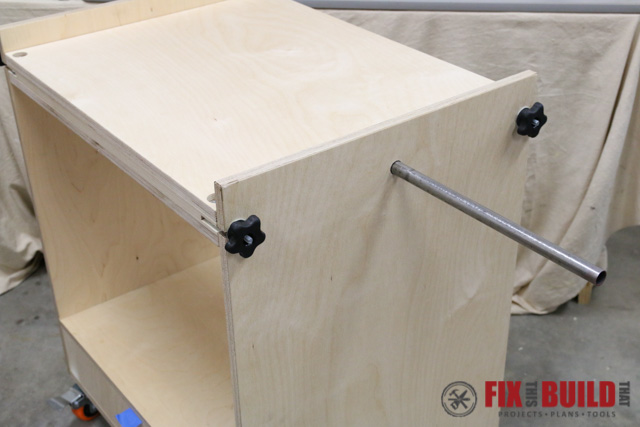
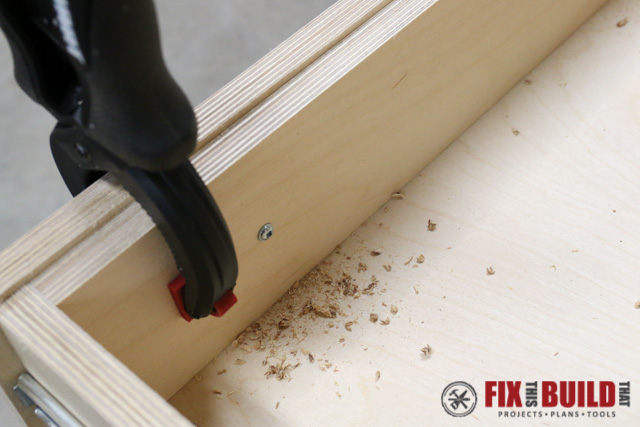
Cut the rod so that there is 3/8″ of rod sticking out of each side. This will give the pipe and top more support.
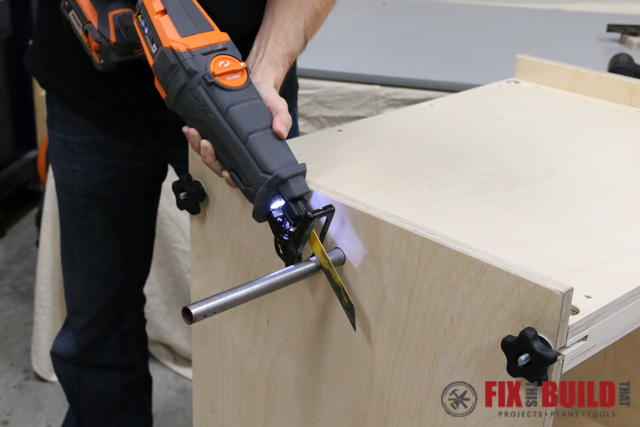
Center the rod so it sticks out the same on each side (3/8″). Drill a 1/8″ hole through the top and through the top of the pipe. Countersink the hole and secure the pipe with a 1-1/4″ screw.
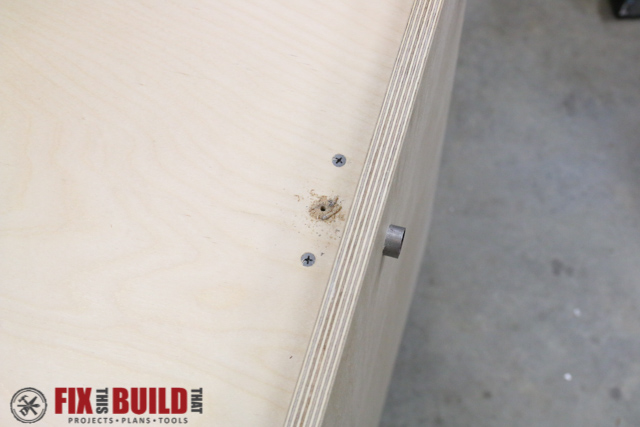
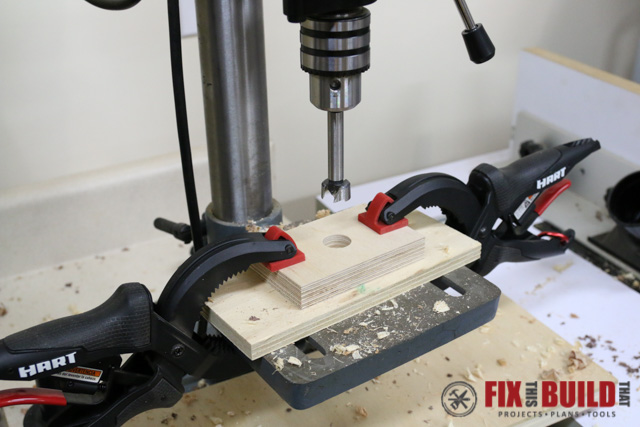
To cover and support the pipe sticking out, cut a pair of pipe blocks out of 3/4″ ply. Round the edges and drill a hole 1/2″ deep in the center of each block.
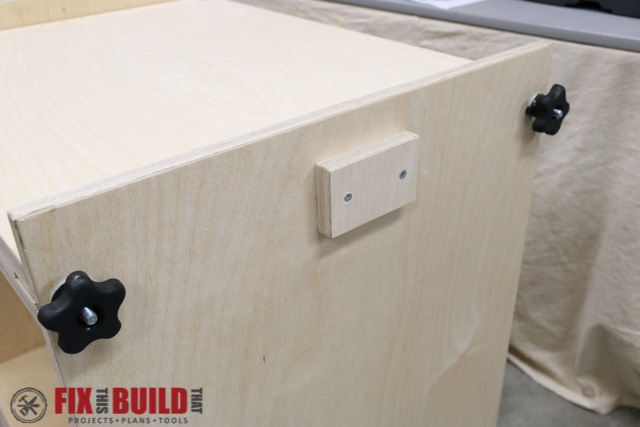
Put the blocks over the pipe and secure them to the side with 2 screws.
Positions and secure your tools with lag screws. I used 3-1/2″ lag screws and washers to mount each of my tools. Adjust your screw length as needed to go through at least 2 layers of plywood.
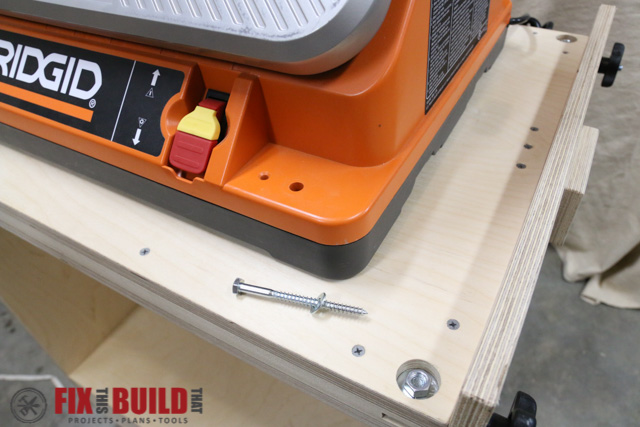
Mount the lighter tool first and the heavier tool second.
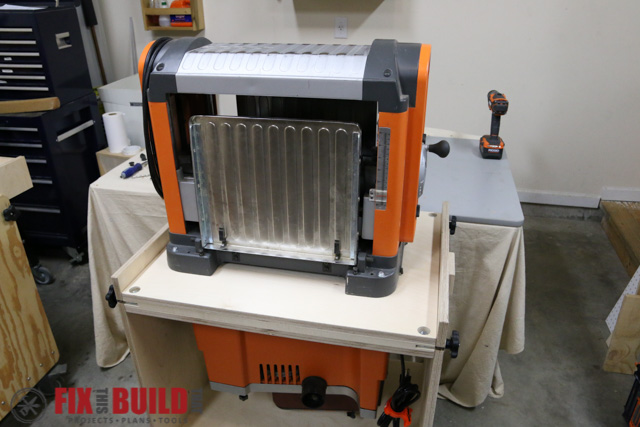
Now rotate your tools, locking and unlocking the hardware about a dozen times. At least that’s what I did 🙂
Make sure to go check out my version 2.0 of the Flip Top Tool Cart for the upgrades I’ve made to it.
If you want to build other great shop projects to organize your workshop then go checkout my Shop Projects page. Leave a comment below with what tools you’ll use on this Flip Top Tool Stand and how it will change your shop!
RIDGID provided me with tools and/or monetary compensation as a sponsor of this build. All opinions are my own and are not filtered by the sponsor.


really want to build this for some of my equipment but worried about the weight. How much can this build tolerate casters aside?
Can take up to 100lbs per side from what I’ve seen. As long as you’re using a solid plywood and not MDF.
I see you used Baltic Birch / 13 Ply plywood. Do you think that’s suggested to help carry the load and make it as durable as possible?
it’s not so much about the load bearing as any 3/4″ plywood will do. It’s more about the straightness and stability so it doesn’t want to bow the sides or get twisted. And yes, it’s much more durable as it’s birch vs. a poplar core and thin veneer
Long time follower, listen to the Podcast as well.Purchased the plans for this Fliptop and was wondering if I were to build this to support a 36″ tall bandsaw and 32″ tall drill press, do you have any recommendations if this is advisable?And, I’m thinking I’d only have to cut the sides 15″ taller. Any other parts need to be modified?Could you provide a set of SketchUp plans so I could plan out the changes?Thanks!
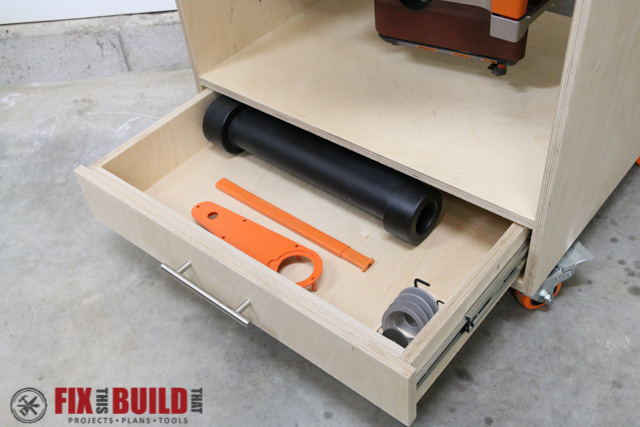
Brad. Quick question. I’ve just ordered the spindle sander. Do all the spindles and spacers fall out when you would turn it upside down on the cart? Thanks
the spindles will stay in place with the top locked down, but everything else should be stored in the lower drawer
I have a DeWalt 735 as well, I have been eyeing several plans for a flip top cart. Something that concerns me is the weight of the 735, it seems to me that finding a tool that is of equal weight goes against anything I’ve seen that might come close or be of equal weight. Sure there are counter weights and all sorts of other things to all to the opposite side to balance the weight. So what do I do, better yet what did you do to give both tools equal weight distribution?
I was wondering if a benchtop router setup could be put on the file top too cart. I dont see why couldn’t but maybe somebody will have some thoughts on this.
My question is have you had the pipe buckle? I was looking at doing the exact same thing but was thinking that over time it would buckle under the weight.
No, been going strong for 3 years
Hey Brad – Great build I am excited to start on mine this weekend. I have the Dewalt 735 and am prepared to make the size adjustments if necessary but am concerned about the weight difference between it and the Ridgid. The Dewalt weighs in at 92 lbs. Your thoughts oh master?
Not an issue at all. Have many many folks using the 735 on this. Have fun!
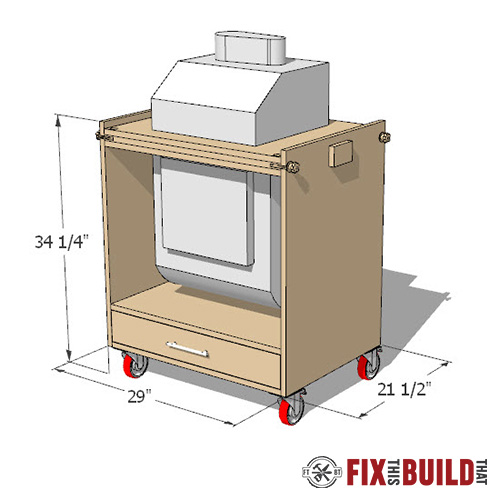
Brad, I just bought your plans for the flip top, looking forward to the build but I want to make sure the top is 34″ from the floor. The only dimension missing in the plans is the height of the caster. Can you advise this dimension? Thanks
Brian, it depends on the casters you buy. I use the 3″ casters from Home Depot which are 4.25″ from top of plate to bottom of wheel I believe. I’d go find the casters you want to use and just measure them first to be sure. Some 3″ casters are 4″ tall.
Brad, thanks i can always get the same from HD but it would be nice to know exactly what you had so i end up with the height I want. Thanks for the quick response! Have a great week end!
I made a mistake when i drilled the 3/4 holes on side panels. I drilled the hole 2 5/8 down from the top of panel to top of hole insted of to 2 5/8 centered. Can anyone offer a work around. Please help
I want to have Lowes make the first cuts to break down the 4×8 plywood what are the measurements?
Great project! I’m going to merge this one with the miter saw station and shrink it a little so I can roll it under my workbench.
Hey Brad. This is brilliant. I will start one of these this weekend. One question though. Any idea on weight restriction? I have a newer Dewalt surface planner. The spec says is 101 pounds. Would you hang that?
Hey, Rick. Absolutely it can handle that one without blinking.
Hey Brad, these plans are great, thanks for making them available to everyone!Just to throw it out there; I found it to be a little easier to measure up, pre-drill and attach the drawer slides (to the side panels) before attaching the top shelf. This way I didn’t have to drill / screw blindly. I also added the backing to the drawer compartment before attaching the shelf as well. I used a couple of pocket holes to pull it nice and tight to the bottom shelf.Thanks again for the solid plans and instructions.
Hey Brad, Can’t wait to build this, just wanted to get your opinion on using 3/4 conduit instead of steel tube since its readily available to me. And congrats on going to this full-time!
Hi Brad, I bought the plan and most of the parts/hardware hoping to get started this weekend. Questions: – Why did you use a steel tube instead of a solid rod? – Why do you screw into the tube? – Instead of creating that structure between the two top sheets, why not use three sheets with a channel in the middle one for the tube?
Hey, Ali! Sorry I missed your comment earlier. I used tube because it’s more than strong enough and easier to drill into. I screwed the tube so it would be rotate with the top, if you didn’t do this the top would tend to rotate around the tube and make a horrible sound (I know from testing it). I didn’t use more ply because it would be harder to cut the channels for the locking mechanism and you would have to buy another sheet of plywood.Hope that helps. Brad
Before I modify plans – any reason why the two sides can’t be flush with the top? I was thinking of using one side as an outfeed table until I had another tool & think a flat top would work better.
This may be the weeklys top silly question… I purchased your plans and have myself so confused with measurements. Ha! Do you know if the DeWalt 734 planer will fit into these sets of plans? Also, when you say 3/4″ tube… do you mean black pipe or…?
Hey Brad, got your plans and built this in a weekend! Awesome job man! I ran into a slight problem with my ply not flaring out at the top where the flip top goes. Not a big deal as one I lock the top in place it pulls the sides back in. Guess I shouldn’t have cheaped out on the ply… Love it regardless!! keep up the good work!! My next project is your outdoor patio cooler/cart, can’t wait to get those plans and start building it!
Hey, Mike! I know EXACTLY what you mean with the ply bowing out. The 2nd version I made (this one is my third version) did the same thing and I had only used a single sheet of ply with no pipe blocks on the side. So it got a little dicey when I flipped it. That’s the main reason I added the pipe blocks so the pipe is 1-1/8″ into the sides vs just 3/4″. So that fare won’t affect you at all!The patio cooler is a great build, we just used our last weekend at my son’s bday party. Can’t wait to see it!
Hi Brad, I really love your builds. Do you think a combination of the flip top and mobile miter saw stand would work? I’d like to put a miter saw and router table on it but would really like the extra support from the mobile station. I’m thinking if I put the wings of the miter station below the knobs of the flip-top, I might be able to make it work.Obviously the dust collection is out of the picture but you think this would be feasible?
Brad, will this fit the R4331 planer? You seem to indicate it does. Could you give me the dimension for the distance between the bottom of the top and the top of the drawer board.How much clearance is there between the planer and the bottom shelf?
Hey, Dave. I don’t have that model but it will definitely fit. You just need to raise the sides a little bit. I outline it in the plans. Thanks!
I’ve got to be missing something or else my math is off (quite possible!) What is the height of the space from the bottom shelf to the underside of the flip top? I come up with 20 1/4″, yet the Ridgid EB4424 has a stated height dimension of 23 1/2″.
Could this be configured to hold a 10″ band saw on one side and a 10″ drill press on the other? Or is that too much weight?!
I’d be more worried about the height. I’ve seen it hold 90lbs on each side with no problem.
I’m sure it design for short people. I’m very tall person. 6’9″ if you wonder. I need to have work bench and everything much higher or I’ll have to bend down to work around. How can I figure what height I need to raise workbench and all others?
Would this be strong enough to hold a miter saw on one side and a planer on the other?
Absolutely. I’ve had many many people use that configuration.
First off thanks for the plans, I’ve been wanting to build one for quite a while. My only issue is that you called for 3/4″ pipe, pipe is specified by the internal diameter, it didn’t dawn on me when I bought materials for this that the pipe I bought was quite a bit more than 3/4″. I just made the internal layer off the top thicker to match but just wanted to let anyone know not to make the same mistake. Again thanks for the plans.
Sorry for any confusion, Myles. The link in the materials section goes right to the proper item and I used the name from the Home Depot item description. But you’re absolutely right, it’s the OD that is 3/4″, not the ID for anyone else that is reading. Glad you enjoyed the plans! I’d love to see your version, post it here or on social media!
Has anybody attempted to mount a slider miter saw on one of these? I’m concerned the sliding rail would prevent it from flipping but at the same time I guess it would depend on which direction it’s turning
I’ve seen some put sliders on here. I think there is one on my Instagram feed.
Hi Brad, I have a lot of 3/4″ MDF.Can I use it instead of plywood?
Any chance you would sell one of these already made? I’d love to give my Dad one for Christmas to use for his router and planer!!
Sorry, I don’t make any of my projects on commission. Too much new work that I’m trying to get done.
Hey Brad, great plans! I wasn’t able to nab the welding tube you used, so I ended up picking up using a solid piece of cool steel I had laying around. I’m wondering what the ramifications are of not securing the pipe from the top?
I want to use this with a disc sander and portable planer. Can it stand up to the 160 lbs that those tools would put in this?
Tim, sorry I missed this. It can definitely take that weight.
I like the looks of your bar clamps…what brand are those?
Brad – I just built this yesterday. Great plans! I have been wanting to build one of these for about 10 years, but finally got to it. I put my Rigid oscillating spindle sander on one side (LOVE that machine, btw), and my Ryobi AP1301 thickness planer on the other side. It worked out perfectly. Thanks for the great plans! I am looking forward to not having to do the workbench swap every time I use these tools!
Sweet, Jim! Let’s see how it turned out! Post a photo in the comments so I can see it. Enjoy the cart!
Here it is. Note that I’m waiting on my drawer slides to arrive, so the drawer carcass is just sitting in the opening for now. I didn’t break any edges or do any sanding or finishing – I may go back and do that later.
I plan on building this for my dewalt planer and my rigid miter saw, but this gives me another idea for a router dual router table. I have two routers. One is mainly used for dado’s the other for shaping, if I built this i could use both in the table.
Sounds like a great idea!
Hey Brad, this is an awesome project – thanks for the plans! I’m working on building this right now and noticed one minor correction to the materials/supplies list. In order to build the locking hardware the way you have it designed, you actually end up needing 8 of the 3/8″ washers (not 4). Not a big deal since I happened to have some extras laying around, but it might save someone a trip back to the store.
Love Ridgid tools, and have been coveting the spindle sander/belt sander combo for quite some time. I already have the benchtop planer mounted to an old table, but I like the versatility of this table much better! Plus, I can finally pick up that sander (if I can get the hubby to go along with me) and not take any more space in my garage/shop! Thanks for sharing the plans!!
What drill press do you have? I like how compact it is.
Brett, I have a small Harbor Freight one right now. It was only like $40 many years back but it’s been all I’ve needed 95% of the time.
Looks awesome Brad! Super clean…super legit! 👍🏻
Thanks, Seth! It looks WAYYYY better than my old one.