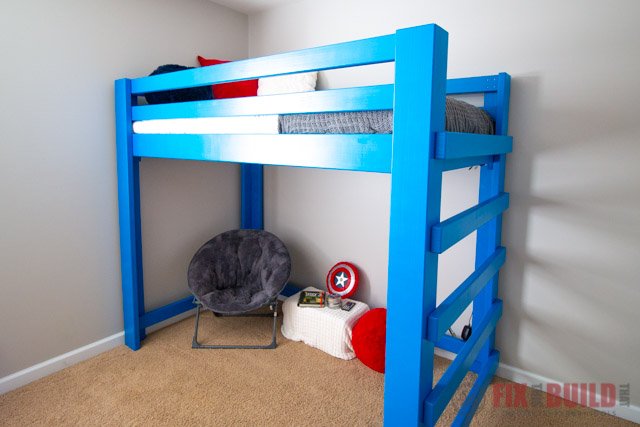
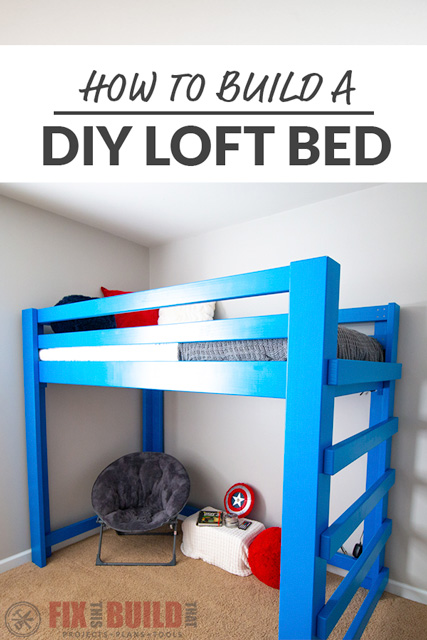
My son has been begging for a DIY Loft Bed for a long time now. He’s been patient (mostly) and finally got his wish. He’s now living the high life and couldn’t be happier with his new digs. It was easy to build, looks great and my kid thinks I’m cool. What else can you ask for?
Well there is one more thing, I wanted the DIY Loft Bed to be affordable and it is. You can make this loft bed for about $75. So whether you’re building a loft bed for your kid, or for a dorm room or apartment, you won’t have to break the bank.
And if you’re new to the DIY scene, I have full detailed plans and a full video tutorial to help you out.
Materials/Supplies
- Lumber: Option 1
- (7) 8’ long pine 2×6
- (15) 8’ long pine 2×4
- Lumber: Option 2
- (8) 8’ long pine 2×12
- (1) 8’ long pine 2×4
- (7) 8’ long 1×4 furring strips
- 2″ pocket screws
- 2-1/2″ wood screws
- LED Lights
Affiliate links are used on this page. See my disclosure page for info on affiliate programs.

How To Build a DIY Loft Bed
- Choose Lumber
- Cut and Assemble Legs
- Cut Parts, Assemble Bed Frame and Paint
- Assemble Headboard End
- Assemble Footboard End
- Connect Frame to Ends of Bed
- Add Guardrails
1. Choose Lumber for DIY Loft Bed
Obviously you’ll be needing some lumber to build your own loft bed. There are two types of wood you can buy for your bed; Option 1 (The Easy Way) or Option 2 (The Not So Easy Way)
Option 1 (The Easy Way)
If you want to go the easy route, stick with construction grade (15) 2×4’s and (7) 2×6’s found at your local big box store. Just buy those boards ready-to-go.
Unless you’re a glutton for punishment, this is the option I would pick. Of course this isn’t what I did… more on that in option 2.
Pros:
- Using pre-milled wood can be MUCH faster and easier.
- The bed will still only cost $75
- Don’t need table saw to rip down wood.
Cons:
- Boards may have more knots and may be more warped.
- You’d save slightly more on pre-milled 2×4’s and 2×6’s, but not that much.
Option 2 (The Not So Easy Way)
The Not So Easy Way means that you buy (8) 2x12s and rip them down into (15) 8ft 2×4’s and (7) 8ft 2×6’s.
If you know me at all, you can probably guess that this is the option I picked. The end result was good, but milling the wood took some time. If you plan to mill your own wood… good luck! Seriously though, watch the video if you want more information on how I milled mine.
Pros:
- Slightly cheaper to buy the lumber this way. The bed frame should cost about $60.
- The wood has fewer knots for cleaner boards. This may be important to you if you plan to stain the bed versus painting it.
Cons:
- This process can be time consuming and tricky.
- You need additional tools (table saw) to rip down the boards.
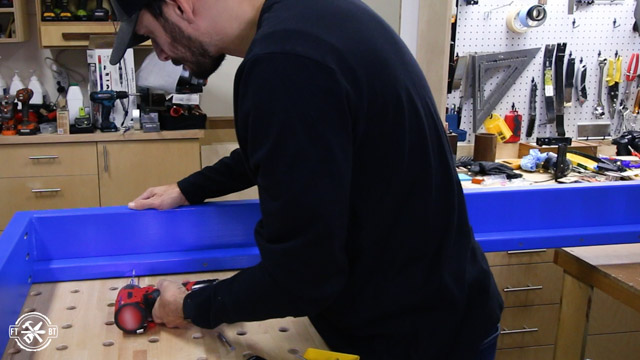
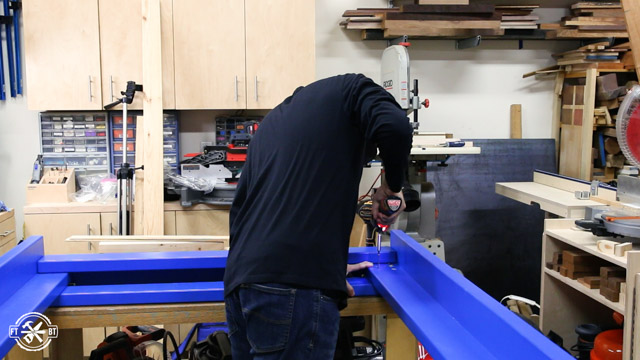
2. Cut and Assemble Legs of Loft Bed
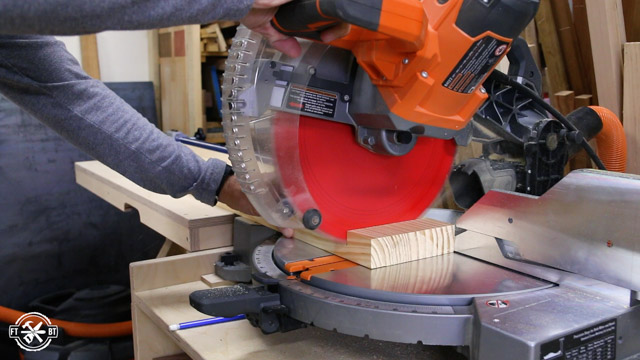
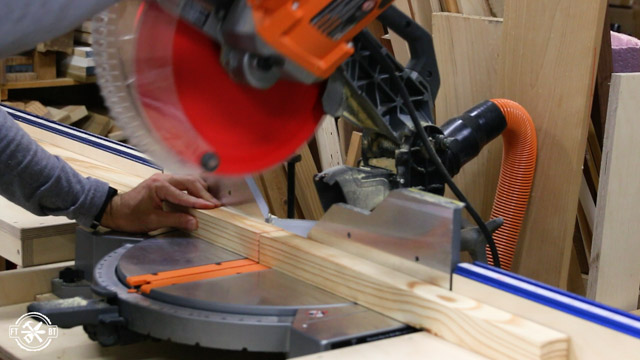
To begin, I cut one end square on of each of the boards.
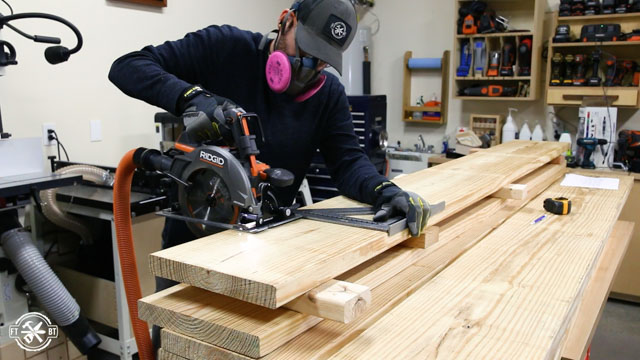
Then I flipped each board over and cut them to length on the miter saw. I also like to run the boards through a planer. This is totally optional but it gives the boards a fresh clean look. If you don’t have a planer you could also sand down to fresh wood instead.
Once the boards are cut to length, it’s time to assemble each leg of the DIY Loft Bed. Each leg consists of a 2×6 attached to a 2×4 at a 90 degree angle. When I glued up the legs I also used biscuits to help with the alignment.
To do this I marked several lines across the edge of the boards for quick reference.
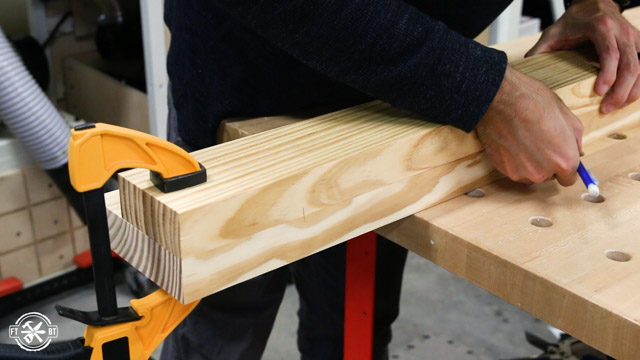
Then I used my biscuit joiner to cut mating biscuit slots into each board.
Next I glued the edges and put my biscuits in place and clamped the assemblies together. The biscuits really help boards that need a little persuasion to stay in alignment. Then I set them aside to dry overnight.

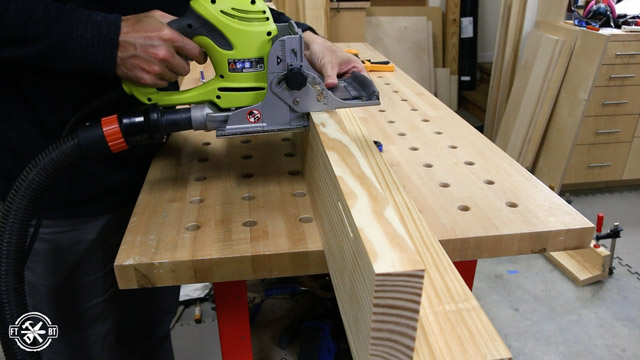
The next day I came back and cleaned up the glue joints on the legs with a card scraper and a block plane.
Since this bed is for my son and I knew it would have kids climbing all over it, I wanted to round all of the corners. I put a heavy roundover on the edges by using a ¼” roundover bit in my router. I made sure to hit every edge of the legs.
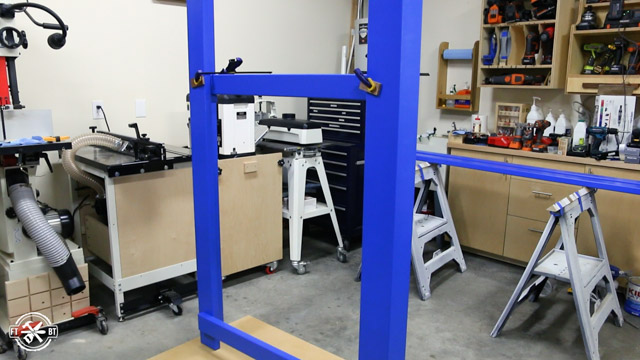
3. Cut Parts, Assemble Bed Frame and Paint
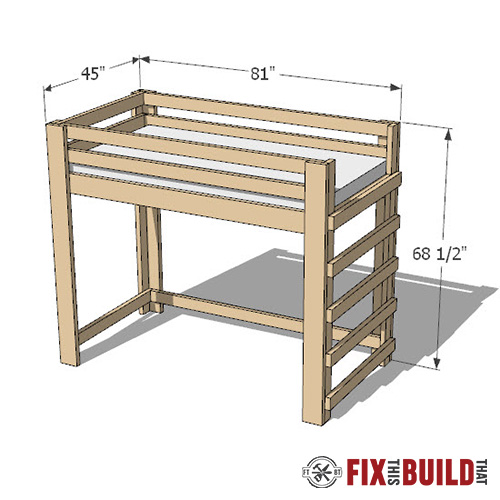
Next I made sure to check the dimensions of the twin sized mattress I was planning to use. It never hurts to double check this before you cut the 2×6’s for the bed frame. It’s also a good idea to keep in mind the width of your mattress. They can vary by a couple of inches.
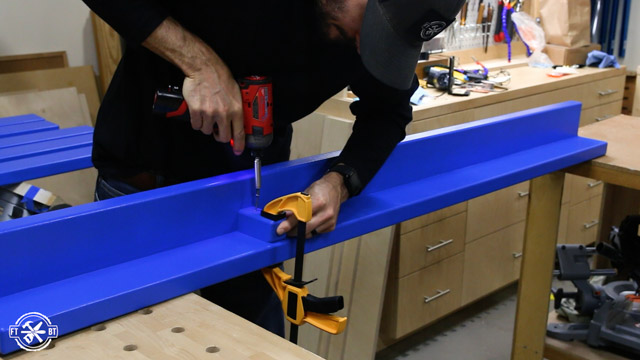
First I cut my 2x6s for the bed frame.
I drilled pocket holes in the short boards. I used my K4 for quick strong assembly. These holes will be hidden by the mattress.
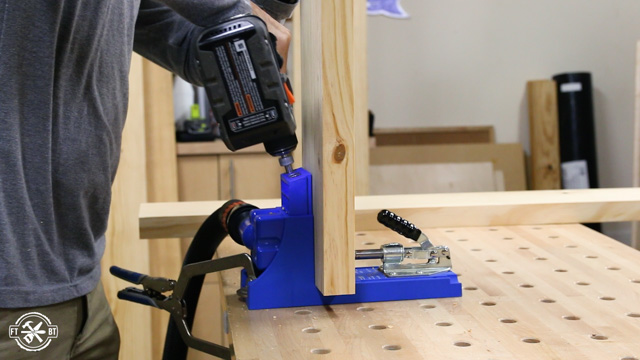
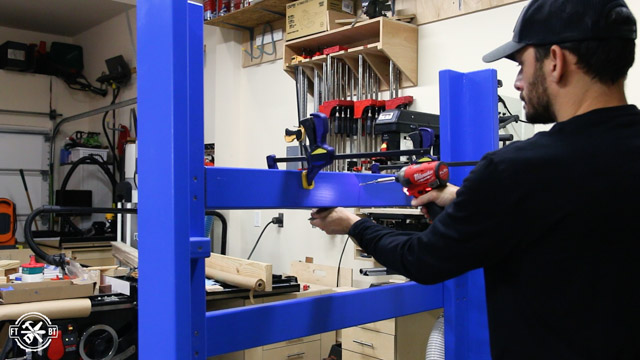
Then I used a right angle clamp to hold the 2×6’s at 90 degrees and attached them with 2-½” pocket screws.

I also used a long clamp to hold the pieces together on the bottom. This made for a secure joint that went together nicely.
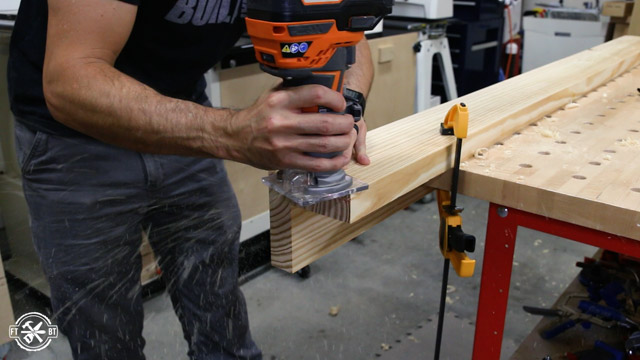
Finally I broke out the router again to round all the edges on the frame. Once that was done, I cut a couple 2×2’s to length to fit on the inside of the bed frame. These will hold the slats for the mattress.
I also cut shorter 2x4s which will go on the ends of the bed. They’ll join the legs and act as a ladder.
Finally, I cut the long stretchers for the bed. With that I had all my parts ready and just needed to put a roundover on the edges. But if you’re using stock 2×4’s you’ll already have those roundovers done and will just need some sanding.
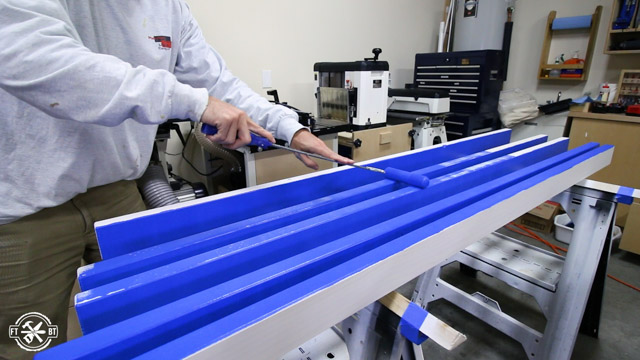
I decided to go ahead and paint all my parts at this point. I don’t have any joinery to work around now and rolling on the paint goes fast and easy. My wife and I put on a coat of primer and two coats of the blue paint.
4. Assemble Headboard End of DIY Loft Bed
I decided to attach the slat holder to the bed frame and assemble the ends in the shop. We’ll connect the three larger pieces and add the guard rails in the room.
I started by adding small 2×2 cleats on the inside of the legs to register the bed frame. This will help later when we connect the pieces together.
Then I started assembling the headboard end of the bed. This one goes pretty quick and easy since the rails are on the inside of the legs.
I clamped down a level to my outfeed table and used it to register the feet flush against it. Then I squared up the legs making adjustments at the top as needed. I also put the top rail in place unattached to make sure it kept the right spacing.
2-½” deck screws are used for all the connections here and I started off just using the self-tapping feature but later switched to pilot holes for a little more consistency.
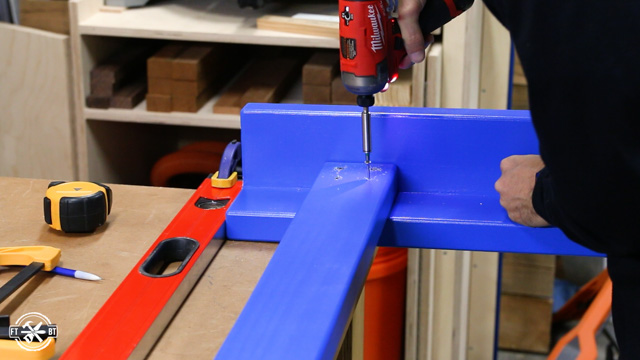
The top two rails get screwed down and that end is done in a snap.
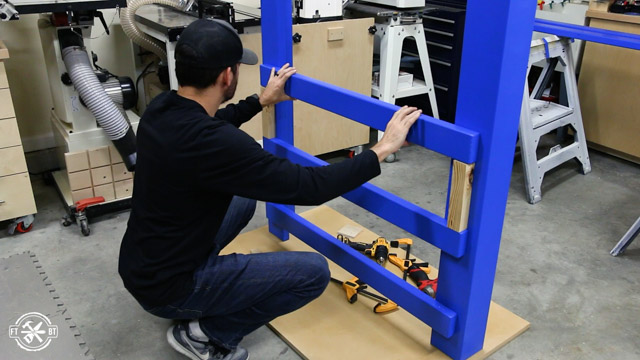
5. Assemble Footboard End of Loft Bed
The footboard end was a little more time consuming. I wanted the rails on the outside of the legs with no screws showing. This makes the ladder easier to climb and I think it just looks better.
First I raised the legs up off the table with some spacers. Then I put the lower ladder rail in place using another rail on the inside to match the bed frame width.
To help place the screws from the backside I made a quick drill guide from a scrap of ½” plywood. I cut it to 3.5” square then drilled four holes in it spaced an inch from each edge. This let me quickly lay the jig on the leg and predrill the pilot holes.
I attached the lower rail on each side then decided it to stand the end up. Standing it up with a rail clamped in place up top made assembly much easier.
I cut a few small scraps to give me even spacing between the ladder rails and worked up the outside of the foot end. The process went put spacers in place, position and center the rail, clamp tight, drill pilot holes then attach with screws and repeat.
I also put a piece of ¾” MDF on the ground to try and level out any unevenness in my garage floor.
Be careful when working with the end upright. I almost toppled the entire thing over a few times. Then I put some clamps around the feet to at least stabilize it to the point where it wouldn’t easily fall over.
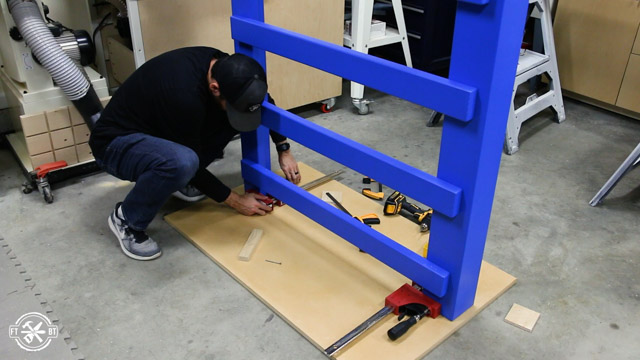
Finally I added a filler strip between the legs flush with the top rail. This eliminates a gap between the bed frame and the top rung. Otherwise that could be a real foot grabber.
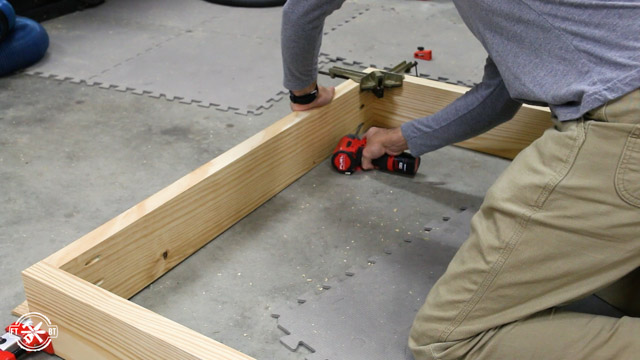
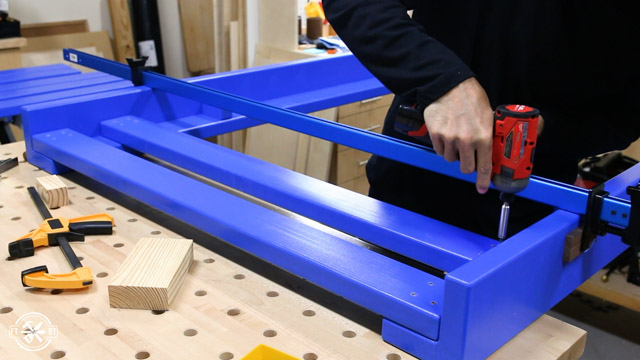
6. Connect Frame to Ends of Bed
With the major parts done we were ready to take them up to my son’s room for final assembly. We put the headboard end against the wall then brought in the bed frame and rested it on the little cleats. This was a tip I saw in Jay Bates bunk bed video and it worked like a charm.
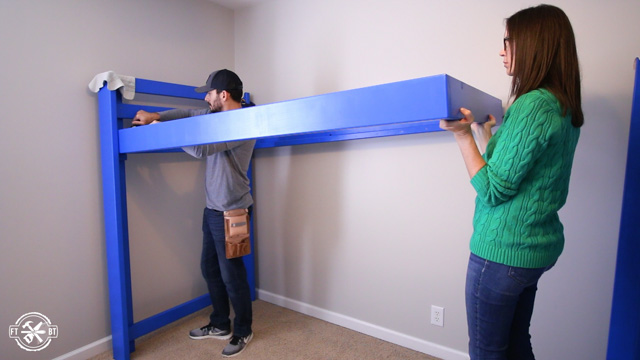
After clamping the frame to the headboard we brought in the footboard and fit it in place as well to square everything up. I did space the legs slightly wider than the bed frame just to make sure it would fit with no issues.
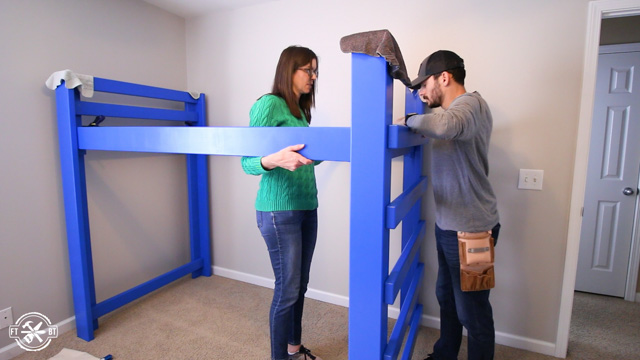
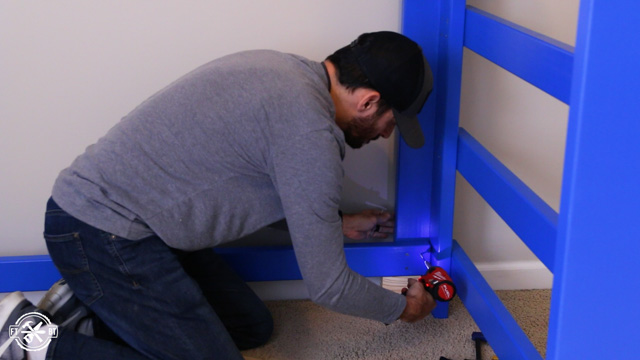
Next I used a carpenter’s square to make sure everything looked good. Then I secured the frame to the ends with six screws into each corner, three into each side of the leg.
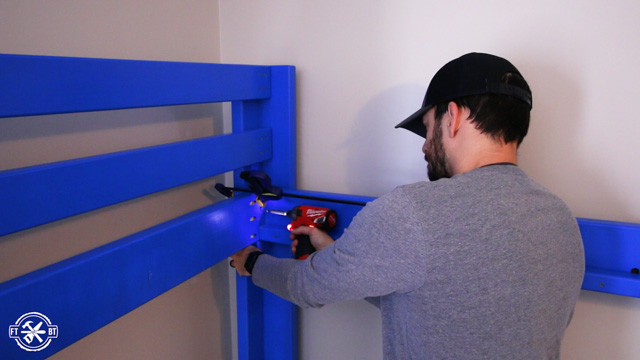
Finally I used the drill guide I’d made earlier to predrill the long guardrails. Then I attached one at the base to shore everything up.
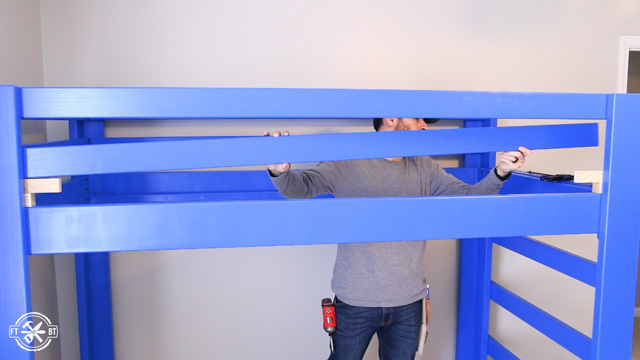
7. Add Guardrails to Loft Bed
The other four long boards went above the bed frame on each side. On the head board side I only used two screws since there is less room as the top rails are on the inside. But in general I overkilled this thing with screws and it’s really stout.
I cut down some 1×4 furring strips to use as slats and I laid them in place across the bed frame. You could also use a sheet of plywood for some mattresses, just check their website for the best recommendation.
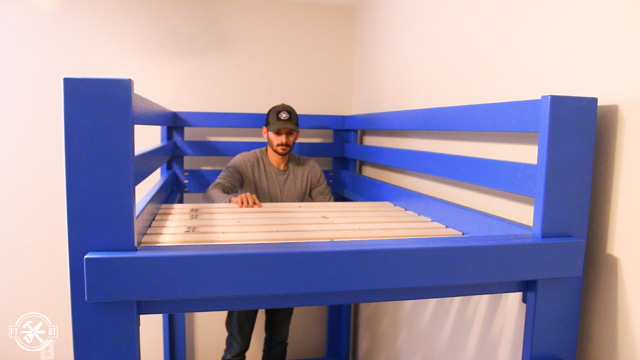
The height we chose for the DIY Loft Bed was based on our 8’ ceilings and wanting to be able to sit up in bed with our son to read. We did add some LED lights underneath the loft bed for a little extra cool factor and some light when he’s reading down there. Our son loves it…but now his sister wants to ditch the daybed and get a loft bed too…hmph.

And that’s how I built my DIY Loft Bed. If you enjoyed this project check out more of my Furniture Builds. And remember, get out there and build something awesome!


I want to make a king sized loft bed. Do you have a plan for this? I guess I can just change the measurements but things are always much more complicated then they seem.
I don’t have plans for a King sized loft bed. If you plan to build one I’d try to find plans specifically for one.
If I don’t want to glue the wood can I just use wood screw? And can I use any type of wood (like SPF) or do I have to use pine?
How do you make a bed when it’s so high?