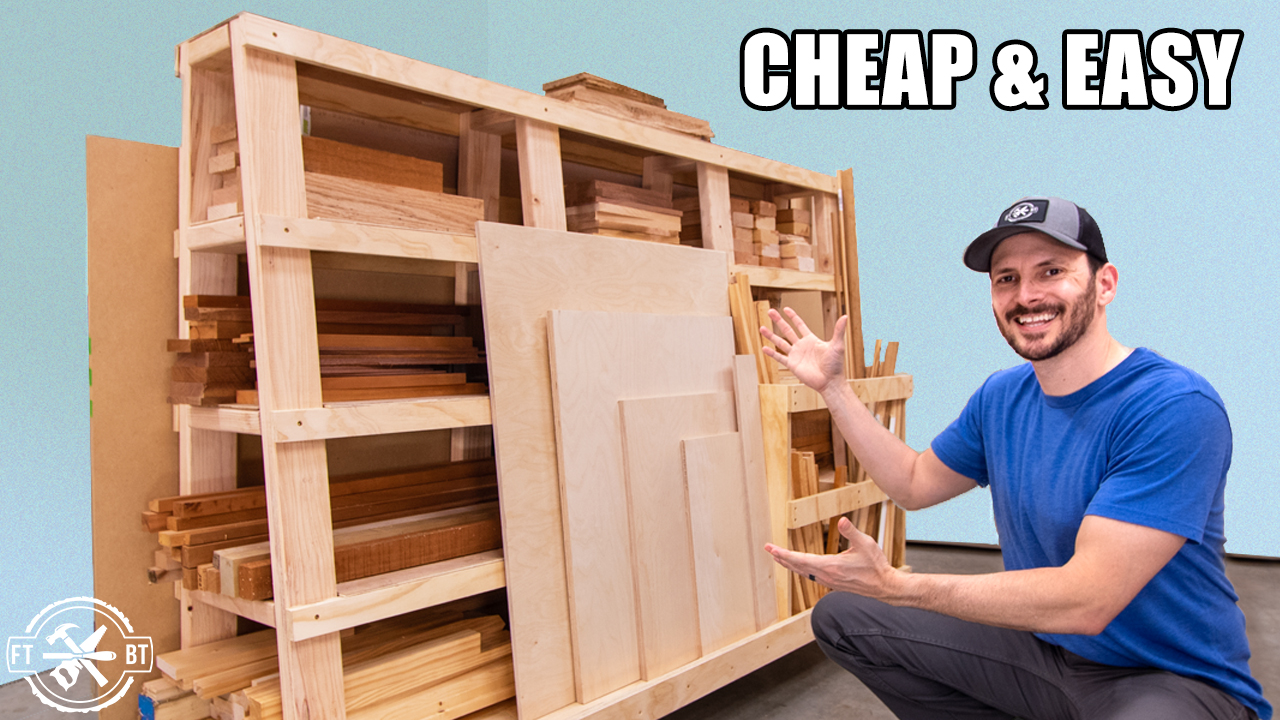
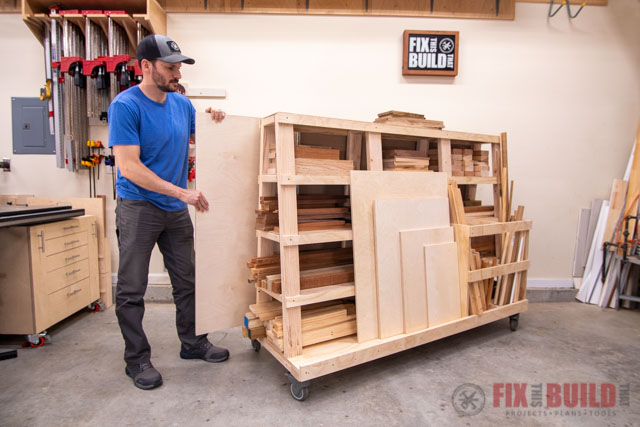
Tired of plywood, offcuts, and random wood all over your shop? Build the DIY Lumber Cart and get a place for all your sheet goods and lumber!
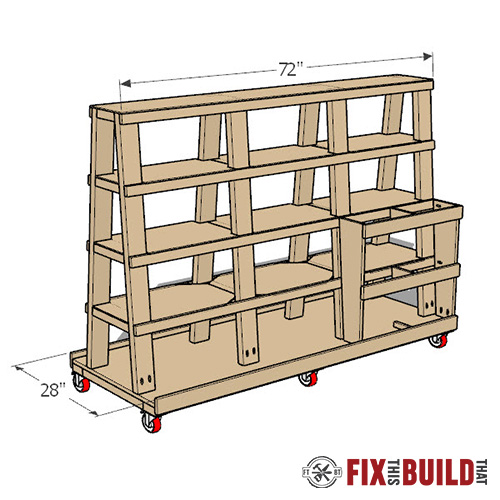
Have a small workshop or garage? No problem! This plywood cart has a small footprint at only 6′ long and 28″ wide. But it packs a punch with storage on both sides and four interior shelves (plus an open top shelf). Add vertical plywood storage on a small section or an entire side to fit your needs.
The DIY Lumber Cart is made from only 1 sheet of 3/4″ plywood and (8) 2×4’s, and can be made with just a circular saw, miter saw, pocket hole jig and set of drills. Add an optional sheet of lauan to cover the interior and hold small parts.
Materials/Supplies
- (1) 4′ x 8′ 3/4″ plywood
- (8) 8’ 2×4 pine
- (1) 4’ x 8′ 1/4″ lauan (optional)
- (6) casters
- 2-1/2” pocket screws
- 1-1/4” pocket Screws
- 2-1/2” wood screws
- 1-1/4” wood screws
- 1” brad nails (optional)
Affiliate links are used on this page. See my disclosure page for info on affiliate programs.

1. Build the Base of the DIY Lumber Cart
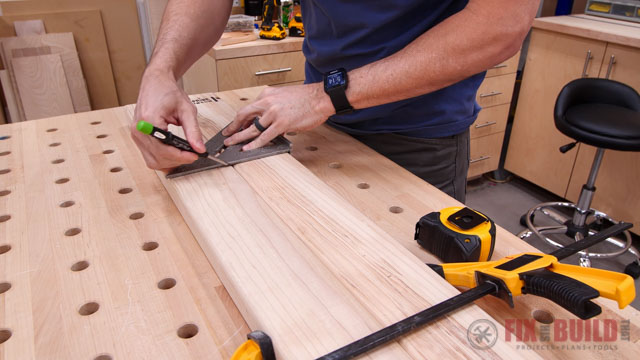
First I squared off the ends of my 2×4’s and then I was ready to cut the lumber to length for the mobile wood rack. I started by cutting two of the boards 6 feet long.
Then I cut 4 cross braces that will connect the longer boards for the base. Finally I drilled pocket holes for joinery and then got ready to assemble.
My plywood cart will be 6 feet long and will be wide enough to hold:
- 4-5 sheets of plywood on one side
- longer boards in the middle
- plywood offcuts on the other side
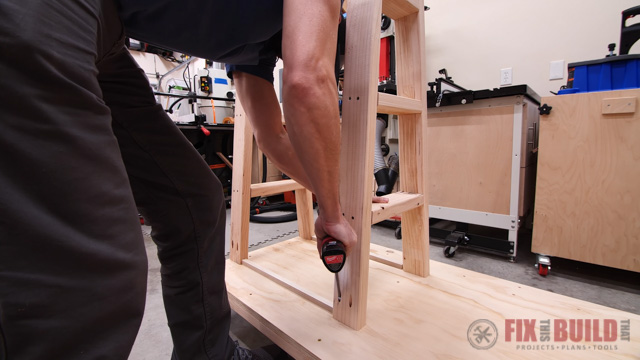
2. Assemble the Base of DIY Lumber Cart
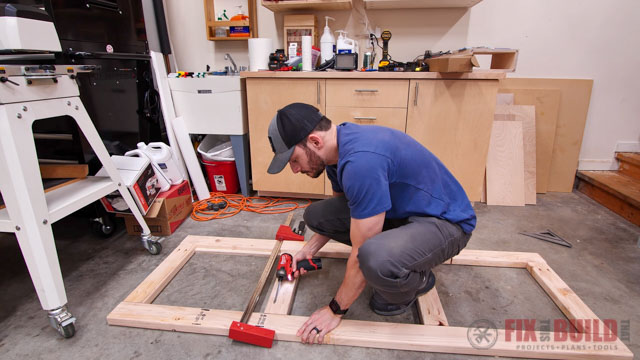
I started assembling the base by laying out the pieces of the frame. Then I used a clamp at one end to butt the pieces flushed together. Next I screwed that end of the frame together with 2-½” pocket screws. When that was done I repeated the process at the other end of the frame.
With the outer frame assembled it was time to attach the interior braces. The interior braces add strength but they’ll also be used to attach the inner a-frames. I used spacers to get their placement just right.
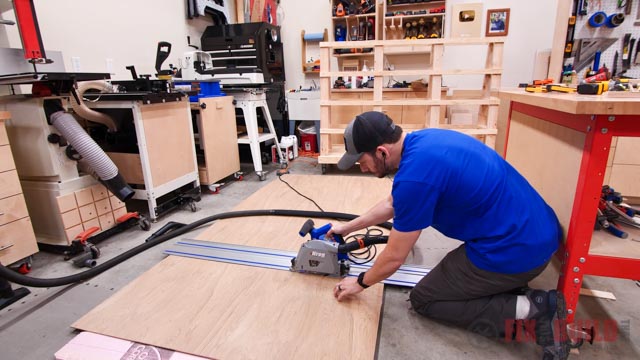
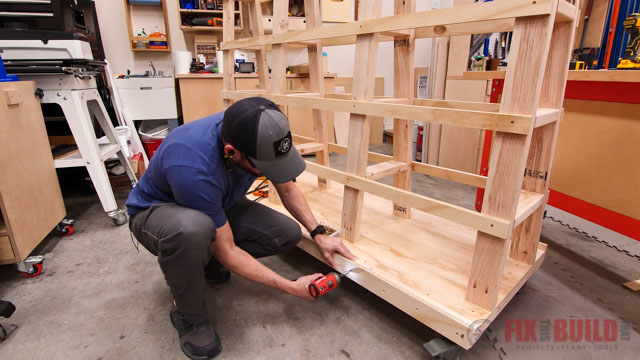
The base will be covered with ¾” plywood, which I cut to length right on the ground (with my trusty rigid foam insulation underneath). Cutting the plywood to width is a longer cut, so I decided to use my Kreg track saw with the extension added. Track saws make these cuts so much easier to do and very accurate.
With the frame complete, all I had to do was screw the plywood on top.
3. Cut Parts for A Frame
The top of the DIY Lumber Cart is an A frame that’s made out of 2x4s with a 5 degree tilt. Before I started cutting the long boards I adjusted the setting on my miter saw for a 5 degree miter. By doing this I could cut the boards on edge and I got two sides per each 2×4.
Next I cut the connector pieces that will go in the middle. I started with the top piece, which is very small. When you cut small pieces make sure to use a stop block, a spacer and clamp when needed. Above all else, keep your hands away from the blade on the miter saw and let the blade stop spinning completely.
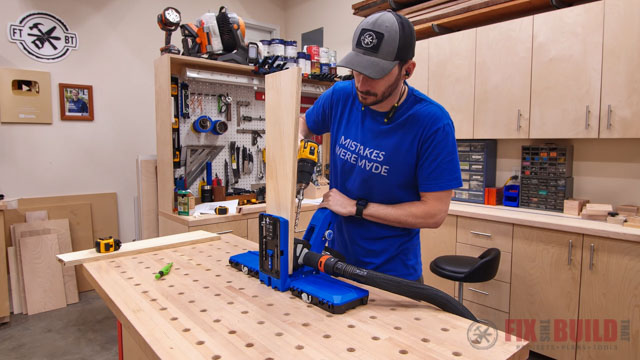
Make sure to drill pocket holes at the bottoms of the long boards. You’ll use these to attach them to the base later on.
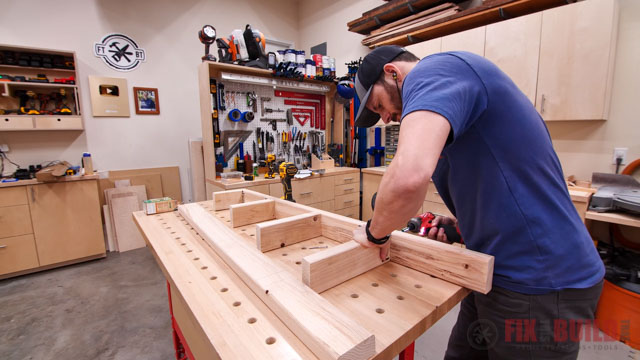
4. Assemble A Frame for DIY Lumber Cart
With all the parts cut I was ready to start assembling. I started by grabbing a pair of the sides and clamping them together. Then I used my combination square to mark where each connector wrung would go on each side for a good visual cue.
Next I started screwing the connector pieces into one of the sides. It’s hard to clamp these boards when screwing them together. Instead I held the boards together with my hand while I drilled pilot holes. Then I was able to screw in the 2-1/2” screws.
Use clamps on the other side, repeat the process and your A frame is done. Once you’ve built three more A frames you’ll be ready to attach them to the base.
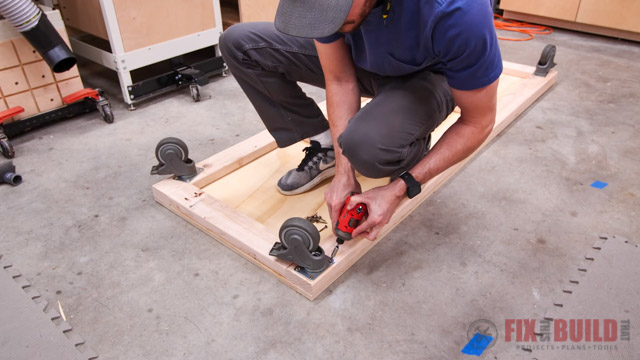
5. Add Castors to Base
This is the perfect time to add your castors to the bottom of the base. My castors are rated for 325lbs each so I’m just using 4. If you decide to use regular duty castors you’ll want to add two more in the middle to help carry the load.
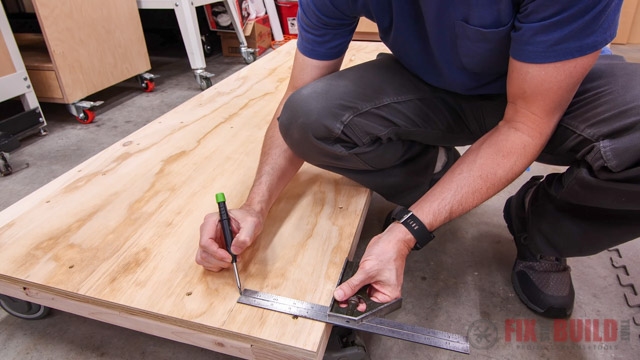
6. Attach A Frame to Base
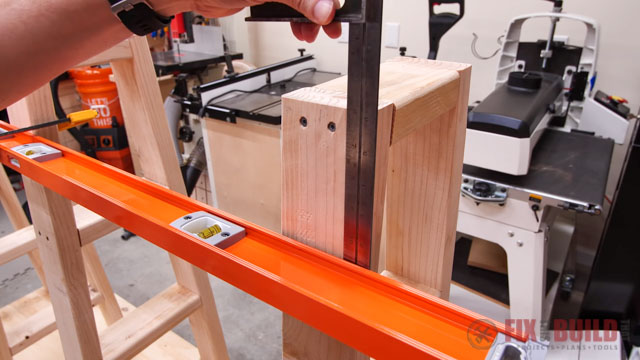
Next I flipped the base over and used my combination square to mark reference lines on each side of the base. This will help make sure the A frames are attached the exact same distance from the edge.
Attaching the end A frames:
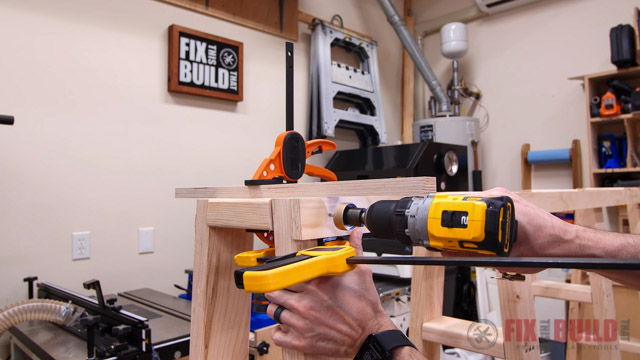
Attaching the end A frames is easy. I just made sure they were each flush with the short edge of the base. Then I confirmed they were on the reference line and used 2-½” pocket screws to attach them to the base.
Attaching the center A frames:
I used spacers to determine where to place the center A frames. These are the same spacers I used when assembling the base. I placed the spacers right next to the end A frame and positioned the center A frame on the other side. This technique ensures the center A frames will be right above the bracing I added under the base. That bracing will be the foundation for a strong and secure connection to the base.
Finally use a long level to make sure all of the A frames are in alignment. If any of them are off, just remove the pocket screws on the A frame, adjust the placement and reattach.
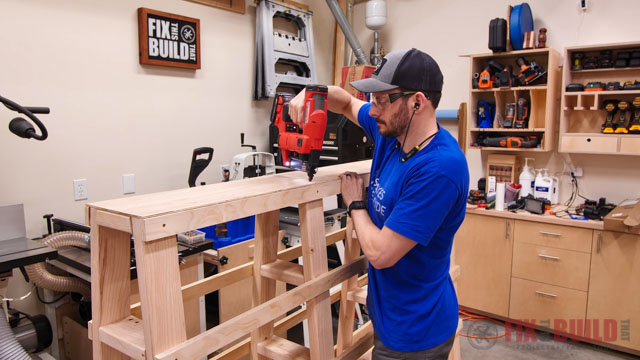
7. Attach Plywood Strips
Next I ripped plywood strips each with a 5 degree bevel. I’ll be attaching the strips to the side of the lumber cart. The bevel will ensure that the strips match the 5 degree angle of the cart and will create a flat top surface.
With the strips in place I’ll be able to smoothly slide full sheets of plywood onto the side of the lumber cart.
To keep the material from sliding off the edge of the cart I attached two more plywood strips about 1 inch off the edge of the base.
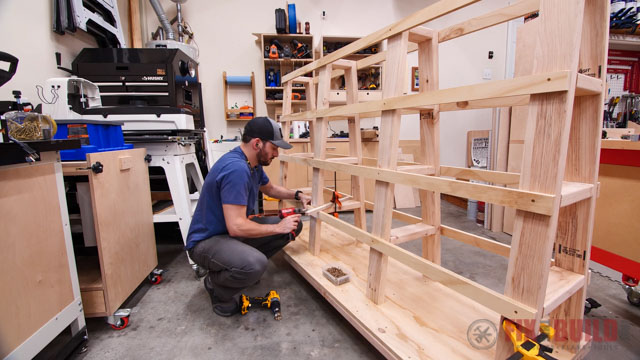
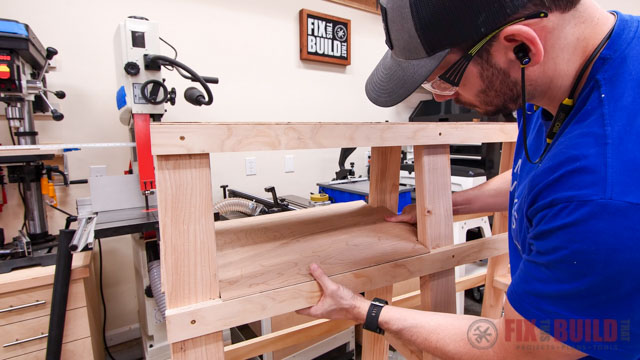
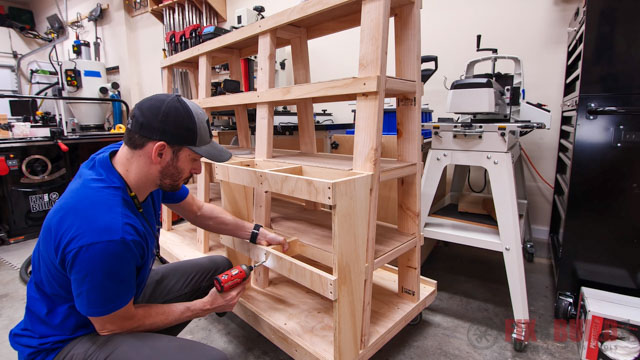
8. Add Interior Shelves
Finally I cut a full size strip of luan for the top shelf and attached it with brad nails.
For each lower shelf I cut the luan into three sections and adjusted the ends to make them fit around the a-frame uprights. This worked really well, I love having those shelves to store smaller offcuts, but you could choose to keep them open too.
As a final touch I decided to dedicate a small space to vertical storage. I started by cutting leftover plywood to rough size first, then I laid out a line to match the lean back of the uprights on a large piece. I repeated this cut on the second large section of plywood and then added pocket holes.
Next I cut outer supports and the secured the whole thing to the DIY lumber cart.
And that’s how I built my DIY Lumber Cart! it’s pretty amazing how much this lumber cart can hold, it’s made storing my plywood and lumber so much easier. I just wish I had made it sooner.
If you like this project make sure to check out more of my Shop Projects.


