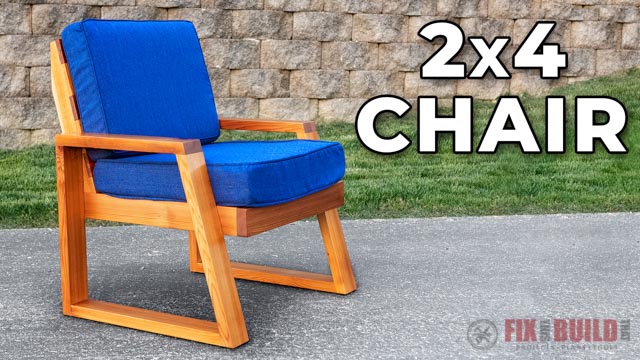
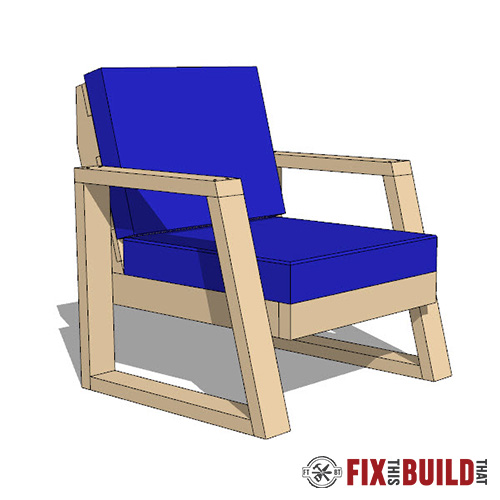
This outdoor DIY Patio Chair is a great place to relax. With deep cushions, a tilted back and sleek angled design it’s made to look good and feel great. Straightforward joinery and assembly make this an easy build that will make a statement on your deck.
You can build your own DIY Patio Chair using my easy to follow detailed plans. All you’ll need is some cedar 2×4’s and 1×4’s for material. You can get the outdoor chair plans here to save time and have an easy build.
I designed the DIY Patio Chair to match the DIY Outdoor Modern Sofa. It also looks great with the DIY Concrete Top Outdoor Coffee Table and the DIY Outdoor Side Table. For more stylish outdoor furniture options my DIY Modern Sofa and the Modern DIY Outdoor Chair may be just what you’re looking for.
Materials/Supplies
- (4) 8′ 2×4 cedar boards
- (2) 8′ 1×4 cedar boards
- 2” or 3” dowels
- 1-1/4″ Exterior Screws
- 1-1/2” Exterior Screws
- 2-1/2″ Exterior Screws #10
- 2-1/2” Exterior Pocket Screws
- Wood Sealer- TotalBoat – (2022 10% off code: FIXTHISTB)
- Gleam Varnish- TotalBoat – (2022 10% off code: FIXTHISTB)
- 1″ rubber feet
Affiliate links are used on this page. See my disclosure page for info on affiliate programs.

How To Build a DIY Patio Chair
- Cut and assemble chair arms
- Build the seat base
- Make Seat Back
- Attach seat back to seat base
- Sand and assemble chair
- Apply finish to chair
Start with your outdoor cushions
Before you start building your chair, it’s important to buy your outdoor cushions. I designed the DIY Patio chair to fit a seat cushion that measures 24.0″ L x 6.0″ H x 25.0″ W. I bought this extra deep outdoor seat cushion in Midnight Blue.
My seat back cushion measures 24.0″ L x 4.0″ H x 18.0″ W. I bought this one also in Midnight Blue.
Here are more seat cushion options and seat back options that would fit the DIY Patio chair. If you decide to use cushions that are a different size you’ll need to adjust the plan accordingly.
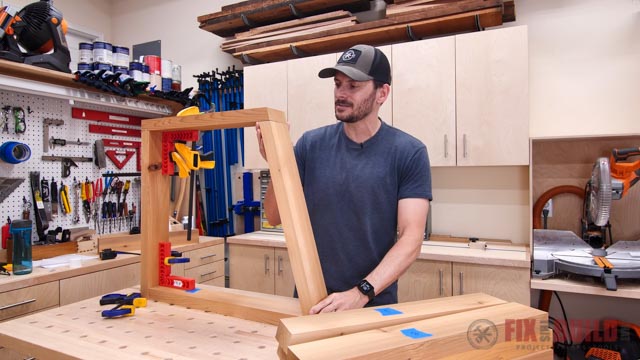
1. Build Arms of DIY Patio Chair
I started by cutting each of the arm pieces to length on my miter saw. To avoid making the arms of the DIY Patio Chair too boxy and square, I decided to add a 15 degree bevel to the front piece.
Next I clamped the base, back and top parts of the arms together just to see how it would look. I liked how the bevel looked on the front piece and was ready to move on to the joinery.
Pocket Hole Joinery
I’m using pocket hole joinery on the bottom of the chair base because the screws will be hidden. I used my Kreg 720 Pro to add the pocket holes, applied outdoor glue to the joints and was ready to clamp everything together.
The front section is harder to clamp because of the 15 degree bevel. To counteract that, I added a 15 degree offcut to the edge to create a flat surface. 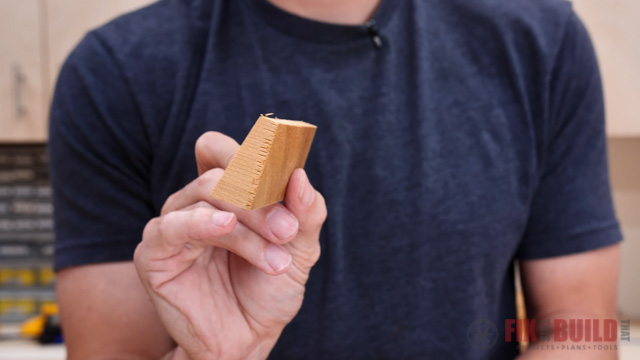
Finally I attached the pieces using pocket hole screws.
Through Dowel Joinery
The armrest will be joined using through dowel joinery. I started by applying blue painters tape in the areas where I would be drilling. Painters tape helps with tear out, which can easily happen when you’re drilling from the top. Next I marked the spots where I’d be drilling holes.
I need the dowel to rest halfway between the bottom and top pieces. To make sure the hole is the right depth I started by laying the dowel on the pieces exactly where I want it to be. Then I placed the drill bit next to it and marked the bit with painter’s tape. This visual will show me when to stop drilling so the hole is the right depth for my dowel.
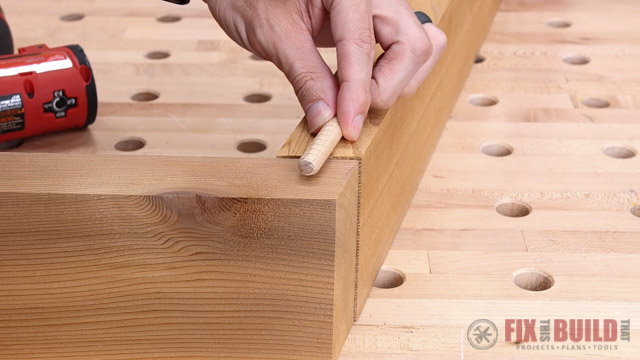
Finally I used my cordless drill to make the holes, added outdoor glue to the joints and dowels, clamped the parts together and let everything dry.
Add Plugs to Dowel Holes
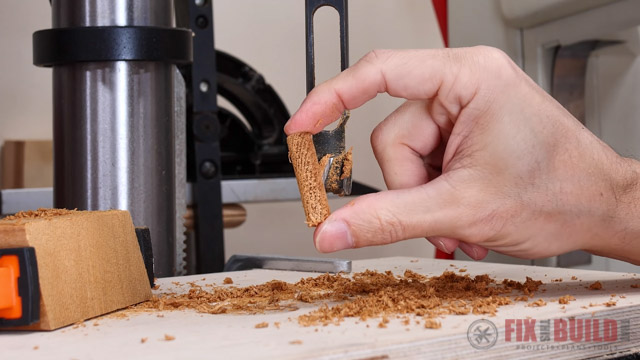
With the through dowel joinery in place, my last step was to fill the holes. You can use store bought cedar plugs or you can do what I did, and make your own. I like to make my own wooden plugs because I can cut them out of the same material I used for my project. This gives me the best possible color and grain match and it’s fun to do.
I used a plug cutter on my drill press to make my plugs, but you can use a cordless drill. Cutting your own dowels is so satisfying, just put the plug cutter on your drill press and get busy.
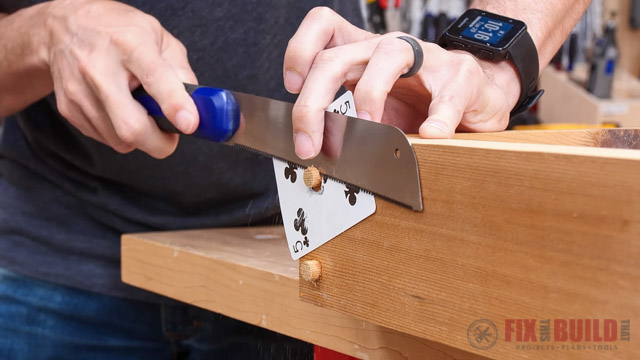
Next I put a little bit of outdoor glue on the end of my dowel and tapped it into the hole. You should get some glue squeeze out. Wipe the glue off and let it dry. When cutting the plug flush place a barrier between your blade and the wood you want to protect. A playing card with a hole in the middle works well for this. Finally sand the area and you’re in business.
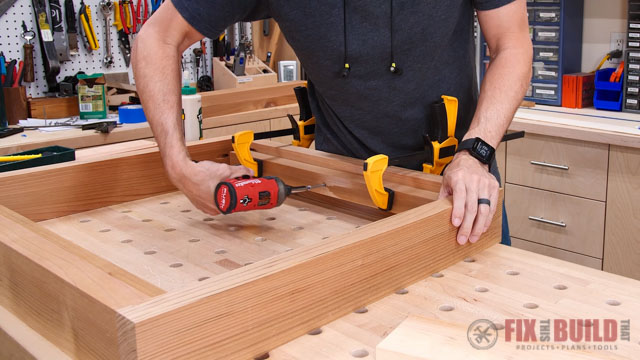
2. Build the Seat Base
The seat base for the DIY Patio Chair is made out of the 2x4s joined with pocket screws. I’ll also add supports on the sides to hold the slats into place which will support the cushions.
To make the frame of the seat base I started by cutting all the pieces to length. Then I added the pocket holes with my Kreg 720 Pro and applied outdoor glue to the joints. Finally I secured everything with pocket screws.
Then it was time to add the side supports to the inside of the seat frame. I cut the pieces to size, clamped them in place and secured them with screws.
Getting the slats ready is easy, just cut your wood to size and drill pilot holes where they will be attached to the side supports. I always wait to attach slats until the finish has been applied to everything. It’s much easier to finish slats when they aren’t assembled.
3. Build Seat Back of the DIY Patio Chair
The last part of the DIY Patio Chair that was left to build was the seat back. I started by cutting the sides to length and made the cuts at a 15 degree angle. Angling the seat back by 15 degrees will make sitting in it more comfortable.
Next I cut the slats which will span the sides and hold the back cushion in place. I wanted the slats to be flush with the sides, so I’m going to recess them in by cutting dados into the sides. I marked where each slat would sit and then set up my dado stack on the table saw. Then I used the dado to cut each recess by making multiple passes as needed.
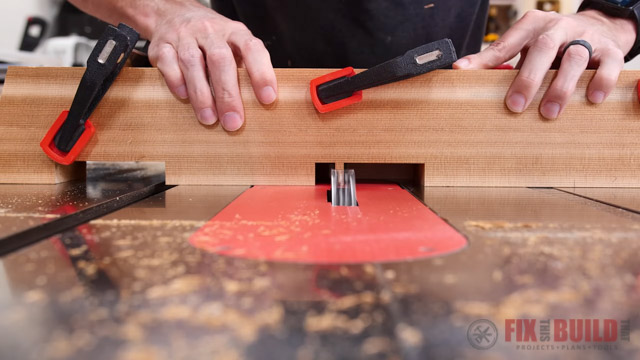
Finally I test fit the slats by placing them into the notches I created.
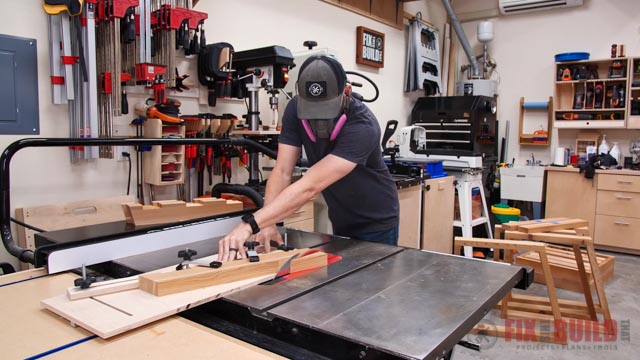
Before I was done with the back of the DIY Patio Chair I decided to remove a bit of the visual weight. I did the same thing when I built my DIY Modern Outdoor Sofa. This chair is designed to compliment the DIY Modern Outdoor Sofa and would make a great set.
To cut the taper, I marked my side pieces and I made the cut on my table saw. It was easy to do using my Easy Tapering Jig. By setting up this cut on my tapering jig I’ll be able to quickly get the exact same results on each piece.
4. Attach Seat Back to DIY Patio Chair Base
Finally it was time to attach the seat back to the base of the DIY Patio Chair. For a strong connection I decided to screw a hole right through the meat of the upright. But first I need to counterbore a hole through the upright so that the screw can go deep enough into the wood below it. I used my forstner bit to make the hole, but you could also use a spade bit or just a large drill bit.
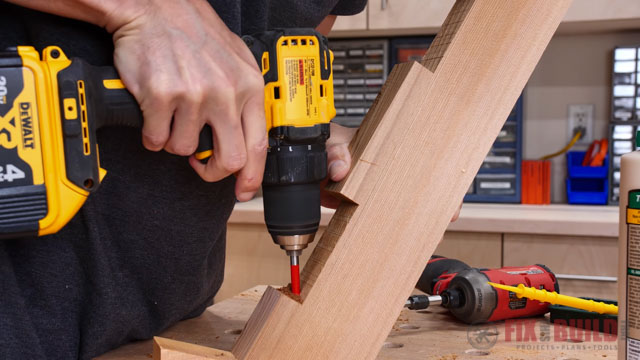
Once the hole was complete I added glue to the joint and screwed it together. I also added one more screw through the side of the upright and into the base. This will give that connection another point of contact and will help prevent any rotation.
5. Sand and Assemble Chair
I prefer to sand and finish projects before the final assembly; it’s usually quicker and easier. First I needed to round over all of the edges which I did using my handheld router. 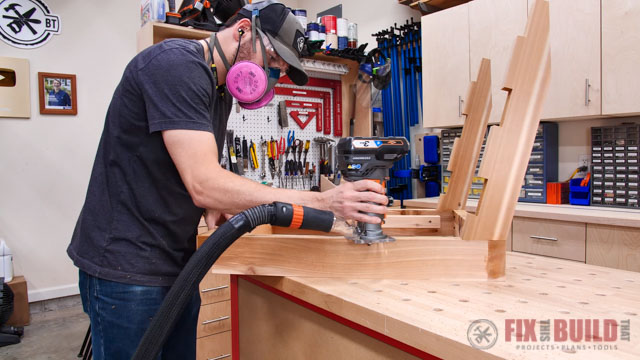
Then it was time to sand everything. I used a random orbital sander which made this much faster.
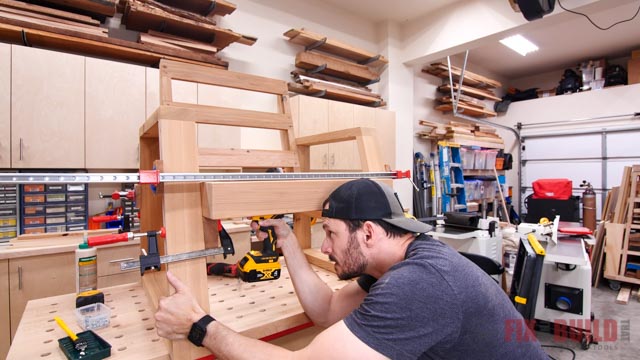
Finally it was time to attach the sides to the seat. To make the process a little easier, I positioned and clamped straight edges to the sides. These will hold the seat base in place until I can screw everything into place I decided to put the seat height right around 16 1/2 inches for the top of the cushion.
Before I attached the sides to the seat base I added a little glue at the connection points. When I attached the seat base to the arms I used a #10 3” screws for a strong connection.
**If the seat base looks a little high to you, it’s because it is. It turns out I mounted the seat 3 1/2″ too high and didn’t realize my mistake until the project was complete. You can see me take these chairs apart and fix the height in this video. This was human error, the plans are correct.
Finally I added another screw a little bit higher up as well. Making sure that there is another point of connection on a different plane is important for stability. I used a countersink bit, screwed everything into place and then added a plug to cover it all.
6. Add Finish to Chair
When I’m finishing cedar I like to do a three step process; 1 coat of TotalBoat Wood Sealer, 1-2 coats of TotalBoat Gloss and finish with 1 coat of TotalBoat Satin. With this coverage the cedar should be able to hold up well with outdoor use. 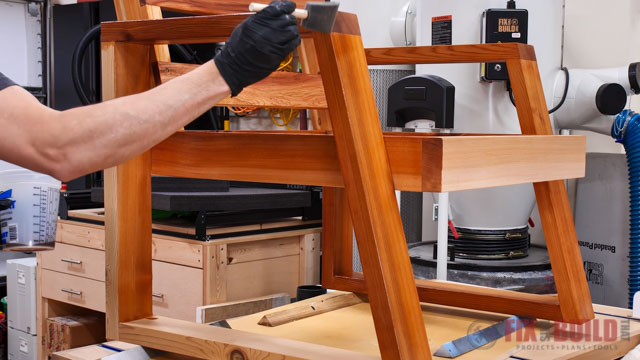
And that’s how I build my DIY Patio Chair. It turned out great, we can’t wait to use it this summer! For more great outdoor projects check out my DIY Outdoor Projects.