Today I’m going to show you how to make your miter joints stronger and easier to assemble using mitered splines. I’ve been using mitered joints in my projects for years and I’m going to share all the tricks I use to make the process fool-proof.
Two Types of Miters
There are two basic miters; corner miters and edge miters. Edge miters are used to make mitered boxes, waterfall edges and more. I’ll be focusing on edge miters in this blogpost. Corner miters can be used to make picture frames and I’m not going over them here. If you want to learn how I make corner miters check out 3 Ways to Make Picture Frames.
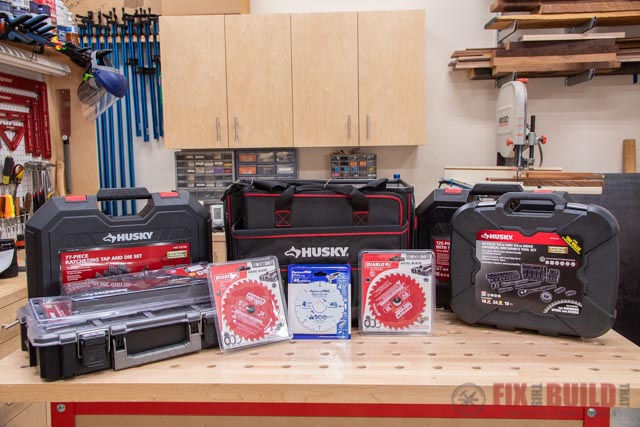
Tools Used
Materials/Supplies
Affiliate links are used on this page. See my disclosure page for info on affiliate programs.
How to Cut Mitered Joints
- Set Table Saw Blade to 45 Degrees
- Cut Mitered Joints
- Set Up Spline Cuts
- Cut Splines
- Assembly Tips
- Fixing Gaps in Mitered Joints
1. Set Table Saw Blade to 45 Degrees
I cut edge miters on my table saw which means I have to set the blade to 45 degrees. Getting the table saw blade adjusted to exactly 45 degrees is crucial to getting a good edge miter joint. The more accurate the angle of the blade, the more accurate the miter joint.
Be safe and make sure to unplug your table saw before touching the blade.
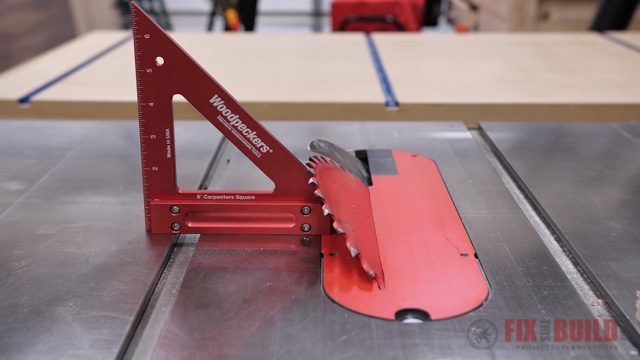
Carpenters Square Method
This is the method I use when setting the angle of the blade on my table saw. Tilt your saw blade to 45 degrees and check it with a good carpenters square or a drafting triangle. Make sure you put the square between the teeth of the blade so they aren’t skewing the measurement.
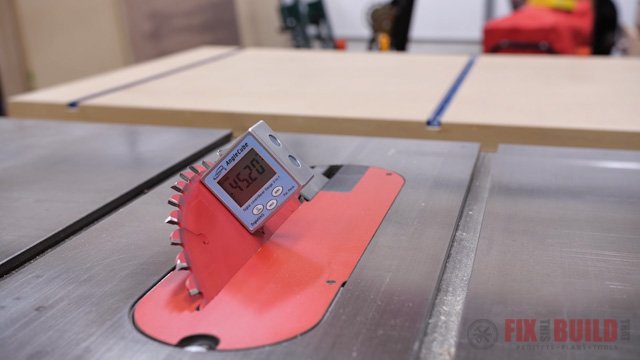
Digital Angle Cube Method
Another way to set your table saw blade to 45 degrees is by using a digital angle cube. A digital angle cube is basically a level, so you’ll start by setting it on the top of your table saw. Once the top is zeroed out, use the built-in magnets to attach it to the side of your blade. Then adjust the angle of the table saw blade until it’s 45 degrees.
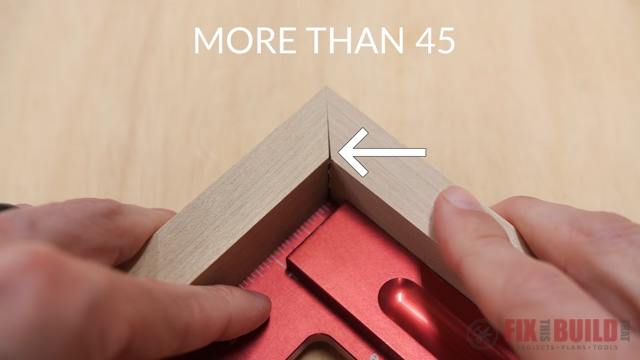
Make Test Cuts and Adjust
After you set your table saw blade to 45 degrees you should make a test cut with a scrap of wood. Then use a 90 degree square to check it, hold your parts tight to the square and slide them together at the joint.
If the outside corner hits and there is a gap at the base then your blade is tilted too much and you’re past 45 degrees.
If you have a gap at the inside corner but the tips touch then you need to tilt the blade a little more to get to 45 degrees.
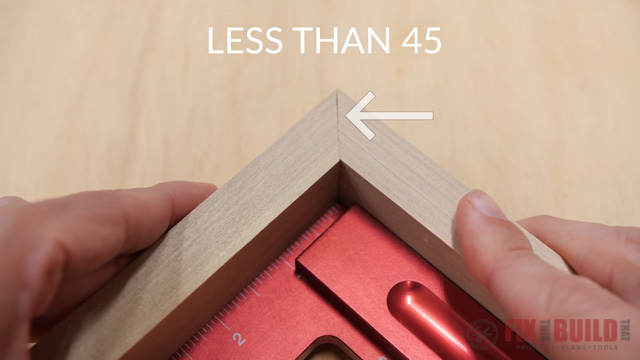
Once you make those minor adjustments, you’re ready to cut your miters.
2. Cut Mitered Joints
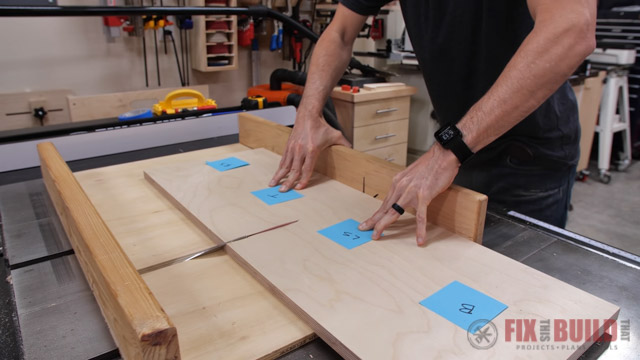
Miter Sled
I use a dedicated miter sled (which is my old crosscut sled) for miters and I take off the front fence if needed for wider panels. But you can also use the miter gauge for shorter miter cuts….or use the fence for long miters. Just make sure whatever you use is properly squared to the blade.
Cutting a Waterfall Edge
And if you want a waterfall edge with continuous grain flowing from the top to the sides, mark your parts and plan for the cuts.
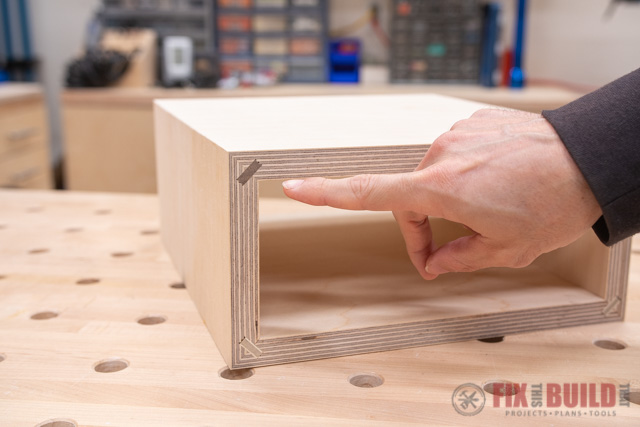
I marked this little test box to designate the bottom, left side, top and right side. I’m not going to go super deep on the waterfall edge portion here, but just make sure you plan everything out before you make your cuts.
The biggest tip with the continuous grain technique is to remove as little wood as possible between the top and the sides so the grain lines will connect and look seamless. You can see how I did this on my DIY Epoxy River Table with Waterfall.
After making all my cuts I also ran miters on a few extra scrap parts for setup later.
3. Set Up Spline Cuts
Now that we’ve got the parts we can make the spline cuts. The beauty here is you use the same setup and just move the fence and blade height.
Make the First Cut
We’ll make the spline cuts in two passes. For the first one I lower the blade to about ⅝” at the highest part of the blade.
Then I mark ⅝” in from the end of a mitered piece and mark a line. I used this to set the fence. What I’m trying to do is get the edge of the blade to hit on that line.
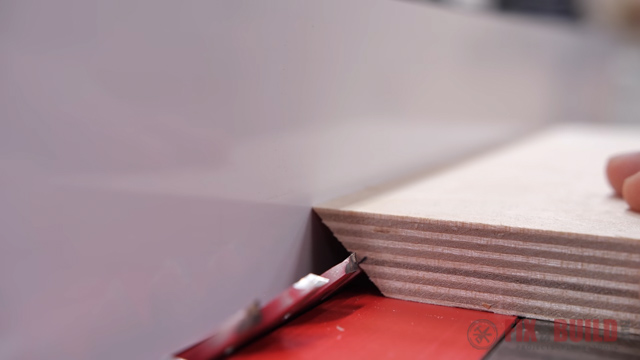
Keeping the spline towards the base gives you more material to work with. Run the test piece through at this setting and check to make sure the kerf is at least ¼” deep and more than ⅛” away from the inside corner.
If it is then go ahead and run all your pieces through at this setting. You’ll also want to run all your setup parts through as well.
Make the Second Cut
For the second cut you need to widen the groove to match the thickness of your spline material and lower the blade for a flat bottom. Before making the cut lower your blade a ¼ turn then move your fence away from the blade enough to match the size spline you’re using, I’m using ¼” plywood here.
You can also see the second cut was a bit deeper than the first one and leaves a larger gap. This isn’t a big deal if you’re edge banding the face. But to fix this you can adjust the blade up or down to make a flat bottom.
Once you’ve got the perfect fit you can run the rest of your parts through at this setting.
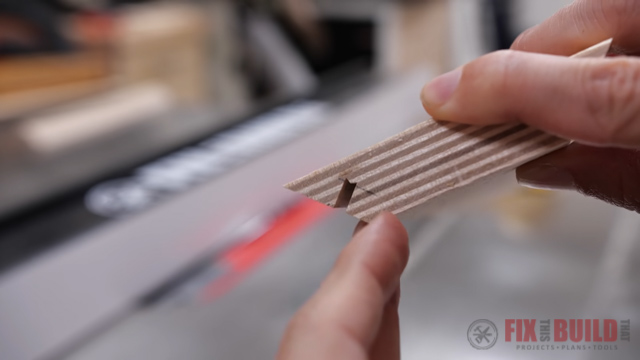
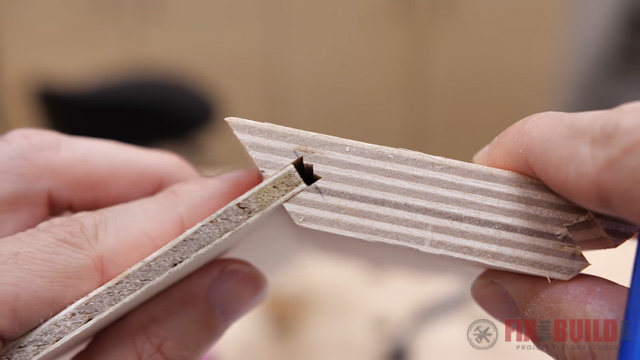
Next we need to size the splines. If the splines won’t be exposed you can leave them a little undersized in width to make sure they don’t keep the joints from going together.
4. Cut Splines
To cut these splines, I put a joint together and measured the gap. Then cut my ¼” plywood to just under this measurement which was about ½”.
I also milled up some walnut to show an example of contrasting splines. If you do this you’ll want the splines to be matched almost exactly to avoid gaps. But I have a better solution I’ll show you during assembly.
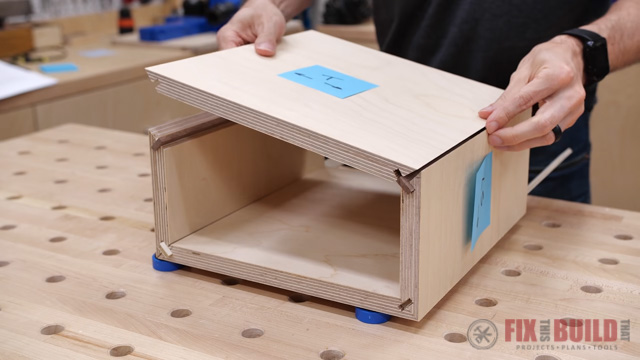
5. Assembly Tips
Not only do splines add strength, they also help make assembly easier, especially on large pieces. On smaller pieces like the DIY Modern End Table I would typically put tape across the outside of the miters and fold the assembly up and tape it closed. But with something like the Modern DIY Desk that would have been difficult because of its size.
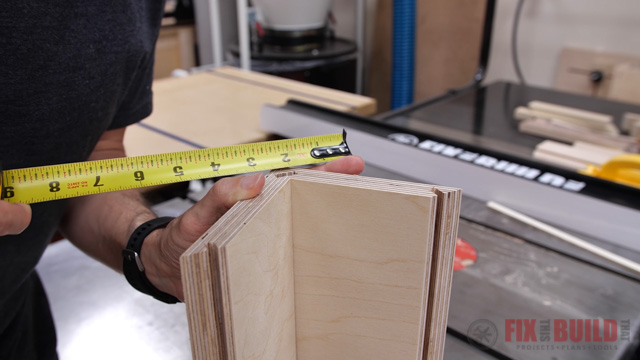
Dry Fit Using Splines
Using the splines you can easily do a dry fit since they hold the sides in place vertically and let you put the top on without needing clamps or tape. Do a dry fit of your assembly first and look for any gaps or other issues.
I marked the splines to size on the box and cut them to length before assembly.
Gluing Up Splines
For the glue I’d recommend using a slower setting glue with an open time of 10 minutes or more. A standard glue might only have 5 minutes open time while an exterior glue or specific slow set glue could be 20 or 30 minutes.
And don’t just squeeze the glue into the spline groove, you want to avoid excess glue squeeze out so give the spline a thin coat of glue and push it in place. If you’ve got tight fitting joints and splines you don’t need a ton of glue.
Clamp Mitered Joints
I used a web clamp to get everything pulled tight. They have clamping pads that wrap around the corner and put pressure on both sides without crushing the corner.
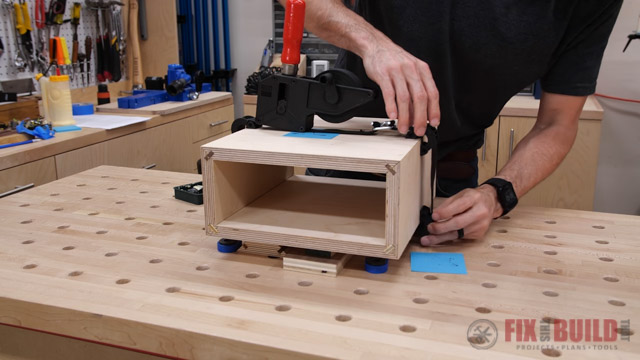
And if you don’t have a web clamp a ratchet strap makes a good stand in or additional helper on large pieces. I also typically add more clamps to pull gaps tight where needed as well.
After glue up you can remove any glue squeeze out and break the edges of your mitered corners being careful not to blow through the plywood veneer.
6. Fixing Gaps in Miter Joints
To fix gaps in the miter joints run a screwdriver along both sides of the joint towards the corner Basically you’re crushing the open gap shut. With plywood you have to be careful so you don’t break off the veneer.
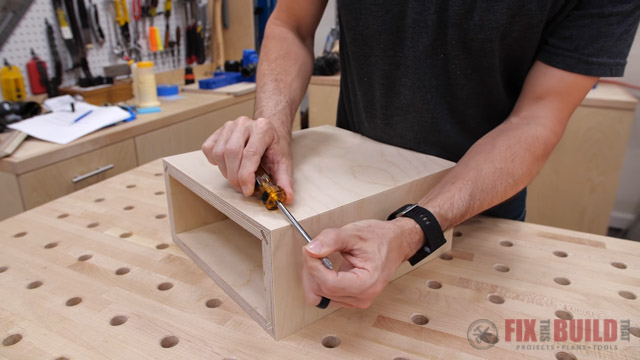
It won’t seal up huge gaps, but it works great on small hairline gaps and you can fill the others with sawdust and glue.
And that’s how I make perfect, strong mitered joints every time! If you want to see how I deal with corner miter joints make sure to check out How To Make a Picture Frame 3 Ways or more Furniture Projects.
Woodcraft provided me with product and/or monetary compensation as a sponsor of this build. All opinions are my own and are not filtered by the sponsor.