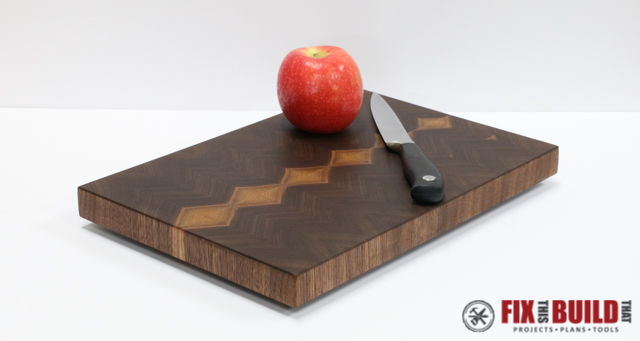
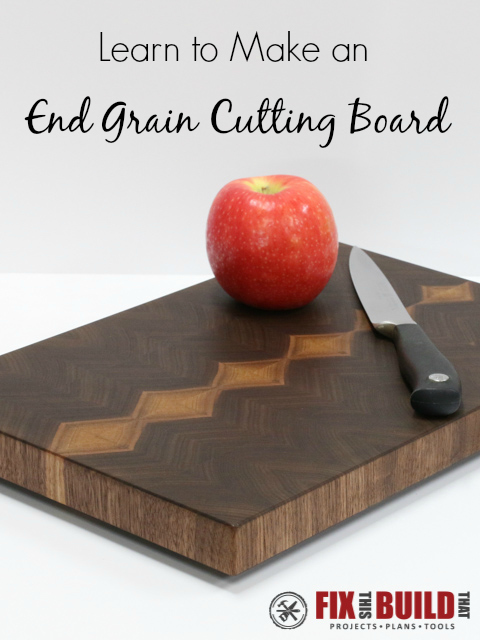
End Grain Cutting Board designs are an awesome upgrade to the normal edge grain cutting board. A few month’s ago I showed you How to Make a Cutting Board from Scrap Wood and I got a great response to it especially over on Instagram and Facebook. One of the questions that kept coming up though was how to make an end grain board and how is that different. Today I’m going to answer those questions give you the end grain cutting board plans you need to make a cutting board with some amazing end grain patterns!
I’ve also update this post with a recent YouTube video I made showing exactly how I made a similar end grain cutting board with a diamond pattern. I used my new 18-36 JET Drum Sander on that one and it was a breeze. I’m proud to have JET on as a sponsor of the channel!
Materials/Supplies
- Various hardwood boards 16″ long 1″ thick
- Mineral Oil
- Mineral Oil and beeswax blend
- Wood Glue
Affiliate links are used on this page. See my disclosure page for info on affiliate programs.
How to Make an End Grain Cutting Board
- Select your cutting board wood
- Glue the end grain blank together
- Cut the strips for the final cutting board design
- Final glue up of the end grain cutting board
- Finish sand and oil the cutting board
1. Select your Wood for the End Grain Cutting Board
The first and probably most important part of making a cutting board is the wood selection. For making end grain cutting boards the grain pattern on the ends of the boards is what will be showing when it’s done. I had a 6′ long piece of walnut that was about 2-1/2″ wide and I cut it into 16″ pieces that were 1-1/4″ thick. Looking at the end grain, I could see these would make an amazing end grain cutting board.
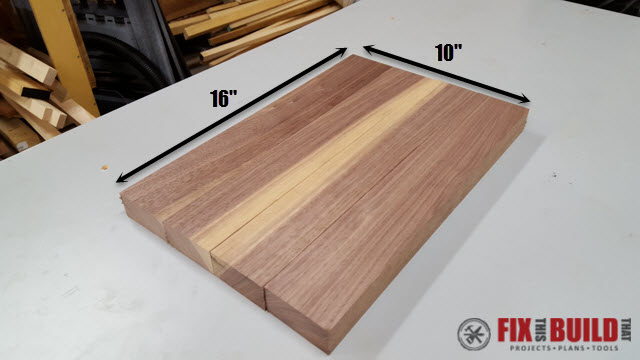
The lighter streaks you see are what’s call the sapwood. This is the wood that is closest to the bark and carries the sap. In walnut the heartwood is dark and the sapwood is light which makes for a great contrast on your end grain cutting board designs.
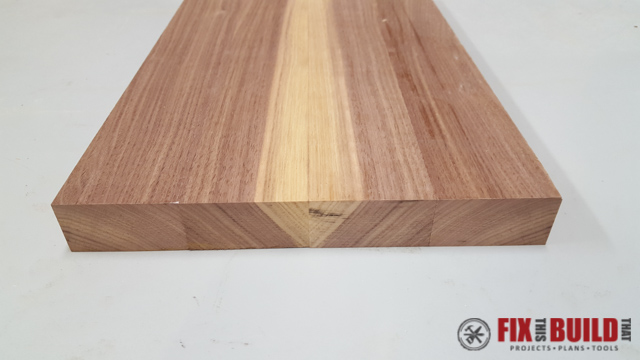
I arranged the boards as you can see above so it resembled a mirror image from the center. I lined the grain direction of the outer boards up with the grain direction of the inner boards so it almost looks like they are just one larger board. The triangle the sapwood made was perfect and you’ll see what it turns into later. You can come up with a ton of awesome designs so move your boards around until you get the end grain cutting patterns you like.
2. Glue Up the End Grain Cutting Board Blank
Joint the edges to make sure you have clean edges ready for glue up (If you don’t have a jointer you can also use a tablesaw). Then glue the boards together using parallel clamps and a water resistant wood glue.
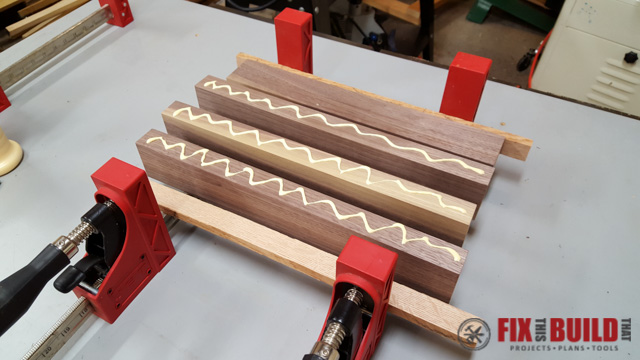
Spread the glue from the squiggly lines evenly before clamping. Squiggly lines is a technical term 🙂 When you clamp the boards together you want to see small beads of glue rise up between the joints. The small oak strips on each end of the glue up help protect the edges of the walnut so you won’t have to sand the cutting board more than you need.
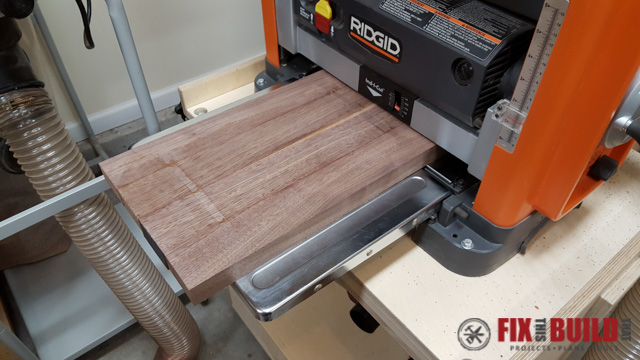
Before putting the top clamp on wipe up the excess glue on the top and bottom of the board with a wet rag. These faces will be planed later so smearing the glue is not an issue.
Let the glue dry over night and then run the glued up blank through the planer on both sides until you have a flat smooth surface to begin cutting the strips for your end grain cutting board.
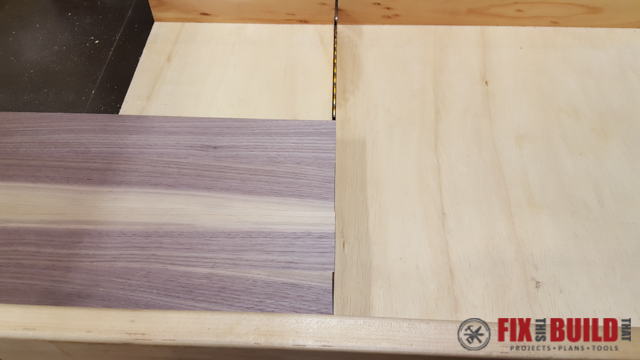
3. Cut Strips for Final End Grain Cutting Board Design
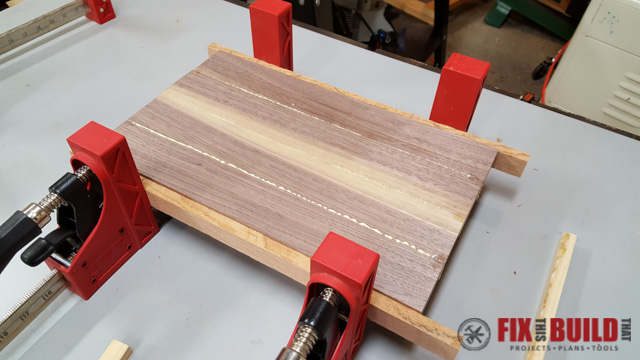
Next you’ll cut the cutting board blank into sections on the tablesaw. This part is very important because the width of the sections will become the height of the end grain cutting board. Start off by trimming one end of the blank so it is clean and square. A tablesaw sled or a very good miter gauge is almost mandatory here.
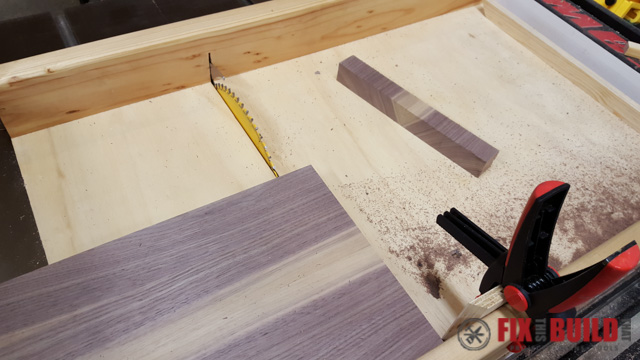
Next set a stop block or other means to make repeatable cuts. I was able to cut 12 sections that were 1-1/4″ wide. You want to cut an even number of sections so factor that in when planning your cuts. And don’t forget to factor for the saw kerf!
4. Final Glue Up of the End Grain Cutting Board
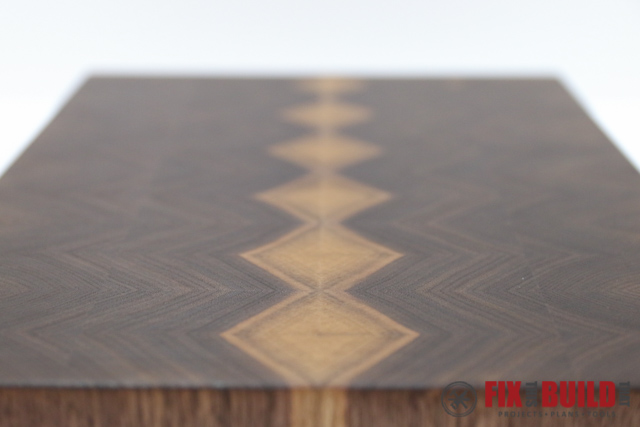
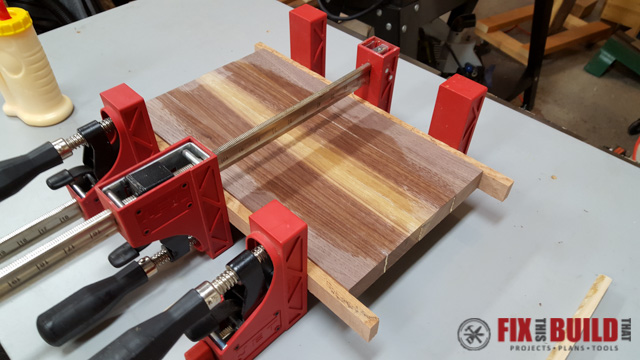
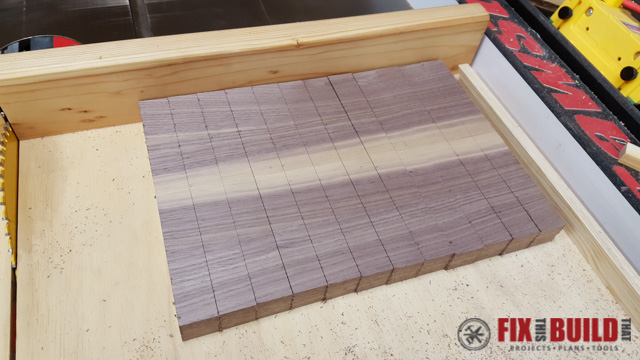
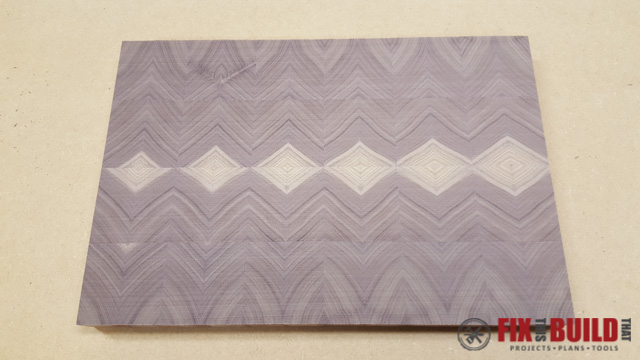
Now comes the fun part, flip all those parts over and match up your perfect end grain cutting board design. For mine I alternated flipping one piece clockwise then the next piece counterclockwise. This gave me the awesome diamond shape you see.
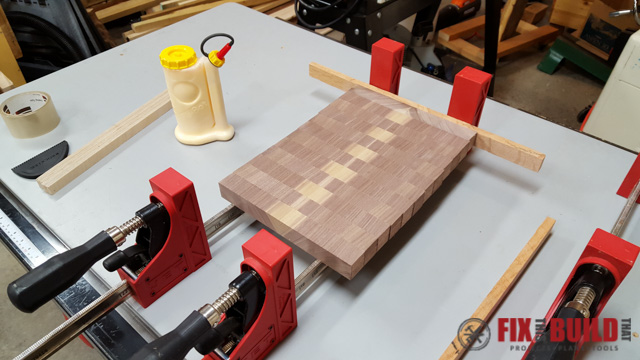
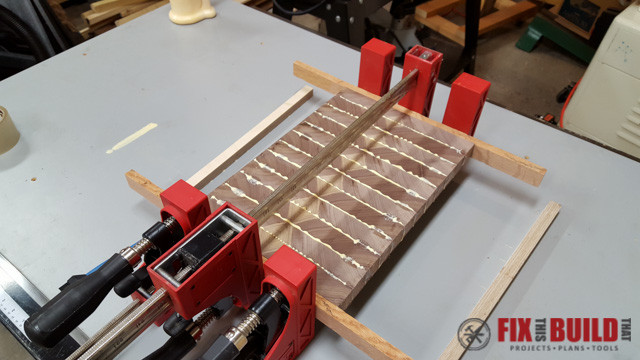
After you have your perfect end grain cutting board pattern, you’ll go through another glue up. Just rotate each piece towards you so all the faces needing glue are facing up. The starter piece won’t get glue as it’s mating piece will get it.Apply glue to all the faces and then clamps them in place and let the blank dry over night.
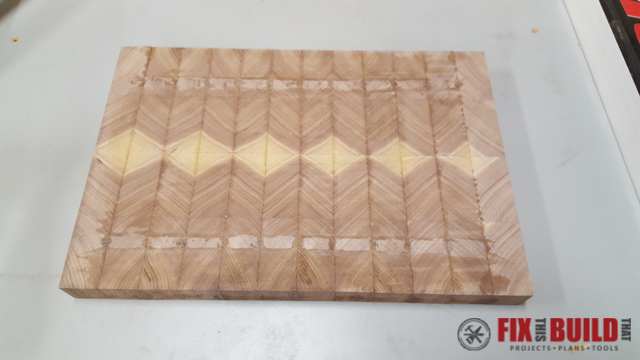
And here is what you’ll be left with. Pretty cool huh!?
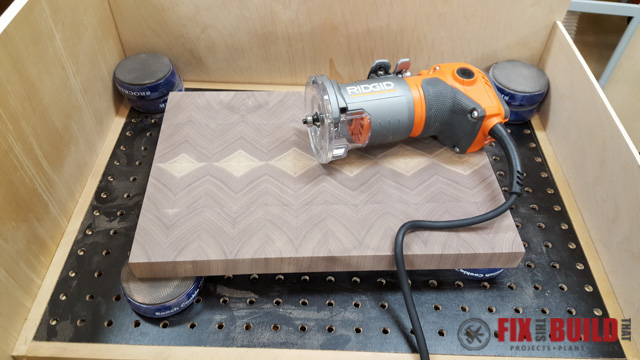
At this point you need to flatten the surface of your end grain cutting board. I’m fortunate enough to have a drum sander (picked up a 9 year old one off Craigslist for cheap) so this is what I use. You can also use a belt sander for this chore or even a random orbital sander.
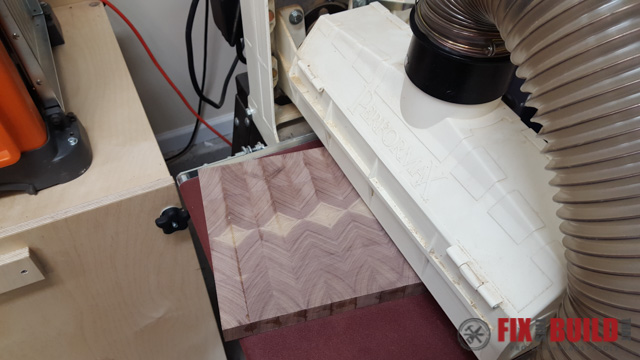
After all the glue and roughness is gone you can really see the end grain cutting board design shine through!
5. Finish Sand and Oil the End Grain Cutting Board
Now that the end grain cutting board is flat you can put your desired edge profile on it with a router. I used a 1/16″ roundover bit for my cutting board.
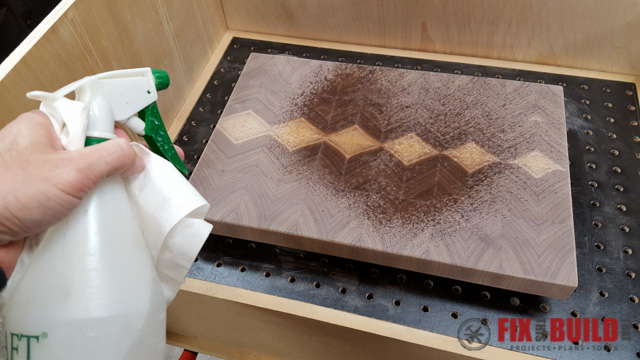
Then sand up through the grits from 80, 100, 150, to 220. After 220 spray the board down with water to raise the grain. Let the board dry and feel the surface and it will be very rough. Sand again with 220 then repeat the wetting and sanding one more time. This will keep your cutting board from being rough after it’s first wash.
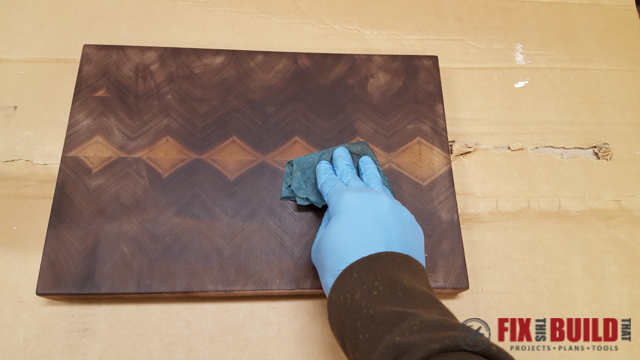
Finish sanding the end grain cutting board with 320 and 400 grit and then you’re ready to put on the finish.
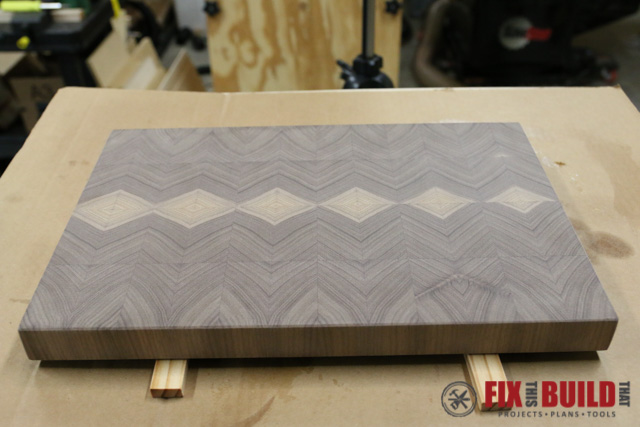
I use straight mineral oil for the first couple coats on my end grain cutting board and then apply a combination of mineral oil and beeswax at the end.
And you just can’t beat that look when it’s all done!
Now you know how to make an end grain cutting board and a cutting board from scrap wood. If you’re a little more adventurous you can also check out how to make a curved cutting board with bent lamination. Put together some awesome creations and post your builds in the comments.
JET Tools provided me with product and/or monetary compensation as a sponsor of this build. All opinions are my own and are not filtered by the sponsor.


That grain looks amazing! The pictures look great too, what camera do you use?
Thanks, Anthony! The process shots are just from my Galaxy S6. The beauty shots on the top are from my Canon 70D
Thanks!
I didn’t think I’d learn much from the step-by-step but some great tips in there! @nimblemill
Thats great to hear, Alan! Thanks for the feedback.
Love the way the board turned out! The pattern is beautiful!
Thanks, Sherry!