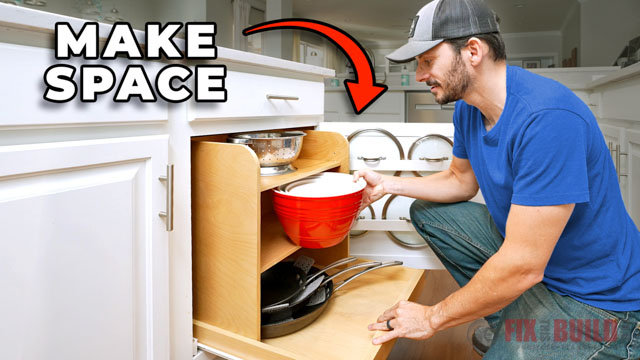
Looking for a smart way to store tools in your garage or workshop? A slatwall storage system may be just what you need. Slat wall storage is modular, easy to install and simple to use. And today I’ll show you exactly how to install it and get your garage wall organized!
Materials/Supplies
- Husky Slatwall Starter Kit
- Husky 4 Panel Slatwall Kit
- 1 inch #8 Screws
- 1/4″ Washers
- 1/8″ Washers
- Plastic tubing
- Scrap Plywood
The Home Depot sponsored this post. Affiliate links are used on this page. See my disclosure page for info on affiliate programs.
How to Install SlatWall Storage
- Locate Wall Studs
- Decide Overall Height
- Attach and Connect SlatWalls
- Insert Hangers
- DIY Custom Hangers
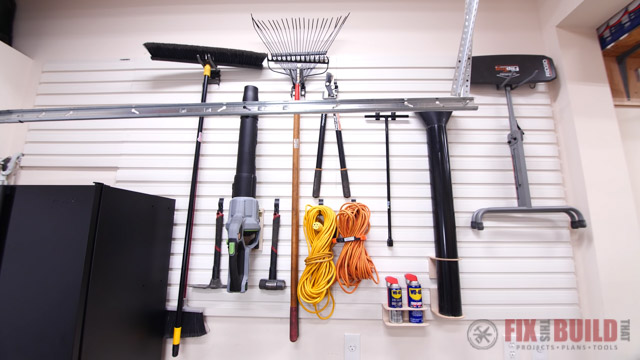
I’ve been organizing my garage shop for years, but one wall still needed some work. This is where I hang yard tools, along with other tools that need to be tucked away. But I wasn’t using all of the space, and I knew it could be so much better.

My solution was to install slatwall storage. I used the Husky Slatwall Panel Kit which I received from Home Depot as a part of their PROspective tool review program.
The beauty of the Husky wall panel system is they’re modular, so they’re easy to customize to exactly what you need. This means you can adjust the size and shape of your slatwall which can allow you to store even more items. The slatwall system is also quick to install and comes with lots of different hangers, which I’ll get into later on.
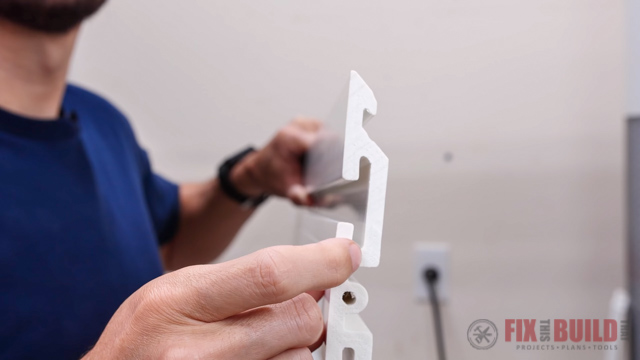
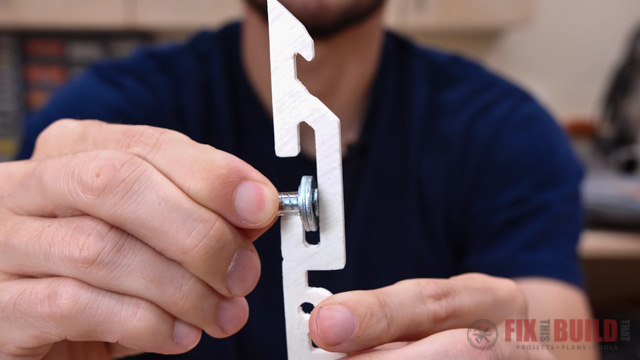
The front of the slatwalls are t-shaped, while the back of the holders have fittings that sit right in the opening.
Locate Wall Studs
The slatwall system will need to be securely attached to your wall, which means they need to be attached to the studs. Finding the studs in your walls shouldn’t be stressful, you can use a stud finder or try my favorite method.
When I need to find a stud I like to use a large, rare earth magnet with a piece of painters tape on it to protect the wall. To find the studs slide the magnet along the wall until the magnet holds. Wherever the magnet holds, it’s being held in place by a screw from the stud.
Decide Height of Slatwall
Before you start attaching your slatwall, you need to decide how high it will go.
In the Husky Slatwall System there’s a top rail and a bottom rail. Together those two pieces are going to add three inches to the total height to your slatwall.
Next I calculated how many inner pieces I needed to use. Each inner piece in this system is six inches tall. I decided to go with nine inner panels. That puts my overall slat wall at fifty seven inches tall, which will take me right above the outlets on my wall. At that height I’ll still be able to hang my yard tools without hitting my X-Carve CNC machine which will be right below.
Attach and Connect Slat Walls
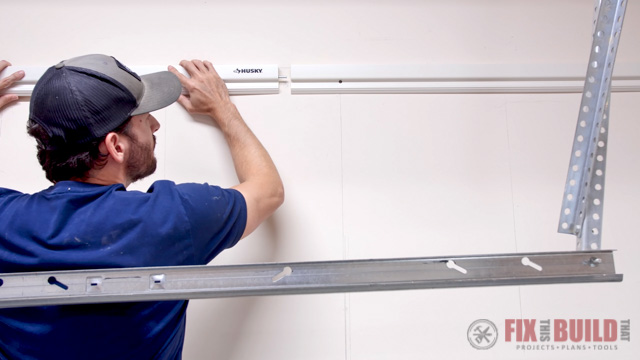
Installing the Top Rail
I started by installing the first section of my top rail. The top rail was drilled into the wall making sure to secure it to a stud on either end. I also made sure that all of the screws were seated all the way into the PVC. When the next panel clicks in, you don’t want it to be hitting the screw heads.
Next I was ready to connect the next section of the top rail. I did this by clipping retention clips into the end of the first section. Then I slide the next section into the other end of the retention clip. This will hold them together while I secure the second section of the top rail. I’ll do this on all of the panels as I move down the wall.
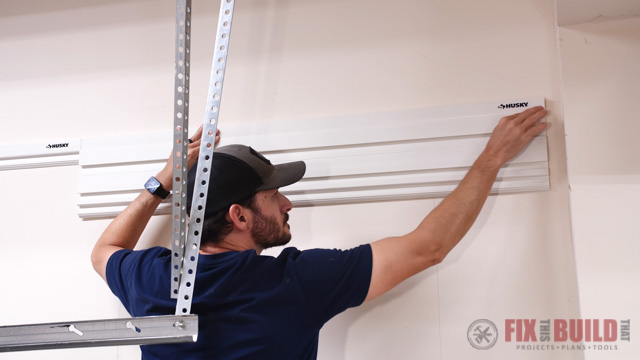
Install Inner Panels
Installing the inner panels is really easy and goes quickly. Start by taking your first inner panel and clicking it into the top rail all the way to the right. Then align the edge of the inner panel with the right edge of the top rail. Finally screw the panel into the studs.
Modify SlatWall Panels
If your slats are too wide to fit your wall, you can always cut them down. I did this with my last two slatwall panels. I wanted to be able to hang long term storage above my cabinet, but the panels were too wide. But since slatwall panels are vinyl you can easily cut them with regular power tools or even a handsaw. By cutting the panels in half, I turned two panels into four smaller panels that will fit my space.
Attach Bottom Rail
The bottom rail covers the bottom of the whole operation. It trims the slatwall system out and makes it look complete. But if you ever want to attach more inner panels, you can just pop the bottom rail off and keep going.
Insert Hangers
Attach Pre-Made Hooks
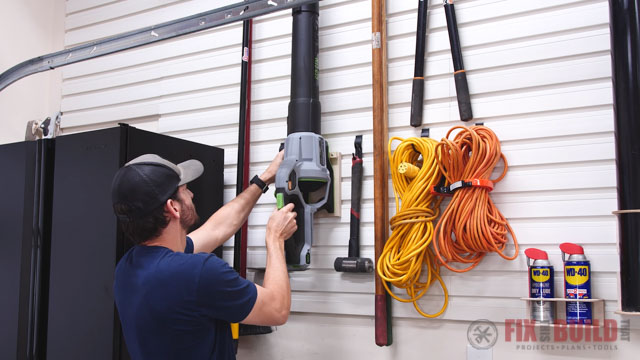
I love that my Husky SlatWall System comes with hooks that are ready to use. It includes many different sized hooks which hold my tools really well. I started hanging my longer and larger items first, and then I filled in the smaller ones.
My wall was already looking so much more organized, but I had a few more tools that I needed to hang. These tools needed a special hook or hanger, which I decided to make myself. 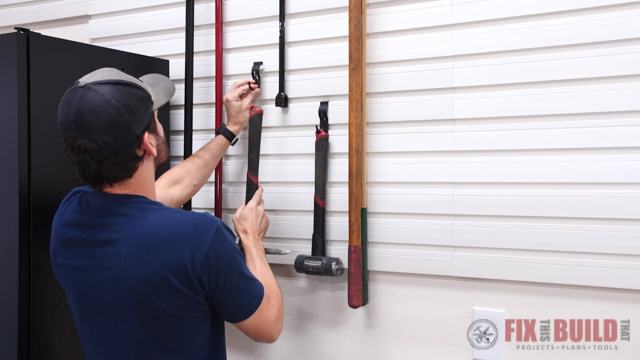
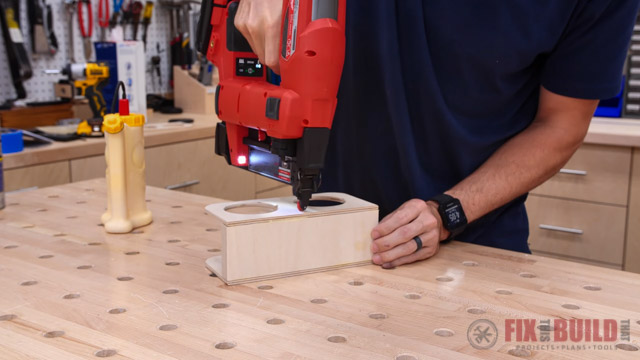
DIY Can Holder
I wanted to store a few cans on my garage slatwall so I decided to make a custom holder. The design I came up with was very simple; a bottom piece that the cans will rest on, a top piece with openings to hold the cans in place and a back piece to connect the two together.
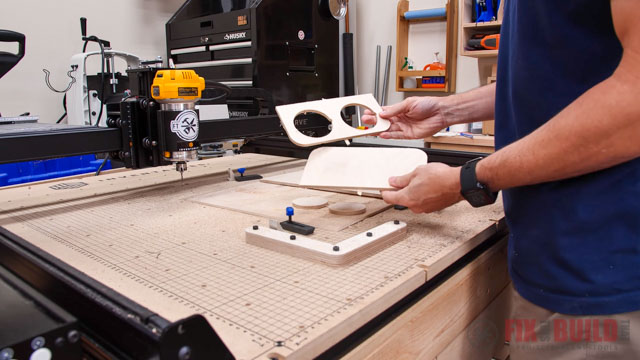
I decided to use my CNC to cut the parts out, but you could easily DIY this holder. Just use a jigsaw to cut out the pieces and a hole saw to cut out the openings. Once you have your parts, glued and nail them together and you’re done.
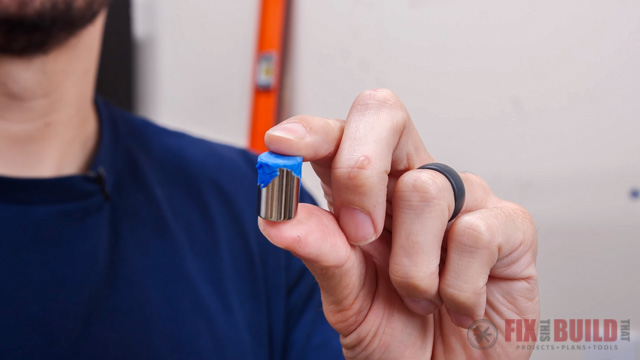
Figuring out how to DIY the hooks to hold everything to the slatwall was a bit trickier. But I got it done with a little help from my friend Johnny from Crafted Workshop. For each hook I used a one inch number eight screw with two ¼” washers, a 1/8″ washer and a little piece of tubing on the back.
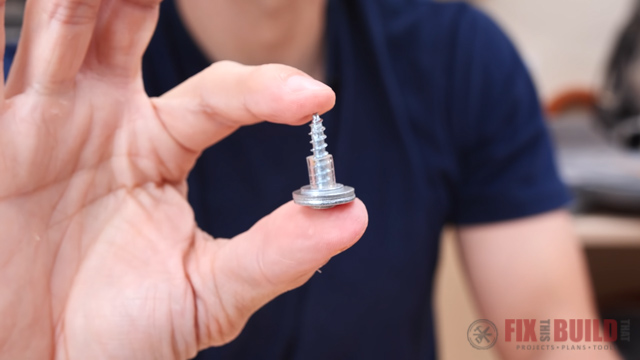
The screw and washers combined were able to slide right into the t shaped openings in the slatwall. The plastic tubing holds the washers in place.
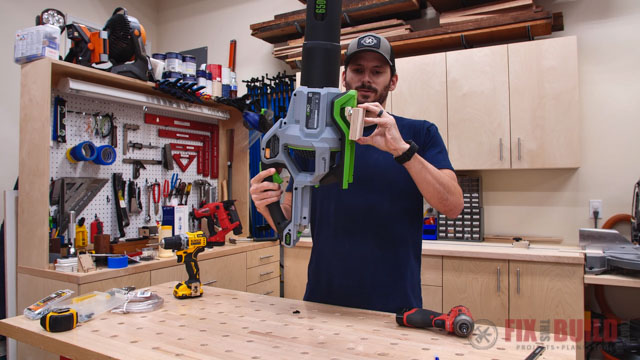
DIY Blower Holder
I use my blower all the time, and I couldn’t find a holder to mount it on the slatwall. So of course I decided to make one myself. This is a a nice little DIY method for anything that you want to hang on your slatwall.
The back of my blower has a hook built in, so I’m building a hanger for it to nest in. To do this I’m using quarter inch plywood and cutting off a piece that will hold it in place. When I attach the piece I’ll add enough washers so that the hook can slide into place. With that done I added the same screws and washers to attach the holder to the slatwall.
That’s how I installed slatwall storage in my garage. I’m really enjoying how clean and organized the stawall turned out. I’m able to fit more tools on it than I did before, and everything has a place to go.
If you’re looking for more garage storage ideas check out my DIY Garage Shelves.
The Home Depot provided me with product and/or monetary compensation as a sponsor of this build. All opinions are my own and are not filtered by the sponsor.