Are you struggling to organize your pots and pans? Today I’m going to show you my simple pot and pan organizer DIY. This easy DIY project will transform your lower cabinets and take advantage of dead space!
This post is sponsored by The Home Depot.
Materials/Supplies
- 1/2″ Plywood- scrap
- Birch Edge Banding
- 5mm Shelf Pins
- Polyurethane
- 18 Gauge Brad Nails
Affiliate links are used on this page. See my disclosure page for info on affiliate programs.
How to build a Pot and Pan Organizer DIY
- Cut sides and back
- Finish the sides
- Assemble parts and add finish
The Problem:
My lower cabinets have a tiny shelf, waaaay in the back that’s pretty much useless. As a result, we don’t use the shelf very much. You have to get on your hands and knees to reach anything on the shelf. Bottom line, it’s not very convenient.
The Solution:
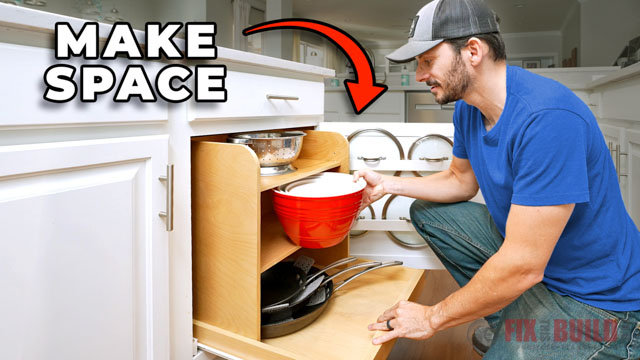
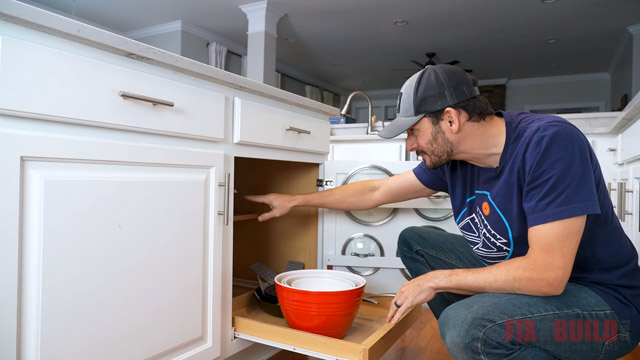
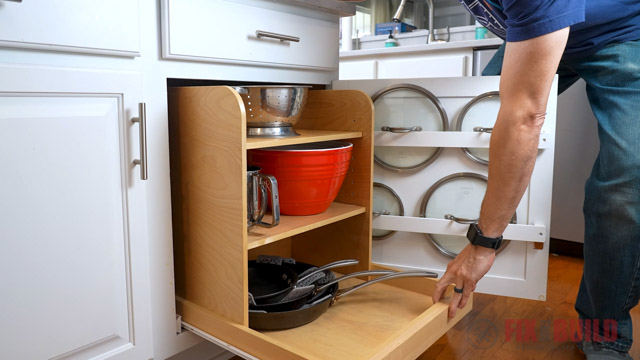
I removed the old shelf, and built a simple insert for my pullout tray. It holds two adjustable shelves and will sit at the back of the pullout tray. Easy right? With built-in shelves right in the pullout tray, I’ll be able to quickly reach everything I store on the shelves.
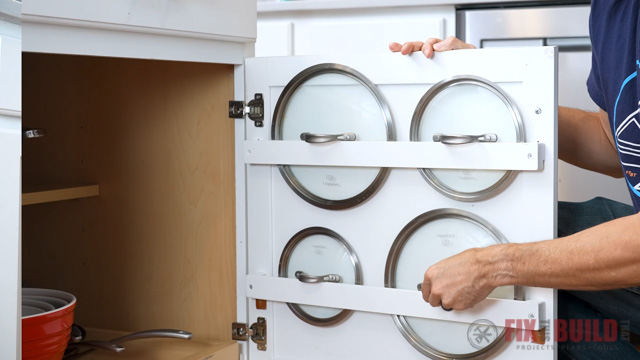
Pot Lid Storage
Having a great place to store your pot lids makes kitchen organization so much better. I have two pot lid storage solutions for you:
- Store your pot lids on the shelves I’m building today. You could even add a third shelf to the DIY Pots and Pans Organizer.
2. Do what I did and build a DIY Pot Lid Holder instead. Three years ago I added it to the inside of my cabinet door and it’s worked out great. That project was one of the best, and easiest DIY projects I’ve ever added to my kitchen.
Pullout Tray
The Pots and Pans Organizer DIY won’t work without a pullout tray installed in your cabinet. If your cabinet doesn’t have one, you can make your own! I go over exactly how to build a cabinet pullout tray in DIY Under Sink Storage.
1. Cut Sides and Back
Cut Side Pieces
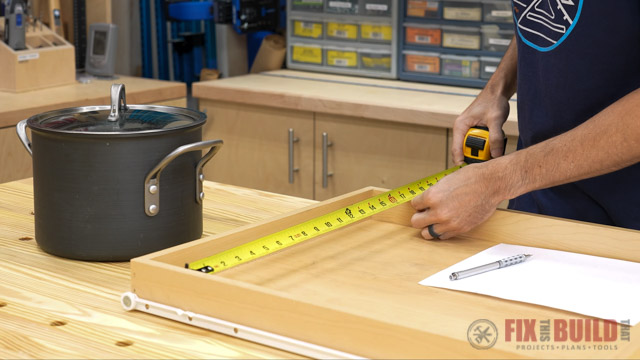
I started by cutting the side pieces for the Pot and Pan Organizer DIY. First I figured out how deep I wanted the insert to be by measuring our biggest pot. Then I cut both sides that wide. I also made sure to cut the side pieces about an inch shorter than the opening of my cabinet.
Cut Back Piece and Shelves
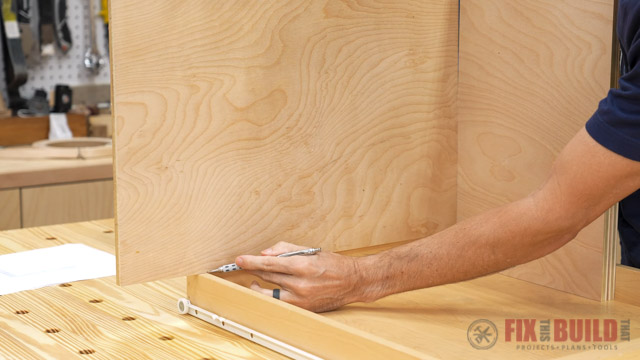
Next I cut the back part the same height as the side pieces. To figure out how wide to cut the back, I used relative measurement. I held both side pieces against one side of the tray, while butting the back piece next to it. Then I marked where the back intersected the inside of the tray. That’s where I made the cut on my table saw.
I used the Diablo 10” 90 tooth Table Saw Blade on my table saw. It really made short work of these cuts. This blade is great because it has 90 teeth which leaves a mirror finish on every cut. The results were clean and crisp.

Diablo also makes the 12” 100 tooth Miter Saw Blade which is basically the companion to the table saw blade. I used it on my miter saw when I built the DIY Double Decker Drawer Organizer. Let me tell you, it got a workout making cut after cut. But I was able to get a polished finish on each cut. I didn’t need to sand or rework anything.

Finally I cut two shelves for the insert. I made sure to cut them about 1/8″ of an inch shorter than the back.
2. Finish the Sides
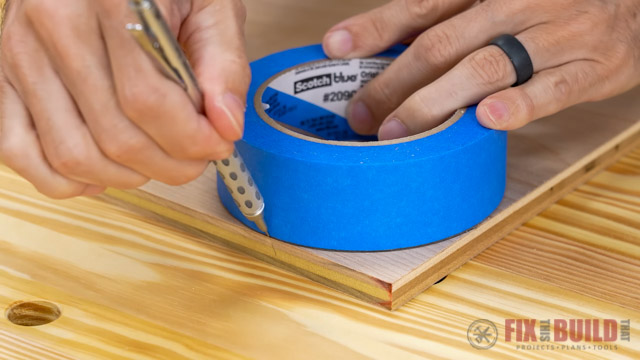
Round Sharp Edges
I decided to round the sharp edge on the front of the insert. This was easy to do by laying out a line with my painters tape and a pencil.
Then I used my jigsaw to cut the curve.
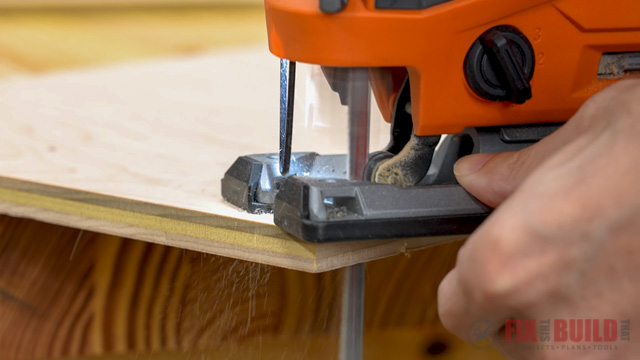
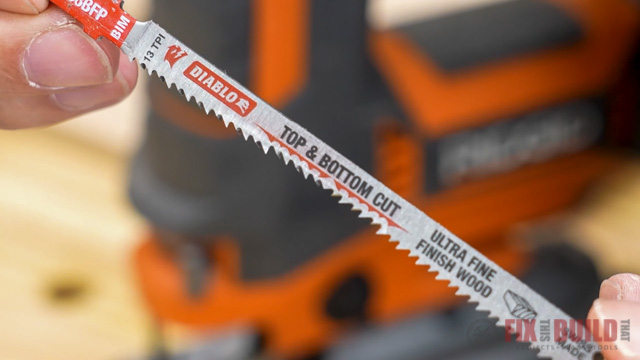
I used the Diablo 13 tpi Ultra Fine Jig Saw Blade in my jigsaw. This blade has specially designed teeth that go in both directions to help prevent tear out. The cut quality was nice and smooth, I had no tear out at all.
Add Edge Banding
Adding edge banding to your DIY pots and pans organizer is a great way to give it a polished look. I used iron-on edge banding in a birch veneer. The edge banding comes with little dots of glue on the back which makes it easy to apply.
Start by laying it right on the edge of the plywood and heat it up with an iron.
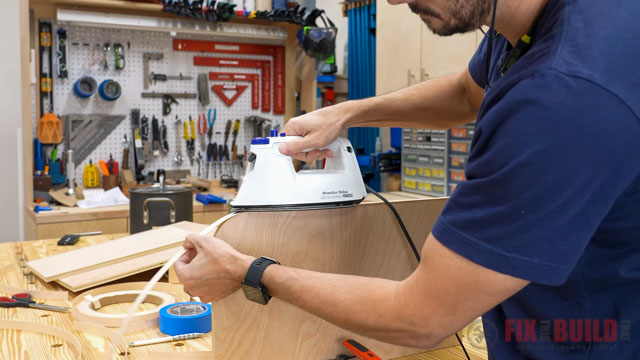
While the edge banding is still warm use a scrap of wood to press it into the edge of the plywood. Once it’s completely cool use a chisel or razor blade to trim off the edges.
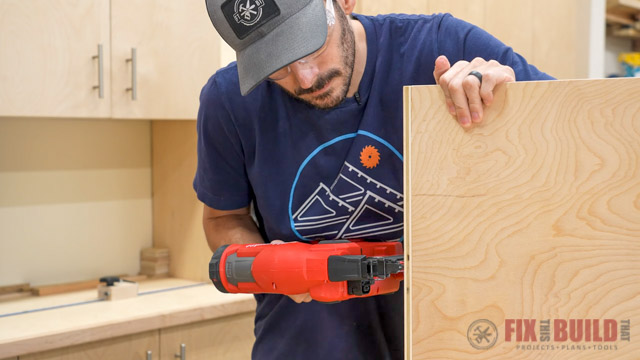
3. Assemble and Finish Pot and Pan Organizer DIY
To assemble the insert I’m kept it simple with glue and 18 gauge Brad nails. I was tempted to add pocket holes, but with the material only being 1/2″ thick that would be risky.
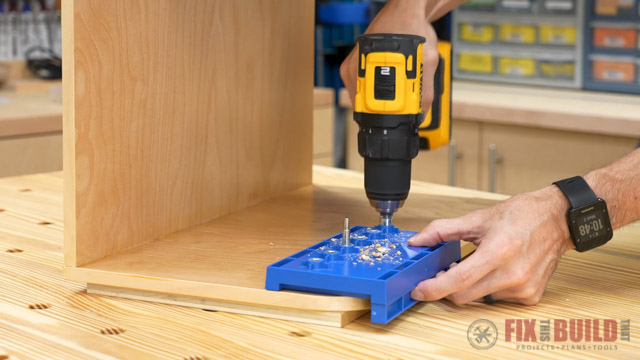
Prep and Finish
Next I filled all of the nail holes with wood putty, then sanded them down once dry. Then I added a couple of coats of polyurethane for protection. Finally I drilled in shelf pins holes using a jig.
Add to pull out tray
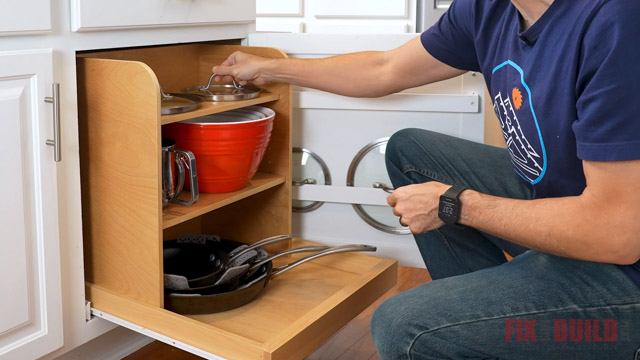
Once the shelf pins were added to the insert, I tested it in the pullout tray. It fit like a glove!

Finally I put the pullout tray back in the cabinet. Then I loaded it up with the insert, complete with both shelves. It looked great! I loaded my pots and pans in the tray, and was able to store frequently used items on the shelves.
And that’s how I made my DIY Pots and Pans Organizer! Check out more of my DIY Kitchen Organization Projects for great ideas.
The Home Depot provided me with product and/or monetary compensation as a sponsor of this build. All opinions are my own and are not filtered by the sponsor.