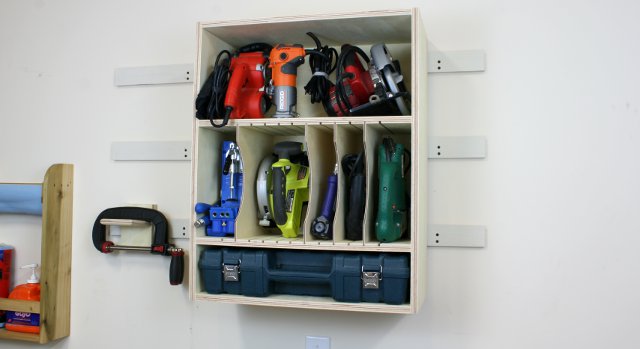
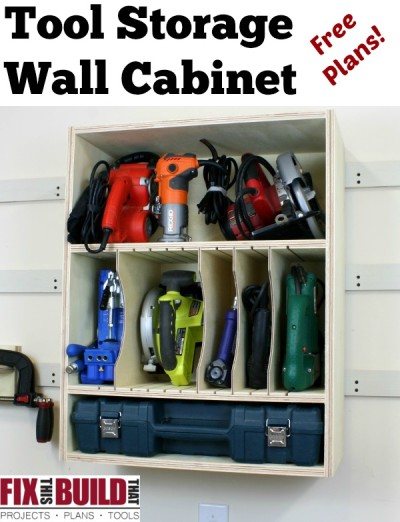
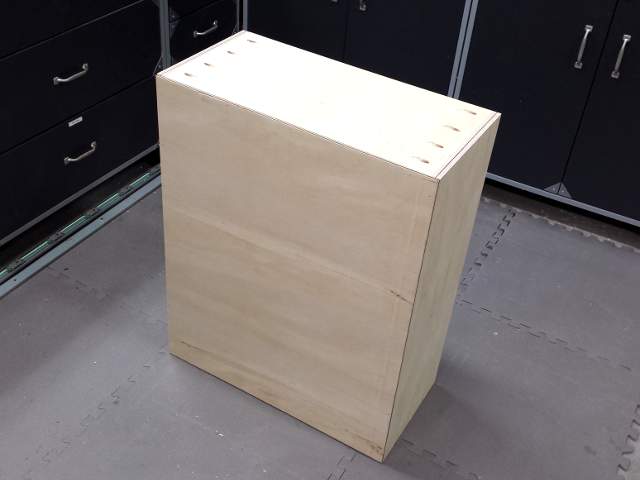
This Tool Storage Wall Cabinet is going to help you get all those handheld power tools, nail guns, and small jigs organized! It’s got flexibility with movable dividers in the center shelf to allow for customization to your specific tools.
Best of all, it’s super easy to build and can be made out of just a half sheet of 3/4″ and 1/4″ plywood! The whole thing is assembled with pocket screws for ease of building and can be built built with just a few basic tools. The cabinet measures 30″ tall, 24″ wide and 11-1/2″ deep.
Here is what I used to build this project:
Affiliate links are used on this page. See my disclosure page for info on affiliate programs.
Tools
- Kreg Jig K4 Master System
- Kreg Right Angle Clamp
- Tablesaw (or circular saw)
- Bandsaw (or Jigsaw)
- Oscillating Spindle Sander (or hand sand)
- Cordless Drill
- 18ga Brad Nailer
Materials/Supplies
- 48″ x 48″ piece of 3/4″ plywood
- 48″ x 48″ piece of 1/4″ plywood
- 14″ x 1 3/4″ x 3/4″ piece of walnut
- 1 1/4″ Pocket Hole Screws
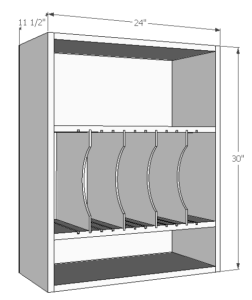

The first step is to cut the 2 sides and 4 shelves from the 3/4″ plywood. Cut the 4’x4′ sheet at 22-1/2″ to define the width of the shelves. This cut should be done with the direction of the grain. The offcut piece should then be crosscut (against the grain) at 30″. This will define the height of the sides. Now set your tablesaw or circular saw guide to 11-1/2″ and cut the shelves and sides to size. You’ll be left with 30″ x 11-1/2″ sides and 22″-1/2″ x 11-1/2″ shelves.
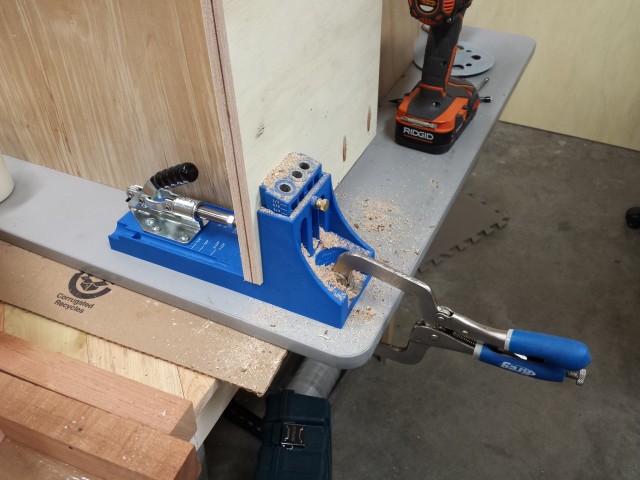
Now grab your favorite pocket hole jig (mine is the Kreg Jig K4) and drill pocket holes in the non-show side of each shelf. I put 4 in each end which makes this cabinet solid as a tank when assembled. Space the pocket holes near the edges 1-1/2″ from the edge and evenly space the 2 inner holes.
Now it’s time to cut the grooves for the moveable dividers. The 2nd and 3rd shelf will get 12 matching grooves. The grooves will be on the non-show side of the 3rd shelf and the show side of the 2nd. The grooves should be about 1/4″ wide (sized to your plywood) and 1/4″ deep. To center them on the shelf start the first groove 2-7/8″ from the edge then space the start of each subsequent groove 1-1/2″ from the start of the one before it.
Whether cutting the grooves with a tablesaw or circular saw you will likely need to make 2 passes for each groove, moving the 2nd pass over enough so the groove width matches the plywood. My advice here is to make the 1st pass on both pieces then make your fence/guide adjustment and made the 2nd pass on both pieces. This will keep everything lined up. When done you should be able to flip the pieces over and have them line up perfectly.
Quick Tip: Use a scrap piece (small piece in first pic) to back up your work to keep the wood fibers from blowing out when the blade exits.
Next you can assemble the cabinet carcass (Told you this thing was easy to build!). Start with the bottom shelf and work up the piece. Laying the cabinet on its back will ensure you have a flat back to attach the 1/4″ ply to. Use a square and the Kreg Right Angle Clamp to attach the bottom to both sides. The pocket holes should be facing down on all shelves but the top shelf.
Work your way up the cabinet marking the position of the shelves, clamping them in place, and attaching them with 1-1/4″ pocket hole screws. The bottom opening is 5-1/4″ tall, the opening for the dividers is 11-3/4″ tall.
Flip the cabinet around to attach the top flush with the top of the sides. The pocket holes should go to the outside on this shelf as well. This will create a 10″ opening at the top. Sand the edges of the cabinet to break the edge (take the sharp edge off).
Cut the back out of the 1/4″ plywood. Before attaching the back check the cabinet for squareness. You can do this by measuring from one corner on the top to the opposite corner on the bottom. Then measure the other diagonal and compare the numbers. If they match then your cabinet is square. If they don’t then you need to squeeze the long diagonal by applying pressure to the corners. You can do this with your hands, a clamp, or a few well placed blows with a rubber mallet.
Now that the box is square, attach the back with 18ga brad nails.
Next cut the dividers to size, 12-1/4″ x 11-1/2″. Then cut a relief into the dividers that will help get tools in and out. I marked points 2″ from the top and bottom and then used the bottom of a 5 gallon bucket to connect the points and draw the arc. I ganged all the pieces together to cut them at once on the bandsaw. I brad nailed the pieces together in the waste cutoff area instead of using tape. This worked well since I didn’t have to worry about marring up the cutoff.
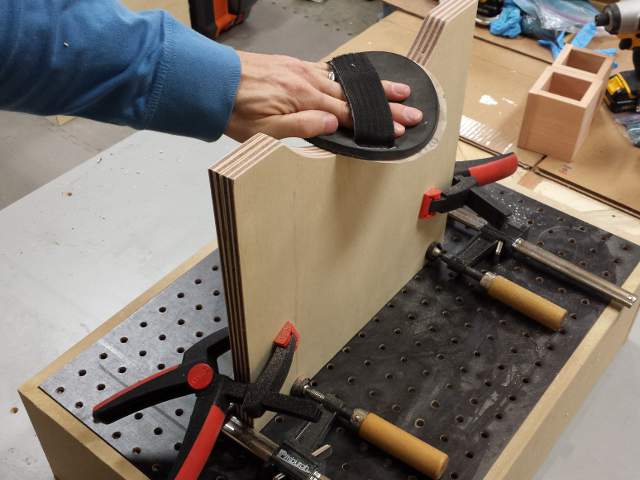
After cutting out the shape you need to sand the profile of the dividers. When the cut on the bandsaw is done the pieces are no longer held together, so I put 2 spring clamps on them to keep them together. To sand the profile I put a f-clamp on the bottom of both sides and used them as supports to keep the ganged pieces standing up so I could sand them.
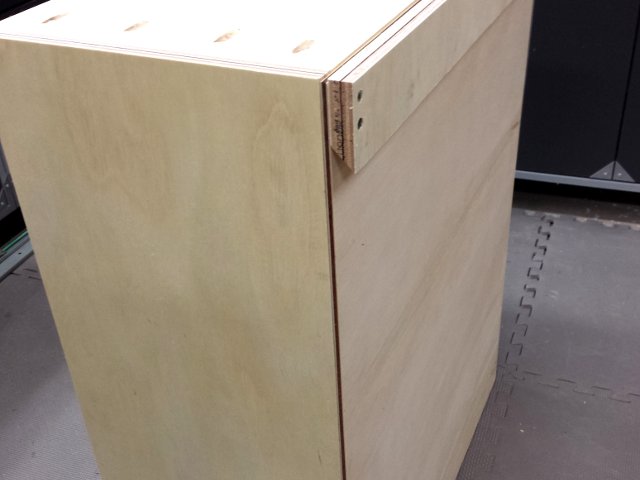
Install the dividers to fit your tools. Cut the cleat and install it on the back of the cabinet with 2″ screws.
Now you are ready to load it up with your swag and put it on the wall!


Hey Brad
I have purchased your blueprints on the 5 DIY Babinets set. I can’t hardly wait to get my plywood and start building. I like the flexibility on how I can change things around, and your blueprints are easy to read. Thanks for the contents on your YouTube Channel. (Great JOB !)
Have a great Day.
Tony Holguin
Thanks, Tony! Enjoy the cabinet builds.
Brad- I was looking for a simple yet highly functional cabinet for all of my power tools.I think I’ll make it the extra 1/2″ deep for a full 12″ and put a door on it. Love the shelf dividers!~~Dolly
Just what I was looking for”simple garage cabinets with well-written plans. Good job! Hope you continue building content on this site.
Thanks, Jim! I sure plan on adding more content all the time!