Over the years we’ve been on a mission to organize our garage. We’ve built DIY Garage Shelves which are great for storing larger items, and the garage has come a long way. But there’s always been one very neglected corner. Our catch-all cabinet for automotive, lawn care and garden supplies has been such an eye sore and is hard to access. We knew we needed to upgrade our garage storage cabinet and that there were some great options from Home Depot.
This post is sponsored by The Home Depot. Affiliate links are used on this page. See my disclosure page for info on affiliate programs.
The Mess Before
We’ve been using an old, plastic two-door storage cabinet to contain our garden and lawn supplies along with items for our cars. It was a catch-all, except we quickly outgrew it. So we took the easy route and started piling everything we could on top of and around it. You know… like you do.
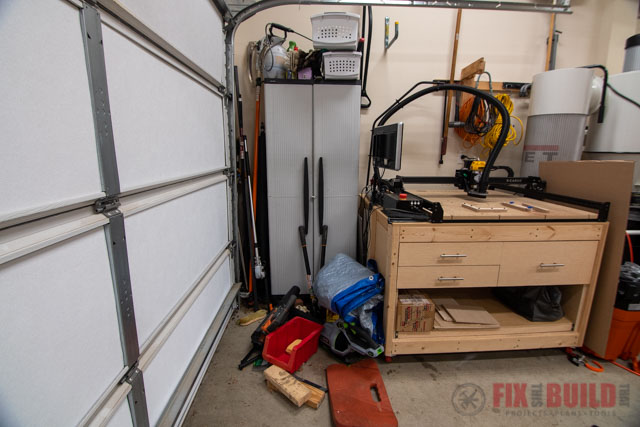
With supplies piled all around, the storage cabinet was even harder to use. Whenever we needed to get something out of the cabinet we had to move the items blocking the doors. This inefficient set-up made it hard to know what we actually had on hand, and you know what that means… buying things we already had. Which is the worst, if you ask me.
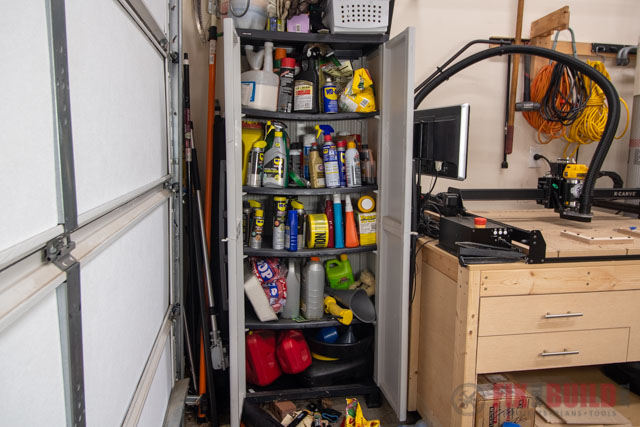
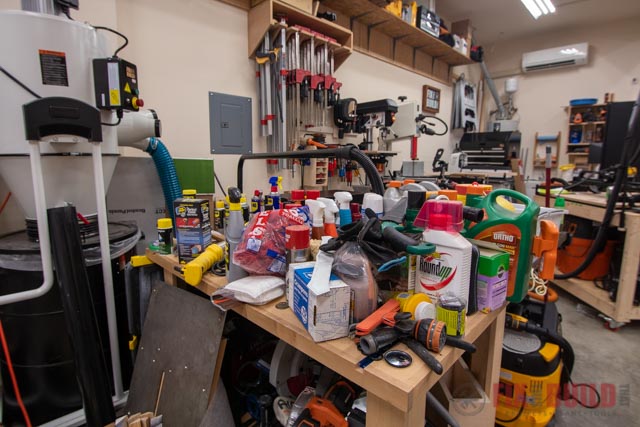
So I pulled EVERYTHING out of the cabinet and put it on the table. And as you can imagine there was plenty of expired or dried up products and a lot of multiples too.
But now we could make a fresh start!
Installing the New Cabinet
I’ve been working with Husky this year as part of the Home Depot ProSpective program and they have an amazing selection of garage storage cabinets. After surfing HomeDepot.com for a while I landed on the Husky Welded 24-Gauge Steel Freestanding Garage Cabinet which was a good fit for the space.
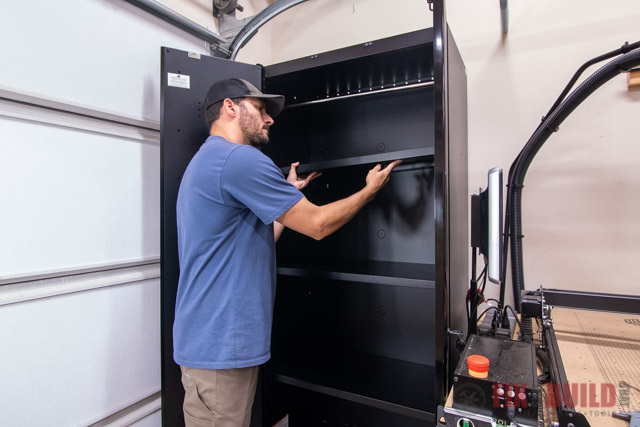
This Husky garage cabinet is 31 inches wide, 75 inches tall and 20 inches deep and it’s made of 24-gauge welded steel. It comes almost fully assembled and you just need to put on the feet and place the shelves. So I placed the storage cabinet on it’s back and screwed the fully-adjustable feet into to the bottom.
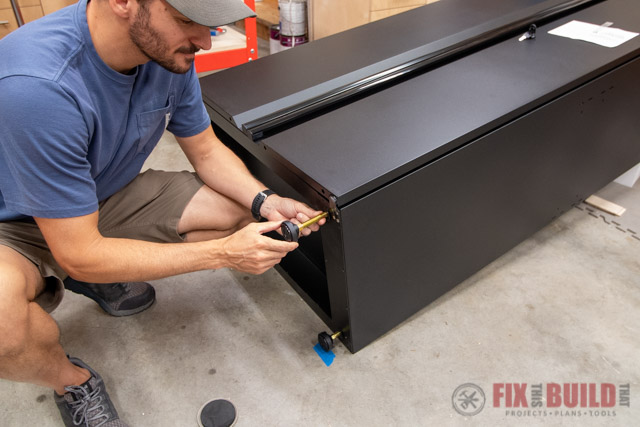
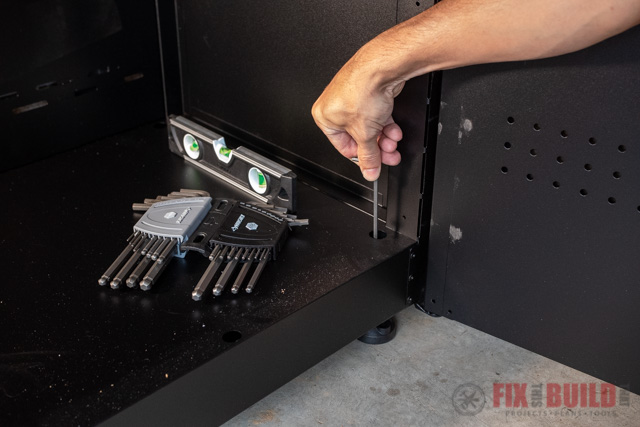
Then I stood the cabinet up and placed it where it was going to go. From there it was easy to reach into the cabinet and level it with a wrench from the Husky Long Arm Hex Key Set. With some minor adjustments and a little patience we were finished.
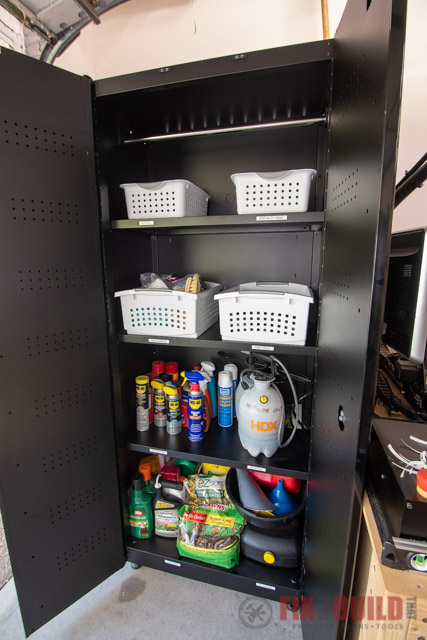
The Husky garage cabinet looked so much better in our space, and it comes with three adjustable shelves and a hanging rod. We aren’t using the hanging rod but it’s a great option if you plan to use the storage cabinet to hold hunting or fishing gear or even uniforms.

It also comes with grommets on the back panels which allow access for power cords. Since we’re just storing garden and lawn supplies in the cabinet we aren’t using this feature, but it’s great to have. And with the extra size and space of this cabinet vs. our old one I won’t have to stack things in front of or on top of it.

Did I mention the cabinet is made of 24-gauge welded steel? It’s solid and study and can hold everything we throw at it. It also looks a lot better than our old wimpy plastic cabinet.
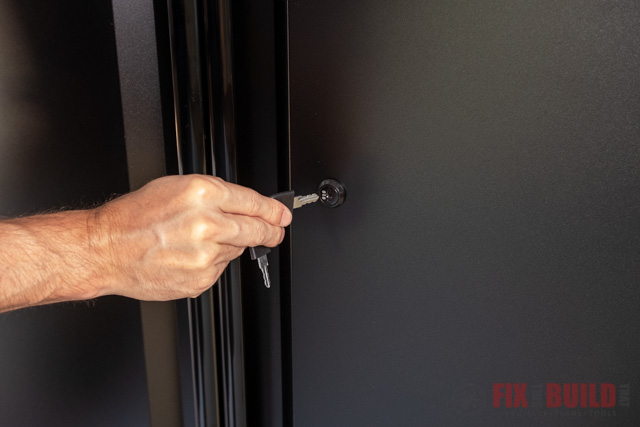
Another feature we also really like about this garage cabinet are the doors. They’re sturdy and are held closed with magnets. They snap shut and don’t open unless we actually pull them open, that’s a nice touch. You can also lock the doors for more security as well which is perfect since we store some yard items we don’t want the kids messing with.
Reorganizing the New Cabinet
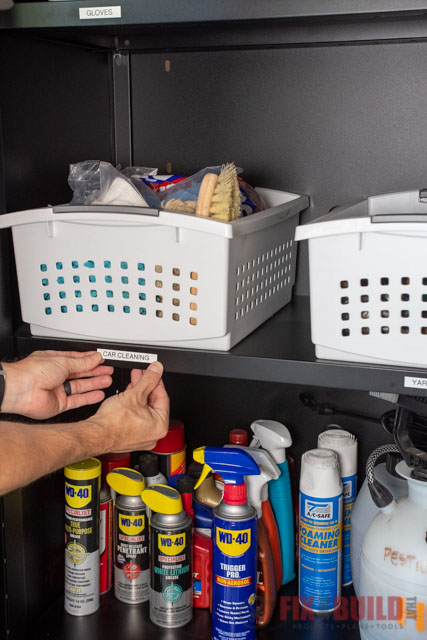
With the cabinet put together we went through all of the items we’ve accumulated over the years and got rid of duplicates and unneeded items. Then we grouped items together and put them in storage bins or placed them on the shelves.
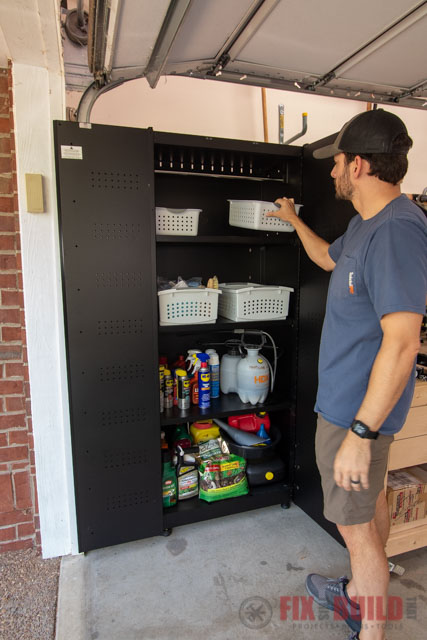
And to make everything easy to find put back when done using it, I used a label maker to identify where the major items should go.
This new Husky cabinet is a major upgrade over the old one that was liable to fall apart at any moment.
And that’s how we upgraded our garage storage cabinet! Not only is everything contained inside the cabinet, it fits all of our items and the cabinet looks really nice. Next up I’ll attack the wall next to the cabinet for some great hanging storage too!
The Home Depot provided me with product and/or monetary compensation as a sponsor of this build. All opinions are my own and are not filtered by the sponsor.