*This post is sponsored by The Home Depot
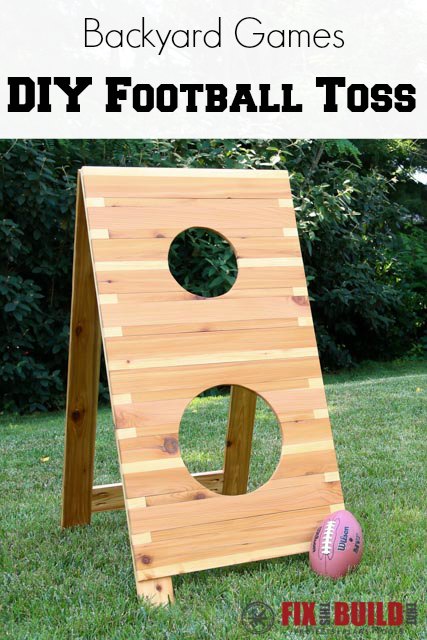
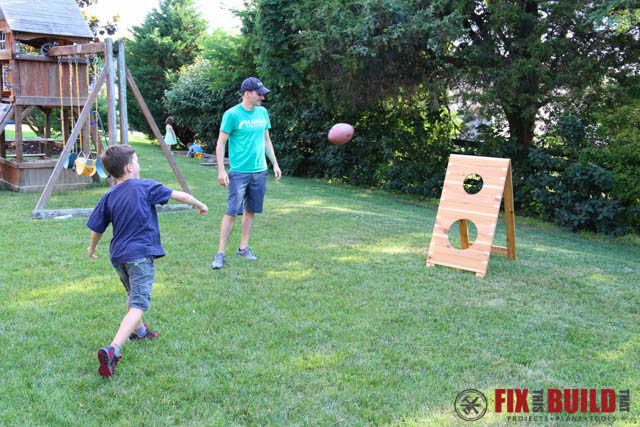
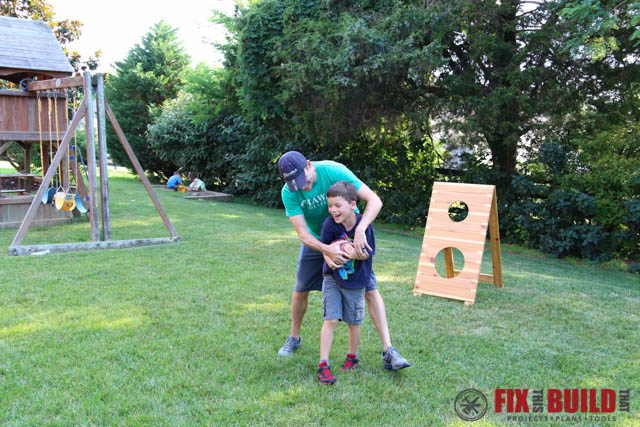
Today I’m going to share the 2nd in my series of #DIYWorkshop projects with The Home Depot. The first one was the DIY Wooden Doormat and the second is a sweet DIY Football Toss Game just in time for Father’s Day fun. This outdoor game will have the whole family having fun and seeing who the best backyard quarterback is!
The best part is that you can learn how to make your own by going to your local Home Depot this weekend! The class is a free demonstration class where you’ll see one being made. While attendees won’t always be able to make and take the project home that day (changes by store), at a minimum you’ll walk away with the skills to recreate the project at home. Keep reading for more details and at the end of the post I’ll share a bunch of other versions with you from other great bloggers to get you inspired.
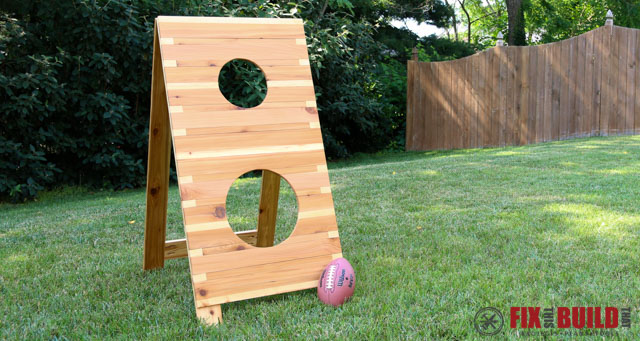
For my version, I made a custom all-cedar version of the football toss game for a classic look that will hold up well outside. It also let me have fun with the natural wood colors to make the yardage lines and hash marks.
If you want some hands on help to build your own then go to your local Home Depot this weekend Saturday June 18 from 10-11:30 local time.
Get all the details on the DIY Father’s Day Football Toss workshop here:
DIY Workshop Info & Registration

Tools Used
- Miter Saw
- Brad Nailer
- Cordless Drill
- Pocket hole jig
- Kreg Face Clamp
- Tablesaw (or circular saw)
- Random Orbital Sander
- Jigsaw
Materials/Supplies
- (4) 6′ 5/8″x5-1/2″ cedar pickets
- (3) 8′ 1×4 cedar boards
- (2) 2-1/2″ utility hinges
- 1-1/4″ Pocket Hole Screws
- 3′ paracord
- (2) 1-3/8″ screw eye
Affiliate links are used on this page. See my disclosure page for info on affiliate programs.
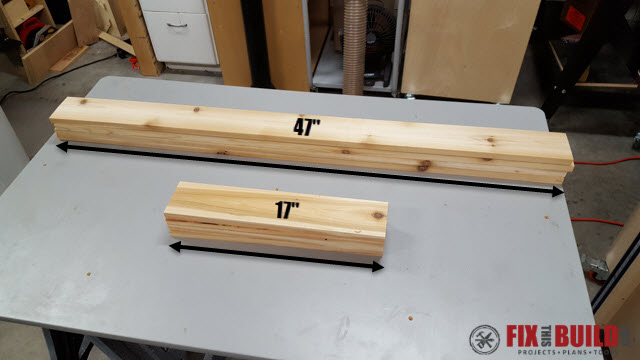
The DIY football toss game is easy to make with just a little prep. Start by cutting the frames from 1×4 cedar boards. Cut two 47″ and two 17″ boards for each frame.
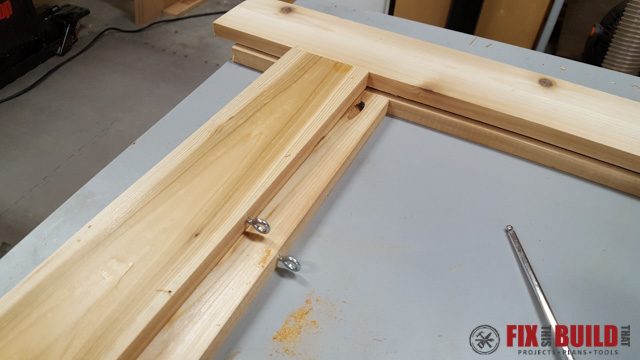
Join the frames with pocket hole joinery and 1-1/4″ pocket screws. The lower rail should be 4″ up from the bottom.
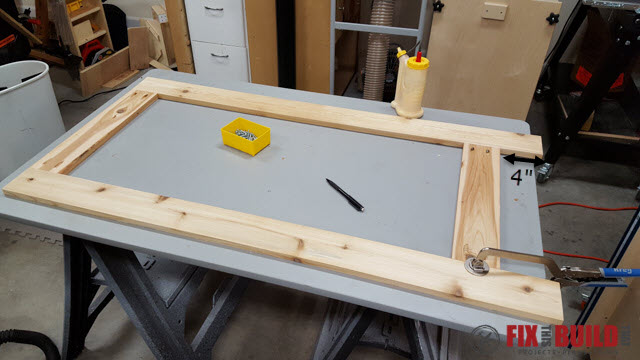
Drill a hole on the top of each lower frame member, centered on the board. Install the screw eyes which will later hold the paracord.
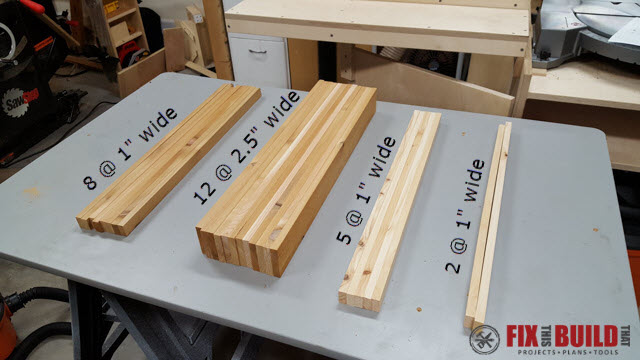
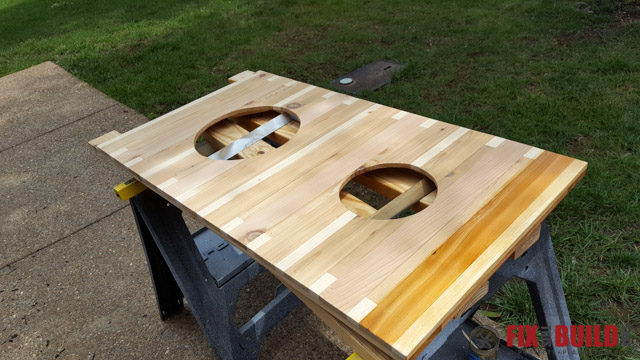
I made the football toss game look like a football field and instead of using stain, I wanted to use natural cedar for it all. So I went to Home Depot and found some cedar pickets of different colors. I used the white boards for the yardage lines and hash marks and it worked out great…the ones up top. Just look through the stack and try to find the really light ones. Note, I bought extra, so you’ll see 3 extra boards than you need.
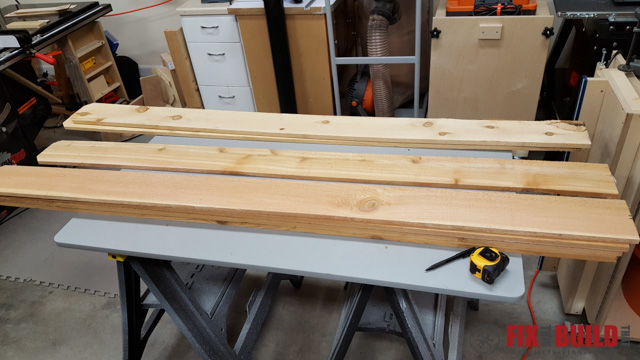
The field alternates between 2-1/2″ boards and 1″ boards. Cut twelve 2-1/2″ wide and eight 1″ wide boards from the dark cedar. Cut seven 1″ wide boards from the light wood, 5 for the yardage lines and 2 for the hash marks. All are 24″ long. Note, I planed the boards down to take off the rough exterior, but you can just sand it smooth after assembly if you don’t have a planer.
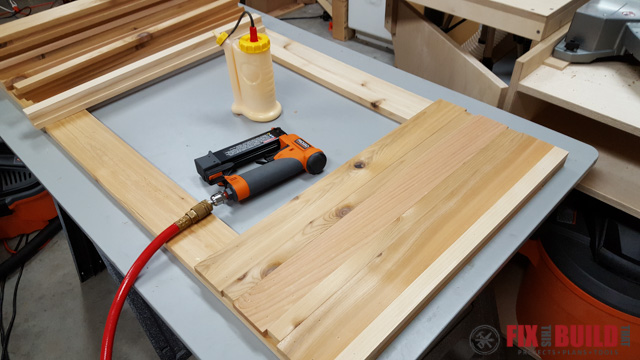
Starting from the top of one frame (frame is turned 180 degrees from last picure), glue and nail a 1″ light strip to the top and then follow with a 2-1/2″ dark strip. Lay down a dark 1″ strip BUT DO NOT NAIL OR GLUE, then add another 2-1/2″ glued and nailed a 1″ spacer NOT NAILED and finally another 2-1/2″ dark strip glued and nailed. This pattern will be repeated 3 more times and finished with a 1″ light strip. Just look at the pictures, it’s way easier to understand 🙂
After attaching all the 2-1/2″ dark strips and full length 1″ light strips, remove the pieces you didn’t glue and nail.
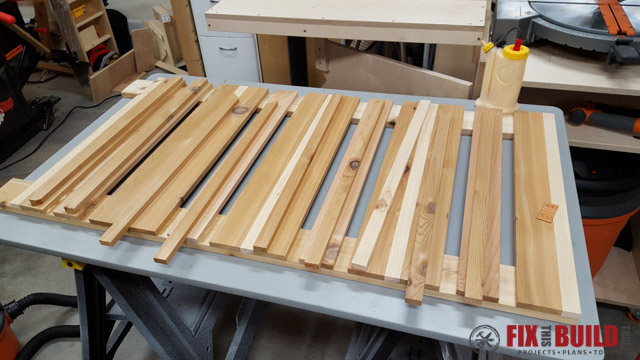
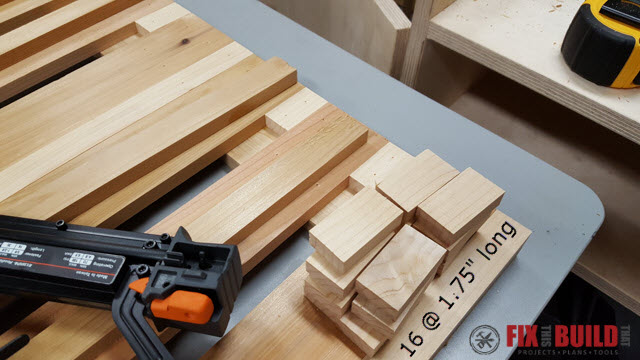
Cut 16 segments of the 1″ white strip to 1-3/4″ long. Attach these to the outer edge of the open spaces with glue and brad nails.
Fill in the remaining open spaces with 21″ pieces of 1″ wide dark cedar. You’ll be left with this.

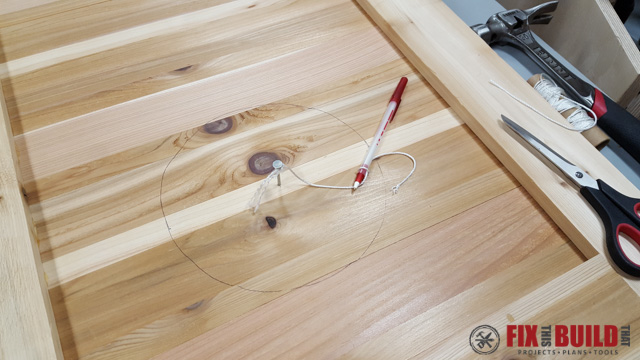
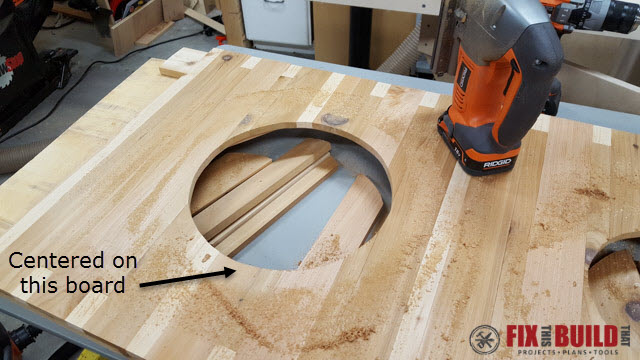
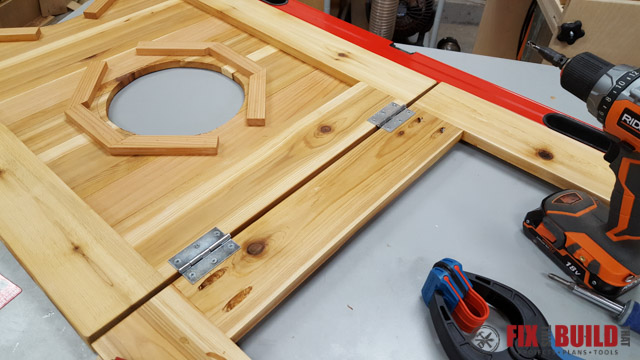
Now let’s cut some holes in that pretty field! The football toss game has two holes for scoring. The top hole is an 8″ diameter and the bottom hole is a 12″ diameter. The top hole is centered on the first full light strip. Use a nail and a pen or pencil set at 4″ to draw the out line of the hole.
 Before cutting out the hole, cut some bracing pieces from 1″ wide leftovers. The idea is to lock the boards together so when you cut the support away they will still hold together. I attached the pieces with 1″ brad nails and glue. Use the circle as reference to where to put the braces.
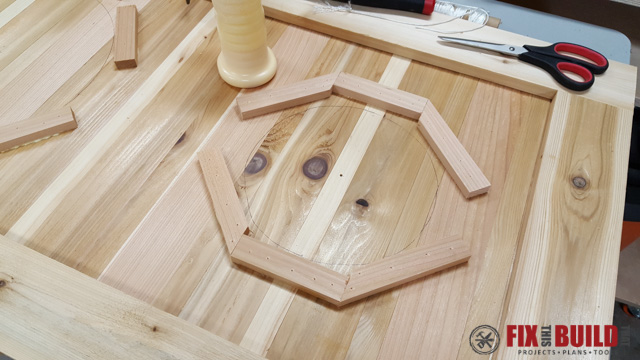
Flip the frame over and layout the same circle on the top of the field. Use a starter hole and then cut out the circle with a jigsaw. Sand or file the hole to it’s final shape.
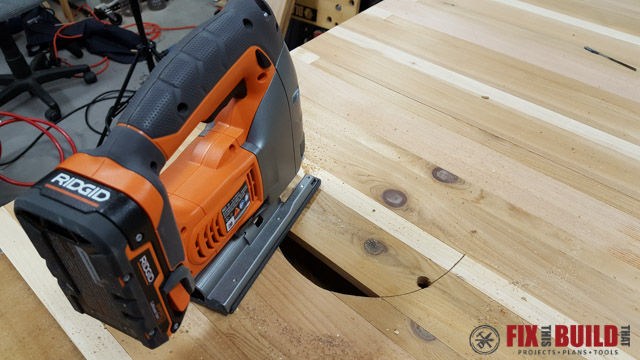
Do the same thing with the lower hole. The lower hole is 12″ and is centered on the 2-1/2″ wide piece just above the 2nd “yard line” from the bottom.
Sand everything to 150 grit and apply an outdoor finish to it. I used a clear spar urethane for my finish. You can see on the first couple boards how much warmth it gives to the cedar.
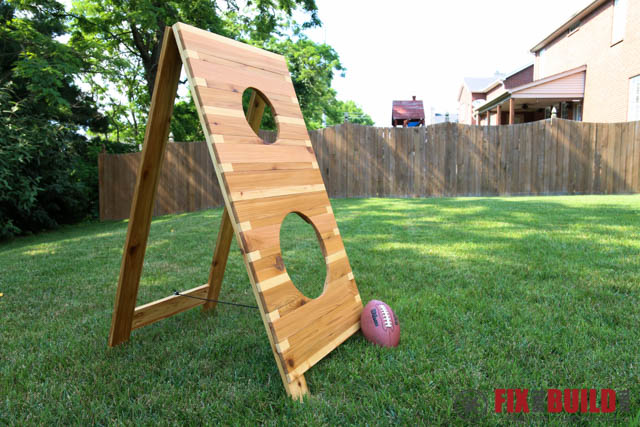
After the finish has cured, install the 2-1/2″ utility hinges to join the frames.
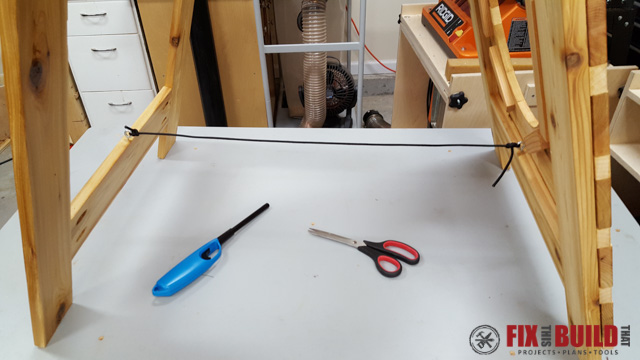
The last step is to install a 3′ length of paracord to keep the football toss game frame from overextending. Tie the cord to each eyelet and seal the frayed ends with a lighter to keep the cord from unraveling.
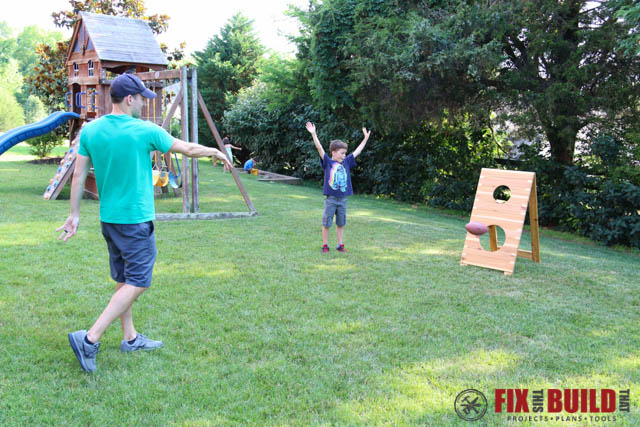
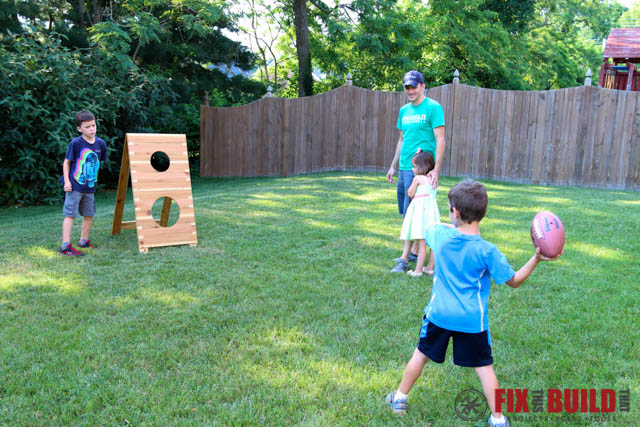
Now take the boards outside and have a blast with your friends and family. The kids really had a fun time testing out the football toss game!
Okay, I told you I would give you some links to other great blogger’s projects. I invited four of my blogging friends a “virtual party” to build this project. You can see their versions here:
Andrew from Field Treasure Designs
Jamin from The Handmade Home
Jamison from Rogue Engineer
John from JohnMalecki.com
On top of that the other Virtual Party leaders also invited some of their friends. You should have a TON of ideas to choose from now!
That’s My Letter / Finding Home Farms / I am a Homemaker
Reality Daydream / The Rugged Rooster
House of Wood / Mom 4 Real / House by Hoff / Her Toolbelt / Life On Virginia Street
Build Basic / Infarrantly Creative / Cherished Bliss / Pneumatic Addict / Here Comes Sun
Remodelando La Casa / Confessions of a Serial Do It Yourself Blog / Our Pinteresting Family / Salvage Sister and Mister / H2O Bungalow
And don’t forget to Register for the Workshop!
And in case you are wondering about these workshops or have never heard of them before here are some details.
- The Home Depot offers Workshops at all of their locations for do-it-yourselfers of all ages and experience levels
- There are three types of Workshops offered – Do-ItYourself (DIY), Do-It-Herself (DIH) and Kids
- Customers can learn how to build decor projects, how to make easy home repsirs and how to operate tools through demonstrations and step-by-step instructions
- Visit workshops.homedepot.com to learn more
I acknowledge that The Home Depot is partnering with me to participate in this Workshops Program (the “Program”). As a part of the Program, I am receiving compensation in the form of products and services, for the purpose of promoting The Home Depot. All expressed opinions and experiences are my own words. My post complies with the Word Of Mouth Marketing Association (WOMMA) Ethics Codes and applicable Federal Trade Commission guidelines.


WOW! It looks so amazing!!! GREAT JOB
Thank you!
What a great look you achieved with cedar boards! I love it!