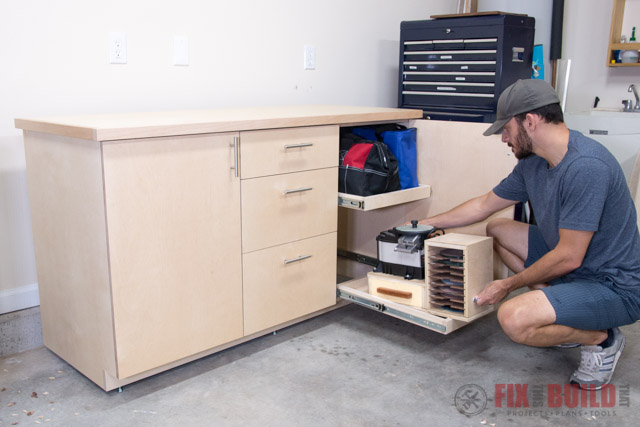
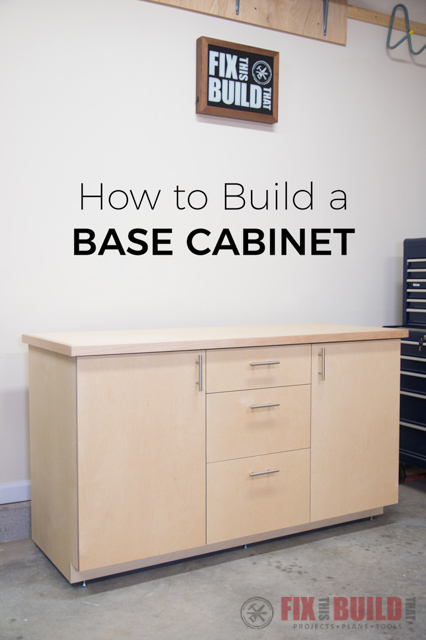
Today I’ll show you how to build a base cabinet with drawers and pull out trays that will help tame your space and get you organized. If you need extra shop storage or garage organization then this shop project is for you! I definitely needed this DIY base cabinet in my shop because my shop storage consisted of a table with a painter’s tarp over it where I hid all my junk.
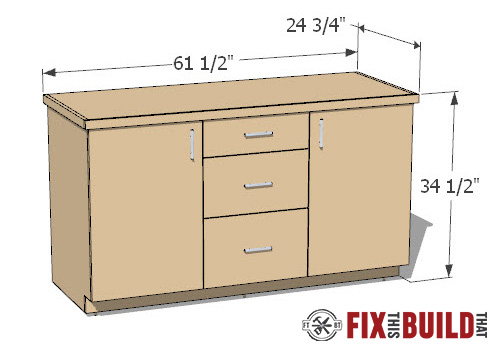
The base cabinet with drawers and pull out trays (not including the top) is made from just two sheets of 3/4″ plywood and another sheet of 1/4″ plywood for the drawer bottoms. The base cabinet assembly goes pretty quickly with the help of several jigs from Kreg Tool. Kreg is sponsoring today’s project and they have very clever and relatively inexpensive jigs that make base cabinet or any shop cabinet projects a breeze. If you want to build your own storage cabinet, I have DIY Base Cabinet Plans available.
Materials/Supplies
- (2) 4’x8′ 3/4″ Plywood
- (1) 4’x8′ 1/4″ Plywood
- (1) 4’x8′ 3/4″ Plywood (for top)
- (7) 22″ Drawer Slides
- (2 pair) 110 degree euro hinges
- (7) drawer/door pulls
- (6) 3/8″ t-nuts
- (6) 3/8″x2″ carriage bolts
- 1-1/4″ pocket screws
- 1-1/4″ wood screws
- Water based Poly
Affiliate links are used on this page. See my disclosure page for info on affiliate programs.

How to Build a Base Cabinet with Drawers
- Assemble the base cabinet carcass
- Build the cabinet drawers
- Install the cabinet drawers
- Add concealed hinge doors
- Install cabinet false drawer fronts and hardware
- Build cabinet countertop
- Install countertop
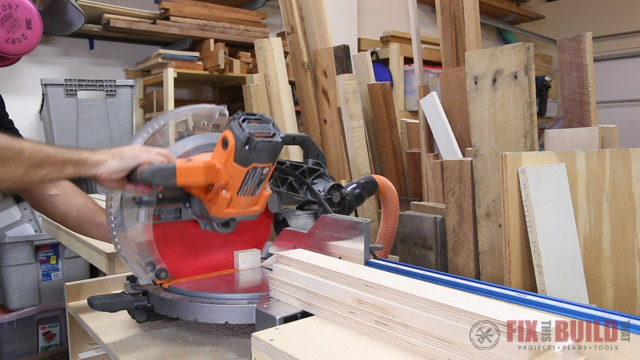
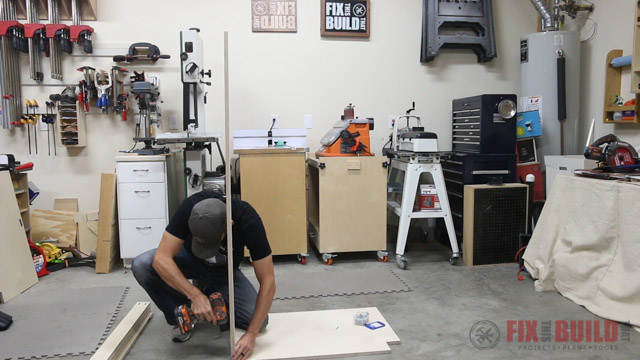
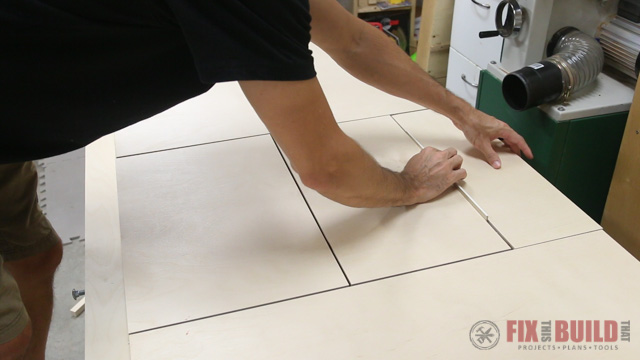
Alright, now let me show you how to build a base cabinet! I started off the project, by breaking down two plywood sheets into smaller sizes for easier handling. I just got this Accu-Cut track from Kreg and it’s an awesome pairing with my cordless circular saw. The nonslip track lets me put it down on the plywood, make my cut and move on quickly. No cords, no clamping, no problem.

I took the sheets to my tablesaw and followed my cut list to cut the sides of the base cabinet to size and rough out most of the other pieces. I cut the parts to a known width and I’ll size them to length later to fit the build as I make it. The full cut list is included in the base cabinet plans to help you minimize waste during cutting and layout.

The sides of the storage cabinet are connected with horizontal supports on the top and bottom. To get all these pieces the same length I clamped them together and gang cut them on the miter saw. The toe kick plate is 1.5” longer than the supports and I cut it to size as well.
Speaking of the toe kick, I cut notches on the bottom of each base cabinet side to accept the toe kick plate. I used a jigsaw to cut the recesses out, just try to keep as straight of a line as you can on the side the toe kick plate will reference.

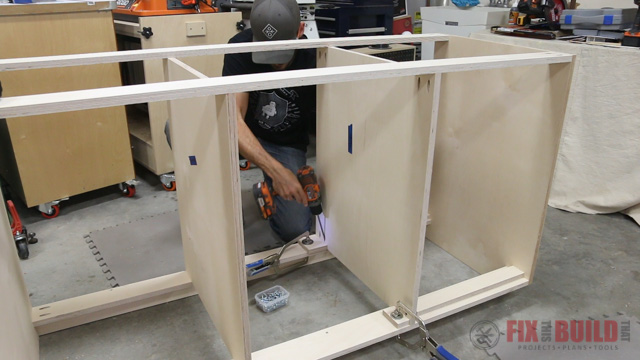
1. Assemble the Base Cabinet Carcass
All the horizontal supports will be attached to the sides using pocket screws so I drilled two pocket holes on the ends of each piece. I highly recommend using the dust attachment for the K4 pocket hole jig as it captures the chips coming out and almost eliminates clean up time.
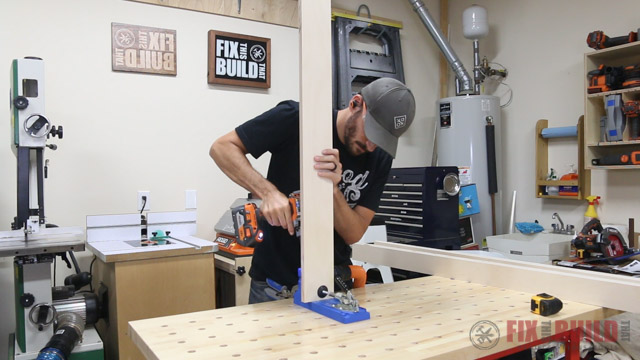
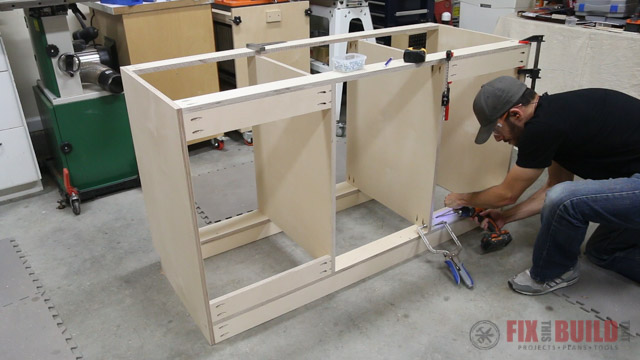
To attach the supports I laid one side down on the floor and began attaching the pieces vertically. After I had the top and lower back support in place I turned the pieces upright and attached the other side to the DIY base cabinet.
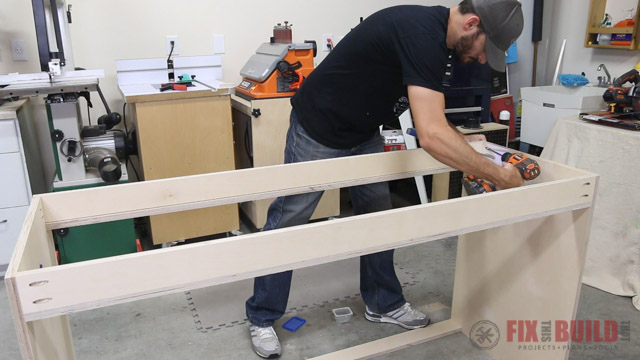
Because I’ll have drawers or pull outs all across the cabinet I didn’t use a solid bottom panel. The lower horizontal supports are screwed into another support piece turned on edge which will carry the weight of the cabinet. This setup shores up the lower supports and gives a place to attach the center dividers which will be added later. I worked my way around the base cabinet flipping and moving it to attach all the lower supports as well as the toe kick plate which is actually a structural piece.
With the frame of the base cabinet established I moved on to cutting the pull out trays which will be on both ends of the shop cabinet. I setup the stop track on my mobile miter saw stand and cut all the pieces to size for the four pull out trays.
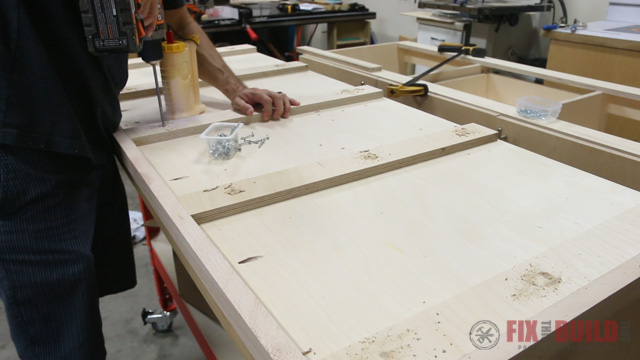
Next I cut the cabinet dividers to size on the tablesaw from the sheets I had cut to width earlier. Each divider is attached to the upper and lower horizontal supports with pocket screws and gets pocket holes on all four corners.
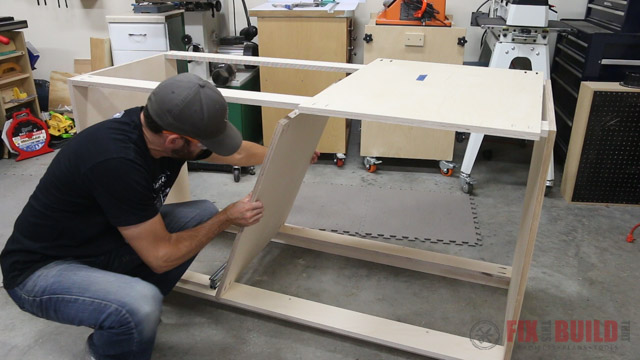
To position the base cabinet dividers I used the pullout drawer fronts and the drawer slides as spacers to get the exact placement. Now honestly this was over kill and me just being over analytical me. You can just measure your pull out drawer front and add 1” and it will go much faster since the slides have some play and flex to them. I attached the dividers with screws then measured for the center drawer widths.
2. Build the Cabinet Drawers
I cut the base cabinet drawers to size base on the dividers. With the varying thickness of plywoods and possible error in measurements you could easily have a bad fit if you cut the pieces in advance.

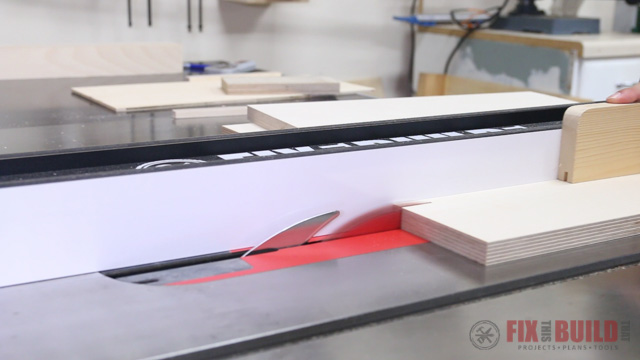
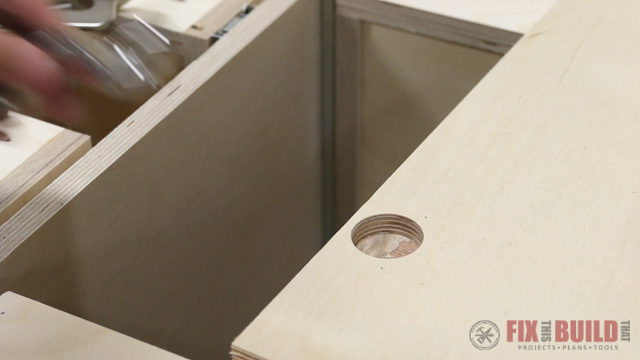
With all the base cabinet drawers and pull out trays cut to size, I took them to the tablesaw to cut grooves for the bottom panel. I used a similar method as I do with most of my drawers, first cutting a full kerf ⅛” groove ¼” up from the bottom then moving the fence over and making another pass to size the groove to my ¼” plywood.
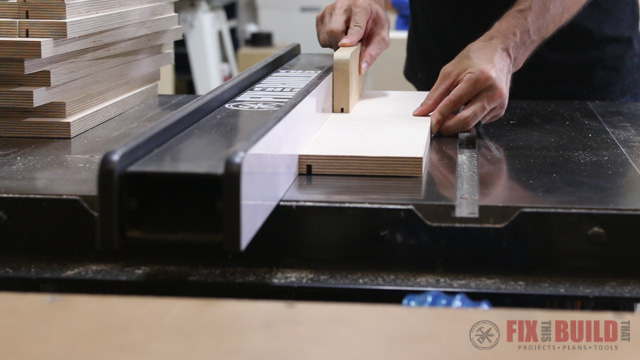
I raised the blade and cut the bottom of the back pieces off so I can slide the panel in after assembly.
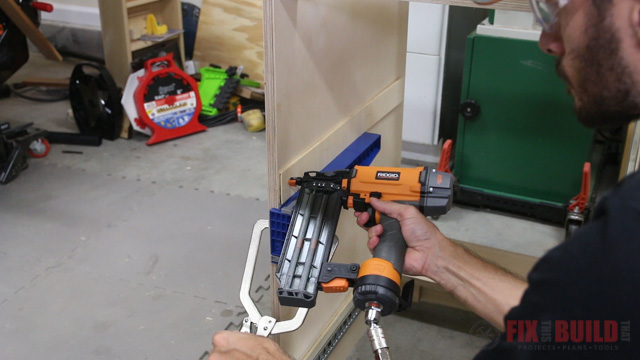
The base cabinet pull out trays go together really easily. I just squared them up and used glue and brad nails to join them. I assembled them upside down to make sure that all the grooves were aligned and even with the underside of the back piece.
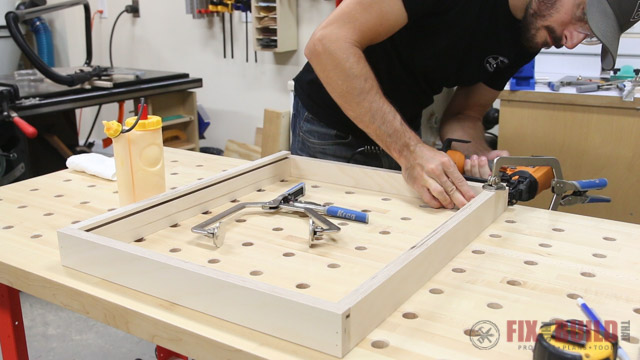
Since the base cabinet drawers will have a false front I used pocket holes on the front and back pieces for joinery. A pair of clamps holding the drawers tight makes assembly a breeze.
All the trays and drawers get a ¼” bottom panel. I cut the panels to size then slid them into the grooves I cut earlier. Each panel then gets screwed into the drawer back with some pan head screws. This is a great way how build drawers for a base cabinet that are strong and quick to build.
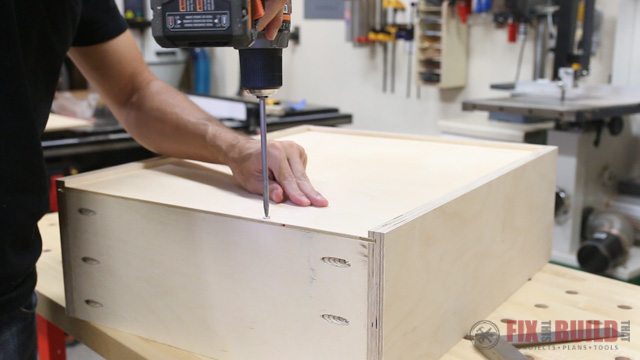
Before installing the drawers I went back and attached some mounting cleats to the corners of the cabinet back to shore it up from racking and give an attachment point to the wall.
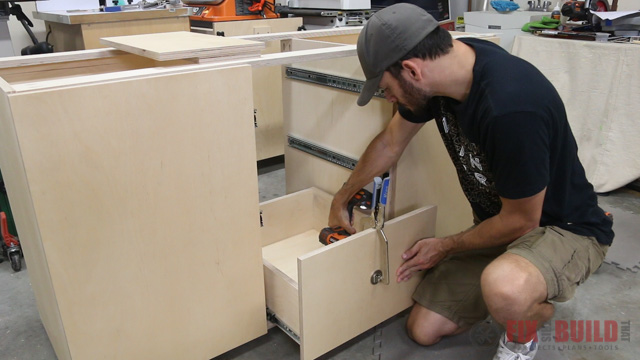
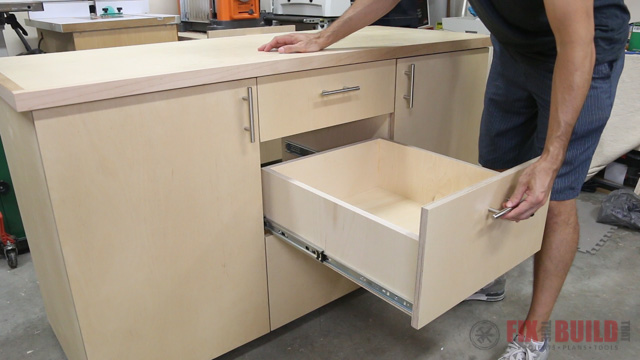
3. Install the Cabinet Drawers
Each side of the base cabinet will get two pull out trays, one on the bottom and one near the middle. I shimmed up the bottom slides with ¼” plywood and gave them an ⅛” setback. Then I used pilot holes and screws to secure each drawer slide to the base cabinet.
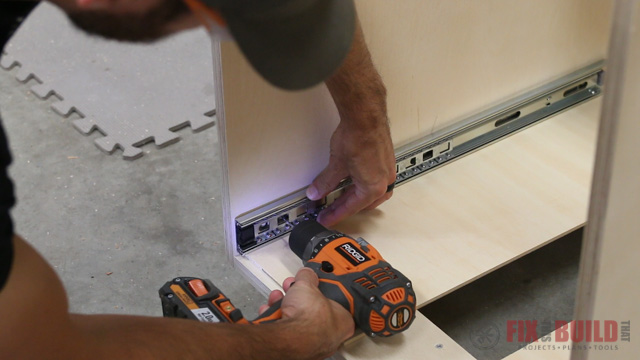
I used the plywood spacers to support the tray and pulled out the slide arms and secured them to the sides.
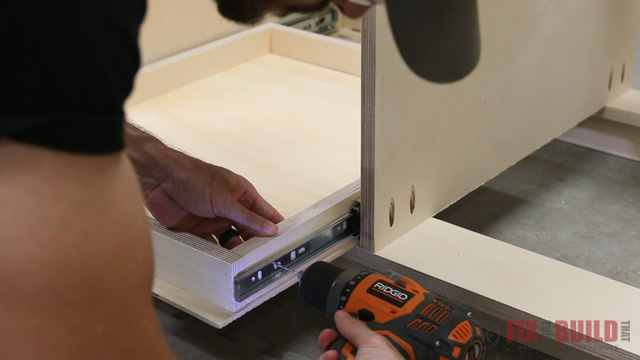
After attaching a front and center screw I removed the tray and installed a third screw in the back.
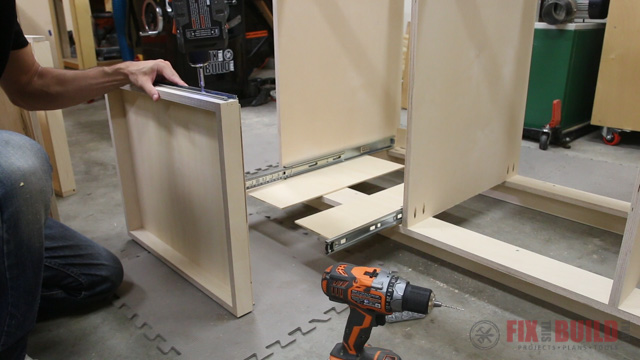
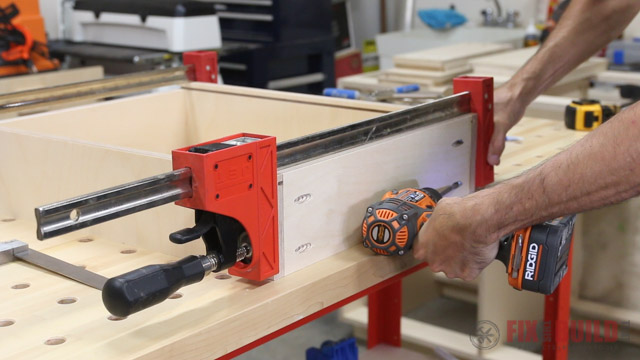
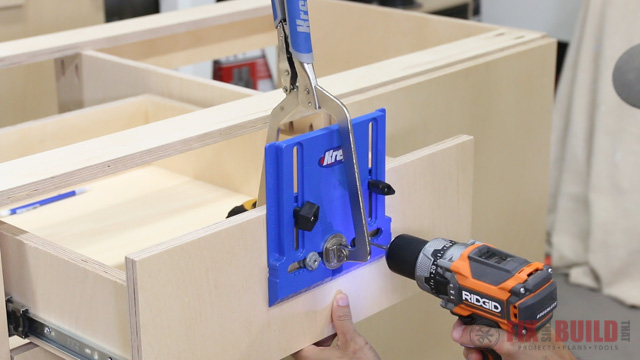
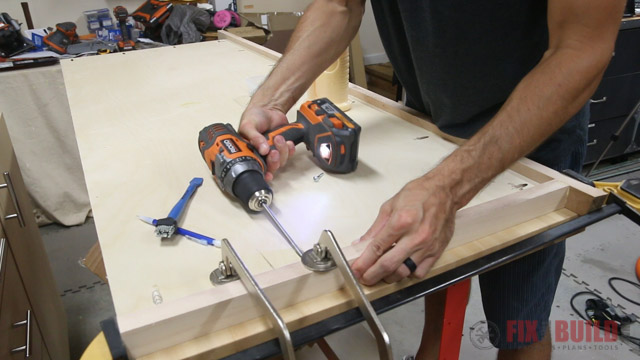
To secure the upper drawer slides to the DIY cabinet I used the Kreg drawer slide jig. I marked where I wanted the bottom of the slide and tray to go then clamped the jig to the side of the base cabinet. The jig gives a large surface for the slide to rest on while you attach the screws.
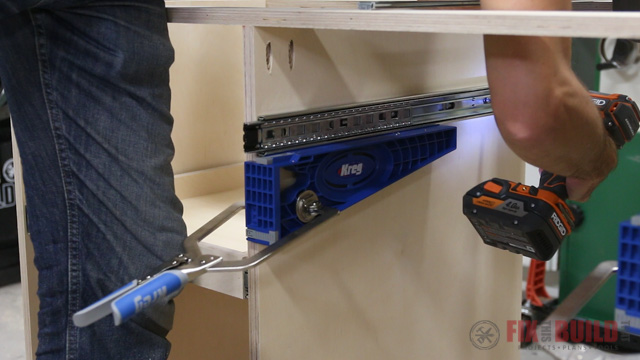
The real beauty of this jig though is when you reverse it, it acts as a support to hold the tray or drawer while you attach it the slide arms to the base cabinet sides. I really liked the drawer slide jig for this application.

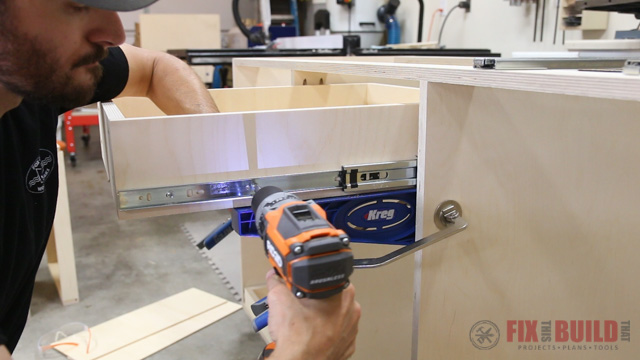
I mounted the slides for the drawers in the middle bay using similar methods as the trays. Then did the same for the far end of the cabinet to finish installing the drawers.
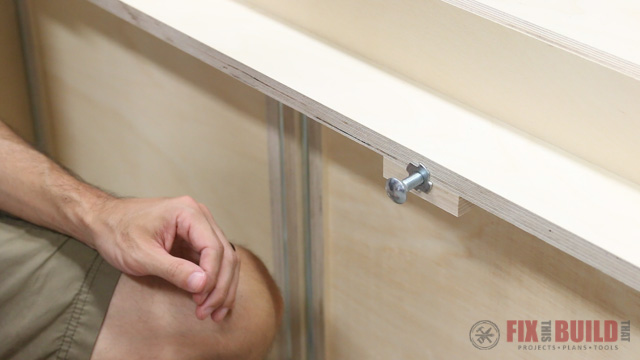
Since the shop cabinet is in my garage I want it to be off the ground and need adjustable feet to level it on my sloped floor. I cut some mounting blocks to size and attached them with glue and brad nails to the front and back supports on the bottom. I drilled a 7/16” hole in between the two pieces to accept a ⅜” t-nut and carriage bolt for the levelers. This is a trick I picked up from Jay Bates which he used on his miter saw station.
4. Add Concealed Hinge Doors
While the DIY base cabinet was on its back I cut the doors and drawer fronts to size. This makes it really easy to layout the doors, take some measurements and cut the drawer fronts to exactly the size you need them. I used an ⅛” spacer to establish the reveal between each drawer.
I’m using concealed hinges to mount the doors to the shop cabinet. Kreg has a concealed hinge jig for this and it might be my favorite one. You line up the jig on the base cabinet door then attach your drill to the included forstner bit and drill out the hole for the cup.

The coolest part is the depth stop on the bit so you can’t drill too deep and how it removes and let’s you drill the pilot holes for the hinge screws using the same jig.
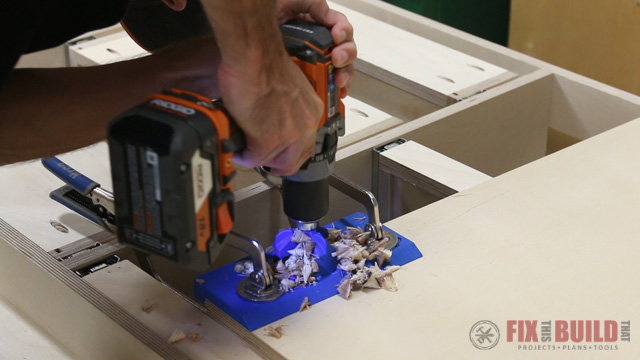
It gave me perfectly aligned holes for mounting the euro hinges and honestly it was just kinda fun to use.
I attached the hinges to the inside of the cabinet and then realized something was no bueno. I had not shimmed out the drawer slides on the outside of the cabinet and the drawer slides were hitting the doors. To fix this little mess up I went back and installed a ¼” shim on the outer sides of the cabinets. In retrospect I’d recommend two layers of the ¼” or a ½” shim because my fit was still really tight. And yes, this meant I had to remake all the trays…ugh
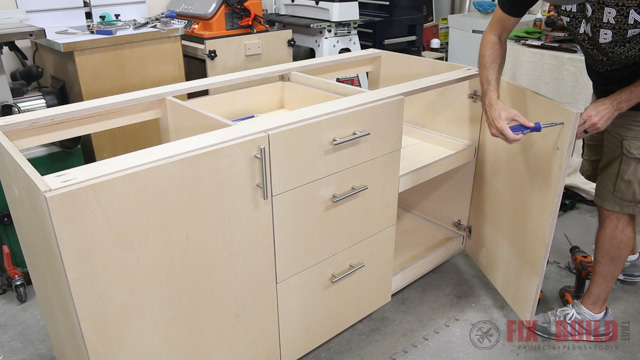
5. Install False Drawer Fronts & Hardware
After fixing that I attached the false drawer fronts to the drawer by drilling ¼” through holes and using pocket screws from inside.
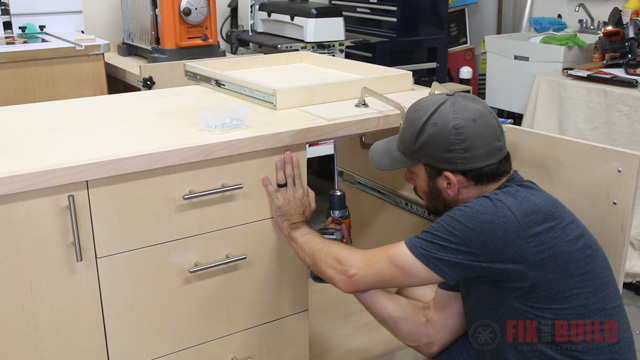
After that I mounted the pulls to the drawer fronts and doors. I used a cabinet hardware jig to space the handles near the top of the of the drawers for easier access to the lower drawers.
I want to replace these handles later with some shop built ones out of maple, but these look nice for now.
6. Build Cabinet Countertop
The final piece of the DIY base cabinet is the top. I used a single piece of 3/4″ plywood for the top. To give the top a beefier feel, I trimmed it with an inch and a half thick piece of maple hardwood. Then I used glue and pocket screws on the underside of the top to attach the trim to the front.
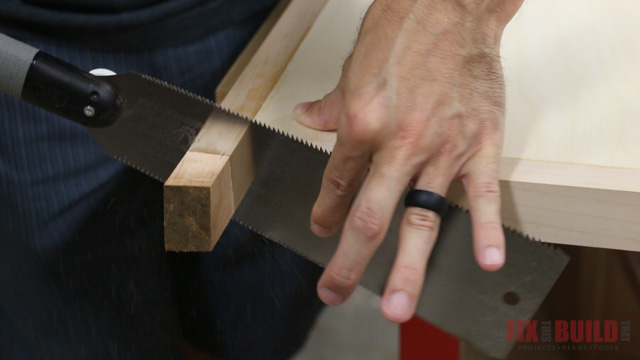
I left the front piece long to cut it to size with my flush cut saw after the side trim was on.
Next I mounted spacer strips on the underside of the top to raise it off the base and give a spot to attach the screws from underneath.
Then I took the top out to the driveway, rounded the edges over with my router and sanded everything to 180 grit. I applied 2 coats of water based poly to the cabinet and 3 coats to the top before taking it back inside.

7. Install Countertop
I removed the pull out trays and secured the top to the base cabinet with screws from below and the project was done.
This DIY shop base cabinet is going to be an awesome addition to my mid and long term storage in the shop. The pull out trays will be great for my tool bags and some larger things like my HVLP unit and sharpening station. The possibilities are really endless with this design and you can size and number the drawer and door combination to fit your needs. You can grab the plans for how to build a base cabinet here.
If you want to check out more shop projects head over to my Shop Project page.


Nice table. Where are you finding good quality (lots of layers) plywood like that?