How to make a bottle stopper on the wood lathe is my first project in a new series I’m kicking off. I’m calling it the 6 Days of Beginner Woodturning projects and I’ll launch a new post each day of a turning project any beginner can make. This was my first time making most of these lathe projects so you’ll see some mistakes I made and things I learned. I’ll link the whole video series below as well as to the other posts.
I’d like to thank JET Woodworking for sponsoring this project and I’ll be using the JET 1221VS lathe for all the turning. It’s a great lathe and the variable speed is a real game changer vs. my old 3 speed mini lathe I only used for a short time.
Affiliate links are used on this page. See my disclosure page for info on affiliate programs.
DAY 1 Video – How to Turn a Bottle Stopper
Full 6 Days of Beginner Woodturning Playlist
How to Turn a Bottle Stopper on the Lathe
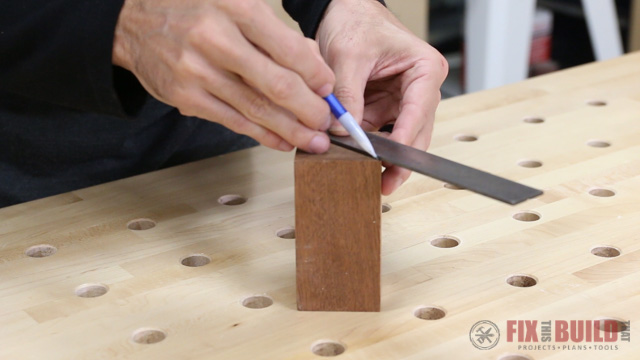
I’m starting off this project with a mahogany turning blank that was about 2×2 and 5” long. I marked the center of the blank on both ends then indented them with a scratch awl. I centered the drive spur and hammered it into the blank with a dead blow mallet.
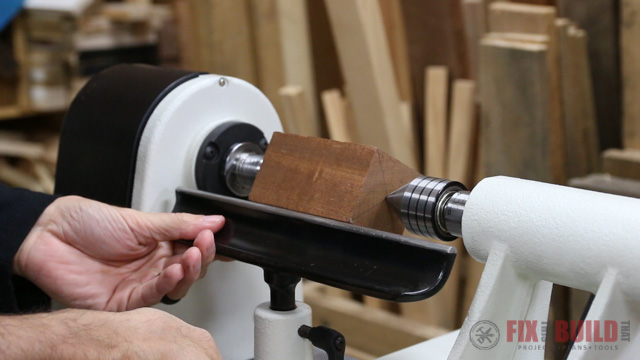
I’ll be roughing out the blank using the drive spur in the headstock and a live center in the tailstock. I mounted the piece in the lathe then tightened everything up and positioned my tools rest to start turning.
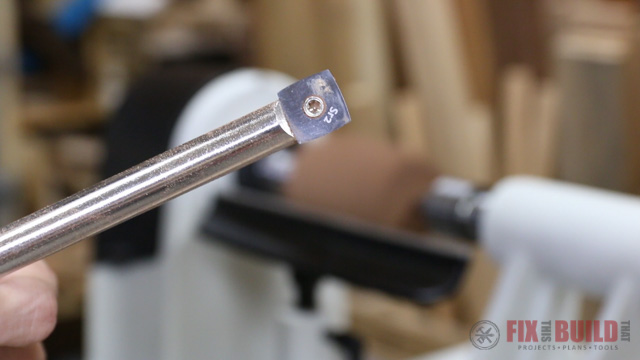
I started the roughing out with this square radiused carbide tool. I like it a bit better than just the square tool for roughing as it doesn’t catch the hard corners as much.
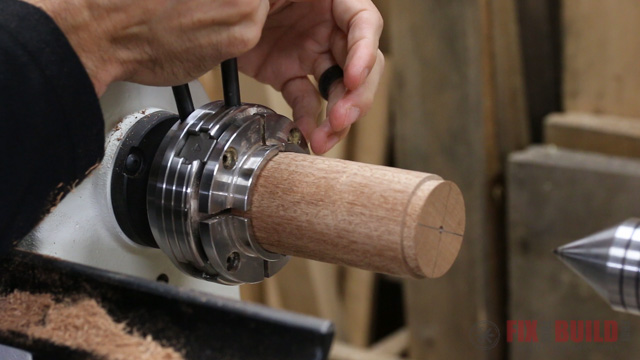
I took the spur drive out of the headstock and put on my midi chuck. You can pick one of these up for under $100 and and chuck is almost a must have for woodturning. I tightened the bottle stopper blank it in the chuck and was in business.
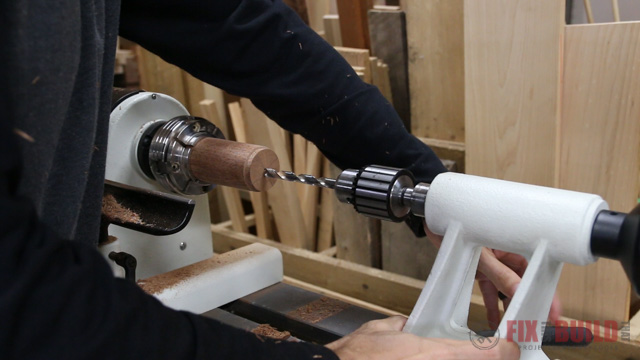
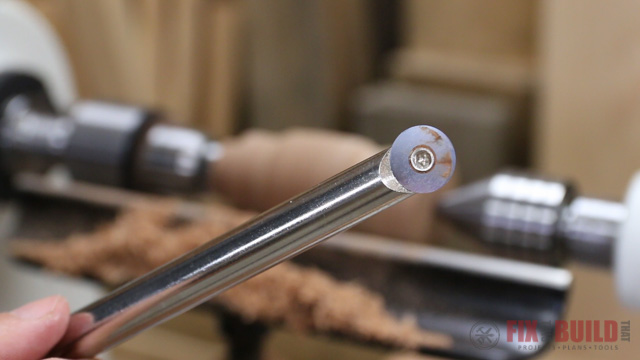
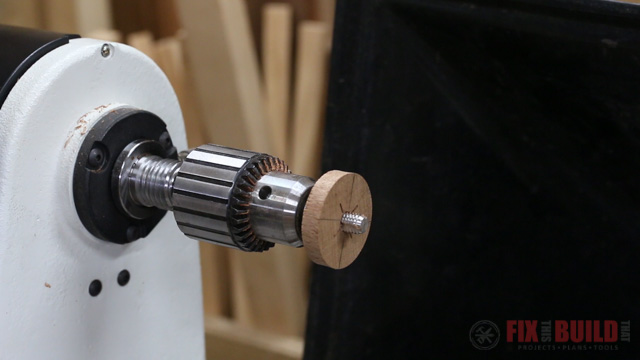
I removed the live center from the tailstock and put in a jacobs chuck, similar to what you would find on a drill press. I’ll use this chuck to drill a centered hole in the blank. Then I can mount it on the turning mandrel and thread the bottle stopper hardware on later. I drilled the hole with a bit slightly smaller than ⅜” so I can tap the threads with the ⅜” tapping mandrel next.
I did the ole swap-a-roo again and this time put the jacobs chuck in the headstock and mounted the ⅜” tapping mandrel into it.
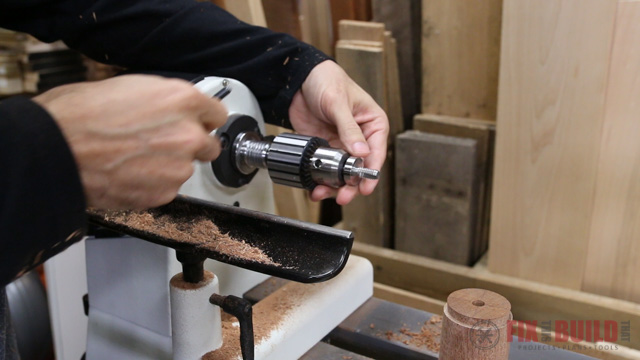
I mounted the bottle stopper blank on the tapping mandrel which also tapped the threads for me. I reinstalled the live center then turned the lathe on and pushed in the tailstock to support the piece. Make sure you lock the tailstock firmly and if you start to feel any wobble just tighten it up again.
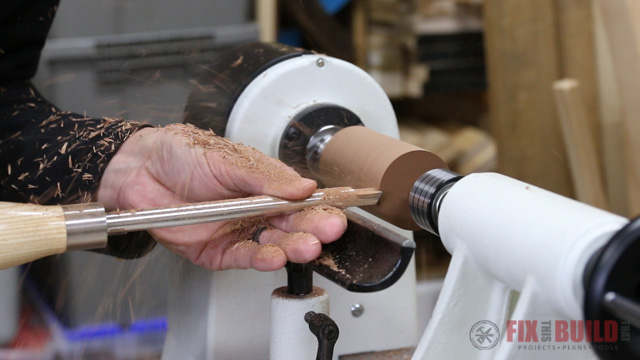
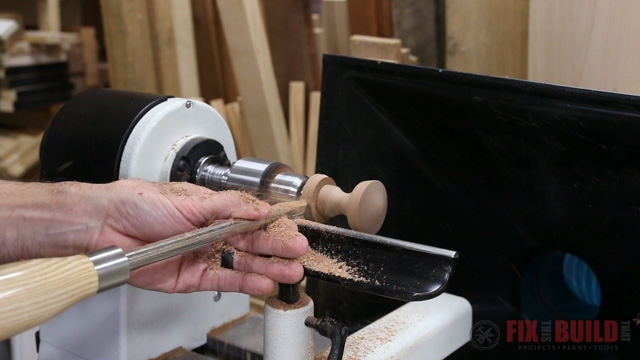
Now here’s where the fun begins! I started turning the bottle stopper cylinder into its final shape. I used the square radius tool to hog off a lot of material then switched to the round carbide tool to make some curves.
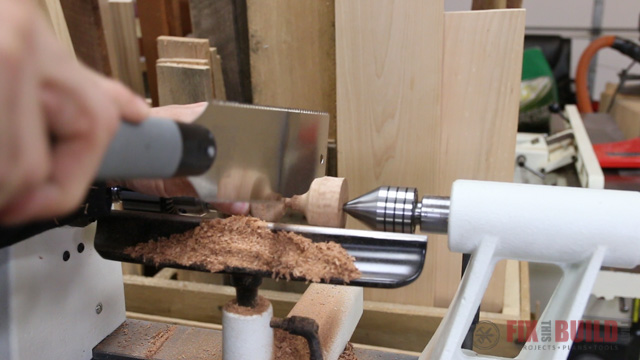
 I love turning because it’s so organic. The shapes I end up with are rarely what I had imagined going in. I just remove material until it looks pleasing to my eye. With the rough shape established I cut the rest off with a pull saw. I could have just parted the whole thing off but I was a bit nervous honestly.
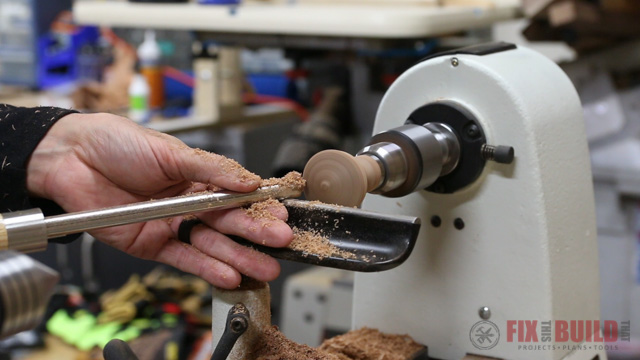
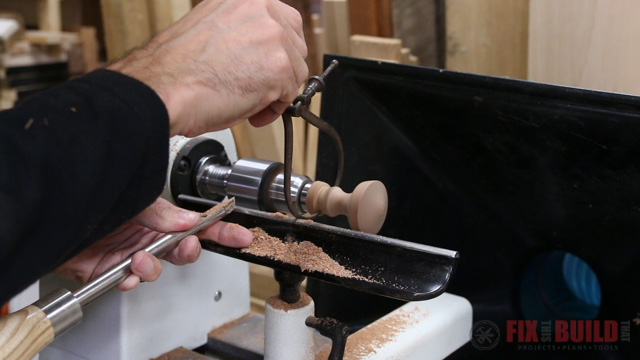
I moved the tailstock out the way so I could position my tool rest and get full access to the end of the bottle stopper. Using the round tool I finished off the top how I wanted it.
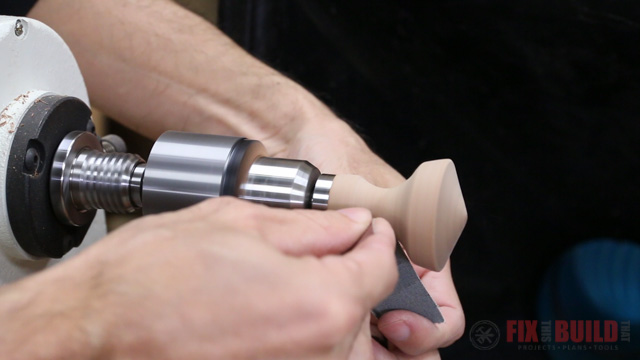
I was pretty happy with the shape of the wine stopper so I moved on to sanding. I use these little woodturner’s sandpaper strips and start with 150 grit and go up to 600 grit. It’s kind of nice because the lathe does all the work and you just move the paper around to get all the nooks and crannies. One thing I learned was to make sure you sand with the direction of the grain before moving on to the next grit. This seems to help hide the sanding marks more easily.
I took off the piece to do a dry fit of the bottle stopper before finish and realized another oversight. The mandrel I used was not made specifically for this bottle stopper kit and had a wider diameter than the bottle stopper I was using. So there was a nasty looking transition between the wood and the metal I needed to take care of.
I basically just needed to space the bottle stopper away from the mandrel enough so I could use a detail tool to shape the end. I grabbed the offcut from the top of the blank and cut a circular spacer off on the bandsaw and drilled a hole in it so mount it on the mandrel. It screwed right on and did exactly what I wanted it to.
The wine stopper seemed to hold fine with enough threads on the mandrel as well. I turned the spacer down near the size of the stopper with the round tool then I switched over to the detail tool to make the final cuts to size.
I set a pair of calipers to the diameter of the bottle stopper hardware and used the calipers to check how close I was until I got to the right size.
I’m using a water based woodturner’s finish to seal the stopper. I got this bottle of finish when I first started turning and I love the results so I’ve actually never used anything else. I applied a heavy coat, which soaks in pretty quickly to the end grain, and applied about 4 or 5 more coats.
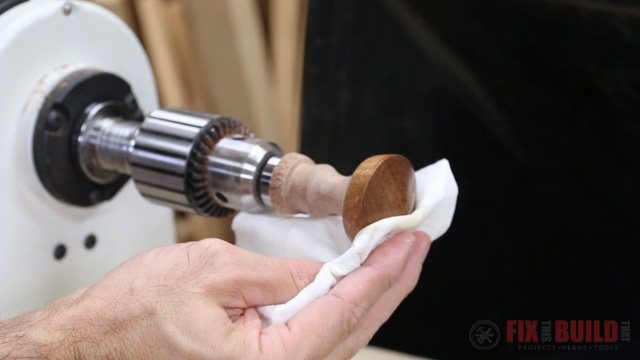
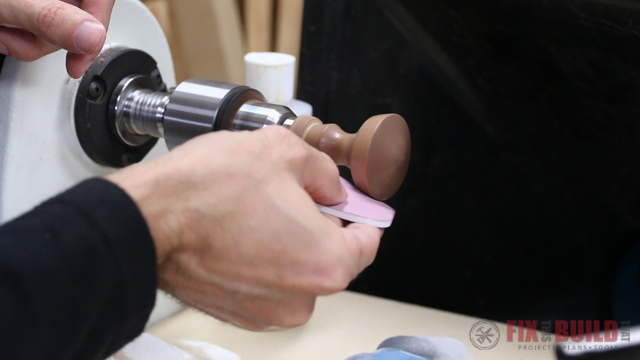
In between coats I sanded with these little micro mesh sanding pads. They do a great job of roughing up the finish but not giving scratch marks. I used the 1800, 2400 and 3200 before each new coat.
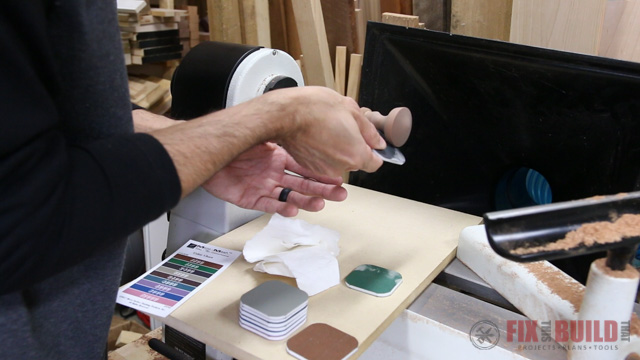
The build up goes pretty quick since this is water based finish and I only waited about 15 minutes if that between coats. After the final coat I used the micromesh and sanded all the way up to 12,000. It gives a great satin finish that’s not too shiny and feels more natural to me. If you want a gloss look you could use a wax and buff it out as well.
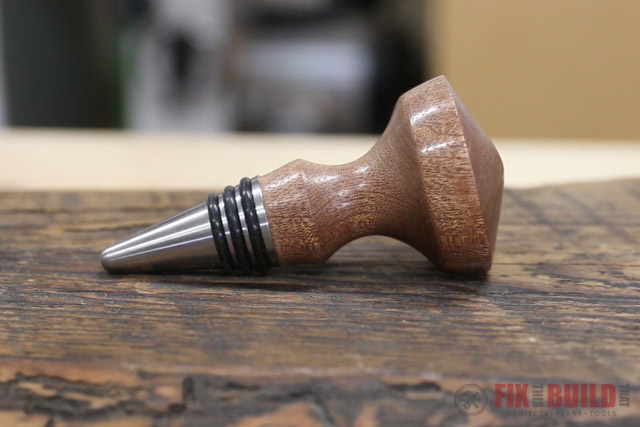
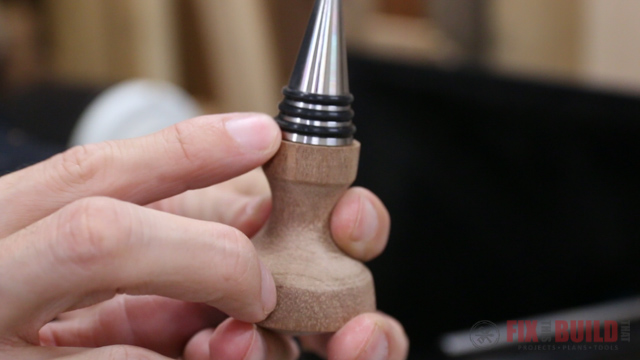
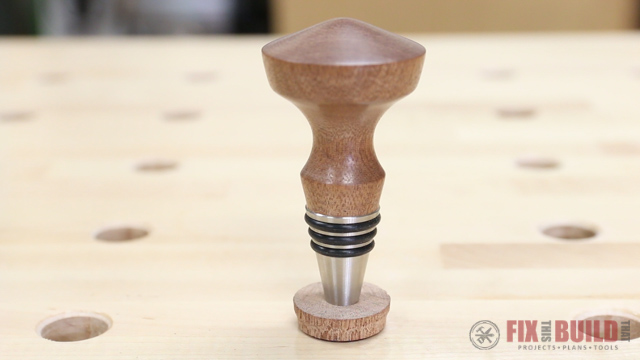
I put the bottle stopper hardware on and it looked awesome!
This is Day 1 of my 6 Days of Beginner Woodturning Projects. Be sure to come back tomorrow for Day 2! Until then you can see some of my other work on my Projects Page.
JET Woodworking provided me with product and/or monetary compensation as a sponsor of this build. All opinions are my own and are not filtered by the sponsor.


