
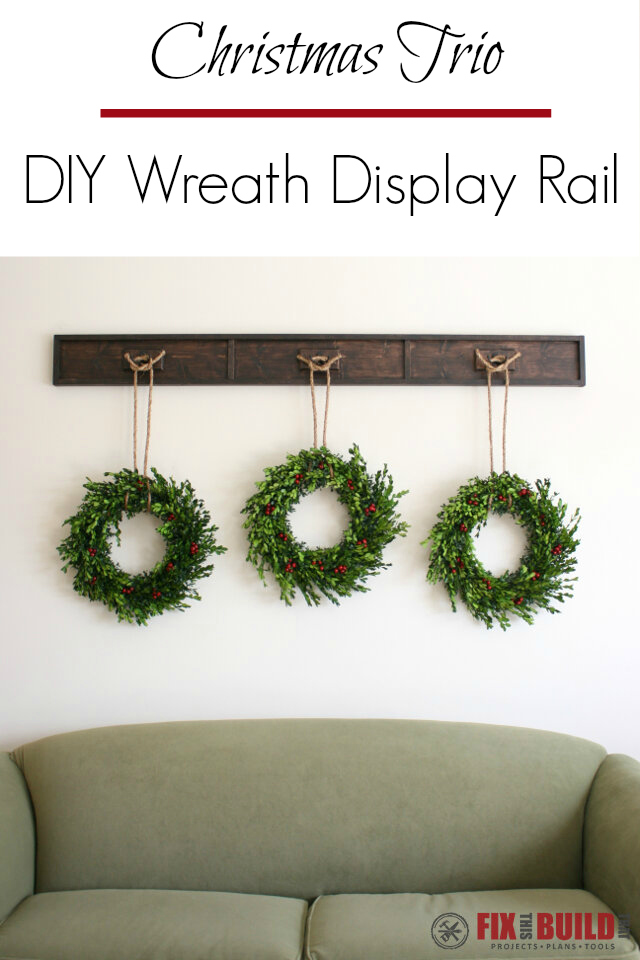
It’s beginning to look a lot like Christmas! That’s right, even though we haven’t quite hit Thanksgiving yet, we are starting to decorate at my house. And how perfectly fitting that my friend Jaime from That’s My Letter invited me to join in on a Home Depot Virtual Workshop Party where I designed and built a DIY Wreath Display Rail.
The challenge was to use 3 wreaths together to decorate your house for the holidays. The Home Depot has an upcoming Christmas Wreath Trio DIY Workshop and this sponsored challenge is to help promote it.
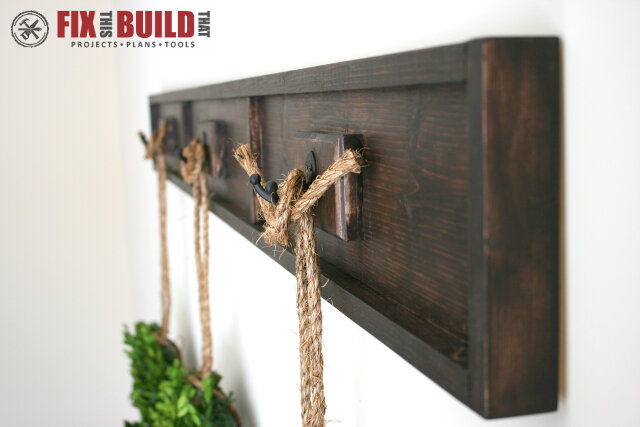
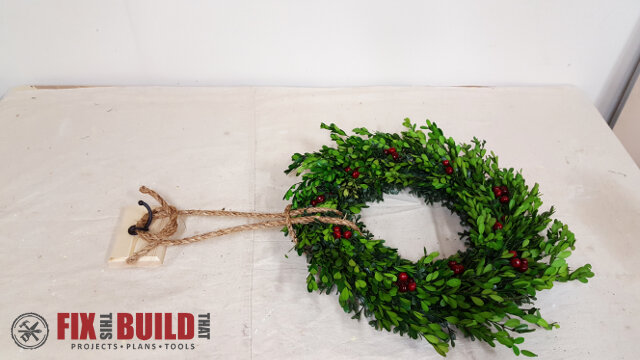
The Wreath Display Rail that I made is super easy to build and can be made from only a few boards and some hardware. I used some Martha Stewart wreaths I got from Home Depot and hung them with sisal rope for a nice clean, rustic, and dare I say…manly look. I’m not much for bows 🙂
And if you need Christmas gift ideas for the Woodworkers and DIYers in your life (or you need to send someone a list for you) then go check out my Christmas Gift Ideas for Woodworkers post.
Before we get started, let me fill you in on this whole DIY workshop business. Home Depot offers Workshops at all of their locations for DIY’ers of all ages and experience levels. There are three types of Workshops offered: Do-It-Yourself (DIY), Do-It-Herself (DIH) and Kids. Customers can learn how to build décor projects, how to make easy home repairs and how to operate tools through demonstrations and step-by-step instructions. Visit http://workshops.homedepot.com to learn more.
And if you want to register for the Christmas Wreath Trio workshop to learn how to make something like what you see above, you can do it through this link: DIY Workshop Registration Page
But today, you are going to learn how to make this Wreath Display Rail. So when you get back from your workshop with your prettied up wreaths, you have another option on how to hang them!
Here is what you’ll need for the project:
Materials/Supplies
- (1) 8′ Pine 1×6
- (2) 8′ Pine 1×2
- 12″ Pine 1/4″ x 3/4″ Screen Molding
- 50′ 3/8″ Sisal Rope
- (3) Double Prong Hook
Affiliate links are used on this page. See my disclosure page for info on affiliate programs.
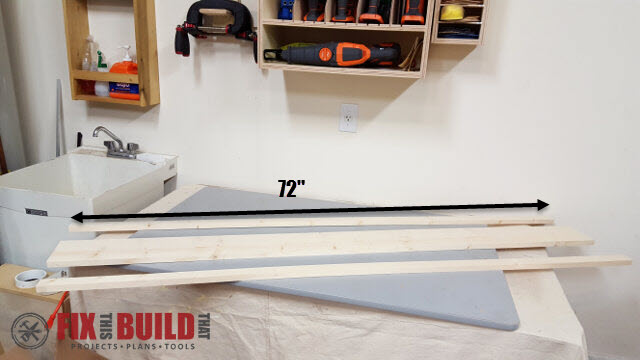
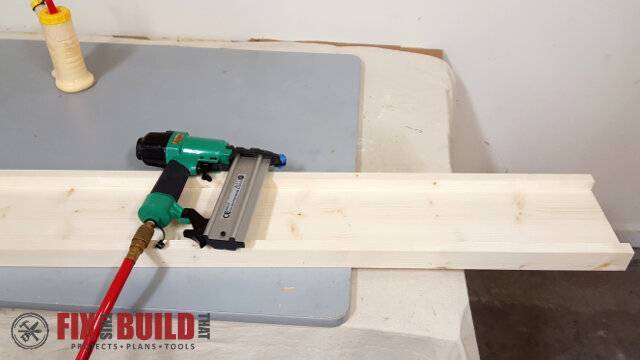
The DIY Wreath Display Rail is a really quick build. Start by cutting the 1×6 and 1×2’s down to 72″.
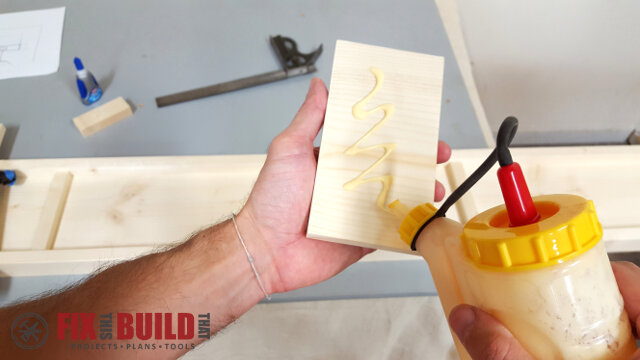
Using wood glue and brad nails, attach the 1×2’s on edge to the 1×6.
Use one of the cut offs from the 1×2’s and line it up on the end of the rail. Mark the length and cut it to size.
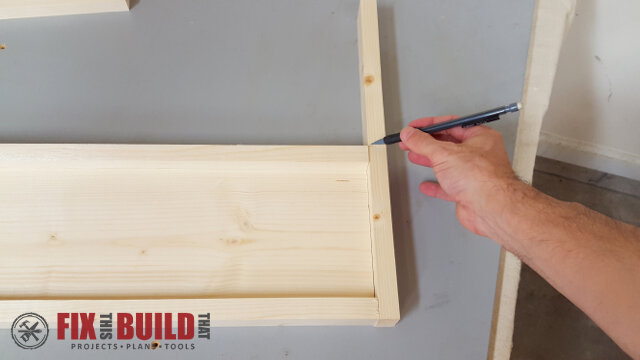
Attach the end pieces with wood glue and brad nails as well.
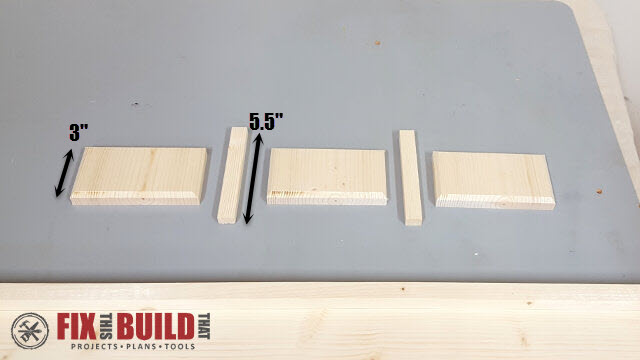
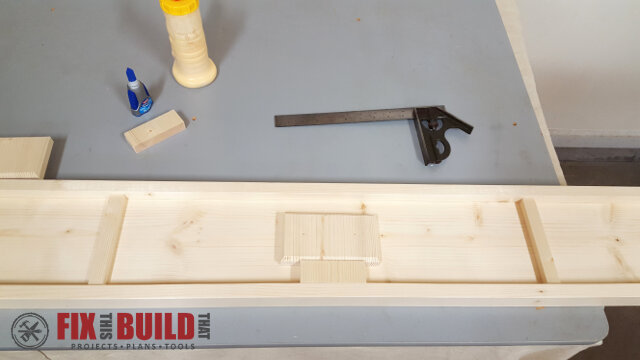
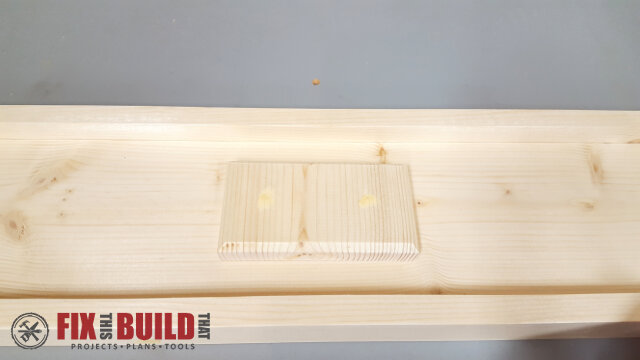
Now cut three 3″ sections off the remaining 1×6 offcut and cut two 5-1/2″ pieces of the 1/4″ x 3/4″ trim. I chamfered the edges of the 1×6 blocks with a 45 degree chamfer bit in a router for a little detail.
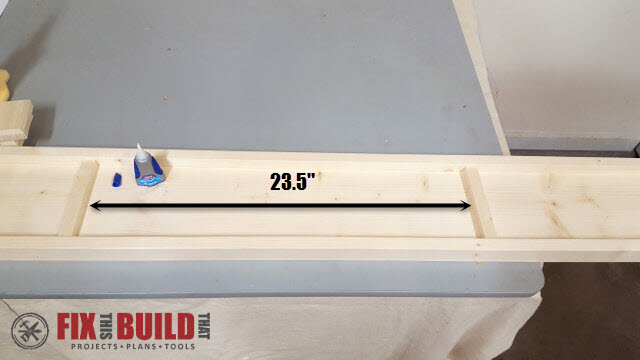
Measure 23-1/2″ in from the inside of the right edge. Attach the 1/4″ trim pieces so the right edge hits the 23-1/2″ mark. I used super glue to attach these pieces so I wouldn’t split the trim or have nail holes.
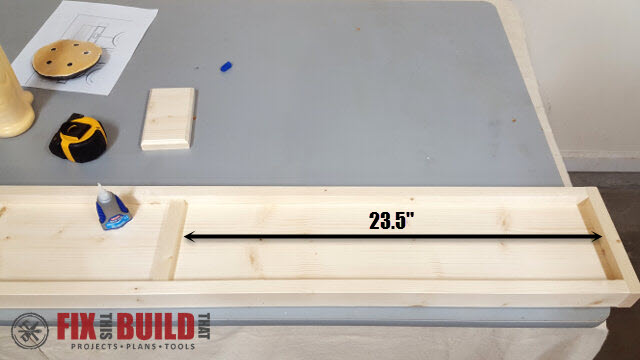
Measure another 23-1/2″ from this trim piece and mount the next one.
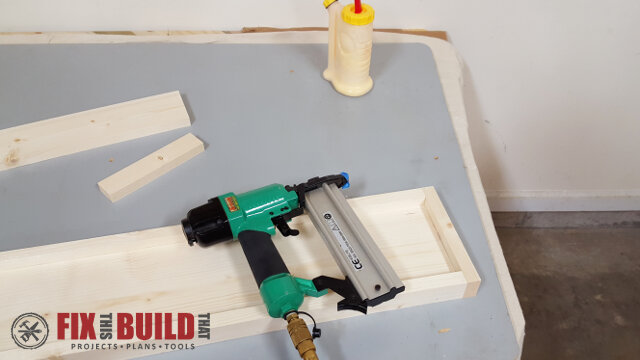
Using wood glue and brad nails, center and attach the 1×6 blocks in each of the 3 sections. Using a 1-1/4″ spacer block will help get the spacing just right.
And like that, you’ve got the whole thing assembled. I told you it would be quick!

Go back and fill all the nail holes with wood putty before staining.
Sand everything down to 150 grit and apply your stain and finish of choice. I went with a Kona dark stain with some light distressing.
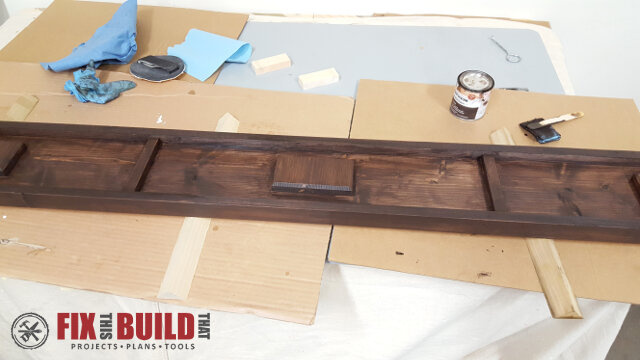
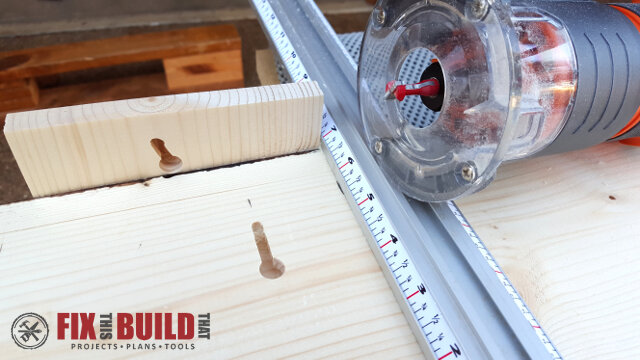
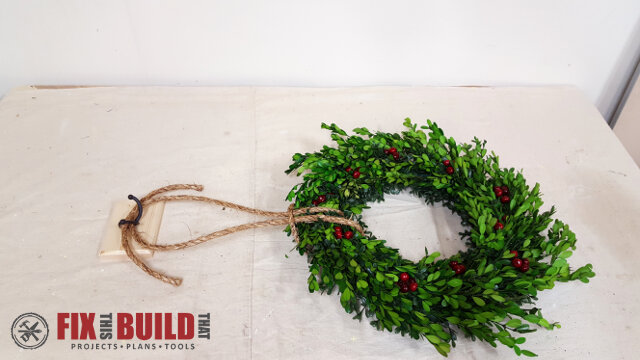
Before attaching the hooks on the front I used a keyhole bit in my compact router and put some slots/holes to hang the wreath display rail.
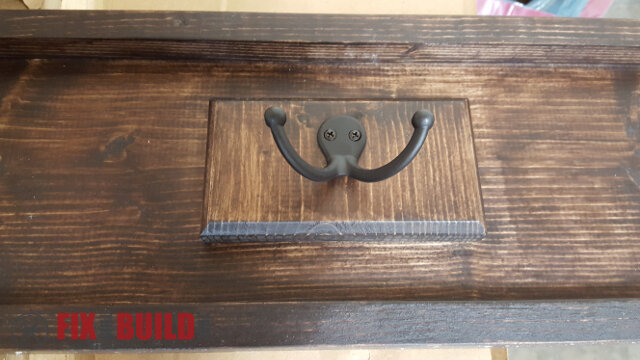
Finally, attach the hooks with included hardware.
Okay, so you might be wondering where the heck the wreaths are in this post. Well, here they come!
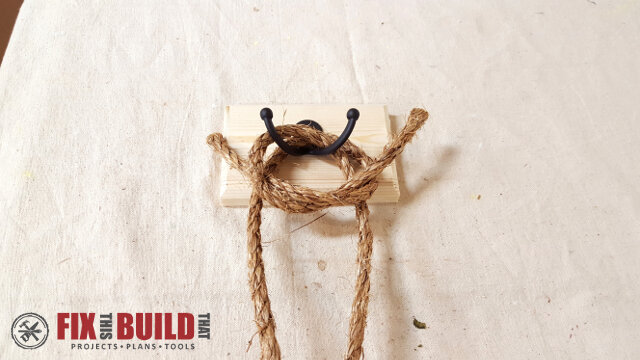
As I mentioned earlier I bought some 22″ Martha Stewart wreaths. I wanted to keep a very clean and rustic look, so I decided to hang the wreaths with a 3/8″ sisal rope. For the shortest wreath I cut about 6′ of rope and for the other 2 I cut about 8′ of rope.
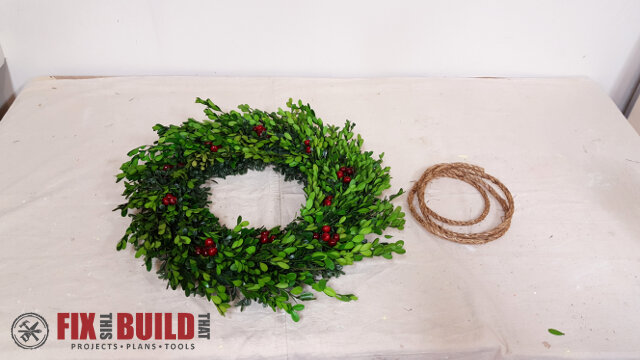
To get the same look I did, fold the rope in half and put the looped end under the wreath.
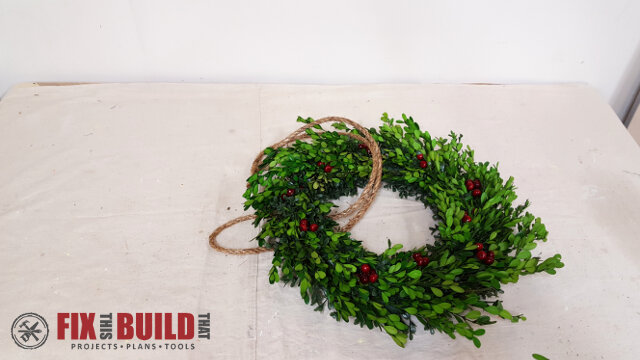
Take the loose ends and pull them through the loop.
You can move and adjust the loop on the wreath later as needed. Loop the loose ends over the double hook.
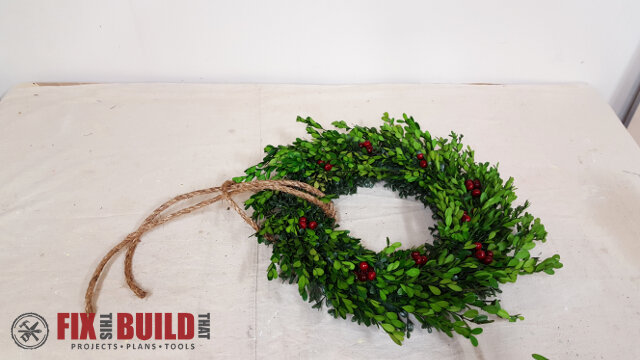
Finally, pull the loose ends down and make on overlapping knot with them like you are starting to tie your shoes.
That’s it! Adjust the rope up and down as you need and if there is extra rope then just get the knots how you want them and cut the excess off after you’ve hung it.
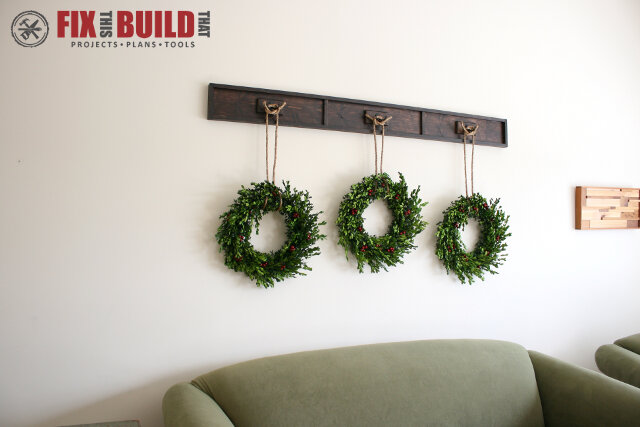
We hung this over a couch that was in dire need of some decoration on a large wall behind it. I think we’ll even multipurpose this and do some other seasonal hangings throughout the year.
Have fun with this project and if you want to see more Home Decor projects, go check out my Home Decor section. But before you leave make sure you check out the other bloggers in the Virtual Workshop Party and see what they did with their wreaths!
Home Depot provided me with product and/or monetary compensation as a sponsor of this build. All opinions are my own and are not filtered by the sponsor.


I love this Brad!!
Thanks, Mindi!
This is beautiful – I love that the hooks can work for display (or coats) all year long! I also love those boxwoods.
AWESOME Brad!!!! Way to go! I love the “manly” comment – lol!!!
You know how I roll, Sam 🙂
I couldn’t keep my eyes off those boxwood wreaths, they’re adorable! What a perfect way to display them!
Thanks so much!
Love those boxwood wreaths! They look great hanging with the dark wood and jute rope!
Thanks, Amber!
This is gorgeous!!! I love it Brad!
It’s official – add decorating to your tags because this is amazing! Love the simplicity and the rope touch is over the top awesome. Nice work my friend.
Thanks, Jaime! I had to dig deep to pull out my inner decorator, but it was there 🙂