
Air conditioner maintenance is crucial to extending the life of your cooling system. Today I’m continuing my HVAC Series to show you how to check and prepare your air conditioning system so it’s ready to go when warm weather hits. You may recall, I began this series in the fall to go over how to maintain and troubleshoot your furnace. Now that it’s almost cooling season, it’s time to make sure your AC unit is working when you need it.
I’ve partnered with Trane Residential to bring you this blog post, and I’ll tell you about some of the great resources they have on their website to help you maintain and care for your HVAC systems. And don’t worry if you have another system brand, these tips and steps will hold true across them all.
Affiliate links are used on this page. See my disclosure page for info on affiliate programs.
Tools Used
Materials/Supplies
Just a quick note: If your HVAC system is under warranty, be sure to follow any requirements to keep it in place.
I’ll be focusing today on some basic maintenance and start up tips for your cooling system. We’ll go through inspection, cleaning, start up and some ongoing maintenance. Let’s get started!
HVAC Basis: Air Conditioner Maintenance
- Inspect Furnace / Air Handler
- Inspect Air Conditioning Unit
- Clean Air Conditioning Unit
- Air Conditioning Start Up Check
- Ongoing System Maintenance
1. Inspect Furnace / Air Handler
Most cooling systems are made up of an air handler and evaporator coil inside the home and an exterior condenser unit. I started by inspecting the interior unit which in my case is a furnace with an evaporator coil installed above it. The inspection is mainly a visual one at this point.
Our furnace is in an upstairs hall closet, but if you have a basement it’s probably down there. It also can be located in the attic or under the house in a crawl space. The main thing you’re looking for here is that the overflow and condensate lines aren’t blocked and the connections look sound. During use the evaporator coils produce a lot of condensation that needs to flow safely outside your house.
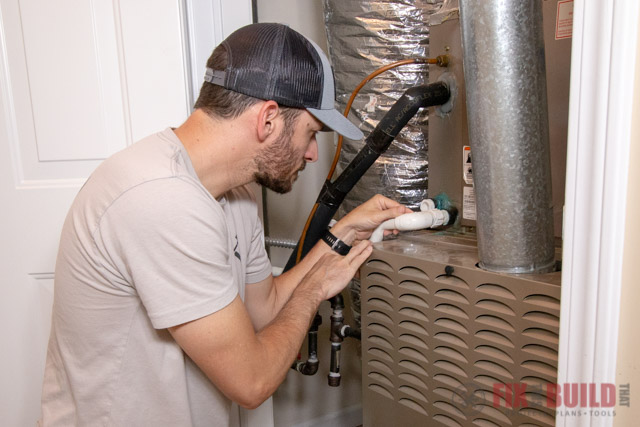
I could easily see into my overflow line but our condensate line was a bit trickier. Some condensate lines have a section with a cap you can remove to see into the pipe. You can clean out the line from this section if you have it. Ours doesn’t have this, so I can’t visually check the line without disconnecting it from the a/c unit, which I didn’t want to do. Instead I’ll check the exterior line for drainage after startup.
2. Inspect Air Conditioning Unit
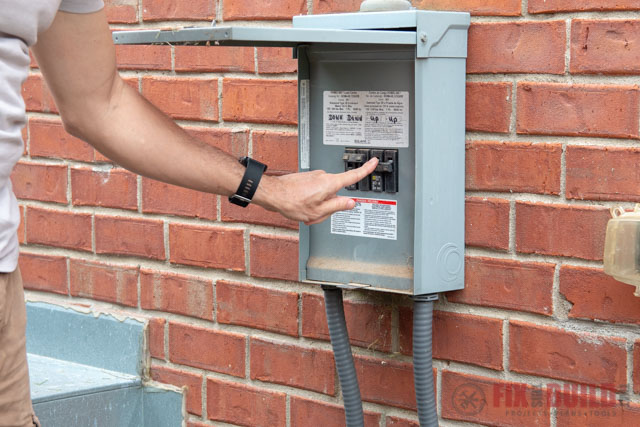
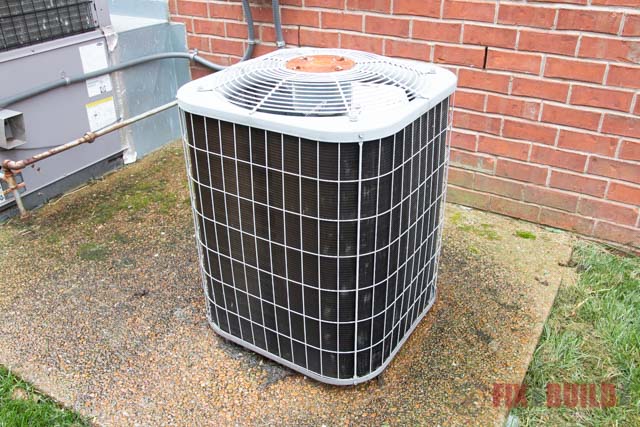
Next I went outside to check the air conditioning unit. After months of sitting idle, the outdoor unit had a build-up of dirt, leaves and sticks. I started by shutting off the power to the condenser unit so I could safely remove the top grill.
If you are uncomfortable doing this or anything else I outline, don’t hesitate to call a service professional to help you out. Trane Residential can connect you with a service professional to get your air conditioning unit in great shape in no time.
After that I removed debris on the outside of the air conditioning unit. It’s also a good idea to cut back plants that may be growing nearby. My outside unit has obviously seen better days, it’s getting rusty and worn. Air conditioner maintenance is even more important on an aged unit to make sure it’s ready to go when we need to turn it on.
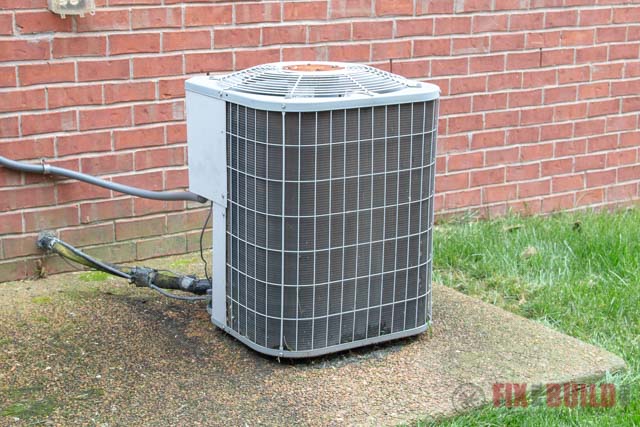
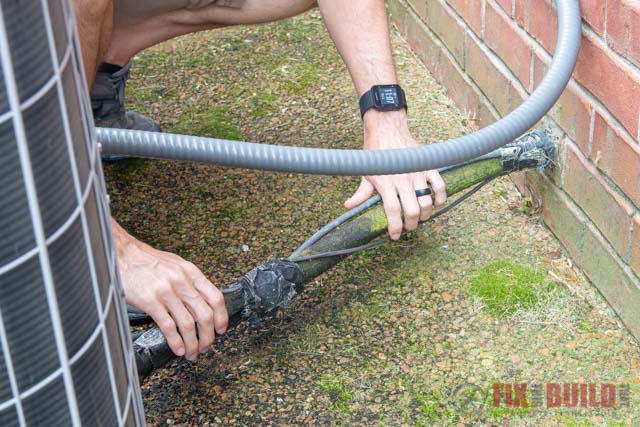
Next I looked at the refrigerant line on my unit. This line needs to be covered in insulation to help keep it cold since it’s transporting cold refrigerant into the house. As you can see the insulation on my refrigerant line is dirty, but the insulation is intact. If any insulation is damaged, you should remove it and attach new insulation.
3. Clean the Air Conditioning Unit
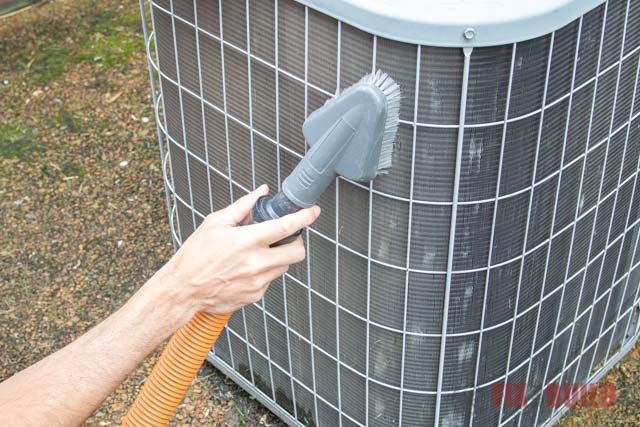
After my inspection I moved on to cleaning the HVAC system. The fins on the condenser get pretty dirty over time. I carefully vacuumed the condenser fins from the outside to get most of the loose dirt and debris off them. Using a soft bristle brush works well here.
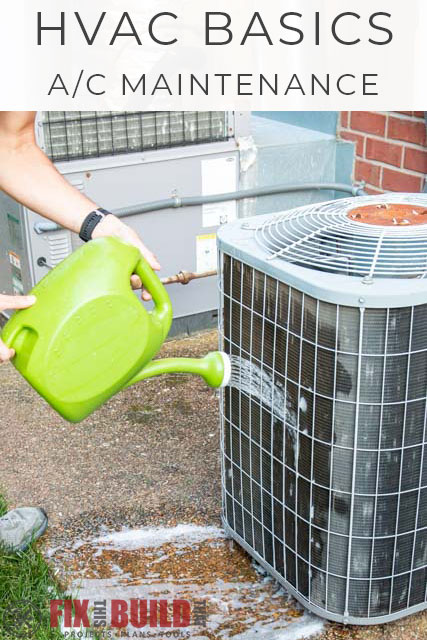
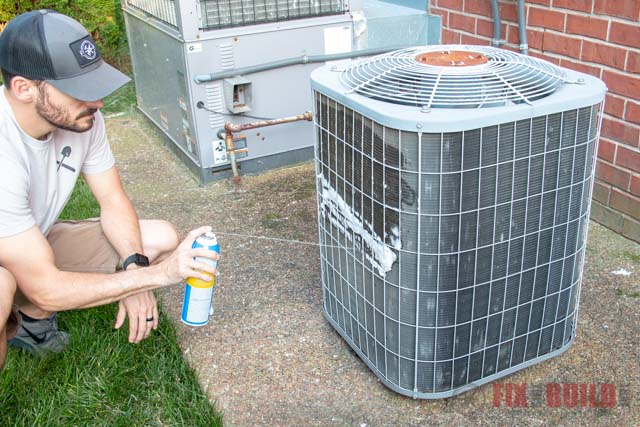
After getting the loose debris off I use a foaming air conditioning cleaner. This cleaner is specifically designed for the fins on condenser units. It foams up and loosens the built up dirt and fine particles off the unit.
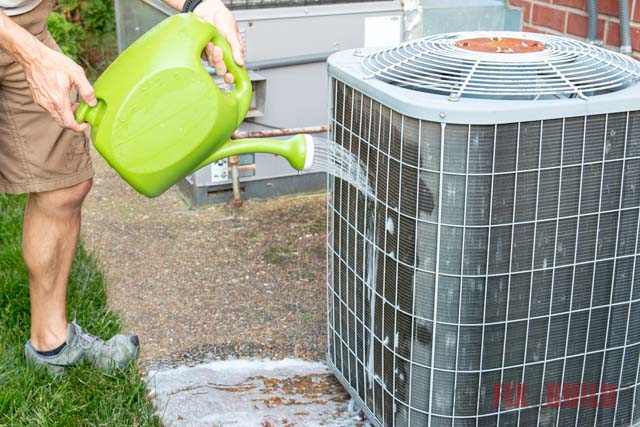
You can rinse the foam off after a few minutes and the dirt goes with it. Since my hose didn’t reach I used a watering can to rinse the unit. If you do use a hose make sure you don’t use a high-pressure attachment or you could damage the fins.
4. Air Conditioning Start Up Check
You can see how much cleaner the fins look now. They don’t have that dusty dinginess to them.
With everything cleaned and inspected I turned the power back on and went inside. I switched my thermostat to cooling mode set it low to call for cooling.
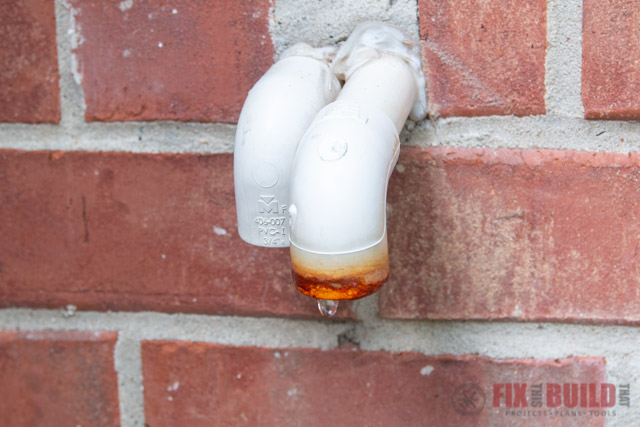
I checked my vents and the air was coming out cool and after a few minutes I went outside. As I mentioned earlier, I couldn’t flush the condensate line from the house, but I can check to make sure it isn’t clogged. When the AC is running you’ll want to see a steady drip coming out of your line. Ours was dripping like a champ, so we were good to go.
5. Ongoing System Maintenance
With these few simple steps your system should be ready to go for cooling season. If you run into issues during startup or see something that doesn’t look right you might need a professional. You can use the Trane Comfort Specialist Dealer Locator page to find a qualified HVAC professional who can help get your system going.
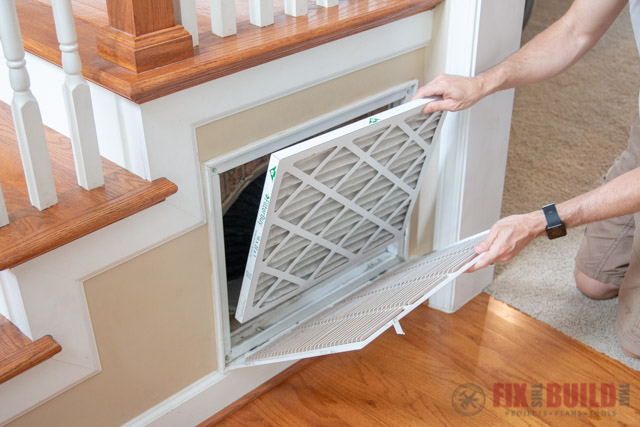
As far as ongoing maintenance, periodically check your exterior unit and make sure it’s clear and clean. And remember to change your HVAC filters regularly. A clogged filter will make your whole system work harder. And a harder working system means a shorter lifespan.
I hope this short walk through has helped you with a few basic ways to get your air conditioner prepped and ready for cooling season. Doing regular cleaning and maintenance on your system should let it serve you for a long time.
If your unit is getting long in the tooth (like mine) a new cooling system might be on the horizon. When looking for a new system make sure you give Trane a look and contact your local Trane residential specialist. They will help identify the right unit to create optimal comfort in your home. Trane offers a wide range of solutions – from the most efficient XV20i to the best value XR14 designed for the warmest climates. Trane’s very in-depth website will walk you through new systems along with a pricing guide and available tax credits for your new upgrade.
If you liked this post I have a more helpful content that you can check out on my Home DIY page.
Trane provided me with product and/or monetary compensation as a sponsor of this build. All opinions are my own and are not filtered by the sponsor.


