
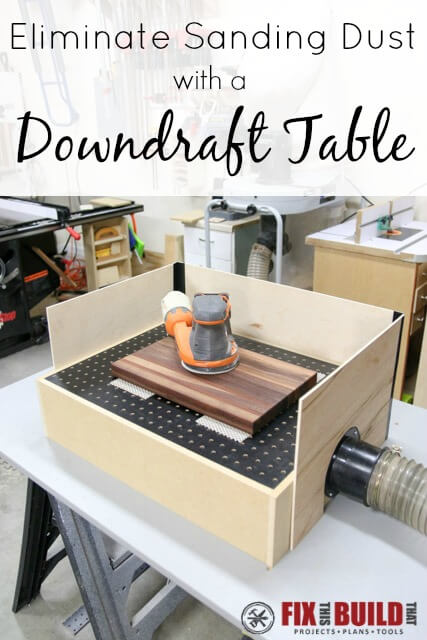
Today I’m going to show you how to build a DIY Downdraft Sanding Table to help eliminate dust in your shop! This is actually and update to an earlier downdraft table and sanding box I made last year. I wanted this one to be a little bigger and I refined the design a little too.
Now I know you love sanding your woodworking projects, right??? You strap on the respirator, grab your sander, your preferred sanding grits (80, 150, 220 for me), now stand there for an hour or more working through your grits while your hand goes numb and you look like Indiana Jones coming out of the sand storm.
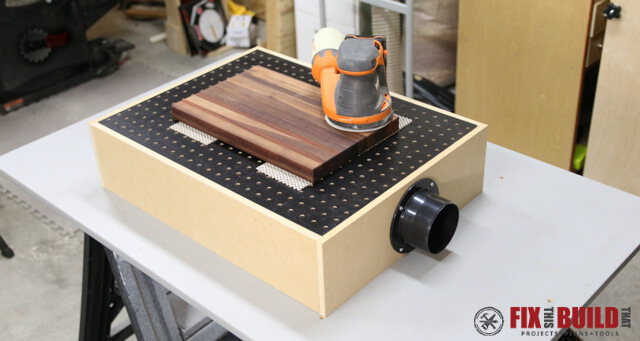
Okay, so we all (at least the sane ones) hate sanding. BUT, I hate it a little less after making this awesome downdraft table / sanding box. It’s a super simple construction and I made mine from scrap cutoffs of 1/2″ MDF and plywood along with some 1/4″ pegboard and a dust fitting. I made mine to accept a 4″ dust port, but this will work with any vacuum or shop vac, you’ll just have to gauge the suction and make sure you don’t go too big where it isn’t effective. After you build this, your lungs will thank you!
Before we get started, make sure to follow me on Instagram, Facebook, YouTube and Pinterest to keep up with all my latest builds and free projects!
Here is what you’ll need for the project:
Tools Used
Materials Used
- 4″ Dust Port
- 2.5″ Dust Port (for shop vacs)
- Quick Set Glue
- Black duck tape
- 1/4″ Plywood
- 1/2″ MDF
- 3/4″ Pine or Poplar cleats
- 3/16″ Pegboard
Affiliate links are used on this page. See my disclosure page for info on affiliate programs.
Building the Downdraft Sanding Table
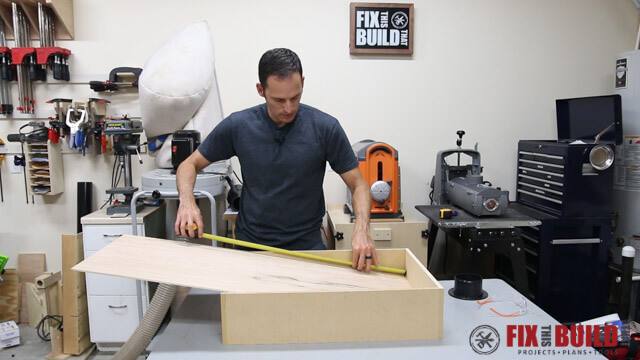
The build is very easy and I’ve used readily available items that were actually all leftover material from other projects in my shop. The finished downdraft table will be 19″ x 25″, but you can size yours as you need it.
- Cut the Pegboard and Downdraft Table Sides
- Assemble the Sanding Box
- Mount Cleats to Hold the Top
- Make the Dust Chute
- Build the Downdraft Knockdown Sides
1. Cut the Pegboard and Downdraft Table Sides
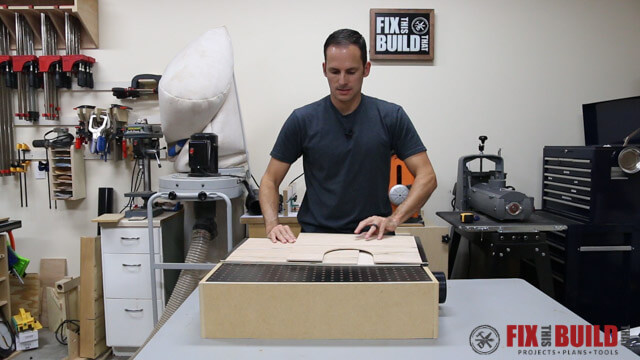
Begin by cutting the pegboard to size. I cut mine to 18″ x 24″ for a nice sized sanding area, but it’s small enough to not need support across the middle.
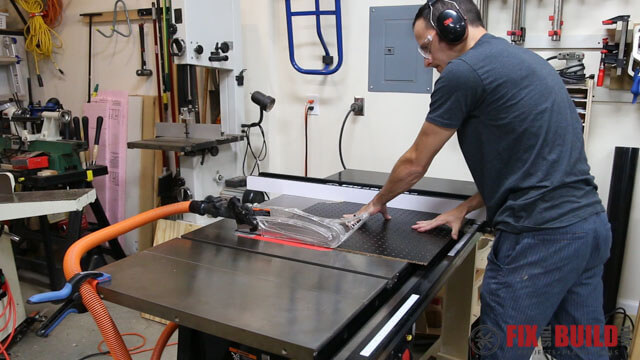
Next rip your 1/2″ MDF into 6″ wide strips for the sides. Crosscut the sides to make 2 long sides of 24″ and 2 short sides of 19″.
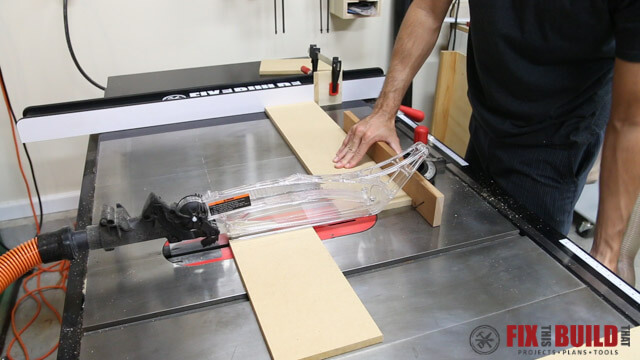
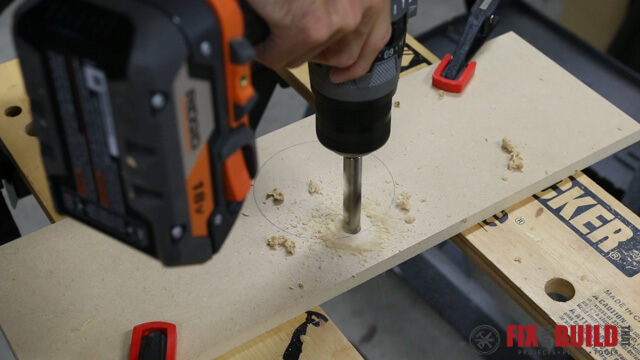
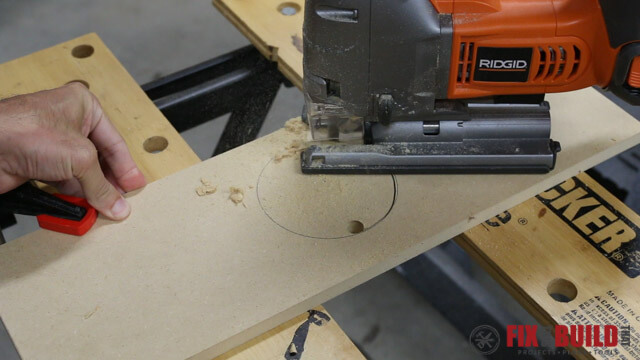
Next layout the position for your dust port on one of the short sides. It should be centered on the board and about 1″ up from the bottom.
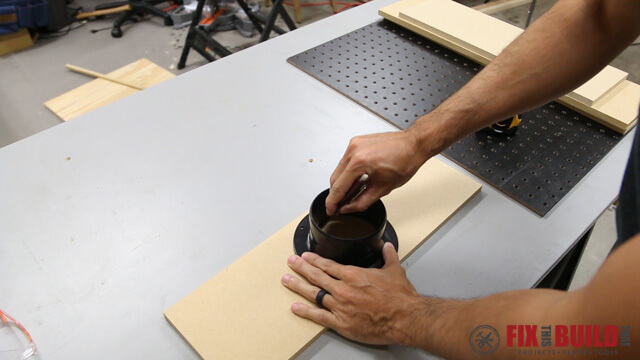
Use a drill to make a starter hole then cut out the circle with a jigsaw.
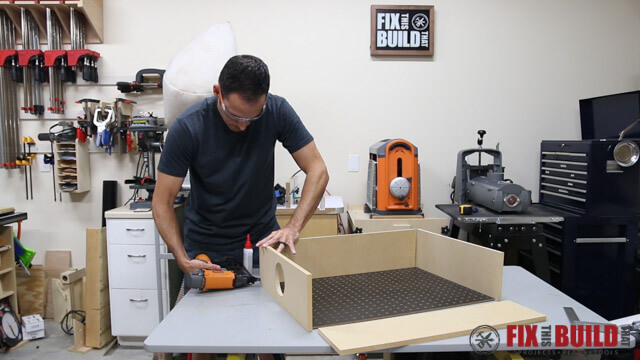
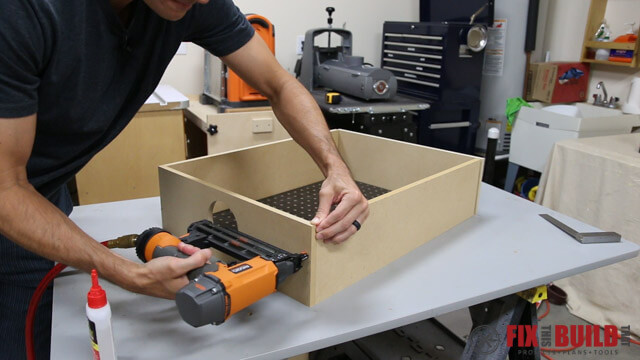
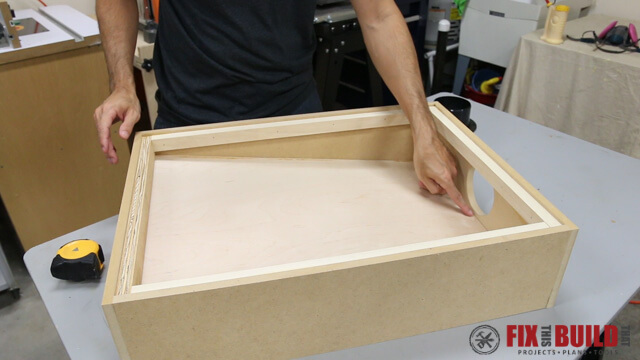
2. Assemble the Sanding Box
Now you can assemble the downdraft sanding table box. Turn the side with the dust port upside down and use the pegboard top to square up the assembly. I joined the piece with a quick setting glue and a brad nailer with 1″ brads.
3. Mount Cleats to Hold the Downdraft Top
The top of the downdraft sanding table is supported by a series of cleats around the top edge. First I Cut an 18″ long 1-1/2″ cleat from 3/4″ material to go on the side opposite of the dust chute. Then the other short side gets an 18″ long 1″ wide cleat and the long sides each get a 22-1/2″ cleat 1″ wide.
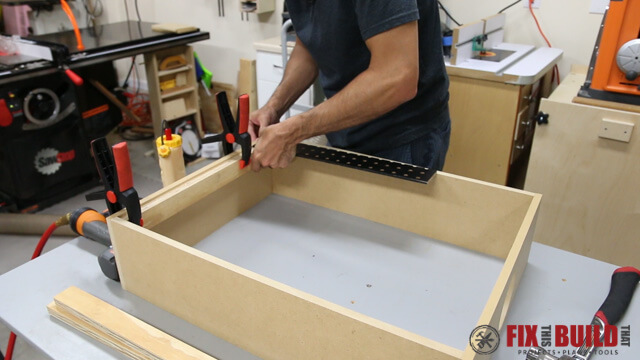
After that I used a small offcut of the pegboard to position the cleats. They should be positioned so the pegboard is flush with the top.
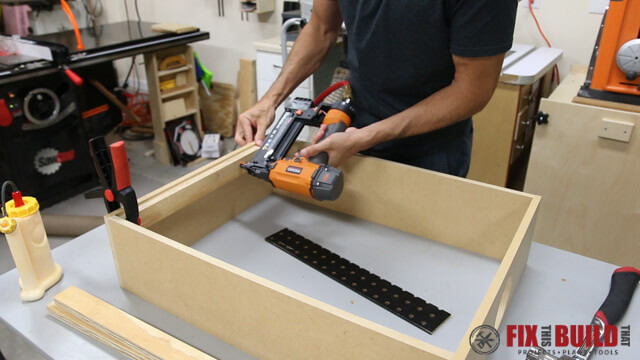
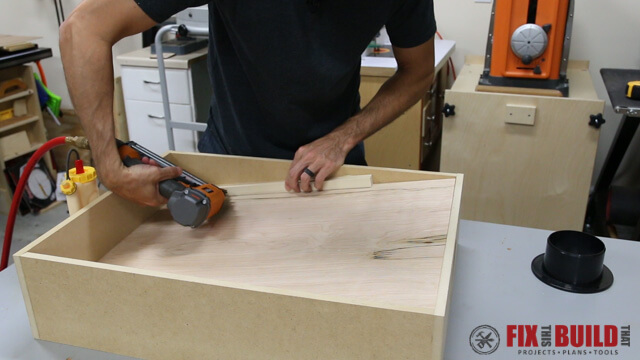
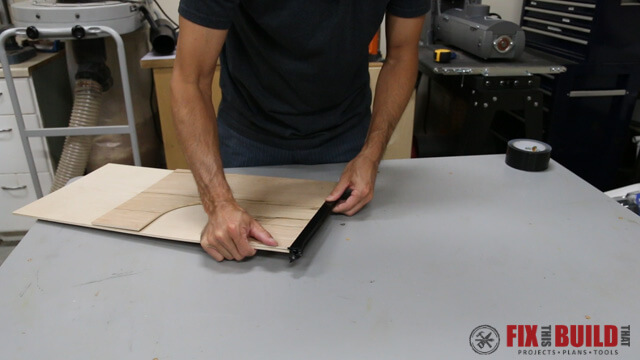
4. Make the Dust Chute for the Downdraft Table
Firstly to make the dust chute, cut a section of 1/4″ plywood to 18″ wide and dry fit it in your downdraft table before trimming to length.
Next cut the chute to size so it sits about 1/8″ down into the box. Note the side away from the dust port should be firmly seated on the underside of the 1-1/2″ cleat and the other end will be close to the dust port.
To secure the dust chute cut 14″ cleats from 3/4″ x 3/4″ strips and glue the faces that will touch the side and dust chute. Nail the cleats to the side with 1″ brad nails.
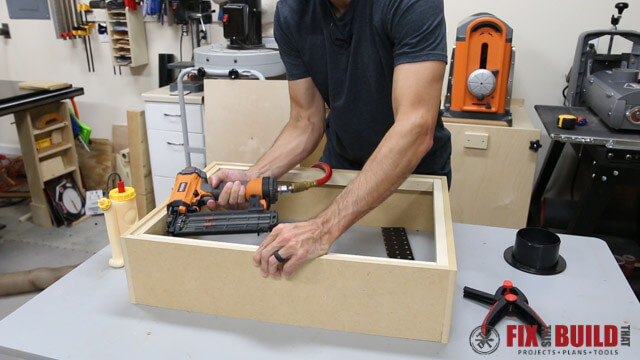
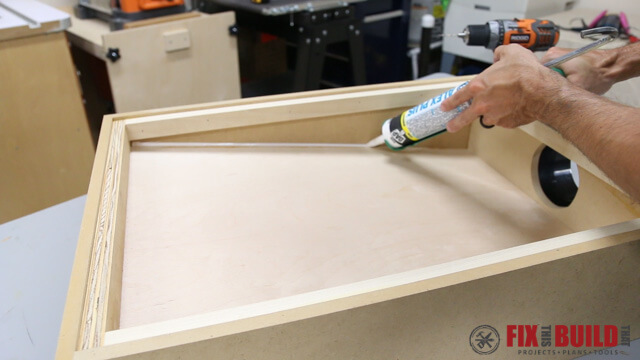
To finish off the box I drilled holes for the dust port and attached it with 5/8″ pan head screws.

Caulk the inner seams for an air tight seal and to direct all airflow from the top.
After that the downdraft sanding table is done! But I did add some knockdown sides for extra efficiency as well.
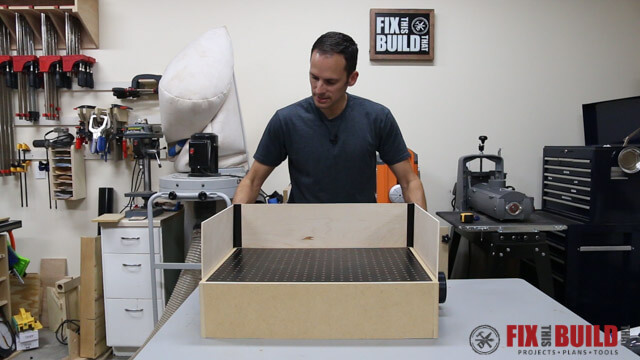
5. Build the Knockdown Sides
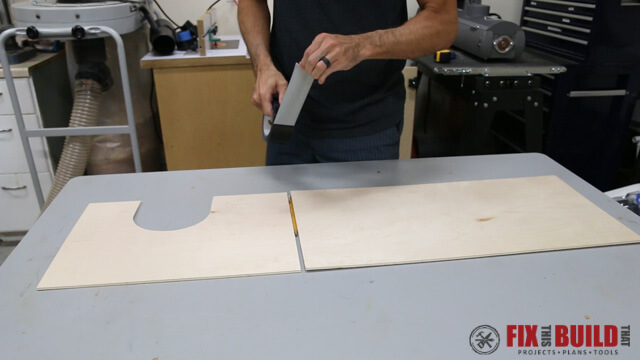
The downdraft sanding table knockdown sides are made from 1/4″ plywood. The sides are 12″ tall and the full sized back piece is 25″ and the two sides are 17″ long.

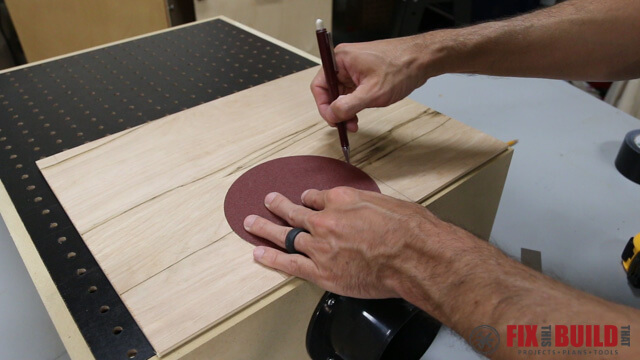
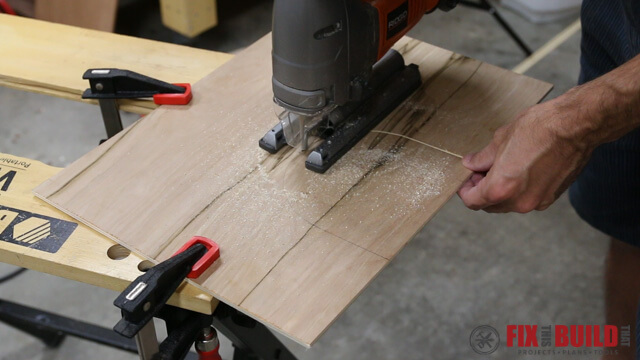
On one of the short sides you need to make a cutout for the dust port. Firstly use a circle to trace and outline and then cut it out with a jigsaw.
The sides are joined together with duck tape for the hinges. Put the panels a pencil width apart then tape the panels together with a strip of tape.

Next flip the panel over and apply another strip of duck tape to the other side, pressing the tape into the seam and sealing it against the tape you already applied.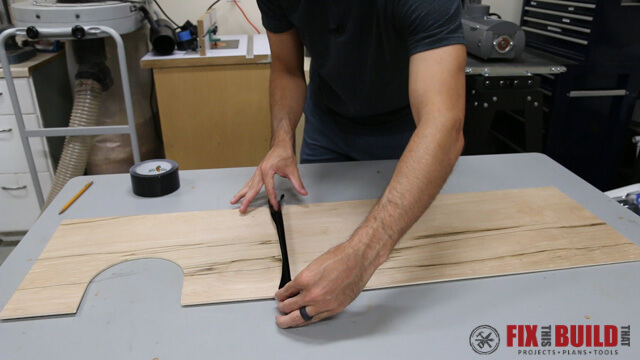
Then fold the panels along the hinge then secure the outer edges of the tape to the panels.
Finally, repeat this on the other joint and you have your knock down panels for your downdraft table.

Now sand to your little heart’s delight knowing your DIY Downdraft Table is a great little sanding box keeping your lungs clean.
If you want more great shop projects go check out my Shop Projects page.


The down draft catches EVERYTHING, with the exceptions noted below, whereas the hose does not.For example, I have a couple Fuzzytools and they do a very good job with just a dust collection hose, but when you are sanding a 2-1/2″ wide stick with your 5″ sander, and even after slowing the spin, the spinning disk will throw a lot of material too fast and hard for the hose to catch. This is not a problem with larger boards.My sanding table catches everything. With no hose to the sander, you can watch the
dust tossed off the disk do a U-turn and disappear down the table.There is an obvious reason my table works so well, and much better than the one in this article – not only does it have sides, but it has a top too, so there is nowhere for the table to draw air from except the front, where you are sitting or standing.Keep in mind, my table is about twice the size of this. If I want, I can play thin stock over part to cause it to focus on a smaller area.
Would a larger table have less suction? Is the point of the removable sides so you can put larger pieces on it and move it around to keep the sanding action over the pegboard?
I wonder which would be better…using a downdraft table or connecting the shopvac directly to the sander? Maybe both at once, but that might result in a loss of suction… Thoughts?
Use a dust collector bag in the sander’s dust port and the downdraft table to catch everything else. The sander’s port is not very good at getting all the particles.
Hey brad, what do you put underneath your wood and pegboard to pervent it from slipping?
I use the foamy shelf liner!
I’m using a Craftsman 5.0 Peak HP shop vac and I’m not really getting any suction from it. Do you think I need a stronger shop vac, or is there something else that is likely the cause? I’ve caulked around all the inner seams and I don’t seem to have any leaks.
Hey Brad, where did you get the dust collection blade guard for your table saw? Does it come with the Saw Stop? I have a PM1000 and really want something to collect dust at the blade but don’t really want to have to build one. Thanks!
I am a Laryngectomee and breathe through a hole in my neck. Sanding is something I need to be very careful around, and this dust collecting box is perfect project for me, and much needed item for my shop! Thanks for posting this!
That awesome, Jim! I’m glad this will help you be safe in the shop!
Great idea and awesome build! I have to build one for sanding my chopping boards:)
Heck, I’d like to know where you still find The New Yankee Workshop on TV?!? LOL! No but seriously, great work up and plans! I will be building this!!!
thanks, Alvin!
Nice plan Brad. I have made one similar and I have used Melamine coated particle board for all the pieces and the amount of friction is reduced dramatically. I used 16″ white shelving from one of the big box lumber stores! Mine is of course a smaller model and you can get the Melamine sheets in 2′ X 4′ or even 4′ X 8′! Thanks again!!
Yours sounds great Stephen! Good idea using the melamine.
Has anyone howhow figured out how big of a box you can make for using a small vacuum like a Stinger wet/dry vac? Thanks for the article it’s a great idea.
Edd, I have not heard about it. But I’d say it could handle this size. Try it out and let me know!
Ok, I will ask. Why the tilted bottom, for vacuum air flow pressure, or for dust rolling downhill?
Mark, yes and yes. The slant helps with both of those. But the main reason is for the suction. The slant helps speed up the airflow as it gets further from the hose and help keep consistent suction across the grid.Brad