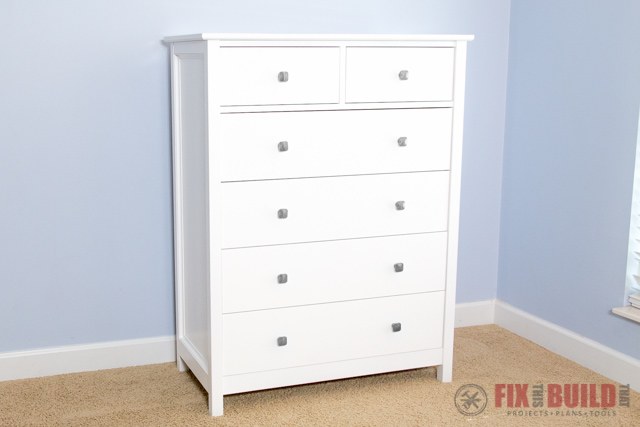
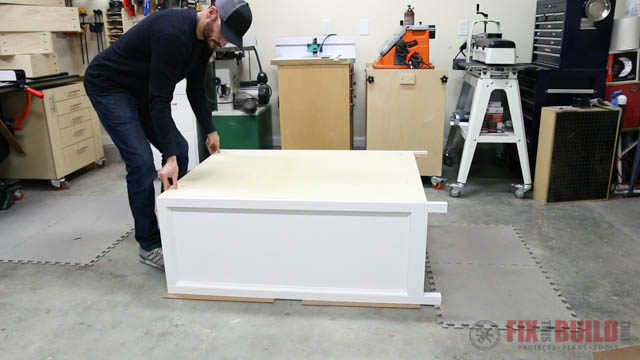
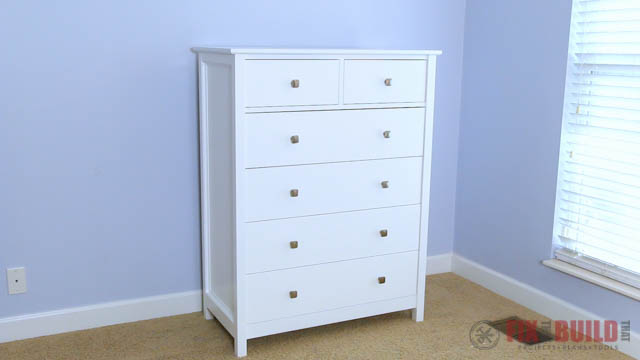
A DIY Dresser might look like a large difficult project, but I’ll show you how to build this 6 drawer tall dresser with materials from the home center and easy joinery. I built this chest of drawers for my daughter to replace one of those large 3 drawer plastic storage bins she’d been using for her clothes. And I have to say this is a huge upgrade!
I used pocket hole joinery for the majority of the DIY dresser which makes it easy and approachable to build. Kreg Tool is sponsoring the project and you guys know I love their jigs. The K4 jig is my go to pocket hole jig and I’ll show you some other cool jigs they have that helped me along the way.
Be sure to watch the full video below to get some extra details and I also have DIY dresser plans available if you want to build your own.

Materials/Supplies
- (2) 4’x8′ 3/4″ plywood
- (1) 4’x8′ 1/4″ plywood
- (2) 8′ 2×2 select pine boards
- (1) 8′ 1×3 select pine boards
- (1) 8′ 1×2 select pine boards
- (2) 6′ 1×3 select pine boards
- 20′ 11/16″ cove molding
- 1-1/4″ Pocket Hole Screws
- (6) 16″ drawer slides
- (10) drawer pulls
- Anti-tip kit
Affiliate links are used on this page. See my disclosure page for info on affiliate programs.

This tall dresser is going in my daughter’s room as another piece of the bedroom set I’m slowly making. It’s going to go great with the DIY Daybed with storage that I made for her last year. And if you do build this dresser make sure to anchor it to the wall with an anti-tip kit!
How to Build a DIY Dresser
- Build the Dresser Sides
- Trim out the Side Panels
- Make Bottom & Stretchers
- Connect the Sides
- Build Dresser Drawers
- Install the Drawers
- Cut and Trim Drawer Fronts
- Make & Install Dresser Top
- Install Drawer Hardware
1. Build the Dresser Sides
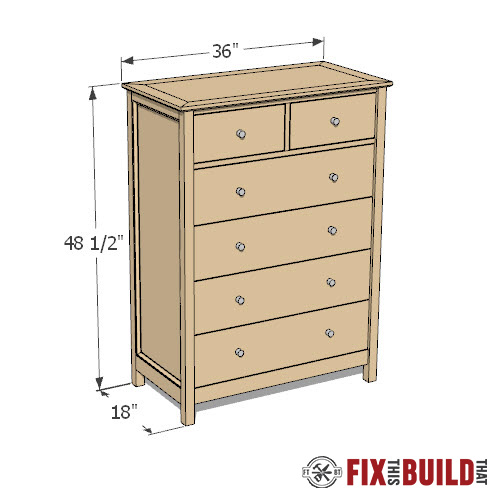
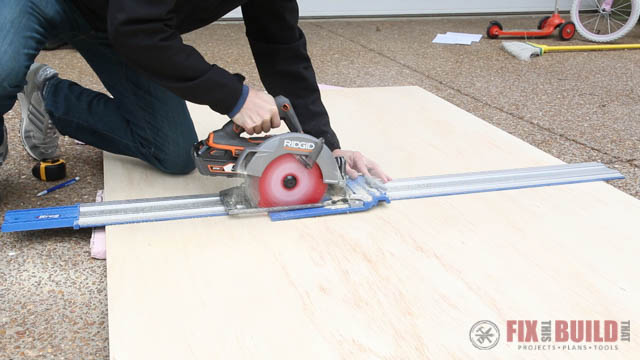
The DIY dresser is made from ¾” plywood and dimensional lumber. I started by breaking down the plywood into manageable pieces with my Kreg Accu-Cut guide and my cordless circular saw.
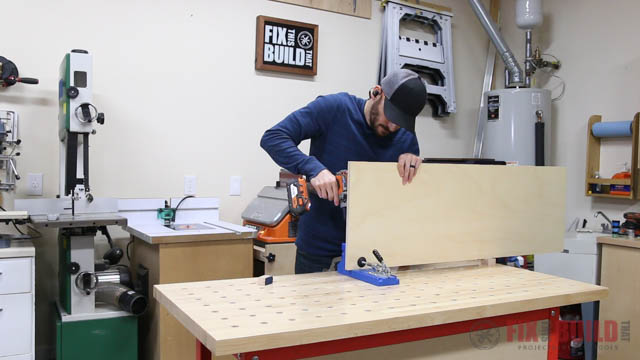
Next I took the smaller pieces to the table saw and cut parts for the sides of the DIY dresser. These plywood panels will be joined to the legs using pocket screws so I drilled pocket holes with my K4 jig down the length of each panel.
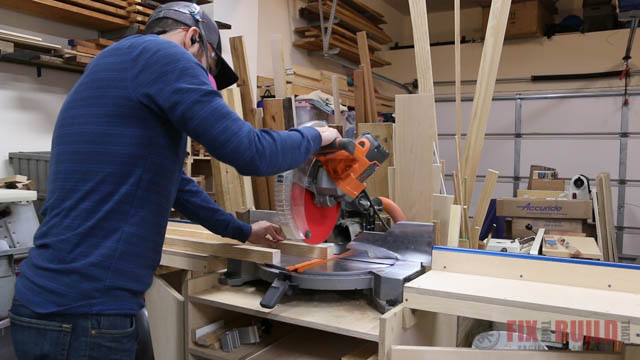
The legs are made from 2×2’s and I cut all four of them to size on my Mobile Miter Saw Stand with a stop block for repeated cuts.
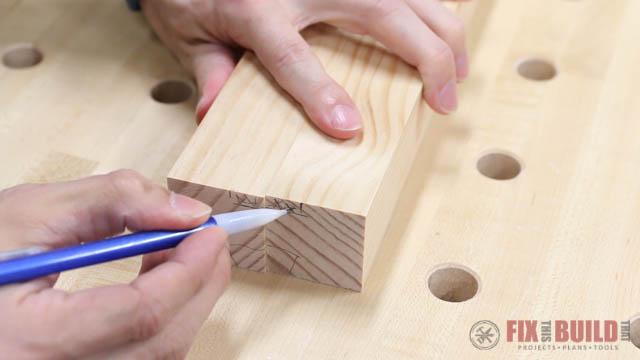
I lined up the legs and marked the ends to keep them in order, then I laid out cut lines for a groove or rabbet on the inside of the back legs. This recess will hold a ¼” plywood back panel flush on the back of the dresser.
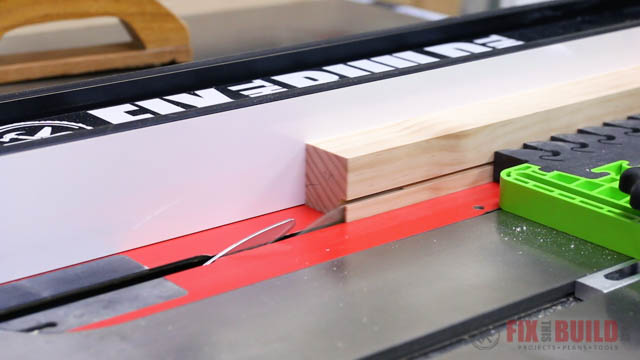
The rabbet cut can be made with two cuts on the table saw. The first cut defines the width of the rabbet.
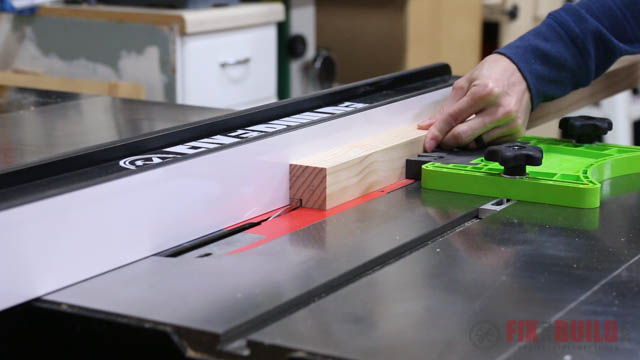
And the second cut defines the depth and frees the off cut. This feature could also be made with a router bit as well.
To assemble the sides I laid some ¾” spacers on my bench to lift the plywood panel up to the same height as the legs. I put glue on the legs then clamped them in place and secured them to the panel with pocket screws.
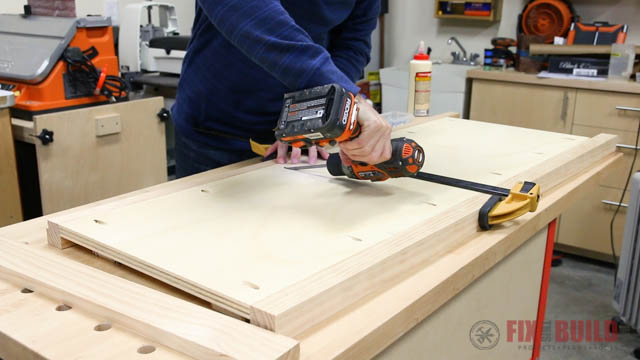
2. Trim Out the Side Panels
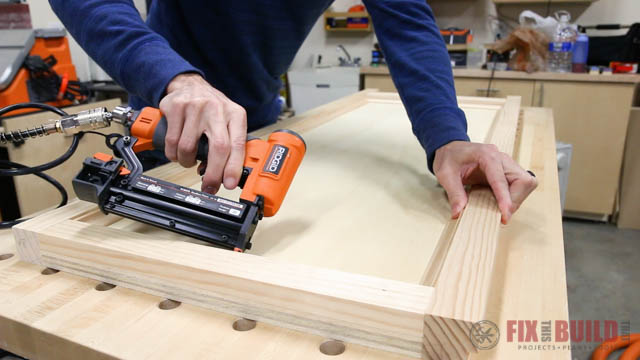
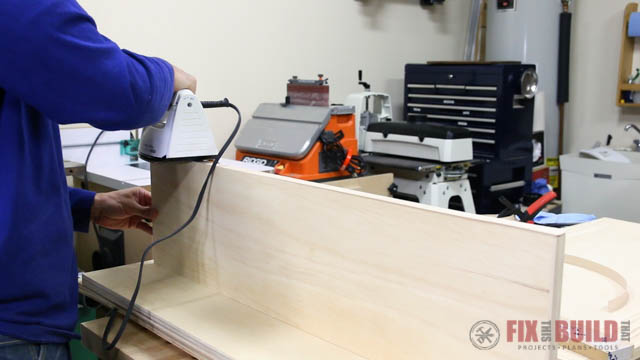
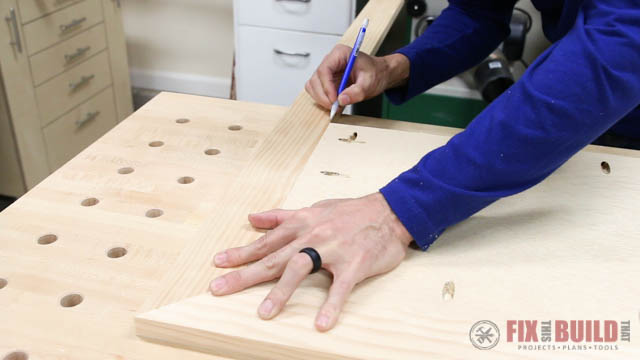
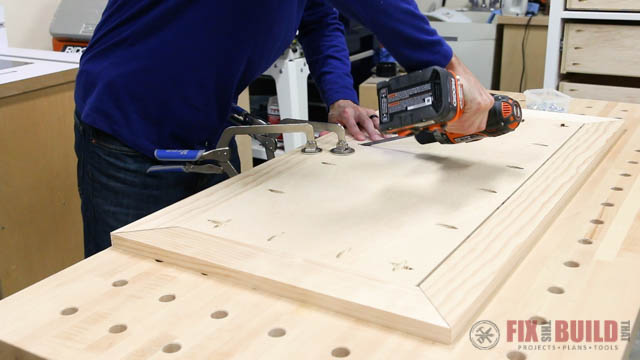
I cut two pieces of trim to size to finish off the outside of the side panels. A 1×2 glued and brad nailed to the top and a 1×3 for the bottom gives the side panel a nice frame and panel look.
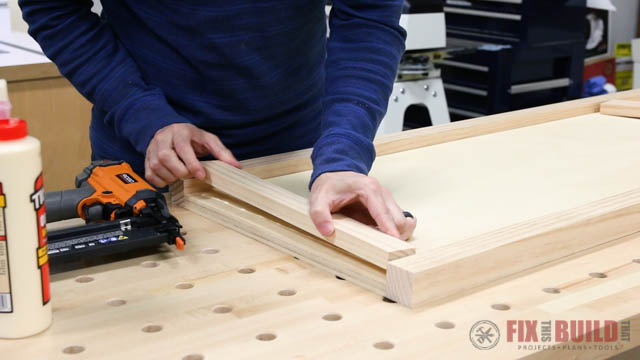
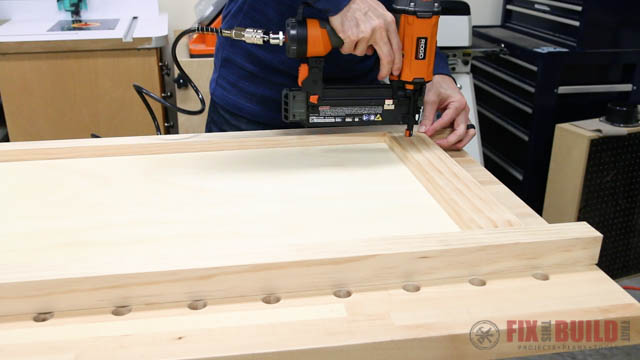
To give the dresser build a little more detail I trimmed the frame of the sides with cove molding. I’d cut one end of the molding, take it to the side, mark the fit, then make the final cut.
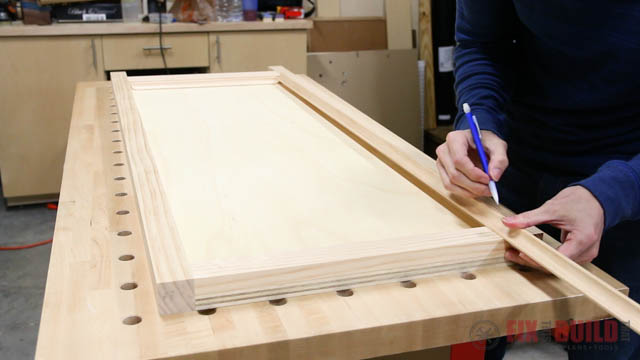
When all the parts were dry fit in place I came back and secured them all with a 23 gauge pin nailer, but a brad nailer works fine as well.
3. Make Bottom and Stretchers
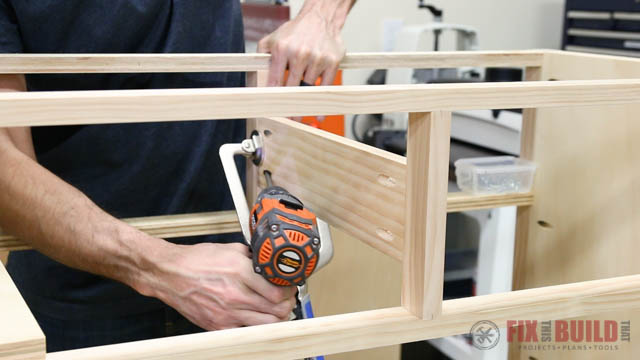
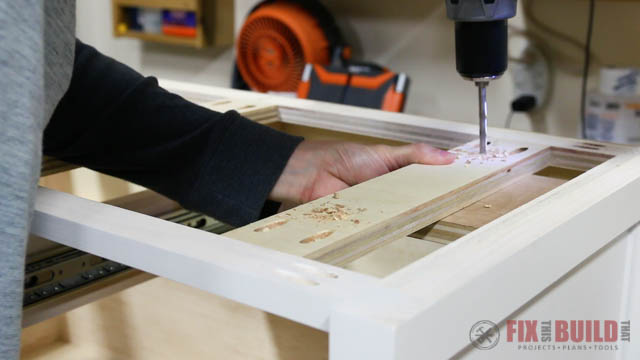
The sides of the DIY dresser are connected by a bottom panel and stretchers on the top and middle which make the opening for the top drawers. I drilled pocket holes around the bottom panel to connect the trim and secure the sides. I also drilled holes in the ends of the stretchers to join to the sides.
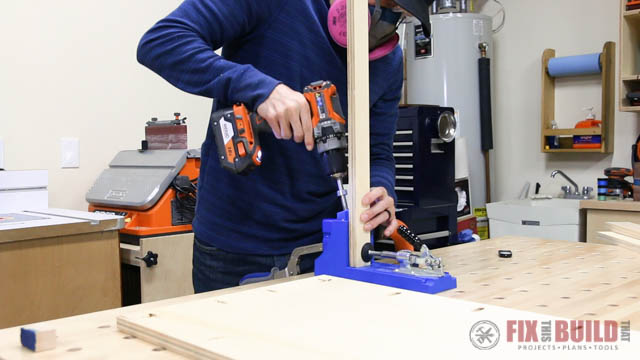
For the bottom panel I started by attaching the solid wood 1×3 wood trim to the front. Then I secured the plywood back trim the same way. Securely clamping everything with face clamps to a flat bench or work surface is key since you can’t see the top of the joint with the panel upside down.
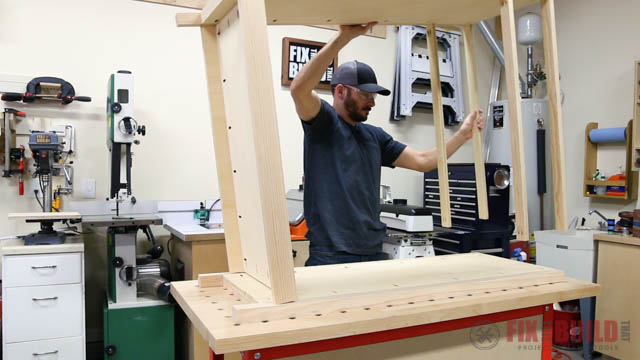
4. Connect the DIY Dresser Sides
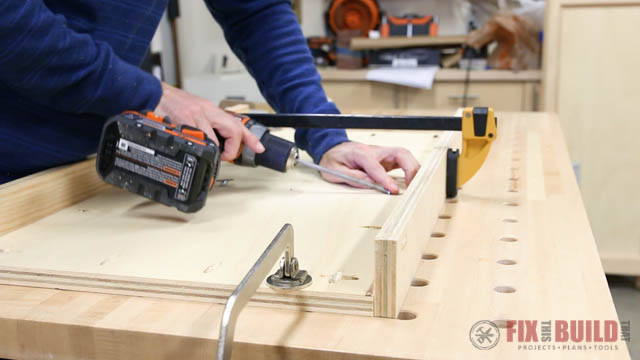
In my design the legs stand proud of the drawers and front trim by ⅜”. I marked reference lines for the setback on the front of the legs and secured the bottom panel in place with pocket screws. Then I moved up and secured the top stretchers in place as well.
With all the cross pieces connected to one side I moved the assembly out of the way then laid down the other side on the bench and put the assembly on top and attached it to the second side.
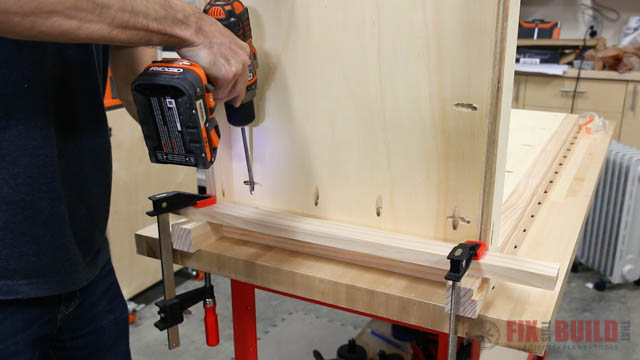
After I attached the bottom and top stretchers I cut the center divider for the stretchers. Then I installed the center divider on the front and cut another one that I attached between the back stretchers. The drawer slides for the top drawers need an attachment point in the center so I cut and installed a piece for that as well.
5. Build the DIY Dresser Drawers
With all the cabinet structure done I moved on to making the drawers for the dresser. The dresser has two small top drawers that fit in the openings I just made and a bay of four drawers that fit in the open space down below.
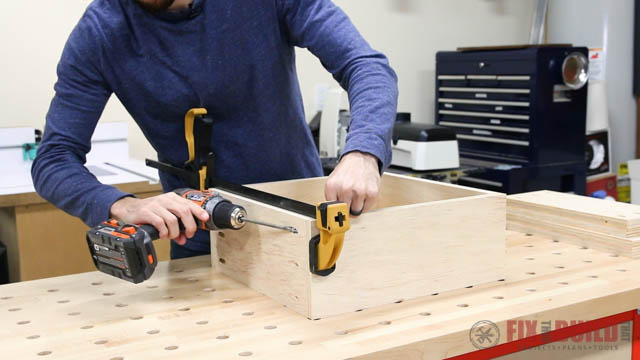
The drawers were made from ¾” plywood and I actually made a whole separate blog post on how to make drawers in 6 easy steps when I made them. I go into a lot of detail about sizing drawers, working with undersized plywood vs. full ¾” stock, and two different options for drawer bottoms.
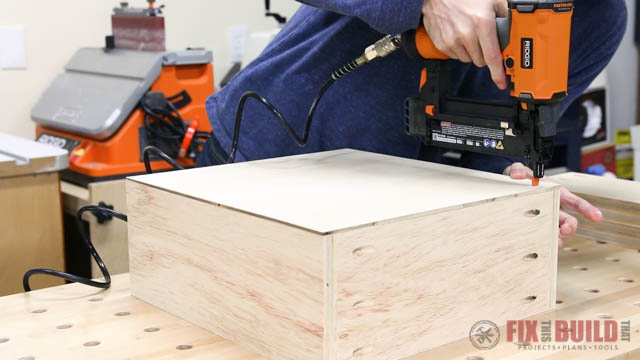

Before mounting the drawers I installed the ¼” plywood back into the rabbet grooves I cut earlier in the back legs. I nailed it in place with 18 gauge brad nails and this helps keep the dresser square and prevent racking. Oh, and you probably noticed I painted the cabinet white, I just used a semi-gloss white paint, nothing special.
6. Install the DIY Dresser Drawers
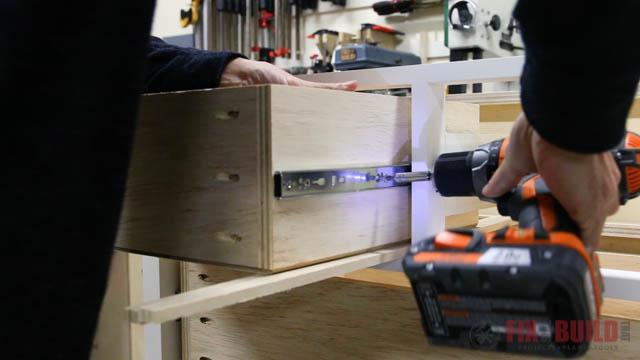
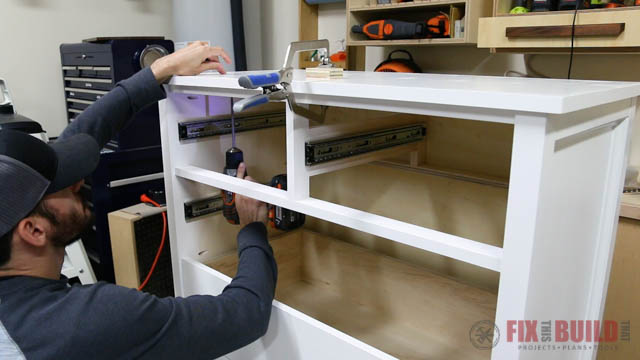
To mount the DIY dresser drawers I used 3/4″ plywood spacers to sit the drawer slides on. I set the slides back so they would be flush with the stretchers. Then I predrilled and attached the slides with screws.
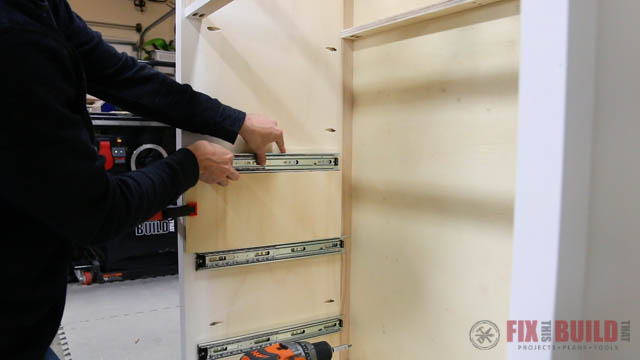
An easy way to size a spacer like this is to take the distance you want between the top of one drawer to the top of the next one, then subtract the height of your drawer slides. This will give you consistent spacing between your slides and make install a breeze.
To install the bottom drawer I laid down a few strips of plywood off cuts to lift the drawer up off the base. I pulled the drawer out, flushed up the slide with front of the drawer and secured a screw on each side. Next I pulled it out a little further and secured another screw on each side. I took out the drawer completely to access the back mounting holes and put a third screw on each slide then reinstalled the drawer.
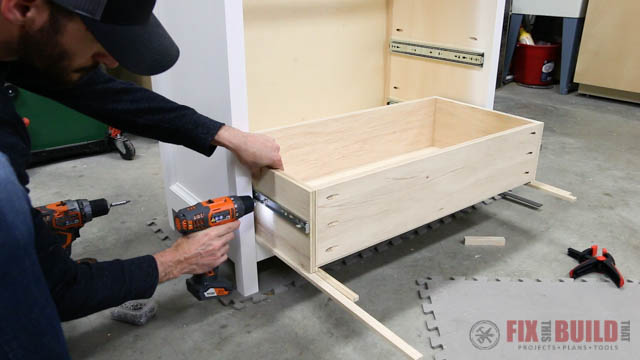
For the next dresser drawer I used two plywood scraps stacked on each side of the lower drawer as spacers. Then I just repeated the same steps as before to secure three screws per side. I repeated this two more times and had all four drawers installed.
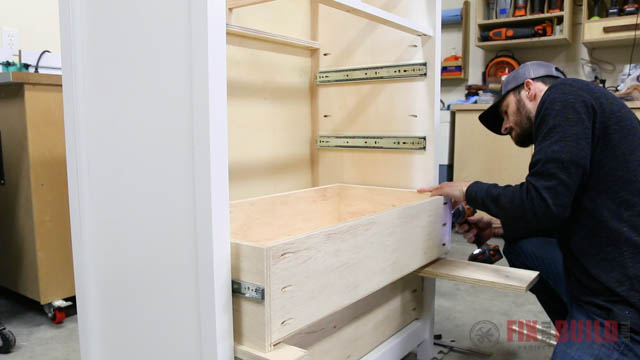
For the top drawers I installed the slides the same way as before using a small spacer and my combination square to offset the slides. Then I used the plywood strips from the bottom drawer and mounted the drawer in the slots the same way. Once you do the mounting process it’s pretty straightforward to do any drawer, you just have to vary the spacers for the application.
7. Cut & Trim the Dresser Drawer Fronts
The last parts that needed to be cut were the false drawer fronts. I cut the drawer fronts from plywood and sized them for a ⅛” reveal around each drawer. In the past I’ve used spackle to seal the edges before painting but I wanted to try iron on edge banding this time. The banding has a heat activated glue and you just press a hot iron onto it and it bonds to the edges.
After it cools down and dries you can come back with a chisel or razor blade to trim the excess. Honestly I didn’t like this approach. It took just as long as the spackle and trimming the excess was finicky.
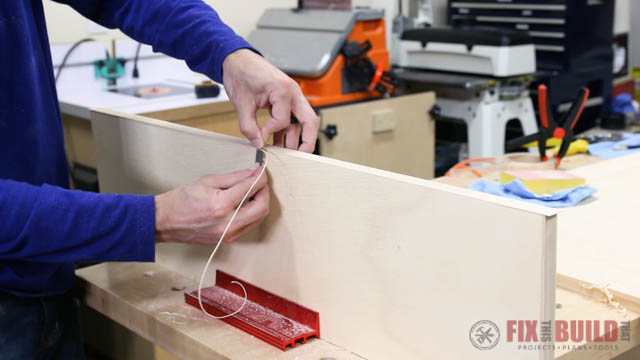
I painted the top and drawer fronts then drilled holes in the drawer box to secure them. I clamped them in place using playing cards to get consistent spacing. You can see my trick for doing this in my How to Get Perfect Inset Drawers post. Then I attached them from inside with screws.
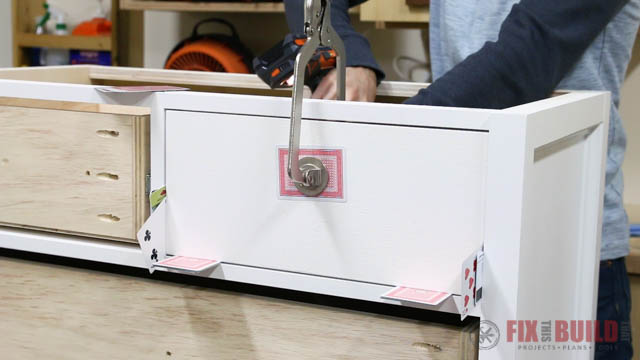
For the lower drawers I start from the bottom and used a ⅛” spacer on top of the drawer to position the next drawer. It went quickly and I had all the drawer fronts in place.

8. Make & Install the DIY Dresser Top
Next up I made the top for the dresser. I was going to go with a solid wood glue up for the top, but I had plenty of plywood leftover and wanted to put it to use. I used 1×3’s for a mitered frame to give a nice solid wood look around the edge and the paint will hide the transition to the plywood panel. First I’d cut a 45 degree miter then mark the position for the next cut and do a second cut if necessary to fit the frame.
I attached the mitered frame with pocket screws and glue, making sure to get lots of glue on the miter joints. After the glue dried I sanded and painted the top white.
The top of the dresser is attached using some small cleats I cut for the top. I screwed the cleats between the top stretchers then predrilled holes through them for the top.
I centered and clamped down the top and attached it with screws. Since I’m attaching into plywood I don’t need to factor in any wood movement which is nice.
9. Install Dresser Drawer Hardware
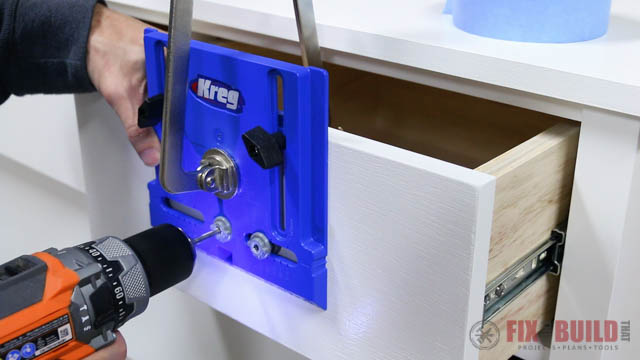
The last I’ll show you is how to install the drawer pulls. I used my Kreg cabinet hardware jig which helped me easily center the pulls on the upper drawers.
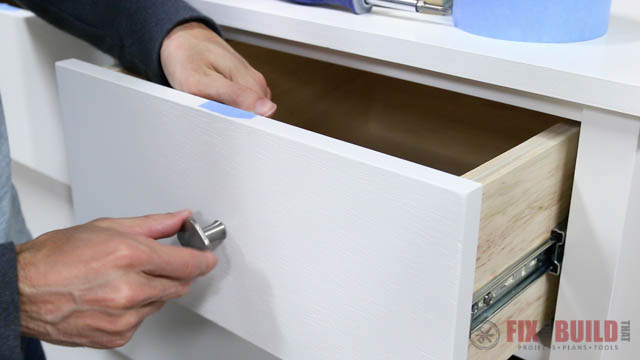
Then I made an adjustment for the larger lower drawers and finished off the lower drawers with knobs, lining them up with the top drawer for a nice neat line of pulls.
And here she is all buttoned up. If you’ve got a good eye you probably notice a bevel on the underside of the top that wasn’t there a second ago. I noticed something off about the piece and decided to throw this 45 degree under bevel on the top at the last minute. It really added that finishing touch I think it needed.
That’s how to build a DIY dresser and if you want to build your own I have DIY Dresser Plans available. If you want to see some other great projects head over to my Furniture Projects page.
Kreg Tool provided me with product and/or monetary compensation as a sponsor of this build. All opinions are my own and are not filtered by the sponsor.


Was the cost in buying the products to make it in comparison to how much it would cost for one of those manufacturering junk you buy in the store? I don’t mind having projects. I just need the price to be reasonable right now. Current covid pricing is crazy.
I recommend looking at the materials list to see what you need to purchase to make the dresser. Then use that information to calculate how much it would cost with the current prices in your area. You’re right, lumber prices are crazy right now, but you can figure out how much it will cost in advance.
Looking for the cut list
You can get them here: https://gumroad.com/l/diydresser
I really need to get the Kreg jigs!
Hey Brad, great dresser. Just got it to build for my daughter as well. I was going to use oak for the legs to give them a little more strength against dents. I was going to ask about dimensions, but your cut list had the answers I needed! Great Work!
Great build. I am going to do a double wide version of this for our master bedroom. I built a bed with drawers in the bottom for my daughter a few years ago. One thing we’ve noticed with the plywood drawer boxes is that anything made of cloth, like sheets and blankets, begin to smell like wood once they’ve been put in there. Do you know of some way to seal the drawer boxes so the clothes won’t smell? Anything you would recommend? Thanks.
I see that the 1×2, 1×3, and 2×2 Pine Select boards on the material list. Has anyone found that pine is too soft for this application? After 1-2 years, are they showing visible dents in the vertical corner post locations?
Chris, if you’re worried about dents I’d go with Ash or Alder or some other inexpensive hardwood. Ours has a few bumps and bruieses but is hanging in there and looking good.
Thanks for the quick response! I might opt for something harder. I plan to build this and will post pics once completed.
I love your work and the instructions are awesome, but you should consider revising the instructions to include a note that the dresser must be anchored to the wall for safety. I have heard some standards like 50 lbs with the top drawer pulled out, but I wouldn’t go into that. No wiggle room in the statement for liability reasons. Even consider adding the parts to the material list so if they don’t, it’s not because you didn’t provide every opportunity for them to get the necessary parts. I’m not a safety expert; just want to keep people safe and you out of trouble. Sorry, I feel like the Debbie Downer; Keep up the awesome work.
That warning is on the plans 🙂 I’ll add it here as well