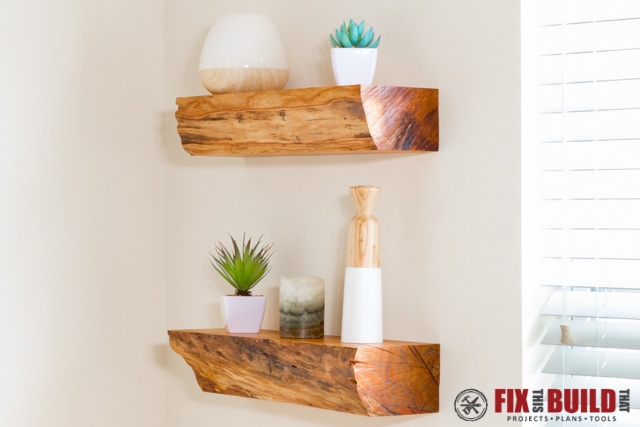
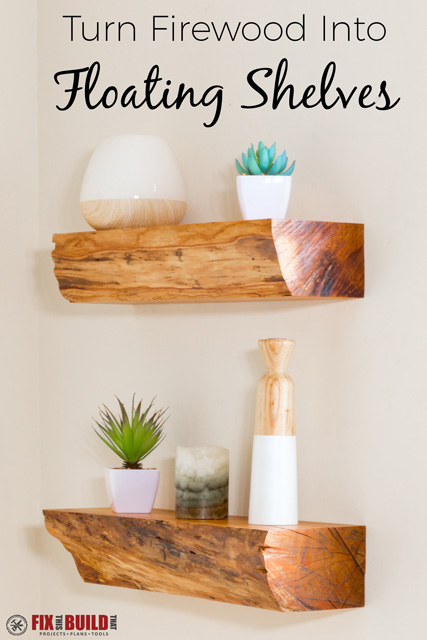
DIY Floating Shelves are all the rage right now, but I wanted something unique. So I decided to turn firewood into floating shelves for a one of a kind look! Each floating shelf has invisible hardware that I’ll show you how to install so the shelf will hang seamlessly on the wall suspended in air. I made these rustic shelves really thick at 4″ but you could make them 2″ thick or even smaller to suit your style. I’ve got a video down below that shows all the steps I used to build them, and I hope this inspires you to make your own DIY Floating Shelves from firewood!
Materials/Supplies
- Firewood (size varies)
- Invisible Mounting Hardware
- Oil based Poly
Affiliate links are used on this page. See my disclosure page for info on affiliate programs.
I started the DIY floating shelves project out with a log from a tree that had been cut down locally. The rest of the tree was used for firewood, but I wanted to try something different with this piece.
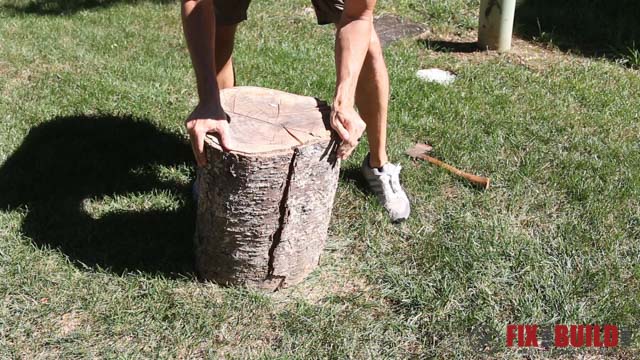
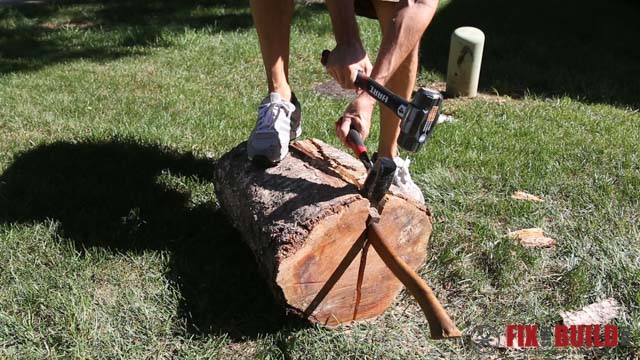
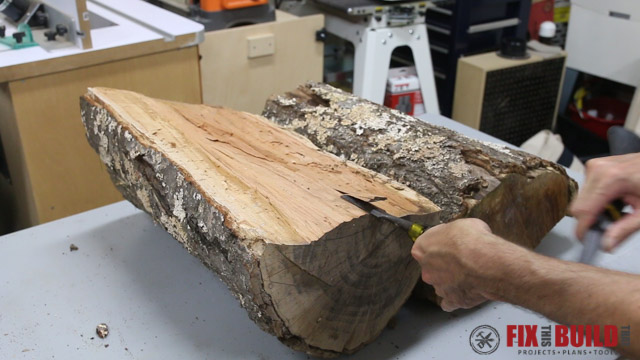
The log had a big split in it from drying, so I figured I would try to split the log from the top on the other side. Clearly I’m a novice in log splitting and have undersized tools and I quickly realized this wasn’t the right way to do it. Instead I used the hatchet as a wedge into the split. This worked much better, but if you have a chainsaw then it would be way easier.
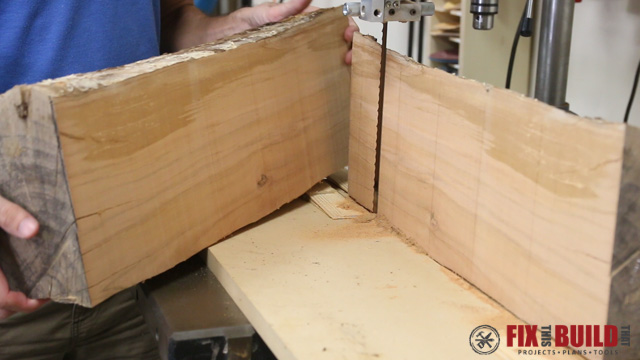
With the log split in two I needed to rough out the shape of the DIY floating shelves. The split wasn’t very straight, so I used a chisel and hammer to clean up the high spots on the log so it would sit somewhat flat. I used a marker to establish the top of the rustic shelves on the front face of the log and transferred the mark to the back with a long ruler. These lines will establish my initial cut which I’ll do on my bandsaw.
I could have freehand cut the log on the bandsaw, but I recently broke a blade when an unstable piece turned during a cut, so I decided to make a quick log sled out of some scrap MDF. My bandsaw has two miter slots so I screwed a runner on one side of the MDF, then ran it through the bandsaw cutting halfway through the sheet. Then I put a runner on some small spacers in the other slot and used super glue to temporarily join it to the sled. I pulled the sled back off the saw and secured the runner with screws and in just a couple minutes I had a safe way to cut the logs into the floating shelf blanks.

I used a marker to extend the cut line of the firewood sled and now I just needed to line up the marks on the log with the marks on the sled and secure the firewood log.
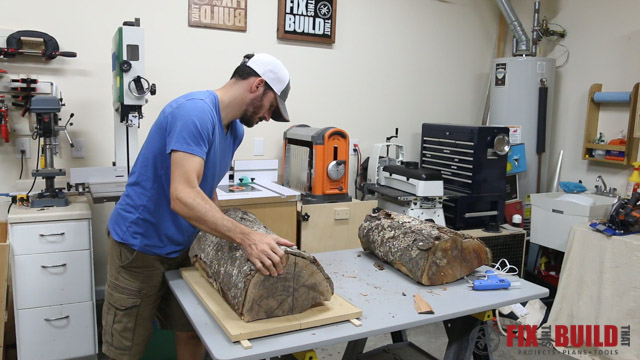
To secure the log to the sled I used wood shims and a hot glue gun. You don’t need a super strong bond here, just enough to keep it from rocking. I also positioned the log close to the front of the sled so I wouldn’t cut all the way through it and that I could use it again.
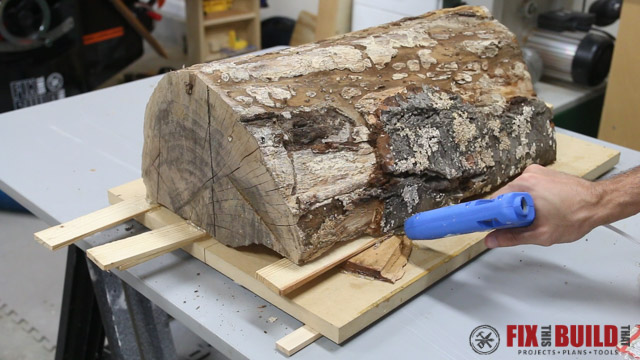
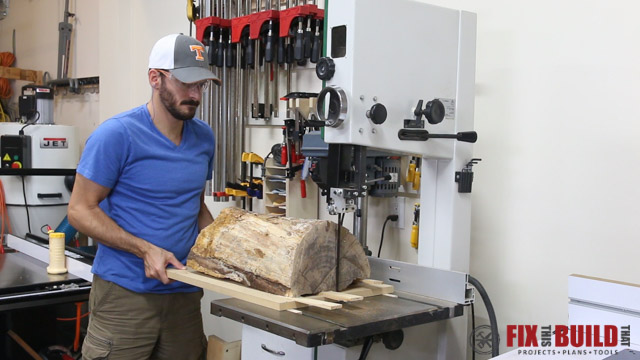
With the log secured to the sled I took it to the bandsaw and started making my cut. The wood was pretty dense so I took my time and let the blade do the work. If you don’t have a bandsaw you could cut this with a 20” or larger hand saw from the home center which I’ve actually done in the past. The sled worked perfectly and after the cut I could see the grain inside the log looked really awesome.
With two quartered pieces from the log I needed to get flat and square faces on the logs to make the final cuts for the DIY floating shelves. I used my jointer to flatten the face that I had just cut on the bandsaw. This could also be done with a belt sander or hand plane, but the jointer really makes quick work of it.
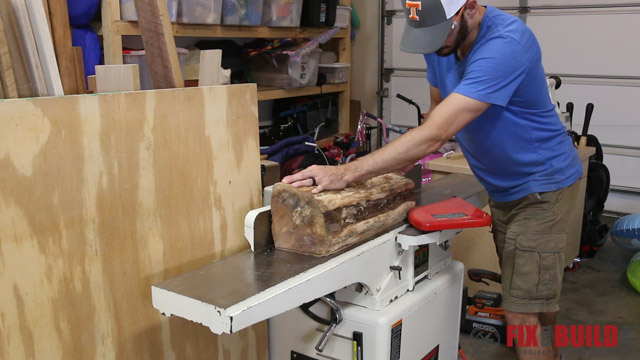
After getting one face of the log flat I turned it 90 degrees and referenced that flat face against the jointer fence. After running the logs through several passes the two faces of the log were flat and 90 degrees to each other and ready to go back to the bandsaw.
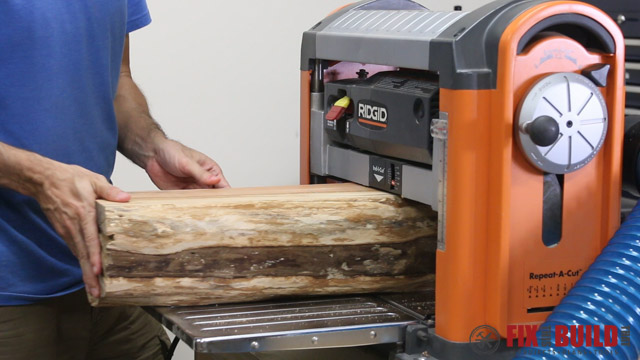
To get the DIY floating shelves down to the final size of 4″ thick I used a combination of my planer and jointer. Running the boards through the planer at 5” plus is slightly terrifying with such a short piece. So if you are using a planer for this make sure to keep your hands far far away from the cutter heads as it’s really exposed being up this high.
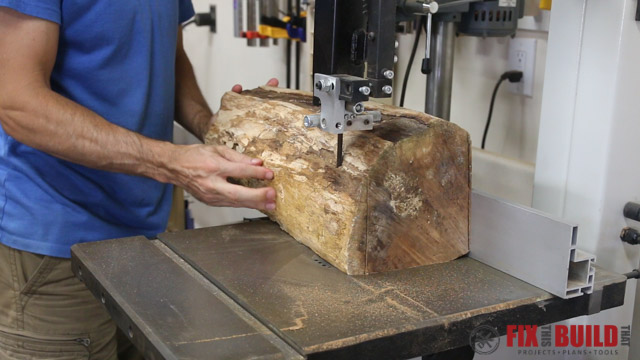
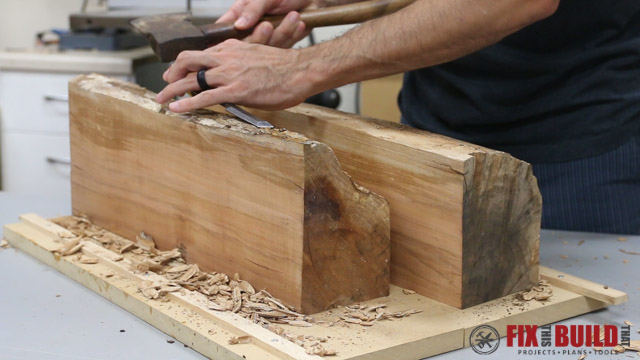
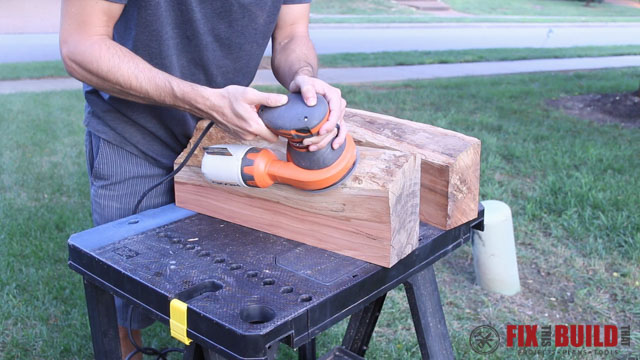
I went back and cleaned up the live edge of the shelves a bit more with a chisel and hatchet and got rid of anything that was soft or rotted. I used a sander to smooth all the chisel marks out and I was ready to mount the invisible hardware for the floating shelves.
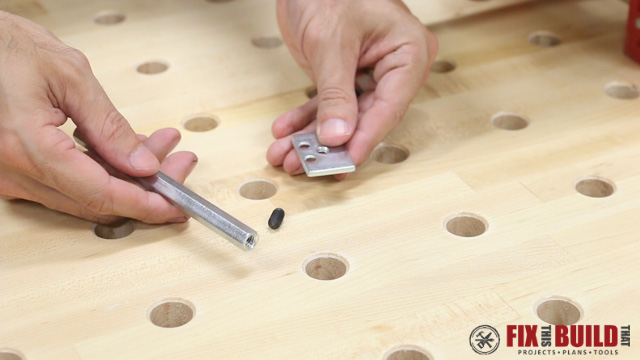
The invisible hardware I used has a mounting plate and a set screw that attaches to a 7/16” support rod.
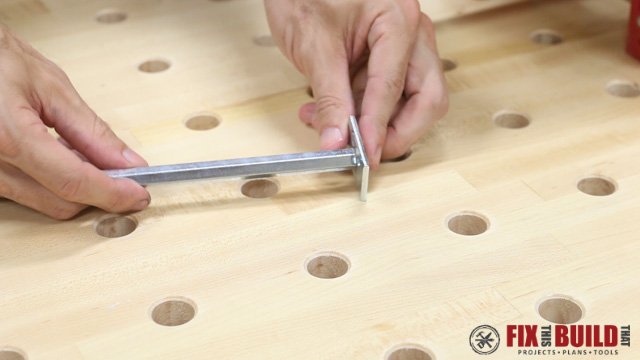
I laid the hardware out on the back of the shelves to match my wall studs, which ended up at 15-¼”. To have a flush fit to the wall the mounting plates need to be recessed into the shelf.
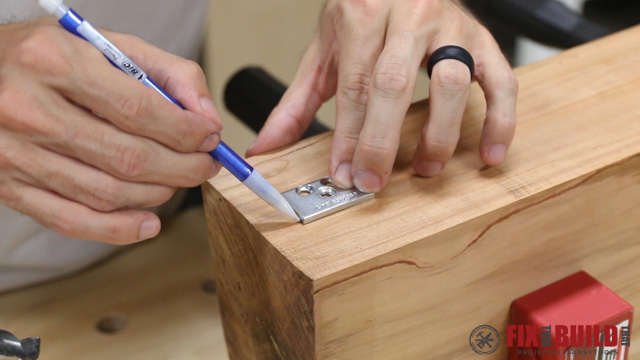
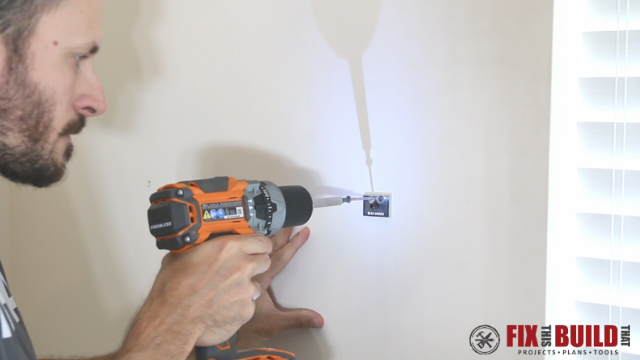
At the same time I realized my longest 7/16” bit was a little too short to fit the length of the support rod. So I killed two birds with one stone and used a 2” forstner bit to drill a recess for the mounting plates. The 2” hole is plenty big for the mounting plate and big enough that I can fit the chuck of my drill into the recess and drill ½” deeper hole for the rod.
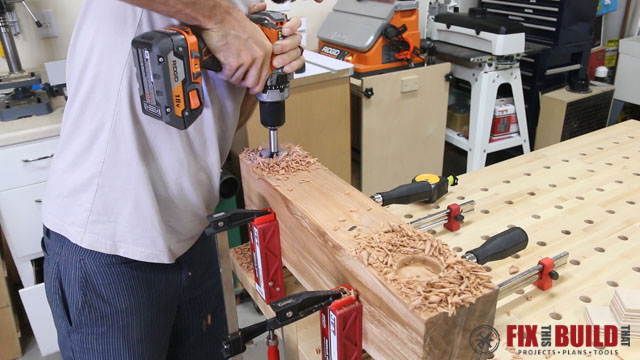
I drilled the holes for the rod with a 7/16″ drill bit right in the center of the 2″ recessed holes.
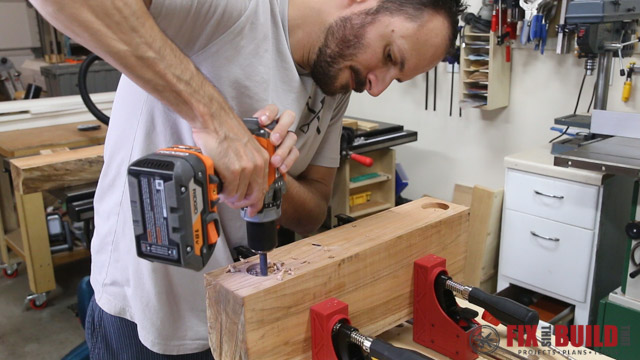
 These floating shelves are pretty heavy so I decided to try and lighten them by drilling a series of holes in the back with a spade bit. Honestly it didn’t feel like it changed it that much, but I’m sure it did remove some weight and also it made some cool little hiding spots you could stash small containers with government secrets or $2 bills.

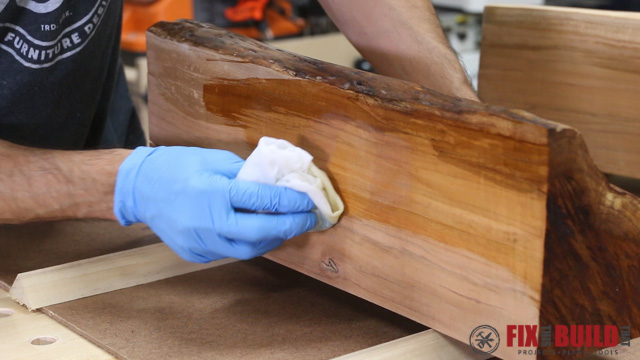
I sanded the DIY floating shelves to 220 grit then applied the finish. I used several coats of oil based polyurethane on the shelves to give it the nice amber finish that really makes the grain pop. The character on the live edges was just amazing when the finish went on. I came back on the second coat with a brush to get into all the nooks and crannies of the front edge.
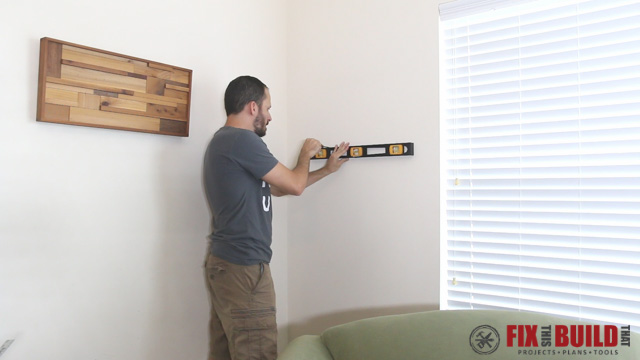
To mount the rustic shelves I found the wall studs then used a level to mark for the mounting brackets.
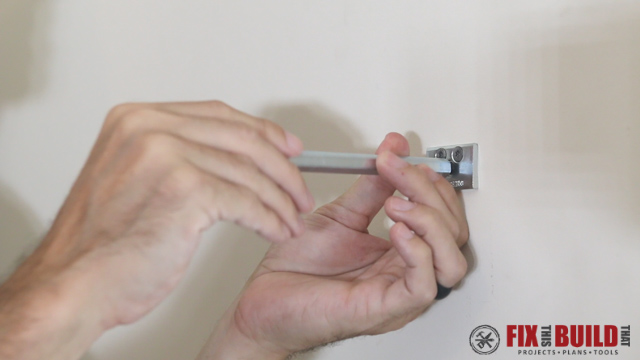
I attached the brackets with 2-½” screws into the studs then threaded the support rods onto the brackets.
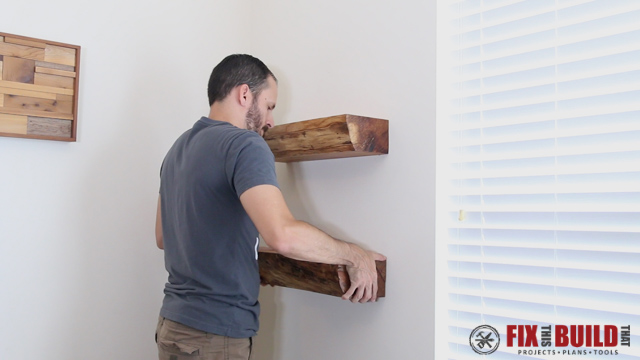
Sliding the floating shelves onto the brackets is easy by just lining up the holes with the support rods. The tight fit and weight of the shelf will easily hold them in place, but you could add adhesive to the holes or use a set screw from above into the rod for extra security.
It’s so cool to see how beautiful a piece of wood that was destined for the fire can become. I love the chunky feel of these DIY floating shelves but you could easily use half the thickness and get four or more shelves out of the same sized log.
If you want to check out more home decor projects go check out my Home Decor projects page.


