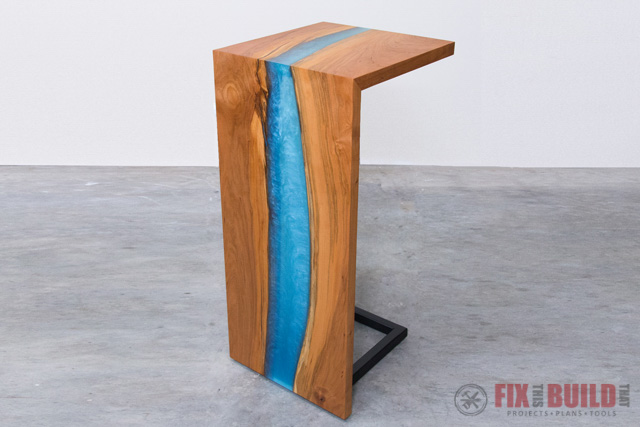
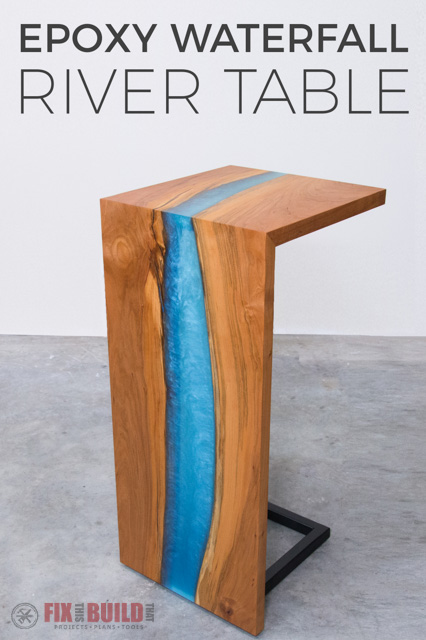
Today I’m going to show you how to make a DIY epoxy river table with a waterfall from a live edge slab. I’ve been seeing a lot of epoxy resin projects lately and I wanted to incorporate a twist on the typical live edge river tables that I’ve seen. I had a twisty slab of cherry that was perfect for the job, so I went for it!
This project included a couple firsts for me as it was my first time working with epoxy and my first time to weld when I made the base. Working with the epoxy resin was not nearly as hard I thought. You can use standard tools to machine it. I’m using a host of different RIDIGD power tools in this build to do most of the work. Thanks to RIDGID for being an awesome sponsor of my channel and this video! You can check out their new tools and promotions here: RIDGID Promotions
Materials/Supplies
- Hardwood live edge slab
- 1″ Square Tube Steel
- Epoxy Resin (much larger than I used)
- Cheaper Epoxy Resin
- Sealant Tape
- Metallic Pigments
Affiliate links are used on this page. See my disclosure page for info on affiliate programs.
How to Make a DIY Epoxy Resin River Table
- Prepare the Live Edge Slabs
- Build a Epoxy Resin Form
- Pour Epoxy Resin into the Form
- Build a Metal Table Base
- Clean up the Epoxy Resin Slab
- Cut and Join the Waterfall Edge
- Finish and Assemble
1. Prepare the Live Edge Slabs
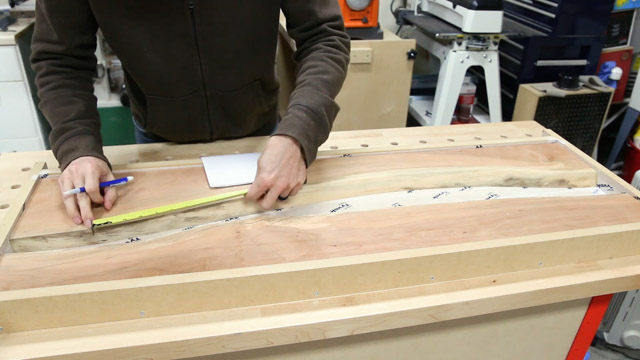
I was given this old cherry slab a few years ago and when I started planning for this project I knew it was the perfect piece to rip in half to give me a DIY river table. To find the best cut line, I used a string and centered it on each end of the slab. Then I played around until I found the line I wanted and marked both ends for the cut.
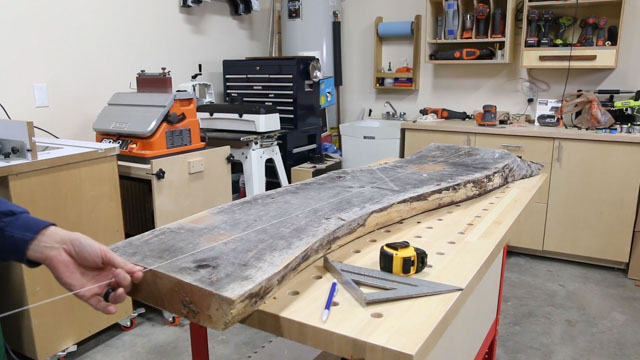
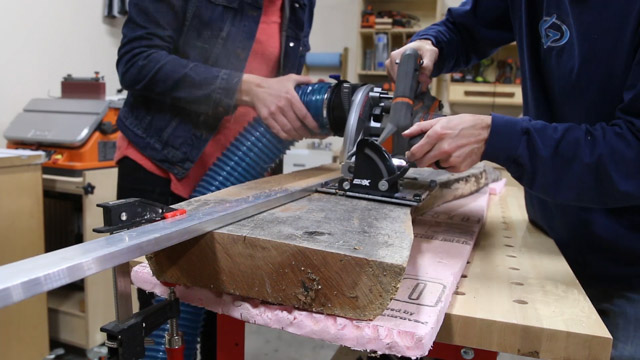
I clamped a straight edge to the live edge slab and used my cordless circular saw to cut the slab in multiple passes. The cherry slab was just a little thicker than the depth of my blade so I had to finish off the cut the old fashioned way by hand.
With the live edge slab cut into two halves I took them through a few milling operations to get the boards ready for the next step. I surfaced the slabs flat on one side with my jointer, then used that reference face to flatten the other side with my planer.
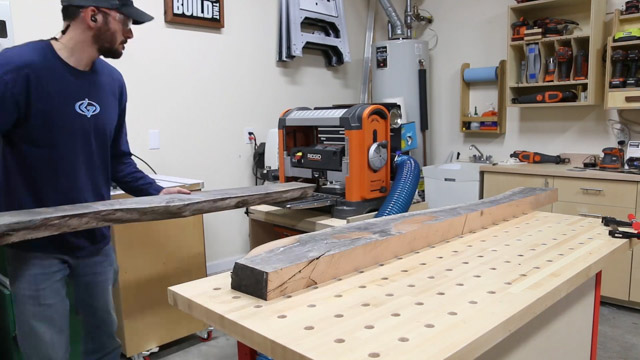
The slabs were too thick and long for the DIY epoxy river table design I was going for, so I machined then down to the right thickness then cut them to size on my miter saw.

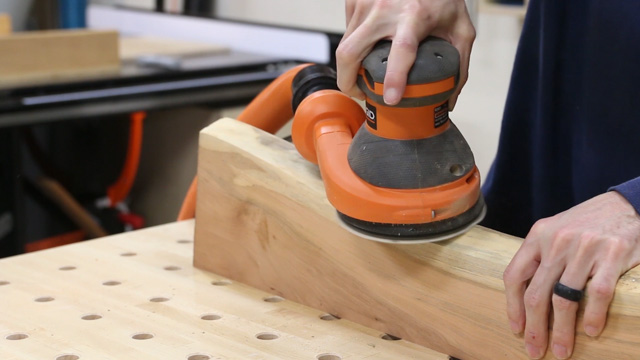
To prep for the epoxy resin pour I needed to clean up the live edges. I sanded off any loose material and got a good surface for the epoxy to stick to.
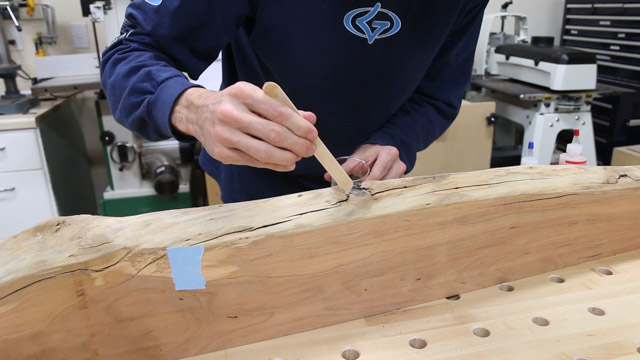
The slabs were pretty gnarly and had some good size checks and cracks in them. I taped up the bottom of the cracks then mixed up some 5 minute epoxy to fill the voids. This will help stabilize the edge and keep the epoxy from leaking out during the pour.
2. Build the Epoxy Resin Form
While the epoxy was setting up I moved on to making the form for the pour. I used ¾” MDF for the form but plywood or melamine can also be used here. To keep the epoxy resin from sticking to the form I covered the pieces in a sealant tape.
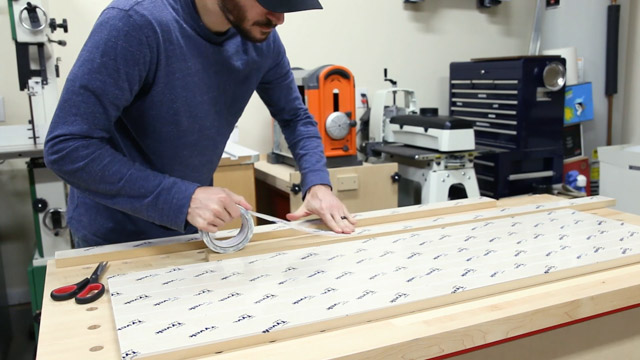
I put the epoxy resin form together with screws and then sealed the inside corners of the form with more sealant tape. If I do it again I’ll probably use silicone to seal the corners as the taping took quite a while, especially in the 3-way corners.
I loaded the live edge slabs into the form and could really see the shape coming together.
To keep the slabs from floating on the epoxy resin, I clamped the wood down and screwed it to the form from underneath. You could also just clamp them down if you don’t want holes in the underside. I also used hot glue to seal some small gaps at the end of the slabs to keep the epoxy out.
The form needs to be level for the epoxy pour so I shimmed up one end of my bench to even things out.
3. Pour Epoxy Resin into the River Table Form
Next I figured out how much epoxy resin I needed for my epoxy resin table DIY pour. I measured the gap between the slabs in 4 to 8” segments at a time and multiplied the average gap by the length of that segment. Then I added up all those numbers and multiplied by the height of the slab to get the total volume of the gap.
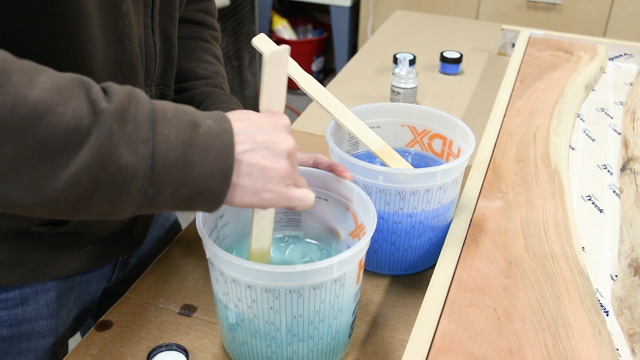
I used an epoxy resin with a 2 to 1 resin to hardener mix. That specific resin will let you pour up to 1-3/4″ at a time. Here is another cheaper epoxy resin alternative, but you will have to pour multiple thinner coats to keep it from cracking.
I wanted a two-color pour so I measured out 1.5L of the 2 to 1 mix in one container and 1L in the other. I added some metallic pigment to the epoxy resin and stirred each mix for several minutes. The deep blue and the green turned out awesome and the silver pearlescent gave it some extra depth.
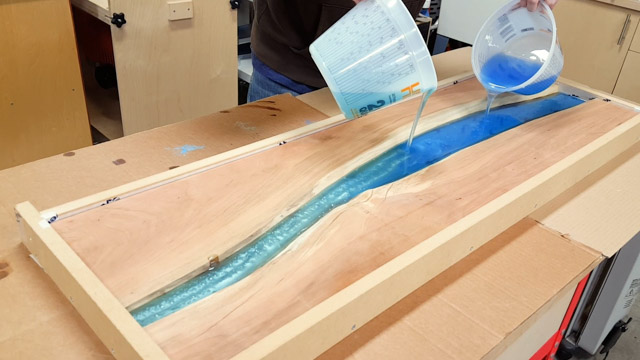
I had to figure out how to pour epoxy resin with two colors to get a good mix. After some thought I decided pour the ends at the same time using both hands. Now I wouldn’t necessarily recommend this, but it worked for me. The colors mixed together and it turned out amazing.
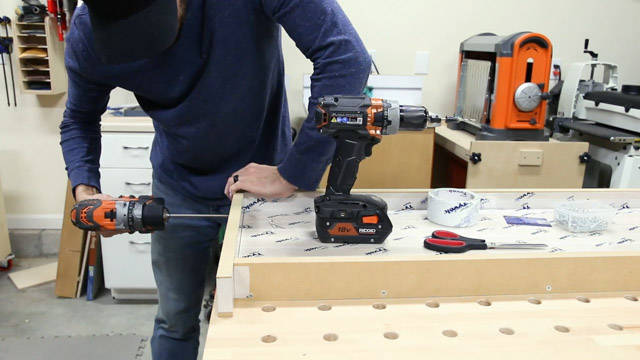
4. Build a Metal Table Base
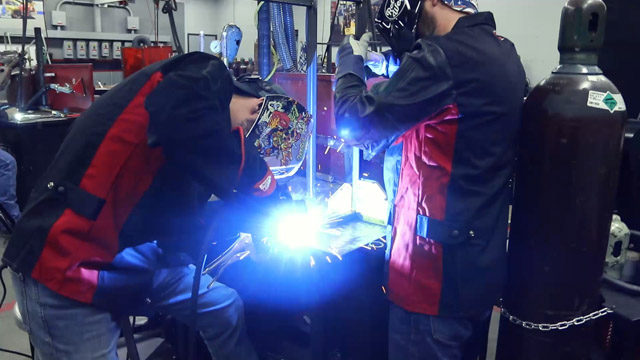
While the epoxy was curing I actually flew to Cleveland for the Spring Make event with Lincoln Electric. They brought a group of YouTubers and local makers together to teach us how to weld better. I was the newbie of the bunch and learned the basics of MIG and TIG welding. While I was there I went to a local metal shop and picked up some 1” square tube for the base.
I used the Lincoln MP210 to weld together the base, and it was quick to learn with the digital readout. I’m really excited to do more welding projects in the future. Thanks to Lincoln Electric for having me out and to Doug from RetroWeld and John Malecki for helping with the base and filming.
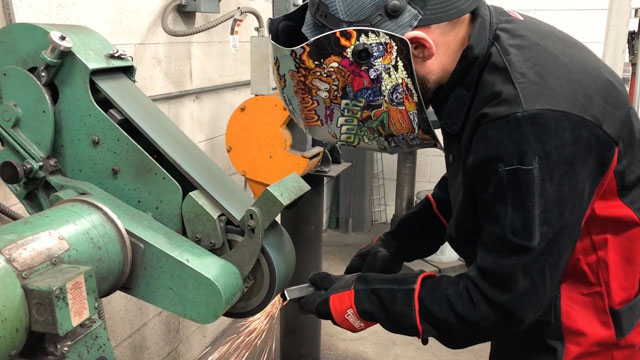
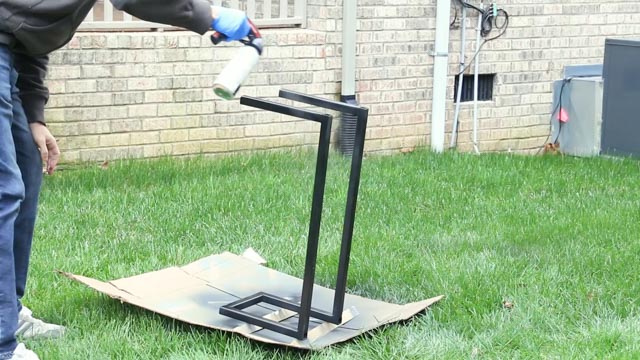
Back home I ground down the welds on the base with my cordless grinder and a flap disc. It was nice to have a cordless grinder so I could grind in the side yard and keep the metal dust out of the shop.
I drilled mounting holes in the base for the top, then I primed it and sprayed on some matte black paint and matte clear coat. It’s not perfect, but it was a great learning experience and first welding project.
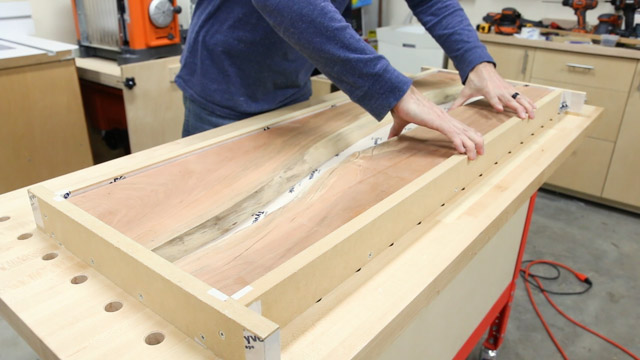
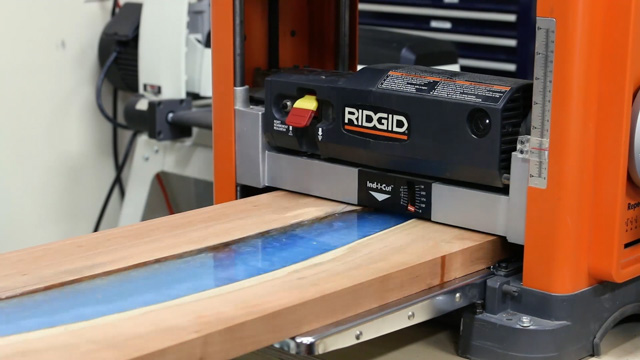
5. Clean up the DIY Epoxy Resin River Table Slab
After the epoxy resin 72 hour cure time was complete it had setup rock hard. I unscrewed and removed the sides from the form then removed the screws from the bottom of the slab. To separate the slab from the form I used a putty knife and small pry bar to work around the piece until it released.
You can see on the backside that quite a bit of epoxy ended up leaking under the slabs. This brought the top surface of the epoxy down below the wood a bit too so it all needed to be leveled.
I purposely made the form just under 13” wide so I could use my 13” planer to the level wood with the epoxy and remove excess from the bottom. You could also use a belt sander for this step on a larger piece.
After the planing a few voids showed up on the surface. I filled them using 5 minute epoxy with some of the blue pigment added to blend it in. Instead of sanding it off after it cured I just ran it through the planer again at the same setting as last time.

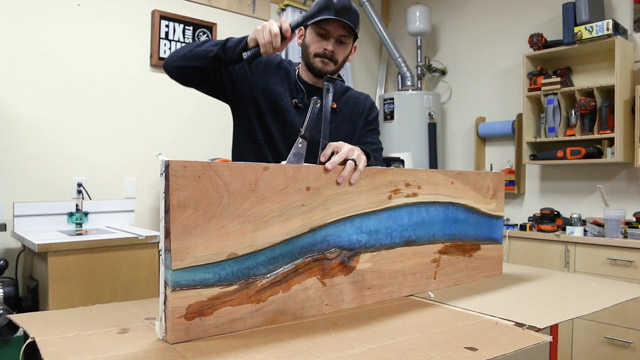
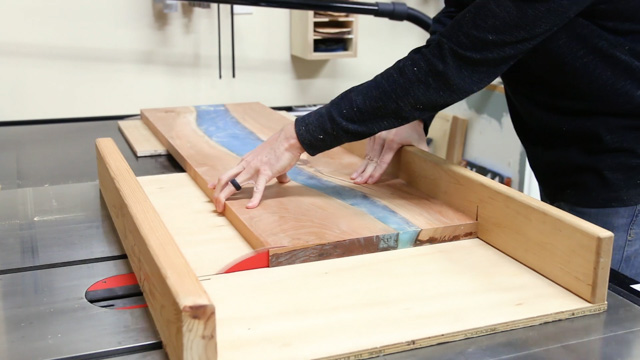
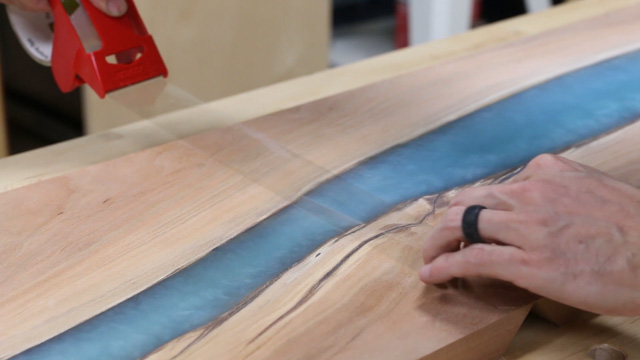
The sides and one end needed to be cleaned up next so I squared up one edge on the jointer then trimmed the other side on my table saw. I squared up one end on my cross cut sled then started final prep on the slab.
Next I went ahead and sanded the slab now since it seemed easier to work with in one piece. I sanded the wood up to 180 grit and took the epoxy up to 400 grit. I’d probably do this after the glue up next time though.

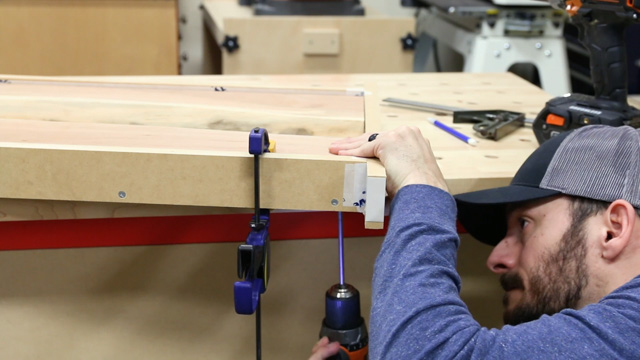
6. Cut and Join the Waterfall Edge for the River Table
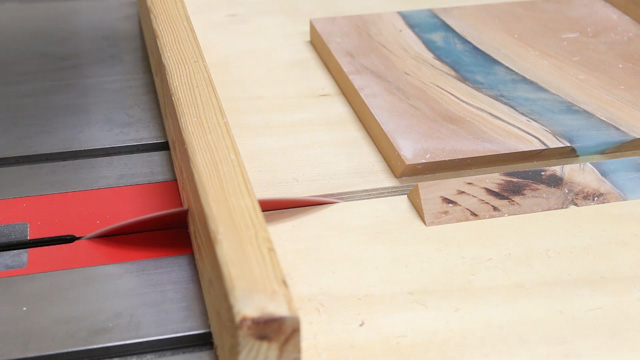
I used my table saw and a crosscut sled to cut the waterfall edge on the epoxy river table. I tilted the blade to 45 degrees and made the initial bevel on the larger vertical piece.
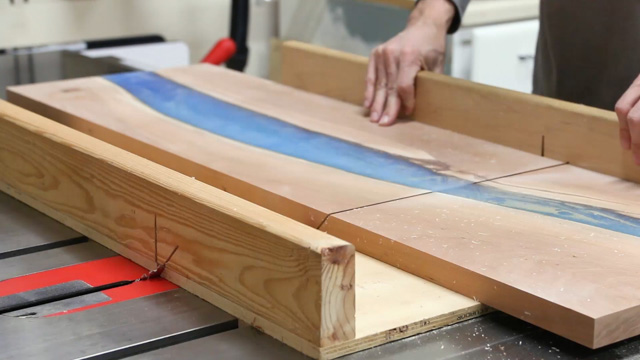
Then I flipped the smaller top piece over and back beveled it with a matching miter. I moved the blade back to 90 degrees and cut the larger piece to exact size for the base.
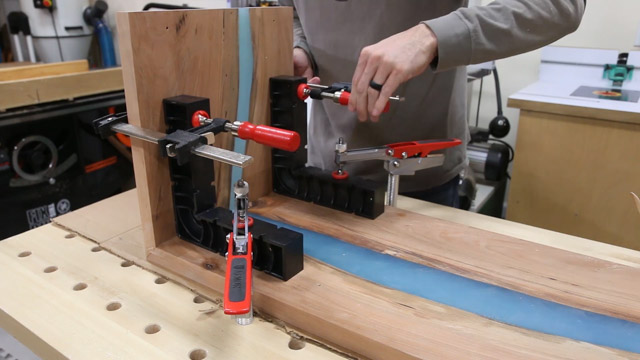
There are several different ways to glue up waterfall miter joints like this, and I opted for what I think is the easiest one. I lined up the pieces with the miters facing down and put a piece of packing tape across the seam. Then I flipped over the pieces and put two more pieces of tape just past the miters to stop the squeeze out from getting on the wood.
I folded up the miter and used the top to position and clamp down a pair of right angle squares to the slab. Instead of glue I used 5 minute epoxy again for this connection and applied it liberally to one side of the joint then folded up the miter and clamped the top to the right angle squares.
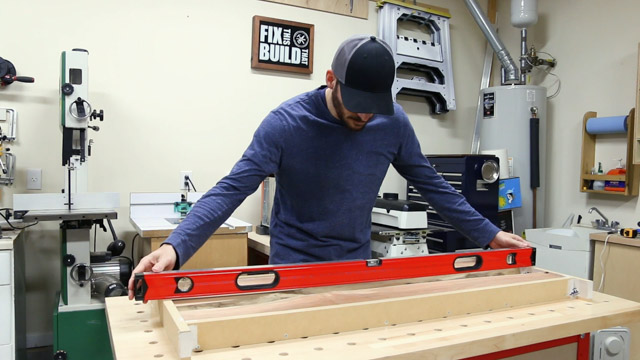
7. Finish and Assemble the Epoxy Resin River Table
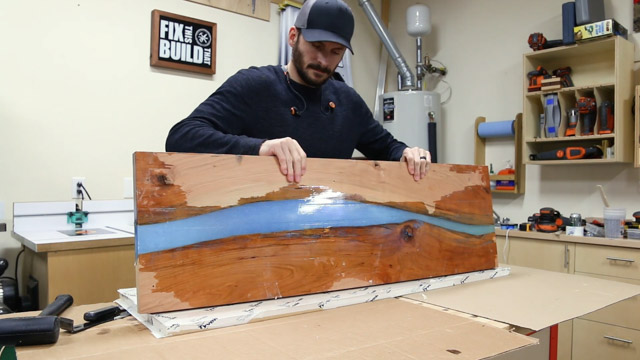
I let the epoxy setup over night and took it out of the clamps the next day. The miter turned out great and all I needed was some final sanding before finish.
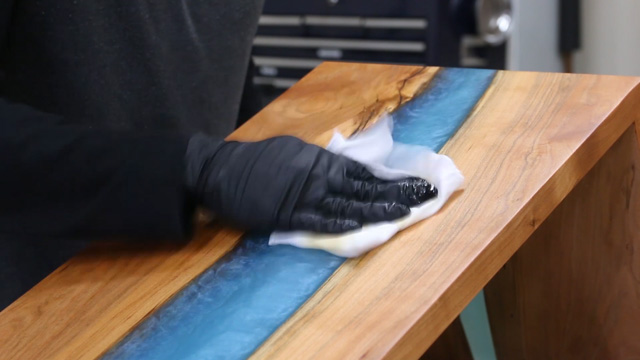
I applied a two part oil based finish to the slab and the cherry and epoxy really came to life. The knots, spalting and grain variation in the cherry just pops against the depth of the blue epoxy resin with the metallic pigments. I buffed the oil off the surface and was ready for the base.
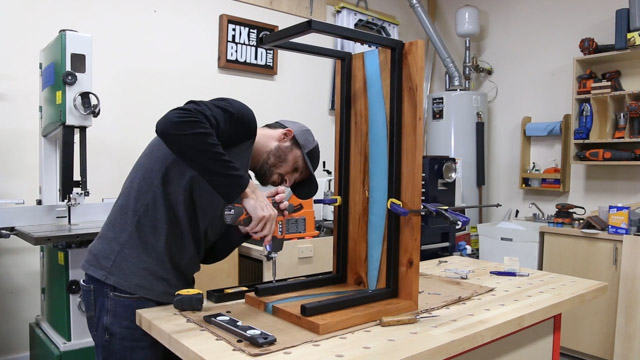
Then I mounted the base upside down and shimmed the wood as necessary to fit my less than perfect welding job. I left the top of the base open in the back so at no is the metal crossing under the epoxy and obscuring the light passing through.
This project really challenged me to try new things. It was fun to work with new materials like metal and epoxy resin and I’m looking forward to incorporating them into more projects in the future.
Now the you’ve seen how to make a DIY epoxy river table from a live edge slab you can head over to my Furniture Projects page to see some of the other pieces I’ve made.
RIDGID provided me with product and/or monetary compensation as a sponsor of this build. All opinions are my own and are not filtered by the sponsor.


I love the new spin on a river table. I think the waterfall effect is amazing and hope to try to create this myself very soon. I have a traditional river coffee table. This would compliment it nicely.
This is great. It makes me want to turn my old slab of wood into a waterfall. Thank you for the wonderful idea.
Very nice job. I’m planning a 8′ dinning table with clear waterfall. Trying to sway the wife with a waterfall/metal leg system but not getting very far. Have Coffee table and 2 end tables completed. Have another odd piece that I plan to use as an odd table.
Does the wood and epoxy really join well and make a strong bond? I guess I just feel like it would be a fragile connection. I saw one of these at a craft show I was in this past weekend and it seemed sturdy enough, but are there chances for it to separate down the road?
This looks amazing!Do you have the measurements for the size table you made?
What oil are you using as a finish coat? I see tables that look like there’s a thin layer of epoxy over the wood, and others that look like they’ve simply been oiled. Which is best? Thanks in advance
Great looking table! Just wondering what the actual pigment colors were that you chose from the link you provide. Thanks!
My pour ended up just 1/16 shy of the top edge (maybe slightly more). Do I risk a real thin pour, and then sand down, or should I sand the wood down to the level of the epoxy? After planing my walnut down, I’m only 1″ thick
Also, my planer is only 12″, and the table is 22, so planing isn’t an option