This post is sponsored by The Home Depot
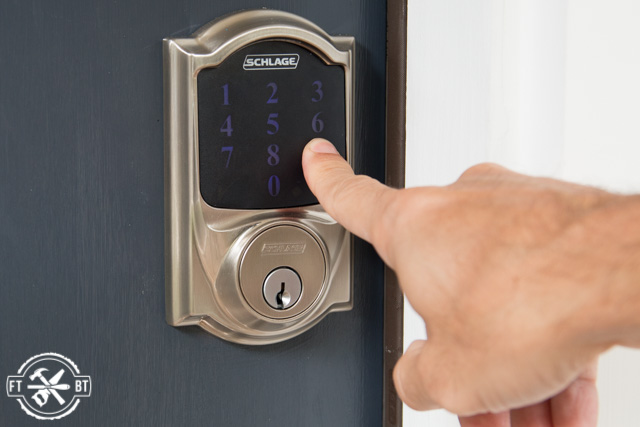
Today I’m continuing on my Smart Home journey and I’m going to show you how to install a keyless door lock. I’ve partnered with The Home Depot to check out some smart home devices this year and I’ve been waiting on this keyless deadbolt to arrive for a while. The one I’m installing is the Schlage Connect Touchscreen Door Lock with Alarm. I’ll show you the install I went through and also answer the top 5 questions I got about this smart door lock on social media.
Tools Used
- Screwdriver
- Drill
- Chisel
Materials/Supplies
Affiliate links are used on this page. See my disclosure page for info on affiliate programs.
How To Install A Keyless Door Lock
- Remove Old Lock and Fit New Deadbolt
- Attach Reinforcement Plate and Strike Plate
- Install Wireless Door Lock
- Program Key Codes
- Answering Top 5 Questions
1. Remove The Old Lock And Fit New Keyless Door Deadbolt
The install is pretty similar to most other deadbolts and only requires a screwdriver, a drill and maybe a chisel if you have some fit issues. First I started off by removing the old lock and trying to install the Schlage deadbolt in it’s place.
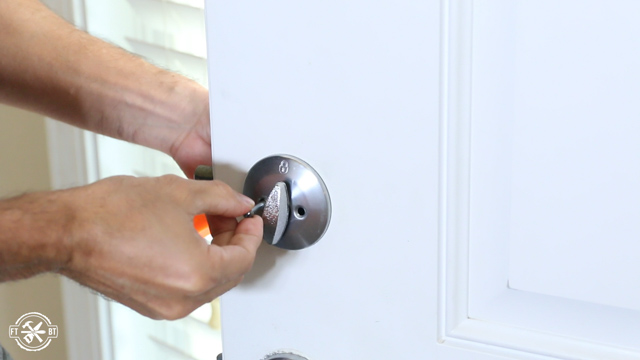
Right off the bat I had a small fitment issue as the mounting plate was a bit too big. To expand the recess a little I traced the outline of the plate and chiseled away material until it fit.
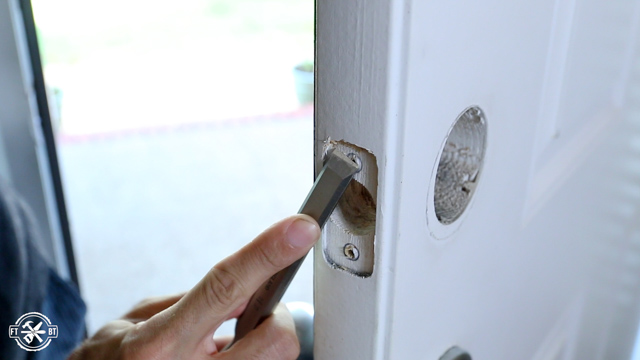
I secured it with the mounting screws and tested the deadbolt fit in my current setup.

The reinforcement plate for the deadbolt didn’t fit the current opening either so I widened it the same way as before with my drill and chisel.
Unfortunately when I put the lock in it did not fit like it should. When I tested it, the lock didn’t actually go into the hole. I used a trick to fix this, and all I needed was a tube of lipstick and my chisel. I extended the lock out and put the lipstick on the lock wherever I thought it was hitting.
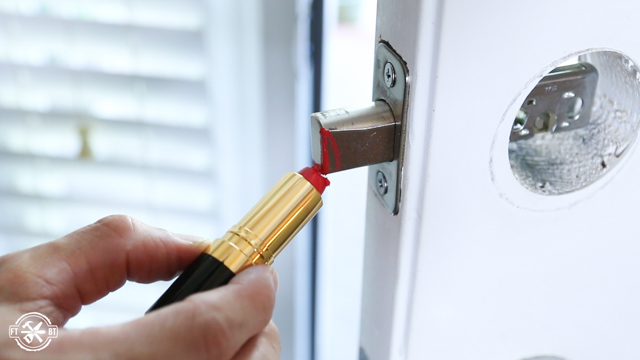
Then I closed the door and attempted to lock it a few times. When I opened the door I could see wherever the red lipstick has transferred and I knew I needed to chisel that section down in order for the lock to be able to close.
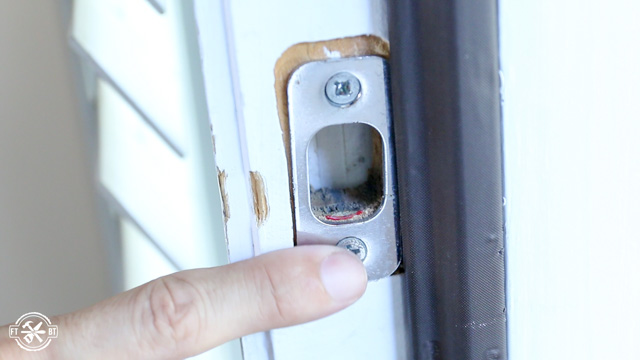
I used my chisel to remove a good amount of wood where I found the red lipstick
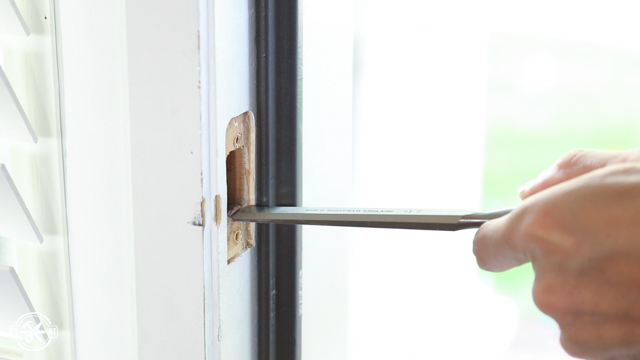

After adjusting the opening, the lock was able to close fully.
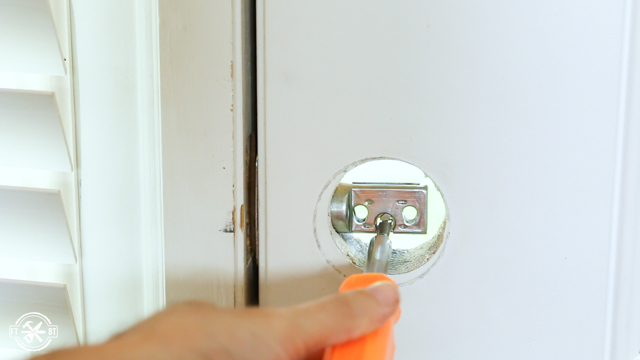

The reinforcement plate didn’t fit the current opening either, so I widened it the same way as before using my drill and chisel.
2. Attach Reinforcement Plate and Strike Plate for Door Lock
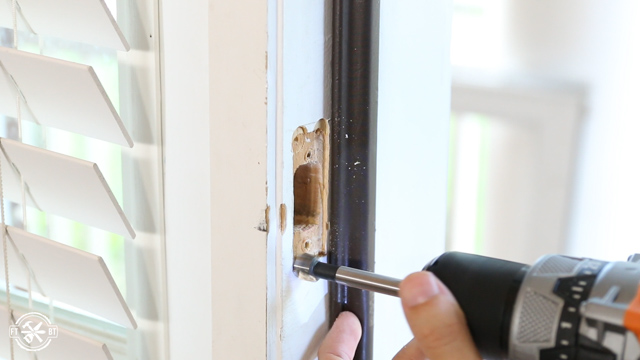

The strike plate is actually a bit thicker then my opening so I used my chisel to deepen the opening as well.
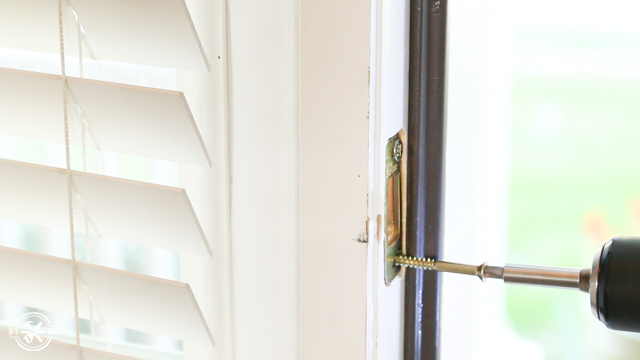
The reinforcement plate that goes under the strike plate is a major upgrade versus the lock I was using before. As you saw the only thing my prior deadbolt had was a strike plate and smaller screws. This Schlage Connect lock has the reinforcement plate that goes under the strike place that is anchored by these large reinforcement screws. The standard strike plate gets installed right on top of it.
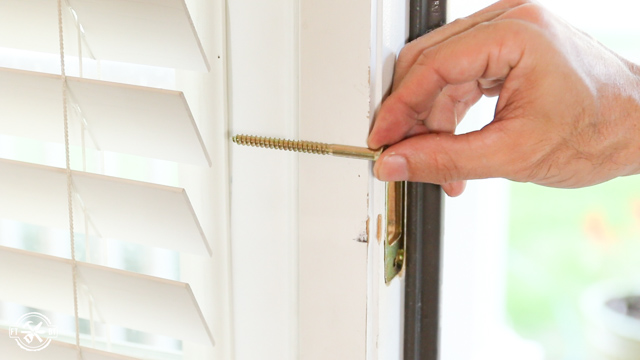


If you use the extra long reinforcement screws, you can keep the BHMA rating of a grade one. This means that your deadbolt is now connected to the frame of the door which helps secure the entire door.

3. Install Wireless Door Lock
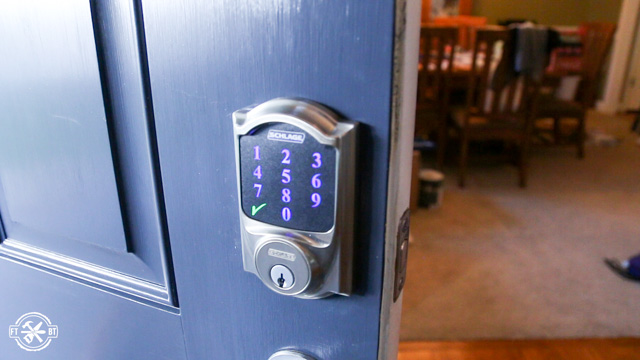
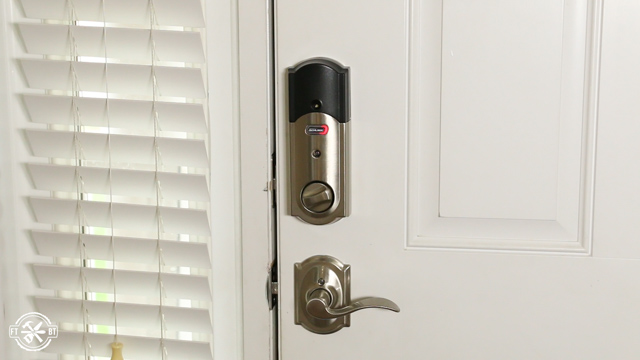
Next I was ready for the touch screen keypad to be installed. The keypad is fingerprint resistant and backlit. The one I have here is the Schlage Connect Touchscreen Deadbolt with Alarm. It’s the Camelot model and this one also comes with a matching handleset as well.
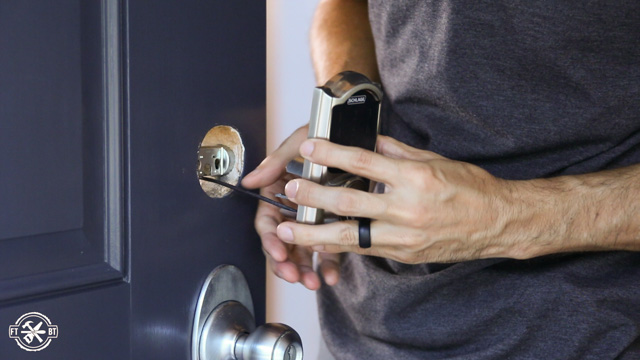

It has a communication and power wire that feeds through to the inside of the door. The inside unit is the brains of the operation and houses the battery power supply, the mother board, and the speaker for the alarm.
The keypad is held in place by a mounting plate on the inside and the indoor unit is screwed on to this as well.
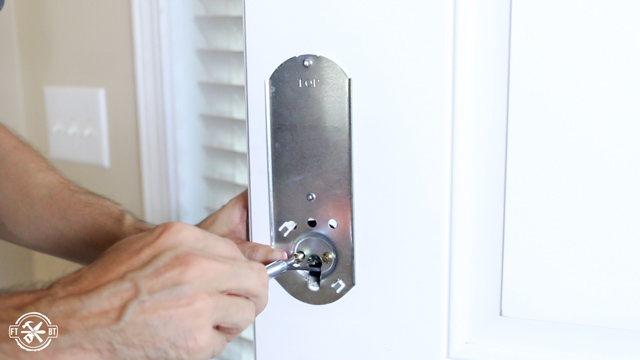

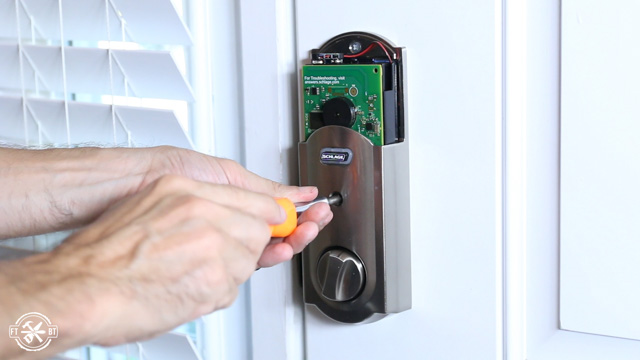

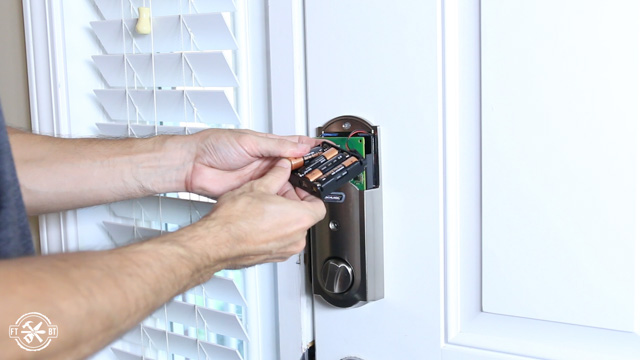
The only hook ups to make are the communication wire and installing batteries in the unit. And with that the lock is ready to go and initialized with a code.

I also installed the matching handleset which is just plug and play like a normal knob.

4. Program Key Codes to the Keyless Door Lock
The lock comes with two default codes but new codes can be added and removed manually. You just enter the programming code, hit 1 for new codes then enter the new code twice.
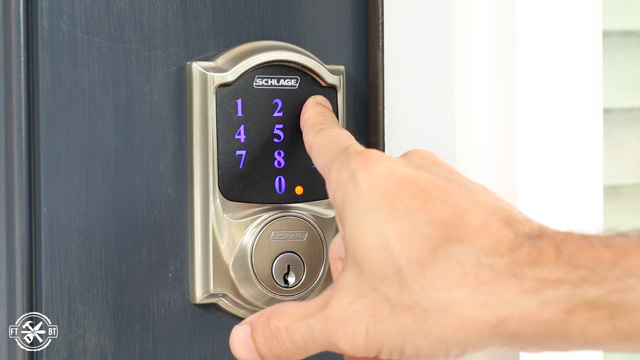

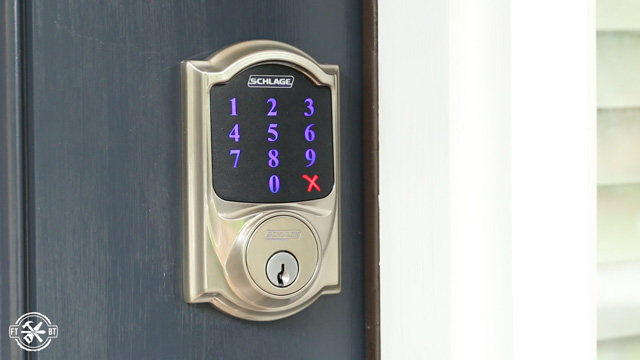
There are also several features that can be toggled on and off manually including changing the length of the passcode to either 4, 5 or 6 digits, turning the keypad beeping on or off and setting a vacation mode where all codes will be denied.

5. Top 5 Questions about Keyless Door Locks
Now lets get into the top five questions I’m going to answer about the Schlage Connect. I asked people on social media what they wanted to know about this keyless door lock and I’m going to go over the top five questions here. Let’s work our way down starting with number 5.
#5: How Long Do The Batteries Last?
There were quite a few questions about how the smart door locks were powered and how long battery life is. Schlage says the batteries should last around 12 months, but I wanted to see some real world answers. So I looked at reviews around the web and found most last 9 to 15 months. The biggest factor is going to be amount of usage as well as fit of the lock. That’s why it’s so important to make sure you have a good fit in the install.


#4: What Happens When The Batteries Die?
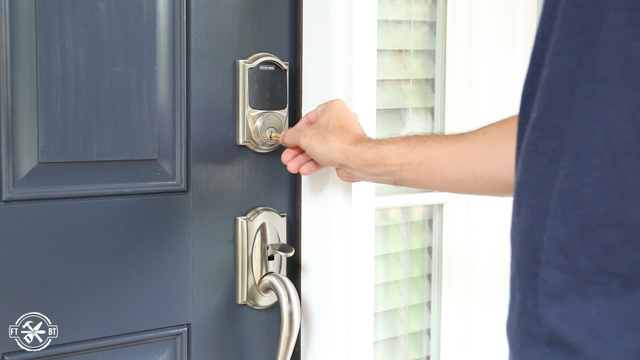
Nobody wants to be locked out of their house when an electronic lock dies. Thankfully there is an easy solution to that. Each of the locks comes with an override key. If the battery ever dies you can use the key for the smart lock and let yourself in. Then with a quick change of the batteries you’re back in business. I’d recommend changing your batteries when you change your smoke alarm batteries every year just to be in the habit.

#3: What Are The Wireless Capabilities?
Another question I got was about the wireless capabilities of the device. And let me tell you, there are a lot! I paired the Schlage Connect with a Wink 2 Hub. Using the Wink app you can see general info on your lock like battery life and connectivity status. You can also add and delete passcodes from the app.
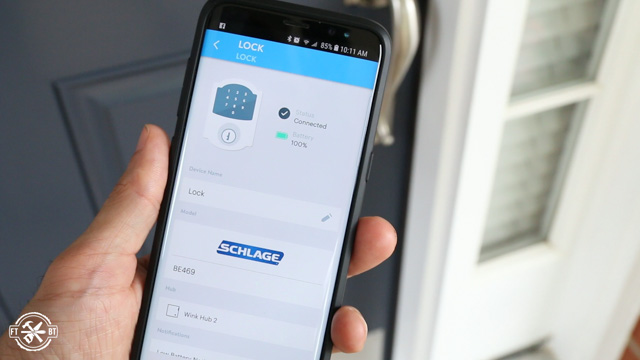

You’ll also have some alarm and security option where you can enable the alarm, set alarm modes, turn on the auto lock function, and turn the beeper mode on and off.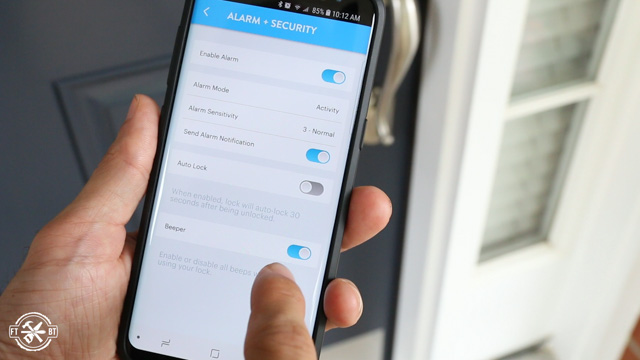

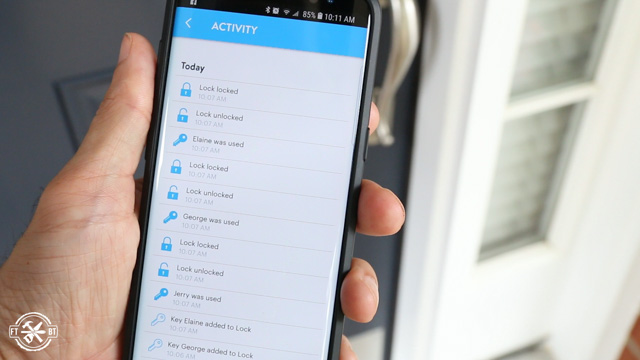
One of the most useful functions is the activity log. It tells you everything that has happened with the lock. It tracks everything from when it’s unlocked with a specific code, manually locked or unlocked, or if codes were added or removed.

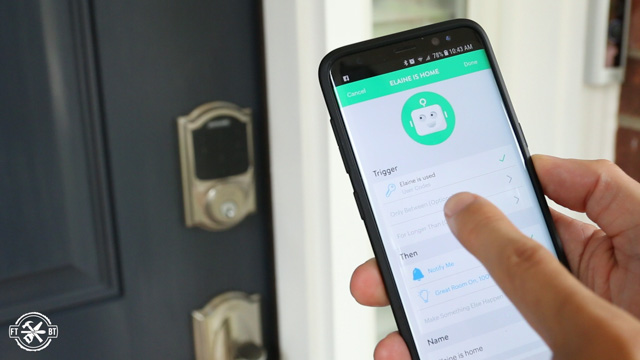
And the coolest function is the Robots function. You can trigger different actions based on what happens with the lock. I set it up so if a code tagged to Elaine is used then it will send a notification to my phone and also turn on the lights in the living room if it’s after 7pm. Pretty cool stuff!

#2: How Does It Help Stop Break-ins? Is It As Good As A Regular Lock?
The Schlage Connect is just as good if not better at stopping break-ins than regular locks. You can see the little strike plate and small screws that were on my old deadbolt, they were puny. The Schlage comes with these massive reinforcement screws that go into the framing of the door and not just the side trim. These add much more strength to the door lock.


The other nice thing about this Schlage smart lock is that if four wrong passcodes in a row are entered then a 90dB alarm will sound on the inside. So you don’t need to worry about someone just discreetly typing in codes trying to figure yours out while you are sleeping inside.

#1: Can It Be Hacked?
And the question I got the most was “Can it be hacked???”. Well, let’s be real, with enough time energy and money anything can be hacked. So there will always be a chance things can be hacked. But the Z-wave technology this device uses is encrypted and would make it no small task to get into the system and I’ve not read of any reports of any of these devices being compromised by a hacker.
The more present threat would be someone getting your passcode. So make sure you keep good track of your passcodes and don’t leave them written down around the house while the cable guy, cleaning crew, or unsavory neighbors are inside 🙂
If you want to check out more of my projects around the home, head over to my Home DIY projects page.
I acknowledge that The Home Depot is partnering with me to participate in this Smart Home Program (the “Program”). As a part of the Program, I am receiving compensation in the form of products and services, for the purpose of promoting The Home Depot. All expressed opinions and experiences are my own words. My post complies with the Word Of Mouth Marketing Association (WOMMA) Ethics Code and applicable Federal Trade Commission guidelines.


The idea of these door lock is perfect. It always secures the safety of your family in your own home. It also describes the features of how it works and how helpful it is to your home. I am going to replace my old door lock with this as soon as I arrived back home. Thank you for sharing this article.
if i used two , one for the front door, and one the the rear door can i get same key for both?
1: it seems your links are dead, specifically the two in sections 2 and 3.2: it seems to me that the more likely source of “hacking” would be a brick through the window right next to – or in the middle of – the front door.
lol- yes, that is the larger concern! I’ve always used 3 inch screws for the frame side of the door and change everything when I’ve moved into a new place – I’m a bit surprised that the author didn’t already think of that.