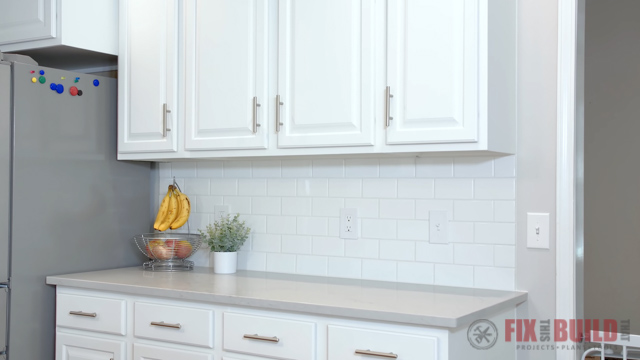
Need to know how to install a tile backsplash? Adding a backsplash can improve the look and function of your home, and it’s a DIY project you take on yourself. I’m going to show you how to install tile backsplash in your house.
Need to remove an old backsplash first? I’ll show you how to safely remove your old backsplash and how to prep the walls for your new backsplash too.
This post is sponsored by The Home Depot and affiliate links are used on this page. See my disclosure page for info on affiliate programs.
Materials/Supplies
- 3×6 Subway Tile
- Tile Adhesive
- Pre-mixed Grout
- Grout Colored Caulk
- 1/8″ Spacers
How to Tile a Backsplash
- Remove old backsplash
- Prep and attach drywall
- Install tile backsplash
- Apply Grout
1. Remove Old Backsplash
Turn Off Your Power
Before you do anything, MAKE SURE TO TURN OFF YOUR ELECTRICITY! There will be wires inside your walls, be safe and cut the power.
Avoid Using Power Tools
DON’T use a sawzall or a multitool to remove your backsplash. As we already covered, there will be wires, and possibly pipes, inside your walls. You do NOT want to accidentally cut any of them. A sawzall or multitool may help you cut quickly, but chances are you may cut the wrong thing.
Try Different Techniques
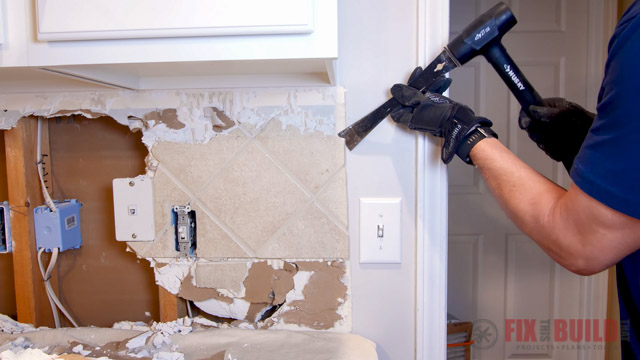
So which tools should you use to remove your backsplash? Whatever tools get the job done, other than power tools of course. I started by pounding the tiles off with a sledgehammer. This worked, but also put huge holes in the drywall. I also had less control over how much drywall was removed on either side.
Next I switched to using a pry bar and a Husky 27oz Dead-Blow Hammer to remove the backsplash. By wedging the pry bar under the tile I was able to use the dead-blow hammer to remove the tiles. This worked really well for me. The Husky Dead-Blow Hammer controls the striking force which helps to minimize denting. And the steel reinforced handle with non-slip rubber grip made handling the dead-blow hammer that much easier.
I’ve been working with Husky this year as part of the Home Depot ProSpective program. I received the Husky Dead-Blow Hammer as a part of that program.
2. Prep and Attach Drywall
If you get lucky you’ll be able to remove your backsplash tiles without damaging the drywall behind it. But if you wind up an uneven surface or even holes in your drywall, it’s easier to rip it all out. Once your drywall is removed you can attach new drywall and have a fresh, even surface to work with.
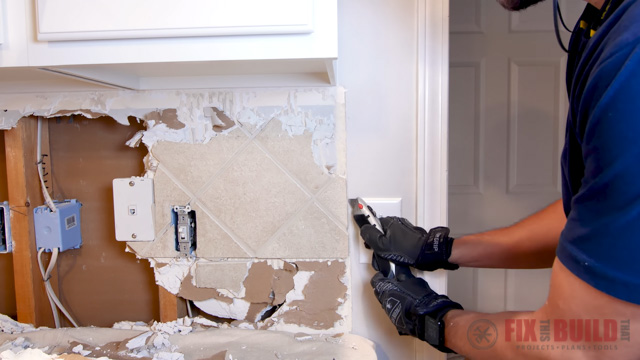
Score Your Drywall Edges
Your goal is to remove the drywall that the backsplash was attached to, not the rest of the drywall. All of that nicely painted wall next to your backsplash? Make sure you don’t accidentally pull it off.
Scoring the wall right next to your end tiles is the best way to protect the good drywall. To do this run a razorblade right next to the edge of your current backsplash. Scoring the drywall adds a small, sharp cut line. You’re not cutting all the way through the drywall, you’re just creating a break line for it.
Once you’ve scored the drywall you can gently pull off the drywall you are removing. The drywall should break off where you scored the line, and not rip off your nice painted drywall.
Scoring Below Cabinets
I like to leave about an inch of drywall directly below my upper cabinets. This small surface gives me something to tie into when I’m adding the new drywall. The easiest way I’ve found to do this is to hold a straight edge or yardstick on the drywall tucked up against the bottom of the upper cabinet. Then I used me safety razor to score a line along the whole area.
Scoring Above Counter
Finally we’re going to score the last line in the old drywall to preserve about an inch of drywall above the counter. Simply hold a straight edge or yardstick on the wall right resting on your counter. Then use your razor blade and score a line above the countertop. Once you’ve scored this line you can remove the old drywall.
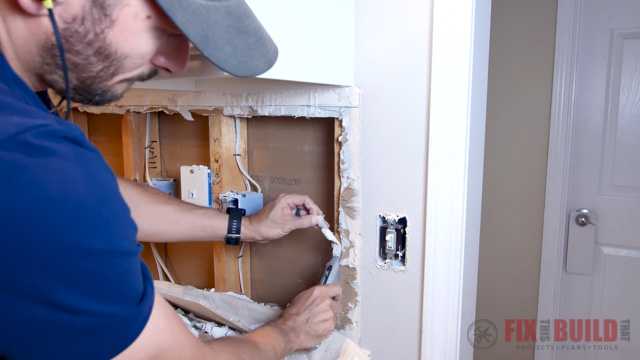
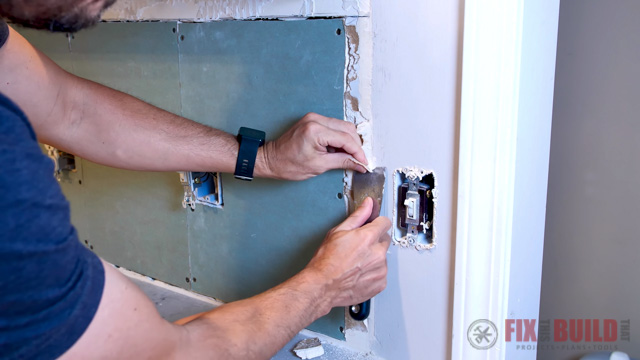
Deal with Electric Outlets
If you plan to move or change any electric outlets this is the time to do it. We’ve never used the phone jack in our kitchen so I capped it off. Then I cut an access opening on the other side of the wall, just in case we ever need to get to it.
If you’re not comfortable moving or dealing with your electric, call a licensed electrician to tackle this job.
Prep Drywall Edges
To attach the new drywall we need:
- A clean edge in the existing drywall
- A solid surface that we can screw into
With that in mind I decided to take off a little more drywall on the stud. I drew a line and used a razor blade to cut and remove the drywall. This left me with a straight cut and about half of the surface of my stud exposed.
Repeat this process wherever your new drywall will be merging with an existing wall.
Prep New Drywall for Install
To prep the new drywall for installation I start by measuring the opening. Then I cut a piece of drywall to fit the opening. Cutting the drywall is easy with a straightedge and a utility knife. Once you score your line you can snap it right in half.
Before installing the drywall you’ll need to measure the location of all outlets and switches. Once you have those measurements mark their locations on your drywall. Next cut openings for them in your drywall; I like to use a jab saw to do this.
Finally screw the drywall into the studs to secure it to the wall. I was using leftover drywall from another project so I had to piece mine together.
Fill Seams in Drywall
Once your drywall is secure, it’s time to fill the seams. This can be the easiest job ever, on all of the seams that will be covered by your backsplash tiles. We’re not looking for perfection here, we’re just trying to smooth things out so your tiles have a flat install surface. I don’t even tape these joints, it’s a quick and easy job.
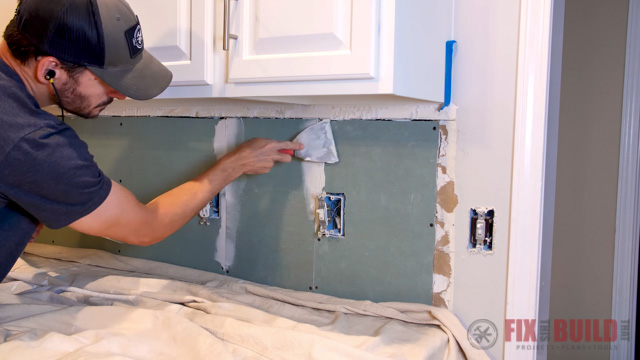
The joints in your drywall that will be visible need a bit more attention. We want to make sure that these joints are seamless once the job is complete. To achieve the best results I start by using a putty knife to scrape off any bumps and loose paper at the seam. This will give me a good surface for the drywall compound to adhere to.
Then I applied a thin layer of joint compound and followed that with tape.
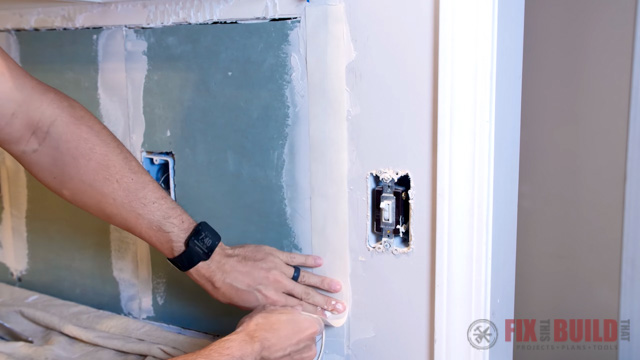
After applying another layer of joint compound on top of the tape, I let the area dry. It’s important to try and make this a smooth transition because I’m not sure how far over I’m going to take the tile. By taping the joint makes the transition stronger and will help to prevent cracking in the future.
After the joint compound dried, I came back and sanded everything down, knocking down any ridges or big humps in the drywall. Then I hit everything with a second coat of joint compound. I made sure to blend everything together on the edges to make it smooth. After sanding it all down again, I was ready to tile.
3. Install Tile Backsplash
I’m going with a classic subway tile and I decided to install them in a classic brick pattern. I think it’s going to look great with our white cabinets and new grey counters.
Check Counters Are Level
The most important step to take now is to make sure my counters are level. You need to know that your counters are level because if they’re not that could throw off the design of your backsplash. To check my counters for level I placed a large level on my counter and read the gauges.
Decide On Starting Point
When you’re deciding where to start the tile on the backsplash I always start with the spot that’s the most visible. For me that’s going to be the end near my doorway. But because of the brick pattern that also means I need to start with three half tiles.
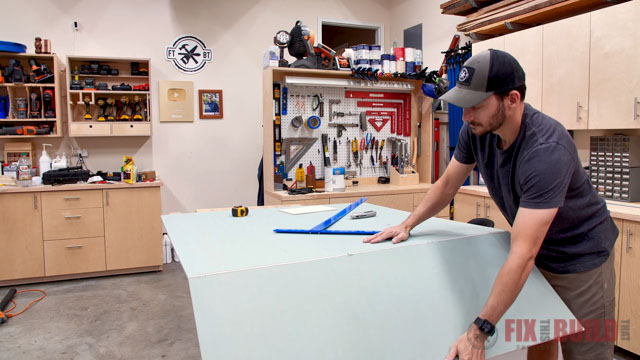
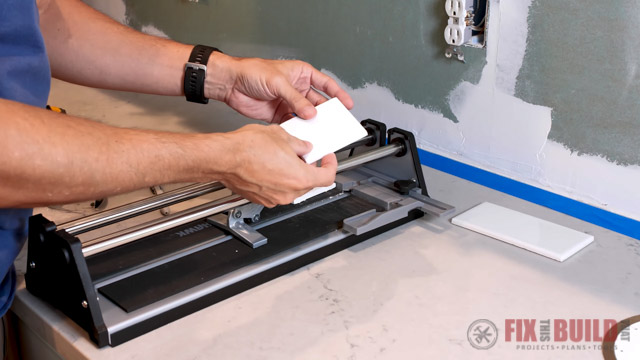
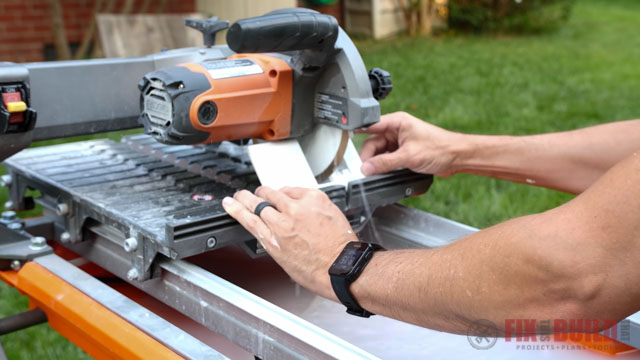
Cutting Tiles
I’ll need to cut quite a few of my tiles in half to achieve my design. I start by measuring and marking the tiles. When cutting tiles make sure to cut just to the side of that line. If not you’ll wind up with a piece that’s slightly smaller than what you need.
When I’m just cutting tiles in half, I found using a snap cutter was the best way to go. Snap cutters use a scoreline to make the cut which results in a clean, crisp cut line.
When I need to cut a notches in a tile, I use a tile saw. A tile saw, or a grinder allows you to make more types of cuts than a snap cutter.
Installing Tiles to Drywall
I started by striking a line down from the edge of the upper cabinets, this will be the starting line for my tiles. I’m using Mapei Type 1 Adhesive and the container tells you what size and type of trowel to use. This will depend on the size of the tiles you’re using.
I found it easier to spread the adhesive using a smaller drywall knife. Then I came back and raked it using the trowel which I held at a steep angle to get the ridges I needed.
When placing my first row of tiles, I used spacers below the tiles to raise them off of the counter. And then I spaced them evenly making sure to pay close attention to that layout line. I inserted spacers between each tile to make sure there was a uniform gap everywhere.
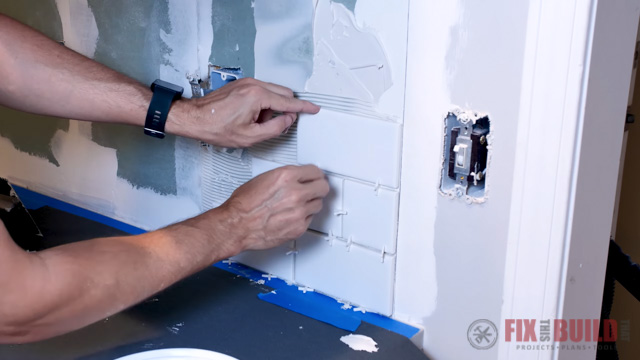
The transition between the old drywall and the new drywall wasn’t perfectly flat. I noticed a dip after the first half tile. The area where the next full tile needed to go was a little lower. So to level it, I took the full tile off and put more adhesive on the back of the tile. Don’t be afraid to pull the tiles down if they’re not looking right. You’d rather do it not, than deal with it later.
I liked working on a diagonal line from the bottom to the top, just like a stair step. It seemed to help me keep things aligned better doing it that way. I worked my way up with full tiles until I ran into the outlets to work around.
I finished by cutting the top row down to size and back buttering the tiles to install them.
Tiling Tips
- Adhesive can be really messy and mine got everywhere. Try your best to keep the tiles and the gaps clean and wipe it off as you work.
- It was hard to adjust the tiles if I put too many tiles in at a time. So I started working in smaller sections and putting in the spacers as soon as I could.
- To try to keep a straight line, look down the tiles from the side and try to see if they’re all lined up visually. You can’t use a level to do this, so you just need to eyeball it.
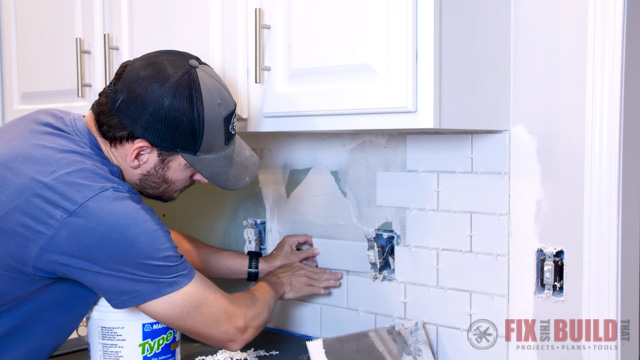
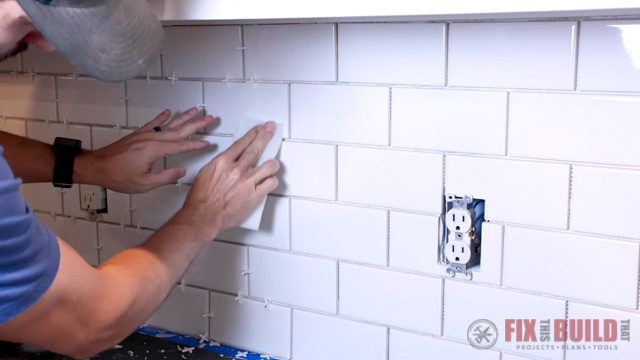
Tile Around Outlets
When I reached my first outlet the first cut was easy. It only needed a straight cut to fit, which was nice. When I came up on the other side of the switch however, I didn’t have a tile to reference against.
You can get around that by making a little mark right on the center of your tile. Then you can line that mark up with the joint below it. Because we’re using a brick pattern it should line up nicely.
When I had to make cuts above and below the outlet, I lined up the tile and marked it. I wasn’t too scientific with how I was marking them, since the wall plates are going to cover any indiscretions. So I use the old eyeball ruler to estimate the gaps.
When making these notch cuts you really need some type of diamond cutting blade. I’m using my tile saw, but you can get blades for a four inch grinder as well. I nibbled out the inside of the notch with a series of cuts. But to get a flat edge at the bottom of the notch, you’re going to have to tilt the tile up into the blade because of the circular nature of the blade. With a little practice, these come out pretty good and are definitely passable.
4. Apply Grout
After letting the tiles sit overnight I was ready to start grouting. I went with a premixed grout, which has additives in it so you don’t have to seal it later. It’s going to make it really nice and easy.
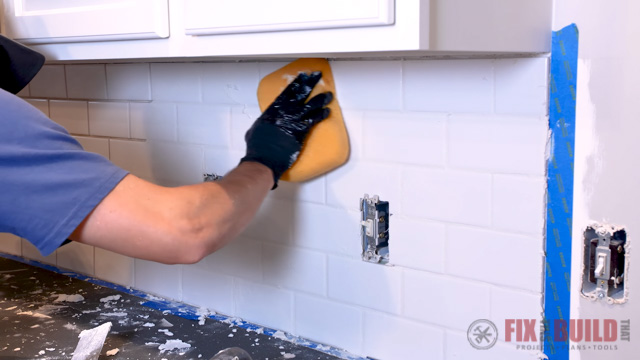
Prep the Tiles
But first I had to take out all of the spacers and remove any of the adhesive that’s still on the tiles. To do this I used a little white Scotch-brite pad. I scrubbed all of the tiles with the pad and also used my fingernail at times. When I ran into really heavy stuff, I used a razor blade which worked great. Just make sure you get all that adhesive off before you start grouting.
Grouting is a pretty straightforward job, but it’s messy. Along with protecting the counters, I put a strip of tape on the edges so that I can protect the wall as well. And I wet down the tiles before I got started, which will help with releasing the grout layer.
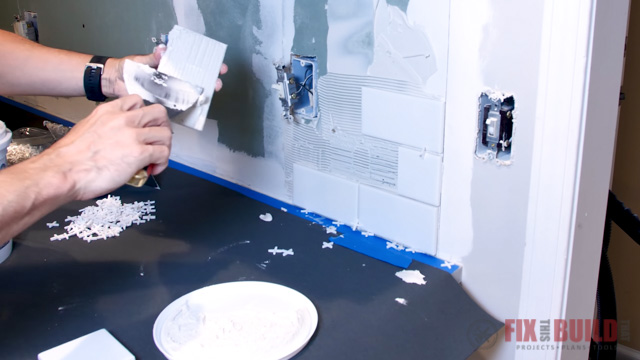
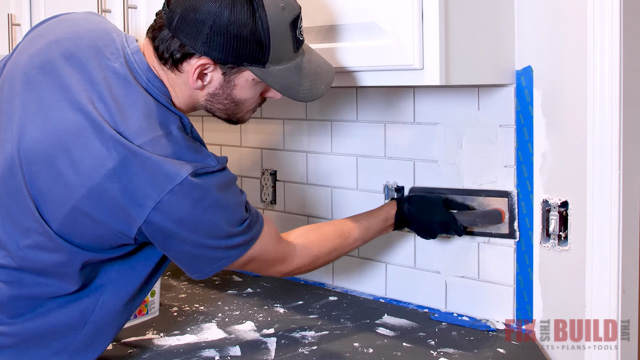
Applying the Grout
I started by using a small trowel to transfer the grout from the bucket to a rubber float. This made it easier to work with. When you start applying the grout between the tiles, you can just push it right in. You can also rake the grout across the tiles at 90 degrees to get the excess grout into the gaps.
Cleaning the Grout
The premixed grout I’m using dries extremely fast. It will start hardening on the surface of the tiles after only about five to ten minutes. To loosen the grout from the surface of the tiles start by lightly rubbing a damp sponge in a circular motion.
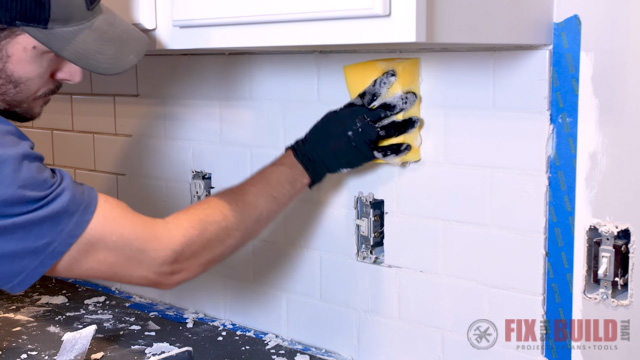
Rinse your sponge out frequently so you’re able to continue removing the grout. Once the bulk of the loose grout was gone, I switched over to a clean sponge and wiped it across the tiles with slight pressure. Make sure to keep the sponge clean, so only make one pass with each edge and keep turning and flipping it.
This two-step process helped remove most of the grout off the tiles, and it also shaped the grout lines. After just a few minutes, the grout looked good, so I moved on to the next section and repeated the process.
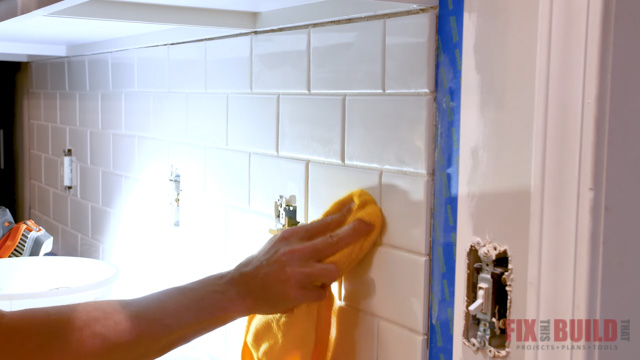
Once everything dried there was grout haze on the tiles. I wiped the haze off with a damp microfiber cloth. Then I used a dry microfiber cloth to buff the clean tile. Finally I used a raking light to make sure I didn’t miss anything. It’s important to get all of the haze off now because if you wait and come back later it will be much harder to remove.
Finish the Edges
The next morning I painted the areas where I patched the drywall. Then I sealed around the tiles with a color matched caulk. I’d highly recommend picking up one of these caulk smoothing tools to help you out. It didn’t work great on that top joint, but it was perfect on the sides and on the countertop joint.
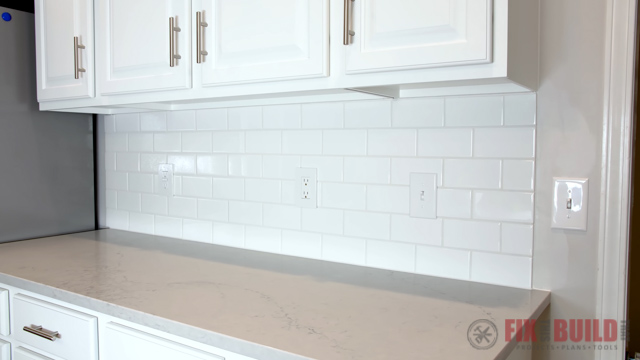
The subway tile backsplash really pulls the whole kitchen together in that bright modern look that we were going for. Learning how to install tile backsplash can be a challenge at times, but you’ll forget all about that when you step back and see the finished result.
The Home Depot provided me with product and/or monetary compensation as a sponsor of this build. All opinions are my own and are not filtered by the sponsor.


