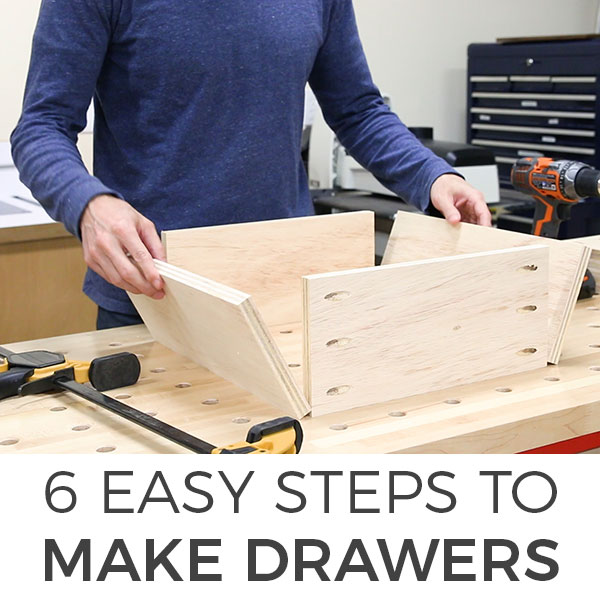
Want to learn how to make drawers for your next project? I’ll show you how to build a drawer in 6 easy steps! These DIY drawers are quick to make, are very strong, and you can even make all the cuts with a circular saw.
I’ll use a pocket hole jig to easily build these drawers, specifically my Kreg K4. Kreg Tool is sponsoring this post and their pocket hole jig makes building these DIY drawers an absolute breeze. I really think it’s the best combination of speed, strength and ease of building.
If you prefer a replaceable plywood bottom, make sure to watch the YouTube video below. I added a bonus clip showing you how to make drawers that uses a captured bottom and is easily replaced if it’s ever damaged. You can also check out my Modular Shop Cabinet System where I build a lot of drawers, all with this method.
Tools Used
- Kreg K4 Pocket Hole Jig
- Tablesaw (or circular saw)
- Miter saw (or circular saw)
- Brad Nailer (or hammer)
- Router (optional)
Materials/Supplies
- 3/4″ Plywood or Solid Wood
- 1/4″ Plywood
- 1-1/4″ Pocket Hole Screws
- 3/4″ Brad or Finish Nails
- Wood Glue
Affiliate links are used on this page. See my disclosure page for info on affiliate programs.
To set the stage here a little, I’ll be using 3/4″ plywood for these DIY drawers. I’ll be cutting them to custom size based on my build. You could also use 1×4, 1×6 or 1×8 stock for your cabinet drawers if you don’t want to deal with plywood.
How to Make Drawers in 6 Easy Steps
- Determine Drawer Height and Rough Cut Parts
- Match Drawer Sides to Your Drawer Slides
- Measure Drawer Opening and Cut Fronts and Backs
- Drill Pocket Holes and Assemble Drawer Box
- Measure, Cut and Install Drawer Bottoms
- Add False Drawer Fronts to Drawer Box
1. Determine Drawer Height and Rough Cut Parts
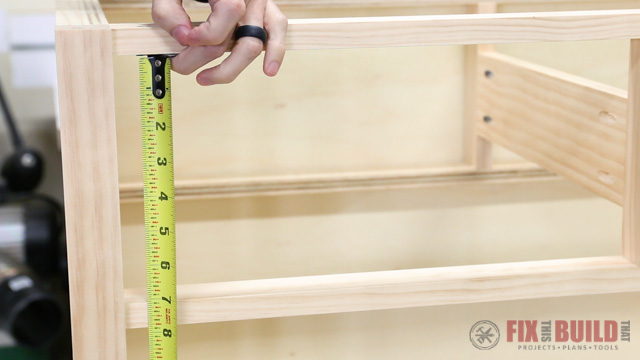
The first step in how to make drawers is to get the right height for them. The rule of thumb I use is to take the drawer opening and subtract 1 to 1-1/2″ to get to the closest half inch measurement. I’m building these drawers for my DIY Dresser.
For this drawer my opening was 7-1/8″ wide so I subtracted 1-1/8″ and made my drawers 6″ tall. If you’re using dimensional lumber you’ll just go to first size that is under 1″ of your opening. For me it would be a 1×6 at 5-1/2″ wide.
I cut down my 3/4″ plywood for the cabinet drawers to make strips that were 6″ wide. I also rough cut them to size based upon the measurements that I’ll get in steps 2 and 3.
2. Match the DIY Drawers Sides to Your Drawer Slides
Next you’ll cut the drawer sides to size. The depth of your cabinet drawers will be determined by the size slides you use in your project. The most popular styles are full extension side mount drawer slides and 3/4 extension bottom mount drawer slides.
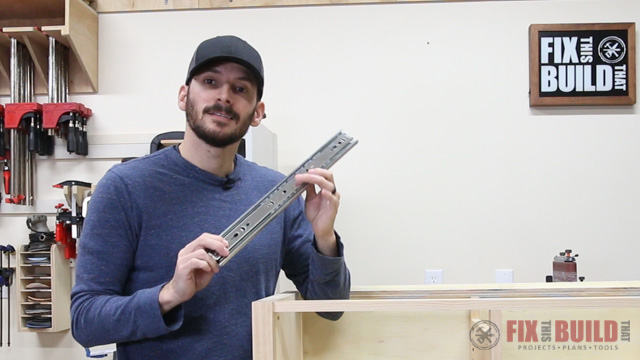
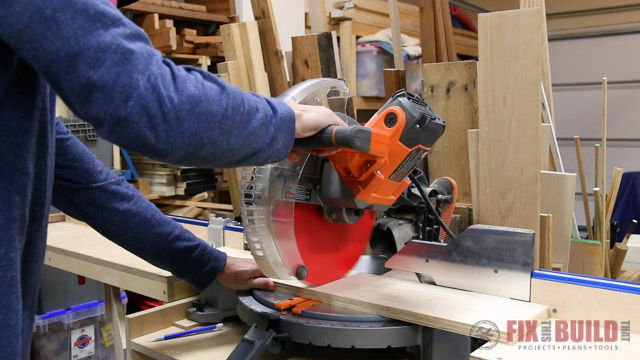
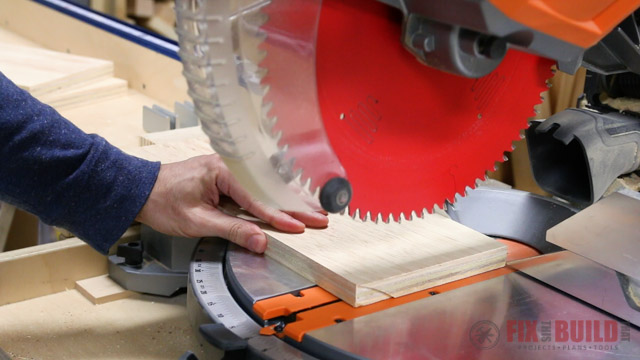
I’m using 16″ full extension drawer slides on this project, so I cut my sides to that measurement. I used my Miter Saw Stand with a stop block track to make quick repeatable cuts.
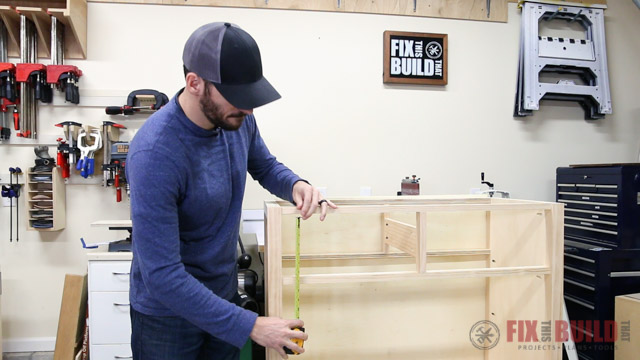
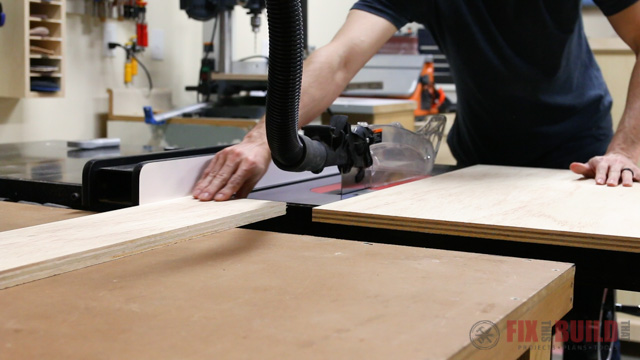
3. Measure Drawer Opening and Cut Fronts and Backs
When learning how to make drawers, this is the step I see people struggle with the most. But when you keep a few things it mind it’s easy math. Start by measuring the width of the drawer opening of your project. Then you need to subtract space your drawer slides need, which is typically 1/2″ each for 1″ total.
The DIY drawers fronts and backs are sandwiched between the sides so those need to be accounted for also. If you’re using 1x material that is a full 3/4″ then just subtract 1-1/2″, but if you are using plywood it gets a little tricky since plywood isn’t really 3/4″.
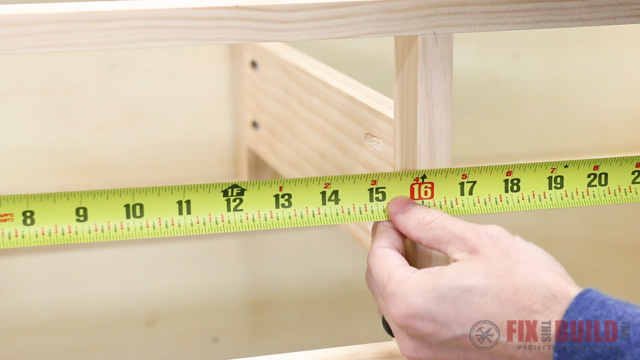
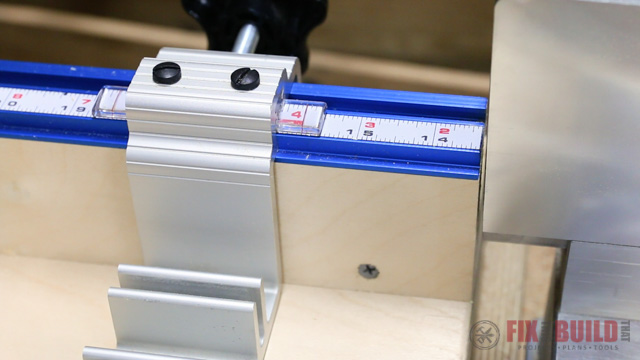
Instead of doing the math on the fractions I set my Miter Saw Stand stop block to the full drawer width. Then I use two scrap pieces of the plywood as spacers against the stop block. These are the same thickness as my drawer sides will be.
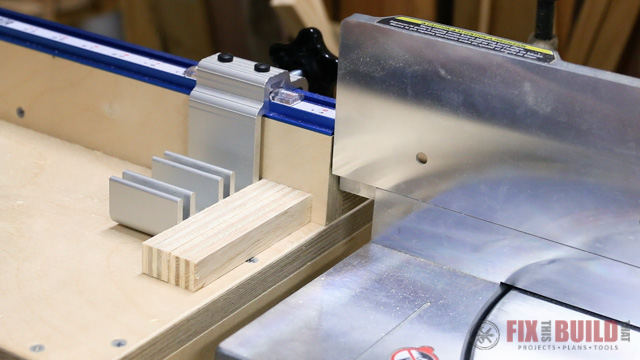
Now I just butt up my front and back drawer parts to the spacers and cut them to the exact length I need. If you don’t have a stop block you can use the same trick by putting the spacers at the end of the board you will cut and include them in the measurement when marking your cut line. Then just measure out the full width of the drawer.
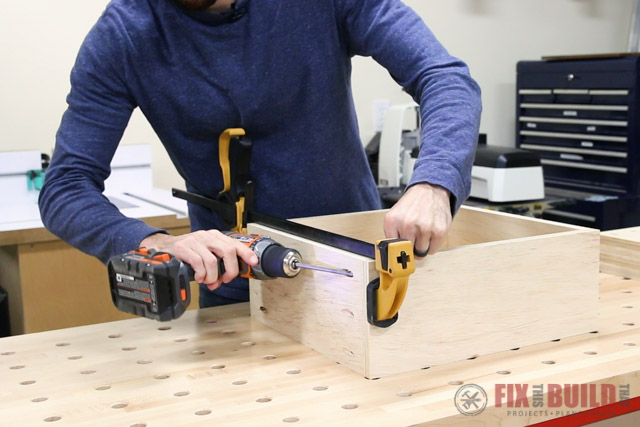
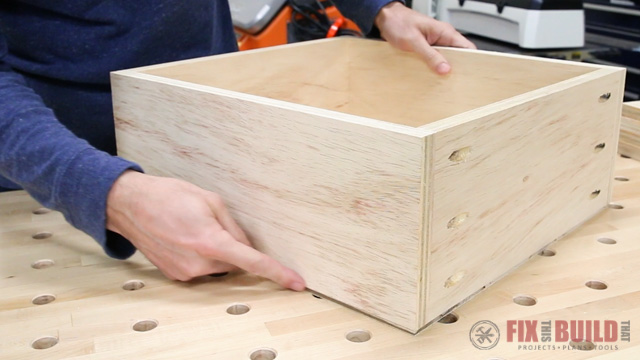
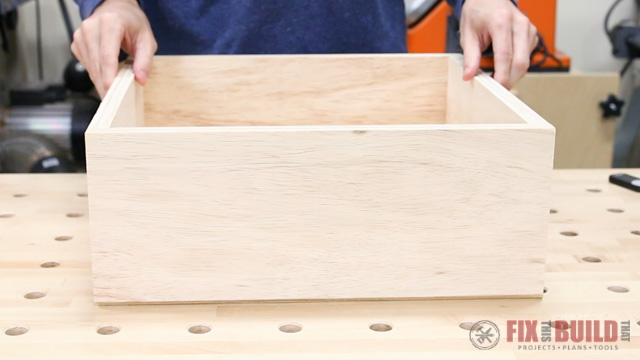
4. Drill Pocket Holes and Assemble DIY Drawer Box
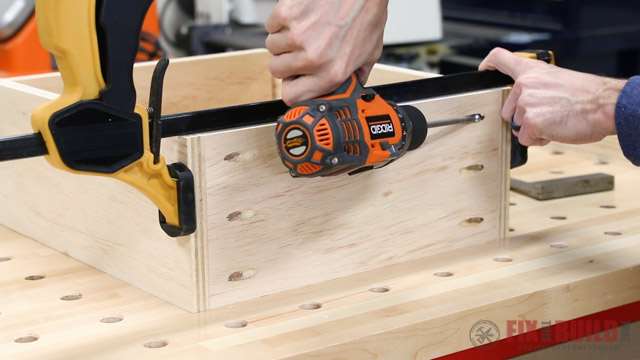
The front and back are joined to the sides with pocket hole joinery. I used my Kreg K4 Jig to drill three pocket holes on the outside ends of the drawer front and back.

Next clamp the drawer sides to the front and the back with the pocket holes facing outwards. Then secure the pieces together with 1-1/4″ pocket hole screws.
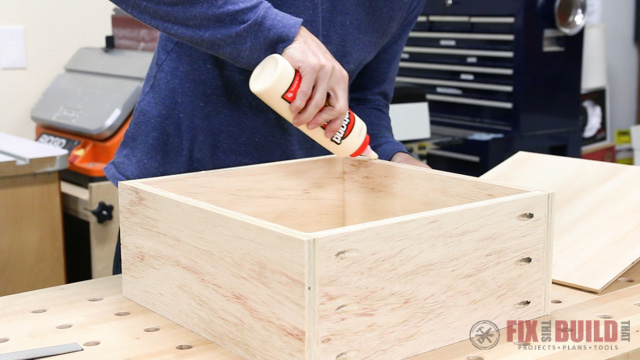
5. Measure, Cut and Install Drawer Bottoms
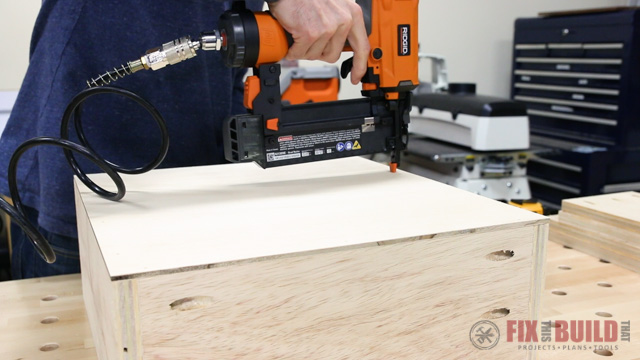
The last step to complete the DIY drawer box is to add the bottom. This step is very easy, you just measure the drawer width and depth (which should match your earlier measurements) then cut a 1/4″ plywood panel to size. Put a bead of glue around the bottom edge of the drawer box, don’t need a ton just a small bead.
Then nail on the bottom with 3/4″ brad nails with a nail gun or use finish nails with a hammer. Keep the nails about 1/2″ away front the outside edge.
You can go one step further and dress up your cabinet drawer box by hiding the plywood bottom. Right now you can still see the plywood bottom.
But using a router and a 45 degree chamfer bit you can put a bevel on the underside of the plywood. You could also do this with a block plane or a sander.
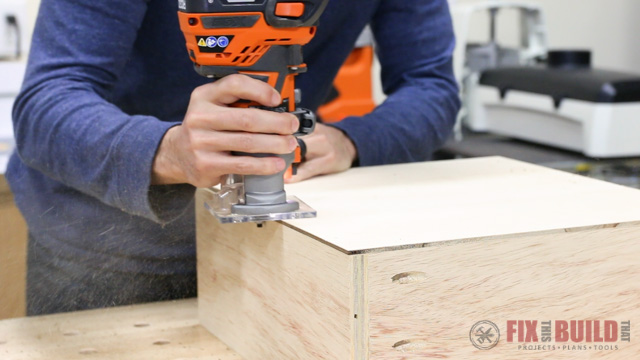
This makes that plywood disappear when viewed from above and you just see a shadow line.
6. Add False Drawer Fronts to the Drawer Box
The last step in how to make drawers is adding false drawer fronts to the boxes. This will vary widely depending upon what type of design and construction you use. But there are two main options to choose from.
Option One: Inset Drawers
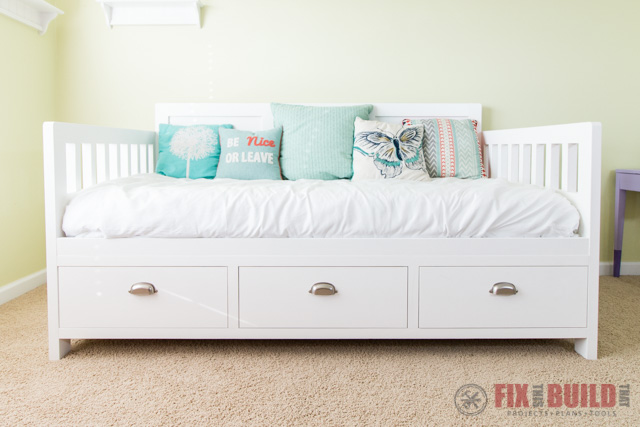
Inset drawers fit inside the drawer opening as you can see on my DIY Daybed with Storage Drawers.
Option Two: Overlay Drawers
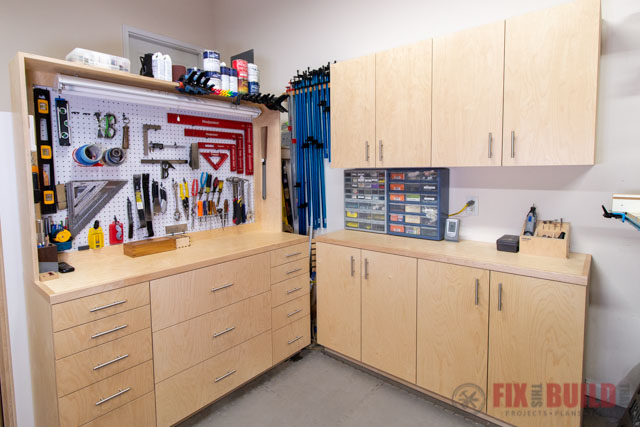
In contrast, overlay drawers sit on top of the drawer opening framing. All of the drawers in my Modular Shop Storage System are overlay drawers.
Either way just cut the parts to size to fit your need and the reveals you want, then attach them to the fronts of the DIY drawers with 1-1/4″ screws from the inside.
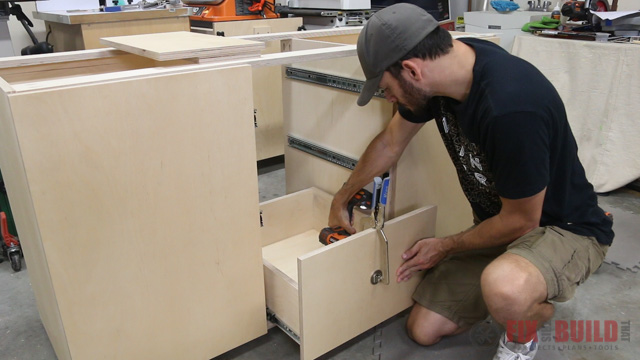
If you need help with how to mount drawer slides you can check out my DIY Base Cabinet post where I go in detail about these steps.
Now you know how to make drawers the easy way! If you want to see some of the furniture and shop projects you can make using DIY drawers then head over to my Projects Page. I have plenty of projects available with plans too.
Kreg Tool provided me with product and/or monetary compensation as a sponsor of this build. All opinions are my own and are not filtered by the sponsor.


Nice Job!