
Have you ever wanted to play with lasers? Of course you have! Ever since the Death Star came on the scene I’ve been intrigued with lasers and like Dr. Evil, I’m wondering why someone can’t just give me some fricking sharks with laser beams on their heads?? Okay, I won’t be blowing up planets or putting lasers on aquatic life, but I will be cutting and engraving wood with a hobby CNC Laser to make a custom lasered wood coaster set.
Rockler is sponsoring a series of 3 posts where I will making different projects with a Full Spectrum Laser Hobby 20×12. CNC machines (like the X-carve or Shapeoko) have become more common place in shops over the past couple years, and I think CNC Lasers are going to also make that some jump in the next few years. So if you are wondering what these laser machines are all about and want to see how they work then stick around and I’ll show you what you can do with one!

Tools Used
Materials/Supplies
- (1) 20″ x 9″ 1/4″ Plywood
- Glue
- Sandpaper
- Spray Polyurethane
Affiliate links are used on this page. See my disclosure page for info on affiliate programs.
** This machine is no longer available, but you can find other options for laser engravers here **
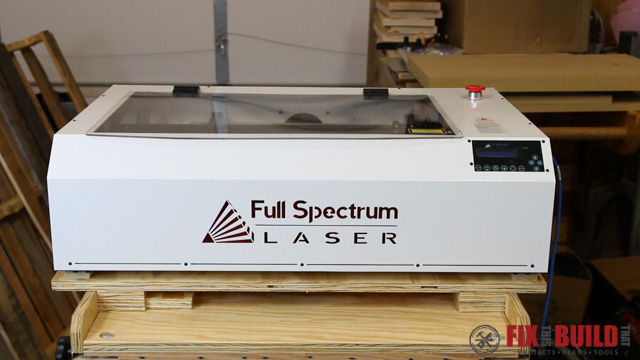
The Full Spectrum Laser Hobby 20×12 is a desktop laser that can be used in small shops or offices with proper installation and is available from Rockler. The machine cutting capacity is 20″ x 12″ and the heart of the machine is a 40W CO2 laser tube. The laser beam (I always do air quotes when I say that) bounces off a few mirrors then through a lens that focuses the beam to cut or engrave the wood. The machine uses a water pump to cool the laser tube, a small air assister to clear the cutting area, and a powered vent fan to clear exhaust fumes to the outside.
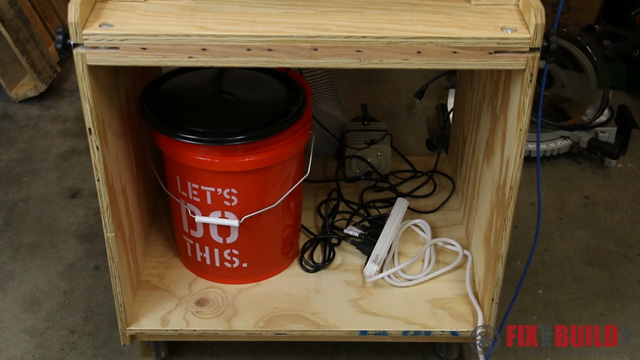
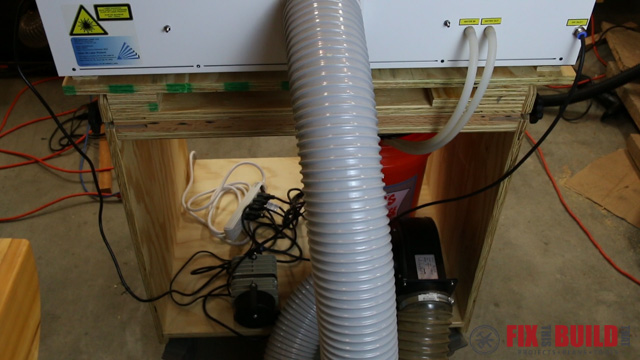
 I mounted the laser on a mobile cart in my shop and have a 5 gallon bucket with distilled water and pump, the exhaust fan, the air assist pump, and a power strip on the bottom of the cart. I run a length of 4″ hose out the garage door when I am cutting since it’s a temporary installation.
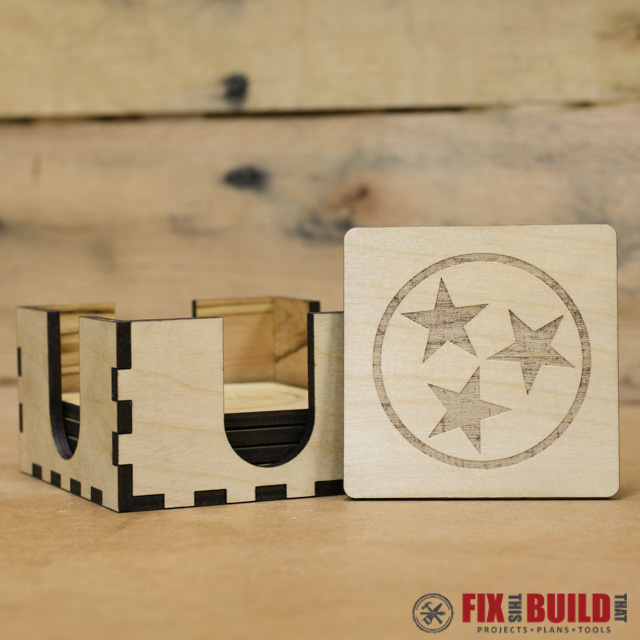
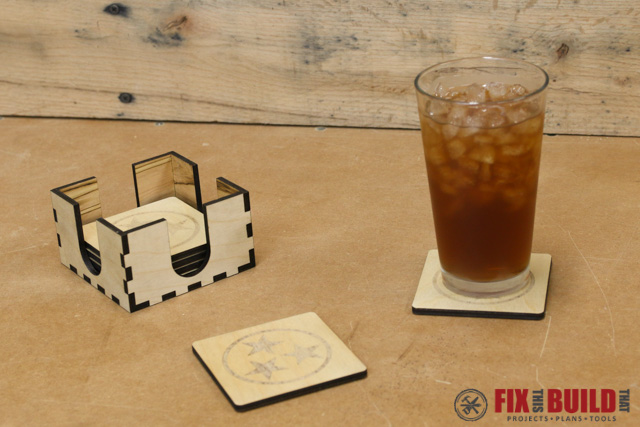
Alright, now let’s get down to the project. I chose to make a coaster set for my first laser project so I can use both the vector (cutting) and raster (engraving) modes of the laser. The coasters are engraved with a custom design and then the coasters along with the coaster holder pieces are cut from the 1/4″ plywood.
Designing the Coaster Holder
You will need design software to make original layouts and designs to print to the laser. I’m using Adobe Illustrator, but Inkscape is a freeware program that many people use for drawing.
Instead of designing an open box from scratch, I used an online CNC/laser box making program (yes those really exist). Go to makeabox.io and all you need to enter are the dimensions of the box you want to make and a few other variables and it will spit out a pdf with the design for you…SWEET!
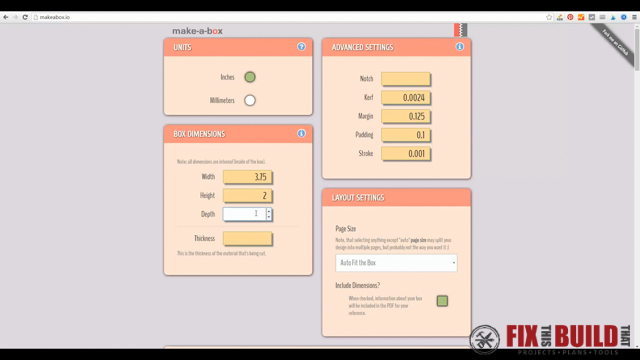
The coasters are going to be 3.5″ x 3.5″ so I made the box 3.75″ square on the inside and 2″ high to fit 6 coasters with bumper feet on them. I needed to measure the thickness of the plywood I was using, so I used some digital calipers and got 0.185″ for my thickness.
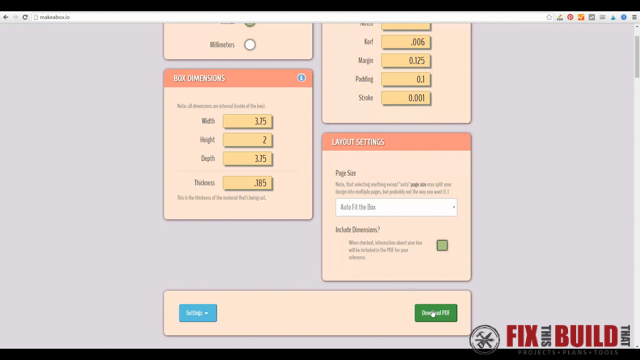
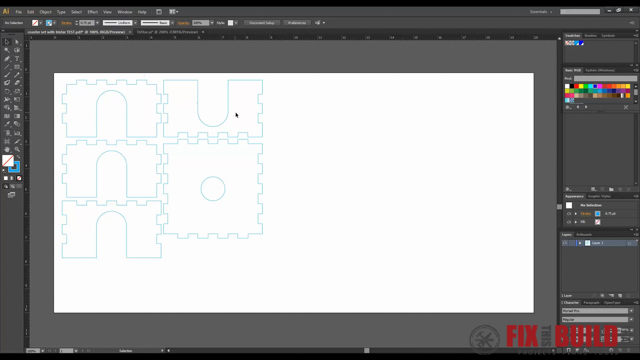
Here is what the program spit out for me.
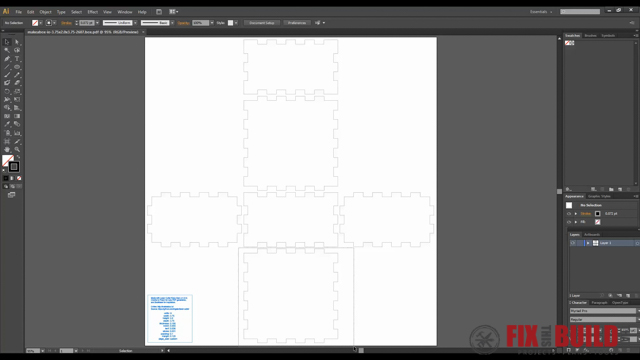
I wanted an open box, so I made some modifications to the design in Illustrator and after rearranging came up with the following.
Designing the Wood Coasters
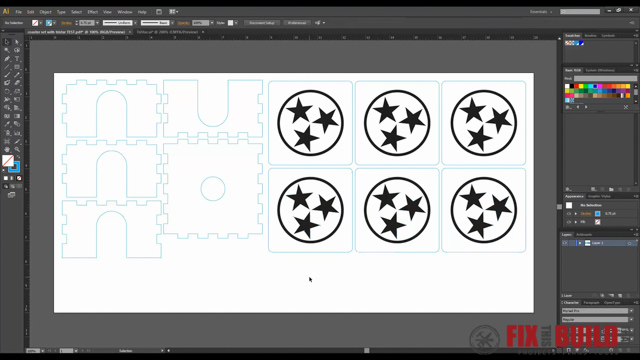
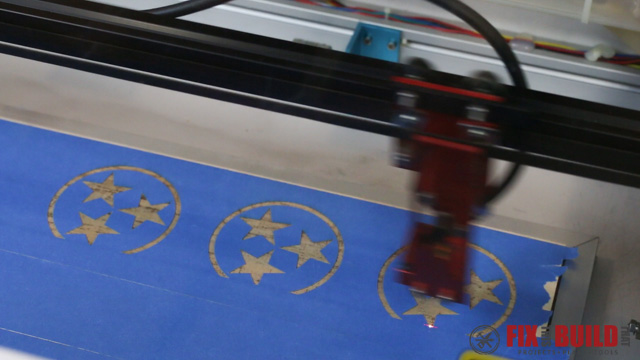
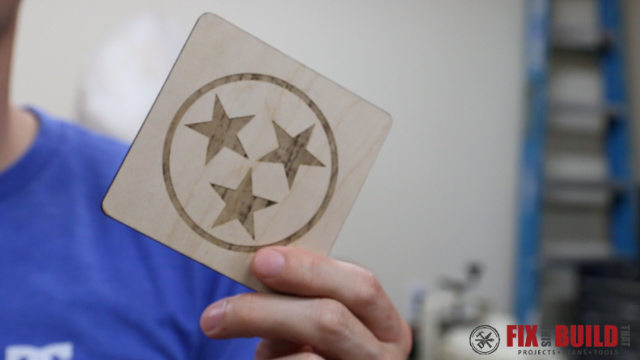
In a separate file I designed a 3.5″ x 3.5″ coaster. For the custom engraving I had the perfect design in mind, the Tennessee Flag tri-star. For those not from TN, the 3 stars represent West, Middle and East Tennessee as seen on our state flag.

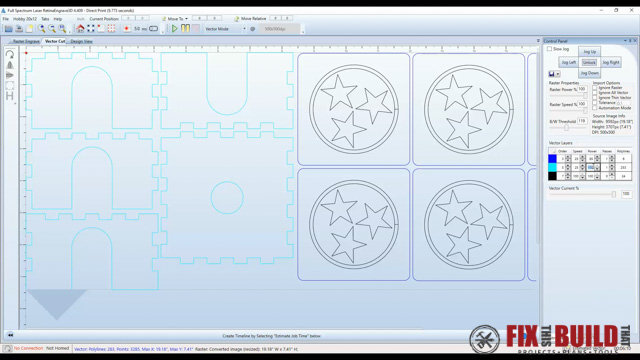
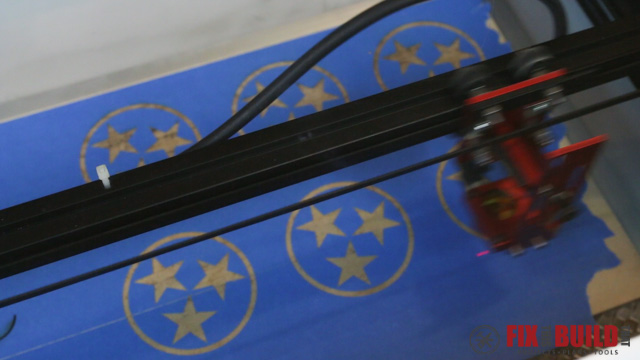
I recreated the design in Illustrator and pasted the coaster design into my other file in 2 rows of 3. You’ll notice the stars and ring are black and the lines of the coasters and coaster holder are blue. This is so the laser knows these are different and will vector cut the blue lines and raster engrave the black lines.
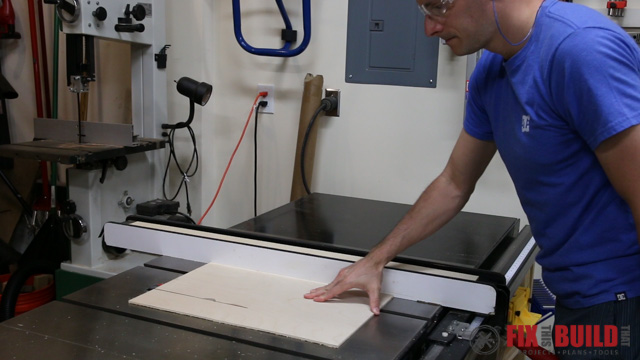
Preparing the Wood Blank
From the design document I knew the design was ~19″ x ~7″ so I cut a piece of 1/4″ plywood to 19-5/8″ x 9″ for the blank. I used 19-5/8″ vs. 20″ because that’s the max width of the honeycomb grid which you’ll see in a minute.
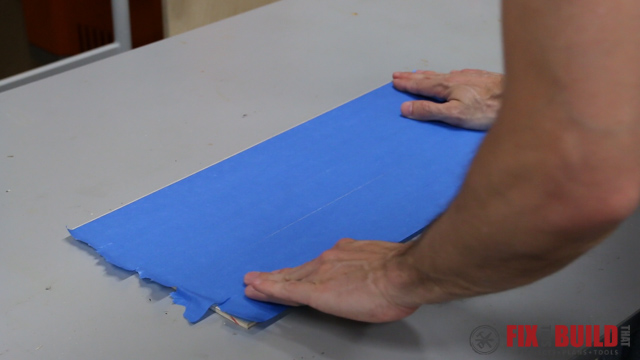
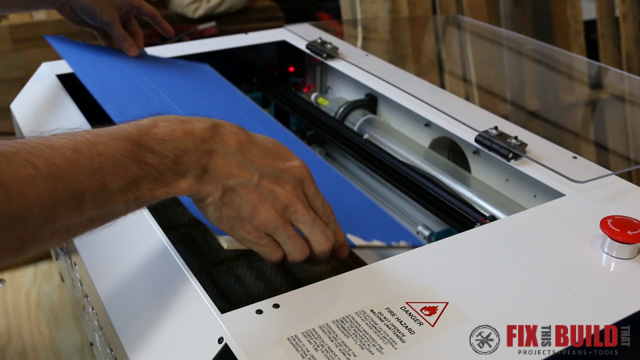
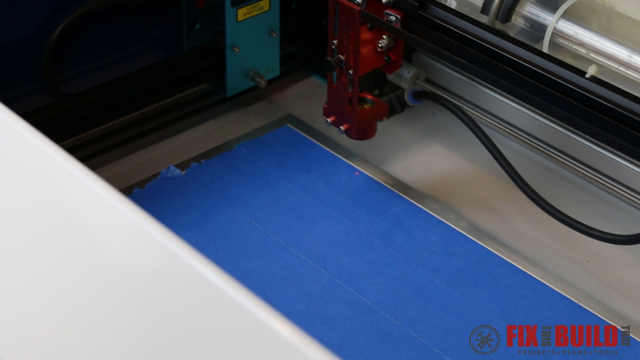
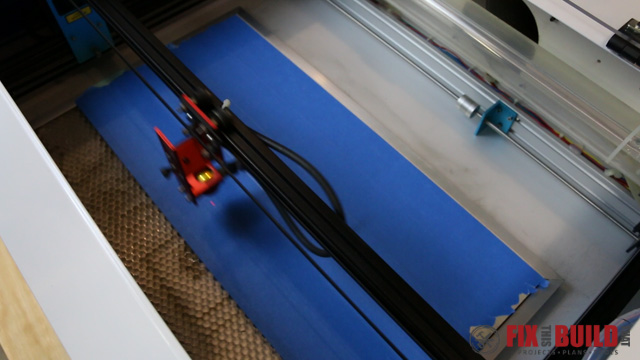
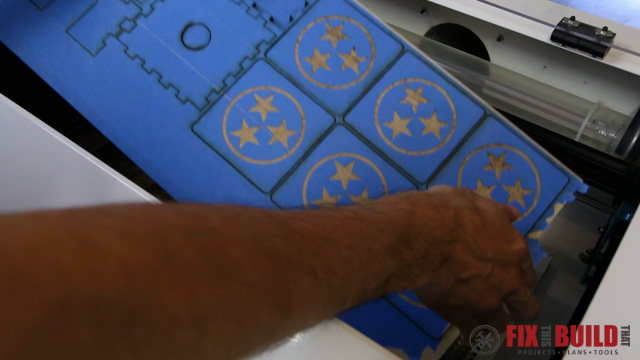
The burning of the wood produces soot and smoke as you’d imagine. To prevent these from charring and staining the wood you can mask off the wood with tape. I used blue painter’s tape and masked off the entire blank.
Then I put the blank in the machine on top of the honeycomb cutting grid. This grid is used when vector cutting. It helps isolate the heat and smoke generated while cutting.
Setting up the Laser to Cut and Engrave
The software that comes with the laser is called Retina Engrave 3D. You can print any file right to the software as if it were a printer. Once imported you can then alter the settings for the cutting and engraving.
There are two settings you can change on the cutting and engraving, speed and power. To find the right settings for cutting your material there is a feature that will cut a series of small squares at different speeds and powers. You can look at the squares and see what combinations of speed and power cut through your material.
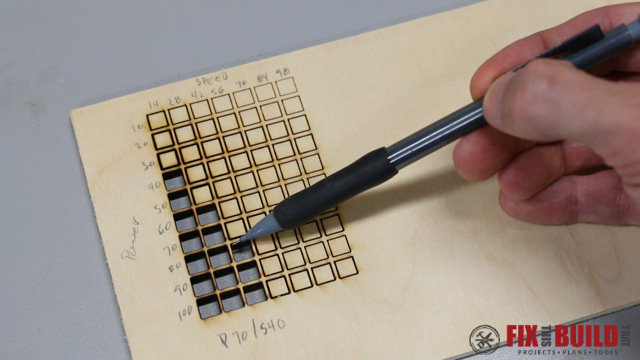
Rastering is similar, but the speed and power will just change the depth and darkness of the engraving. I left mine at 100 speed and 100 power and it worked fine through the tape.
After determining the right speed and power I positioned the laser. The laser is connected to the computer via an ethernet cable and you can position the laser head through the program. You always want to “home” the laser first so the program has a reference point to start from after being turned on.
There is a red pointer dot (this is not the actual cutting laser) that shows you where the laser will fire. I aligned it to the top left of the workpiece and pushed the “Run Job Perimeter” button. This makes the laser head run a large box around where it will be cutting. If the red dot goes off the material then you aren’t positioned properly.
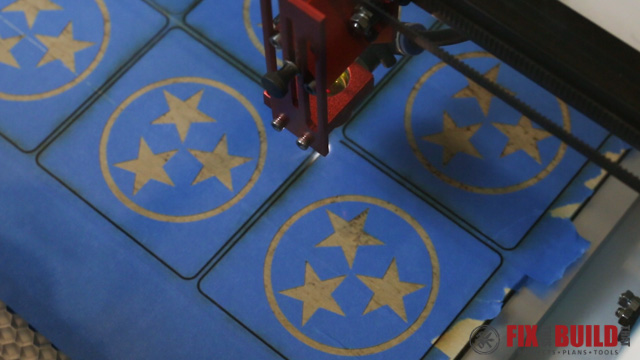
I chose for the program to raster then vector, which means it will engrave my design and then cut out the shapes all in one process. After it’s all setup you just close the lid and push the start button and it does the rest.
It’s really mesmerizing to watch the laser cut and engrave! The whole process took about 35 minutes to finish.
Assembling and Finishing the Coaster Set
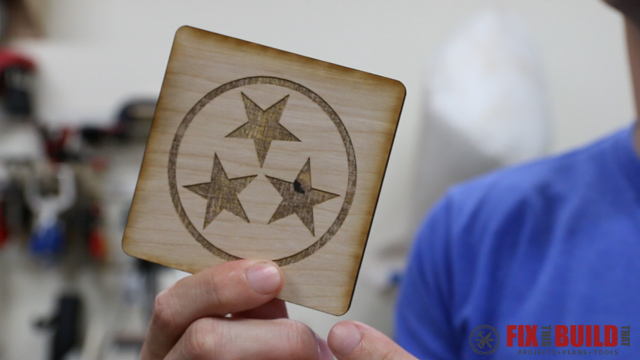
When the cutting is done you can take the pieces out of the machine. If cut properly they should just fall out of the blank. Some of mine did this, but because I didn’t test the cutting with the tape, the settings I used were just slightly underpowered and I had some parts not cut all the way through. Make sure you test your settings with tape!
I took off all the tape and the parts came out great. Here is an example of a coaster I cut without the tape and one with the tape. You can see all the charring and soot around the edges of the one that was not masked.
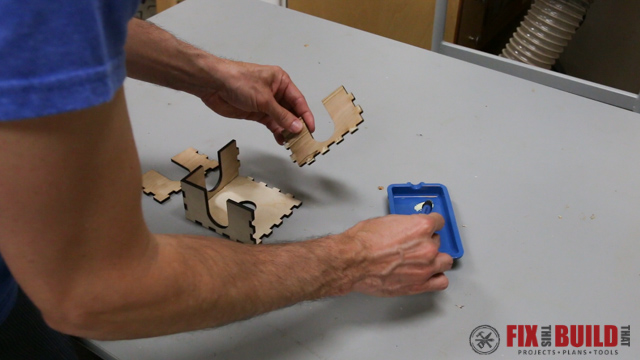
I gave everything a light sanding with 150 grit sandpaper and then I assembled the coaster holder. I put dabs of yellow glue on the tabs and pieced it all together. I clamped the holder with rubberbands and let it sit for an hour or so.
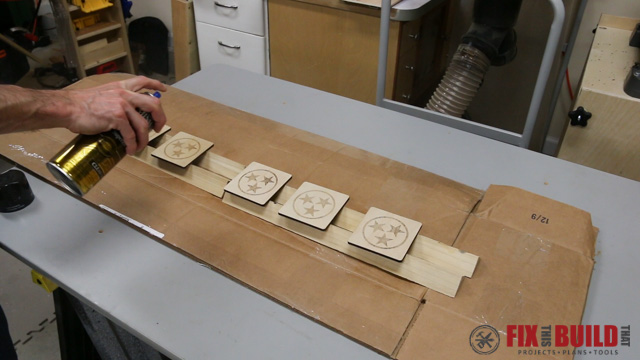
After it was dry I sealed the holder and the coasters with 3 coats of spray polyurethane, sanding with 320 grit between coats.
When the finish was dry I applied some small felt feet to the coasters and coaster holder to keep them from scratching a wooden table.
This was a really fun project to learn how to use the Full Spectrum Laser. I’m going to try using some other materials in my next projects and see what else I can build. If you’d like to check out some of my other Home Décor projects you can do that at my Home Décor projects page.
If you’d like a free PDF of the cut file for the coasters you can download it HERE.
Rockler provided me with product and/or monetary compensation as a sponsor of this build. All opinions are my own and are not filtered by the sponsor.


Gosh, my laser when operating gives off a green light while I’ve noticed that everybody else’s gives off a red light…Am wondering if that makes any difference…