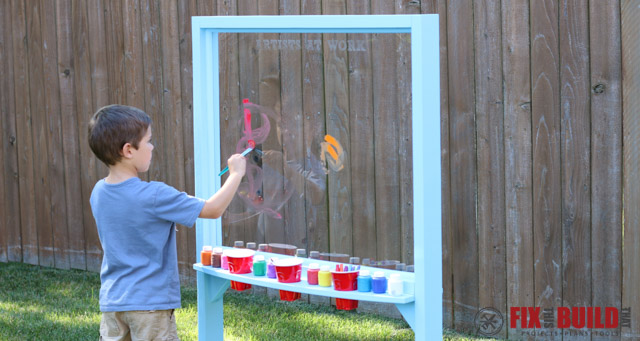
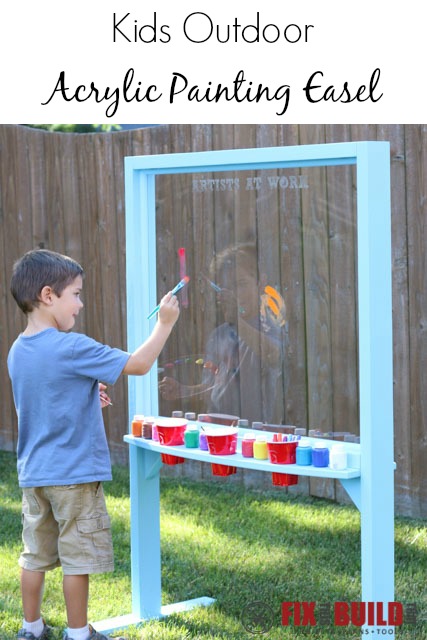
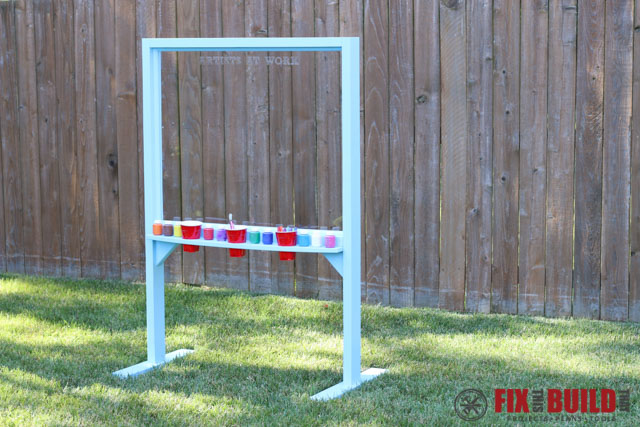
It’s summer time and that means fun outside! Today I’ll show you how to make a DIY Kids Outdoor Acrylic Painting Easel for your budding artists. The art easel is great for the kids to draw and paint on outside with water based paint or dry erase markers. It has cup holders on each side to hold paintbrushes, markers, and other art supplies. The beauty is you can quickly clean off water based paint with a hose and be ready for the next masterpiece. It can also serve double duty as a scoreboard for your DIY Football Toss Game!
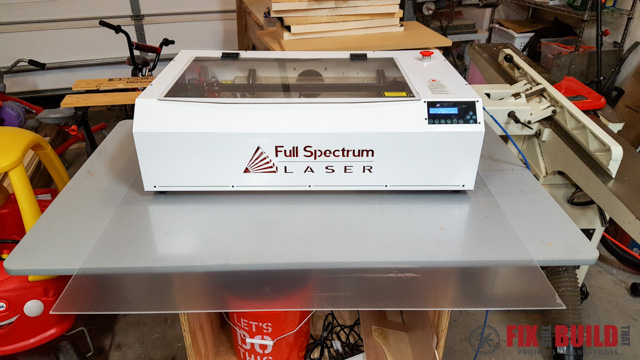
I used a Full Spectrum Laser Hobby 20×12 from Rockler (who is sponsoring this build) to personalize the easel with a fun quote and also to cut out some custom acrylic painter’s palettes which I’ll show you more about later. Go to the Rockler website if you’d like to find out more information about this machine and other laser accessories.
The entire project is built from 4 pieces of construction lumber and some trim and can be quickly built in an afternoon. See how you can make your own below and download FREE plans.


Tools Used
Materials/Supplies
- (3) 8′ 2×4 pine boards
- (1) 8′ 1×6 pine board
- (4) 68″ 11/16″ quarter round
- (1) 36″ x 30″ acrylic sheet 0.093″
- 3″ wood screws
- 2″ Pocket Hole Screws
- 1-5/8″ wood screws
- 1″ brad/pin nails
Affiliate links are used on this page. See my disclosure page for info on affiliate programs.
![]()

The kids outdoor acrylic painting easel is a very quick build. The frame is made from three 8′ 2×4’s and the supplies shelves are made from a 8′ 1×6. Other than that all you need is 3/4″ quarter round trim to hold in the 36″ x 30″ sheet of acrylic.
Making the Kids Acrylic Painting Easel Base
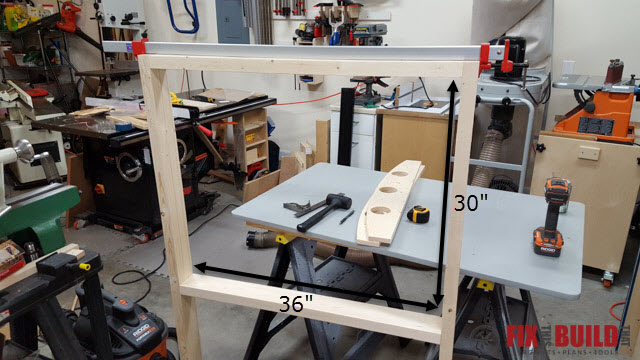
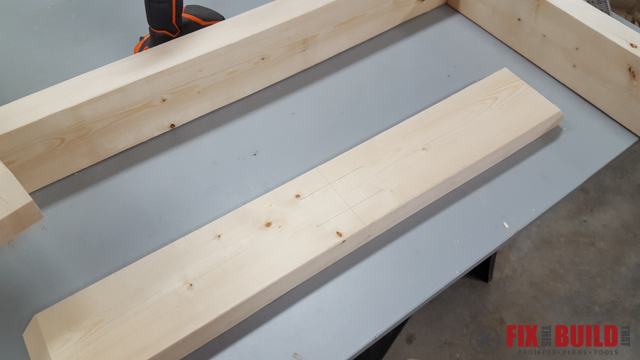
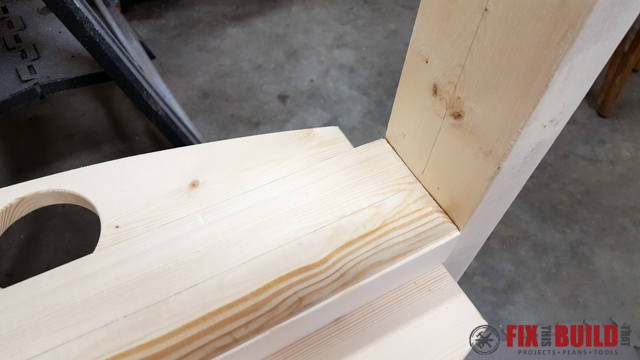
From the 2×4’s, cut 2 frame legs to 54″ long, 2 frame rails to 36″ long, and 2 feet to 24″ long. From the 1×6 cut 2 supply shelves 36″ long.

Drill pocket holes on the ends of the frame rails and on one end of the frame legs.
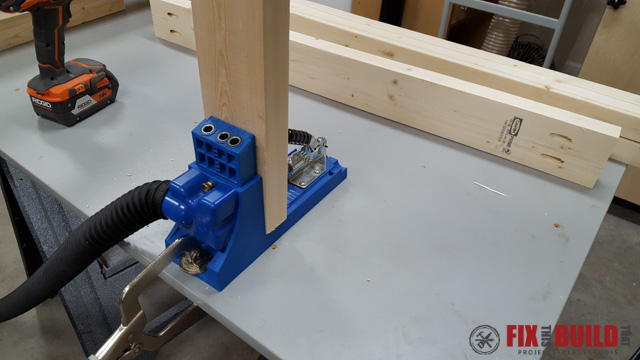
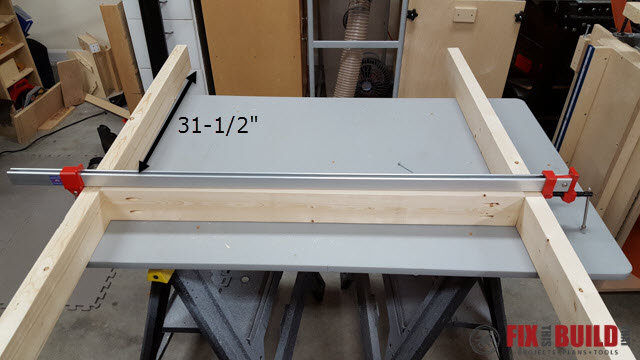
Attach the frame rails to the frame legs with 2″ pocket hole screws to leave a 30″ x 36″ opening. I attached the top later, but there is no reason you shouldn’t do it now.
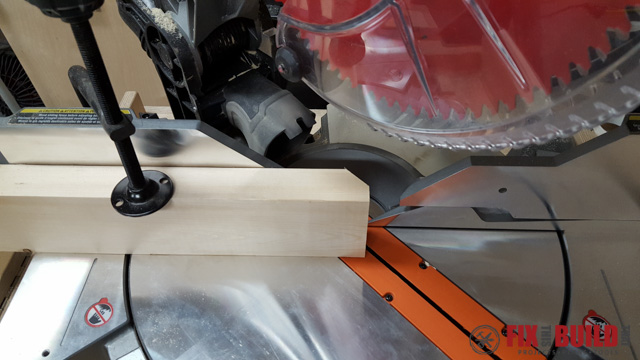
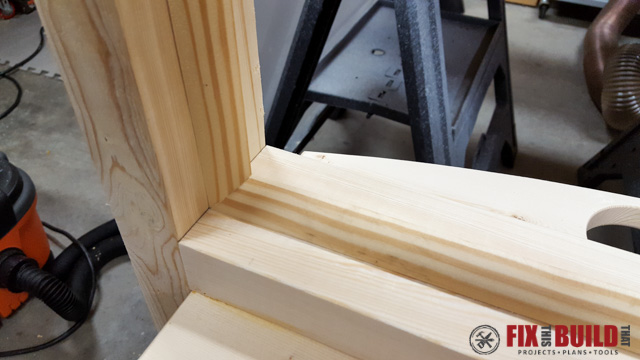
To soften the feet, cut 45 degree bevels on the ends of them at the miter saw.
Attach the frame legs to the feet with 2″ pocket hole screws. Layout center lines on the feet and frame legs to help you align the feet.
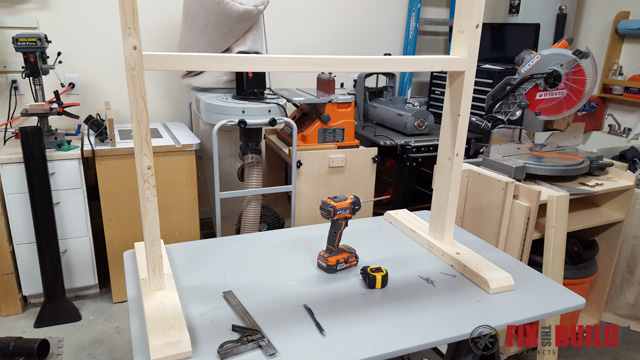
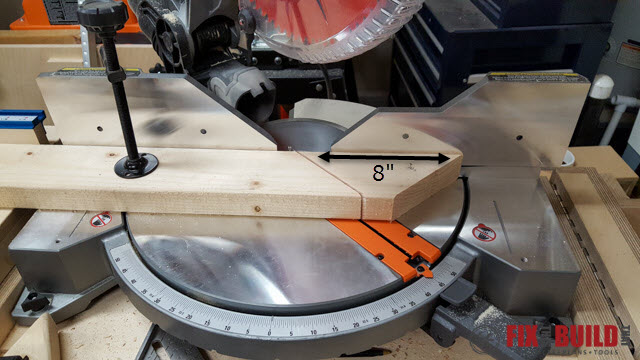
To square the frame, add two 8″ braces with 45 degree cuts on each end. Attach them on edge between the lower rail and the frame leg with 3″ screws. Center the braces on the boards.

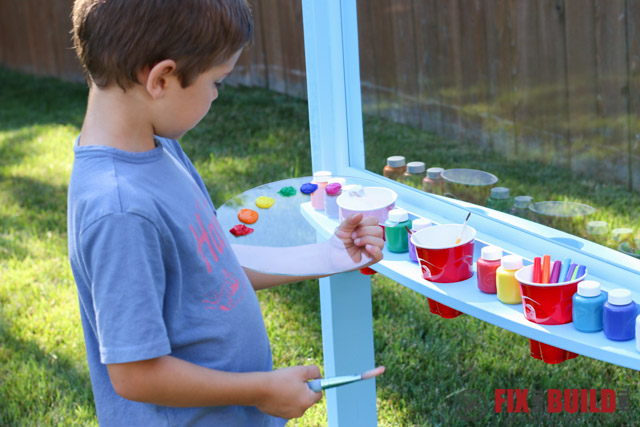
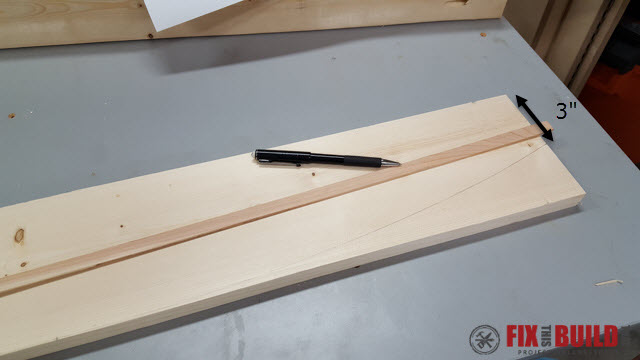
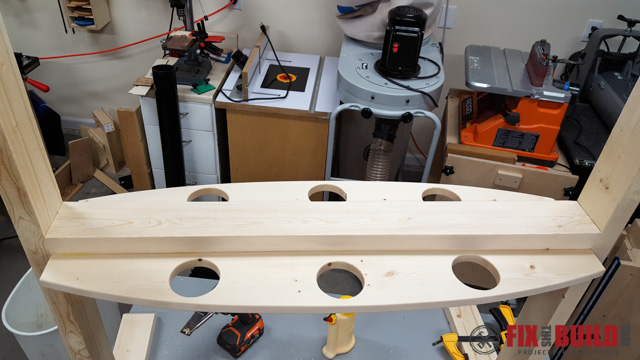
Next you’ll shape the supply shelves and the holes for the cups. Layout a curve that is flush to the edge in the center of the board and runs 3″ from the outer edge on both ends. I used a thin flexible piece of wood to layout the line.
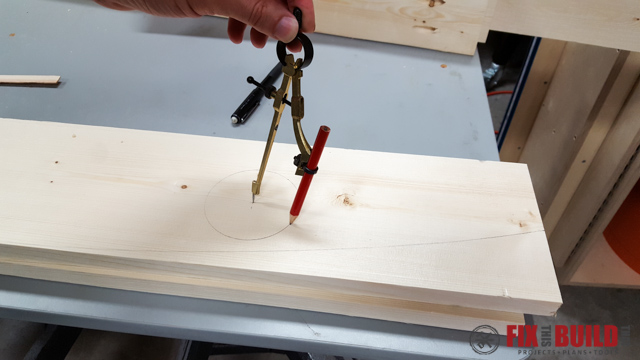
The holes in the supply shelves are 3″ diameter. The center of the outer holes are 9″ the outside of the board and 3″ from the straight edge. The center hole is 3-1/2″ from the back edge. Use a compass and jigsaw to layout and cut the holes. If you have a 3″ hole saw that will make things even easier.

Before attaching the supply shelves, roundover the edges and sand everything down to 150. Attach the shelves to the underside of the lower frame rail with glue and 1-5/8″ screws.
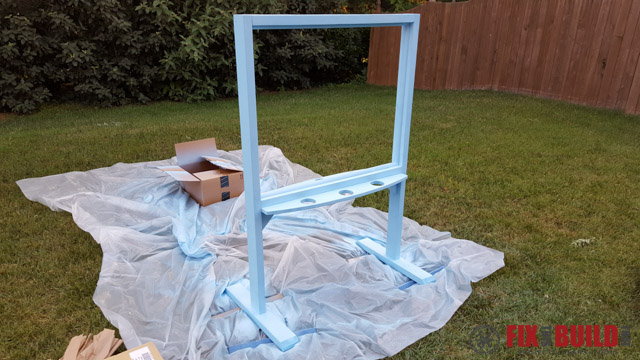
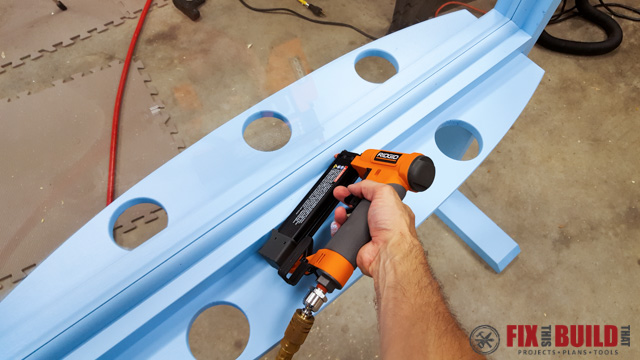
The last thing to do before moving to the acrylic is install 3/4″ quarter round trim to hold the acrylic sheet. Scribe a line 1-11/16″ in from the front edge, then install the quarter round on the line using 45 degree miters at the corners and 1″ brad nails.
Cut the quarter round trim for the other side of the acrylic sheet but don’t install it yet. Now sand everything to 150 grit and paint the base and unattached quarter round with an exterior paint.
Customizing the Acrylic Easel with a Laser CNC
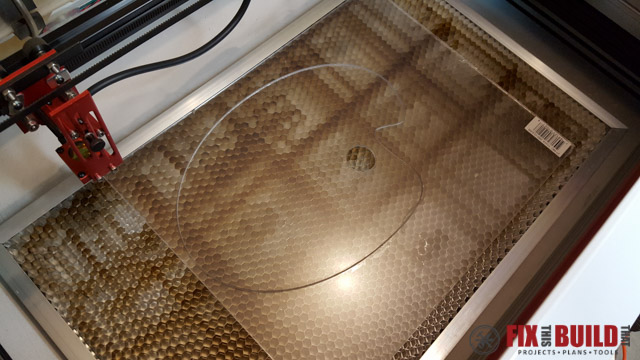
Okay, now that the base and paint are all done we can move along to customizing the acrylic sheet and making the painter’s palette with the CNC laser. I used a Hobby Laser 20×12 to do both of these tasks. I really wanted to see how it did with acrylic and it cuts and etches it extremely well. So before we get to the Final Assembly, let’s take a look at the lasering process!
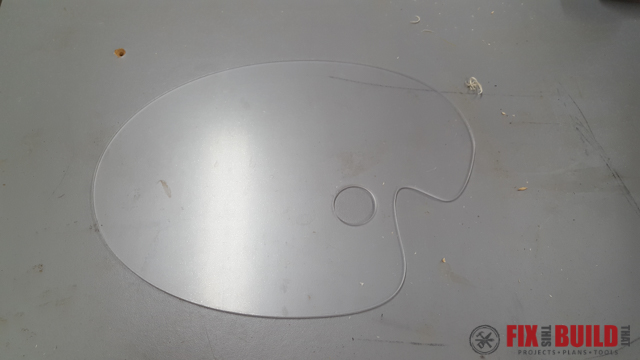
I designed a painter’s palette using Adobe Illustrator based on some photos that I saw online. I printed it out on paper and tested the size with my kids before going to the laser. I used an 11″ x 14″ sheet of 0.093″ acrylic for the material and cut it out using 40% speed and 100% power. I think it turned out awesome. If you want a PDF of this design you can get it here.
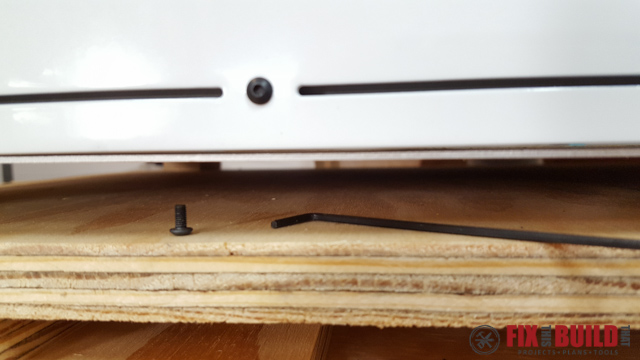
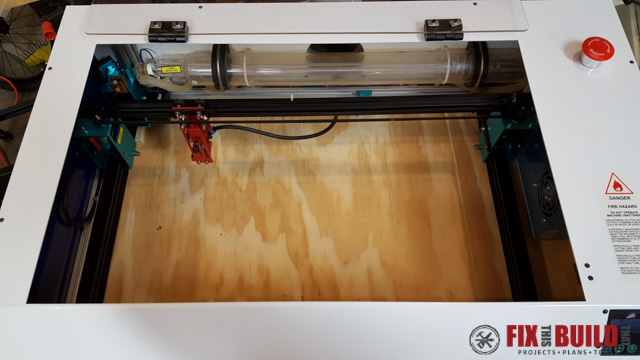
I also wanted to etach a fun phrase on the kids painting easel. I decided on “Artists at Work” and started figuring out how to get it on the acrylic sheet. The laser only fits 20″ x 12″ material in the bed, but the cool thing is you can actually remove the bottom to laser on larger items. So I removed the screws on the bottom of the laser and pulled out the bottom plate.
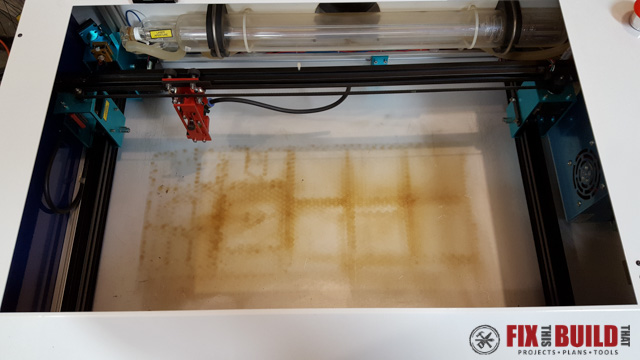
I put a worktop I usually use on sawhorses under the laser to hold the acrylic sheet.
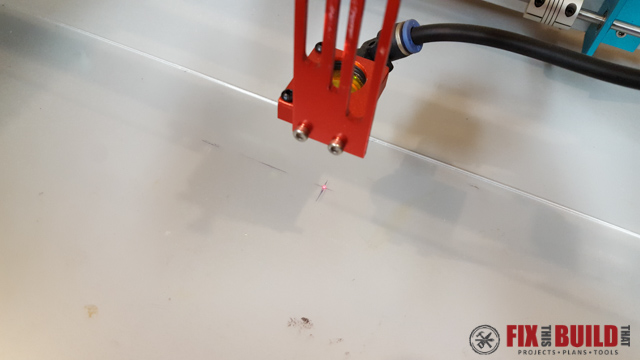
Then I laid out some marks to center the phrase where I wanted it on the acrylic sheet and lined up the laser. If you want more info about the laser software you can find it in my Custom Lasered Wood Coaster Set post.
I etched the phrase in a mirror image on the backside of the acrylic so a smooth surface would be on the front side, but it would read correctly from the front. After it came out of the machine here is what I had. Pretty sweet, eh?

Final Assembly of the Kids Painting Easel
The final step is to install the acrylic sheet and the quarter round to hold it. Strip off the protective film from the front and the back of the acrylic and put the sheet in place. Then use 1″ brad or pin nails to attach the quarter round firmly against the sheet. Fill the holes with spackle and touch up the spots with paint.
Now your DIY Kids Outdoor Acrylic Painting Easel is ready to rock and roll! Load up the palette with paint and get ready to paint outside!

If you’d like more fun outdoor projects then head over to my Outdoor Projects page.
![]()
Rockler provided me with product and/or monetary compensation as a sponsor of this build. All opinions are my own and are not filtered by the sponsor.


I’m going to make it this weekend for Evan, my niece’s 3 year old son. Does that make him my grand nephew ? Not sure of the right family term. I’ll let you know how it turns out.
Hope he loves it!
Solid, dude!