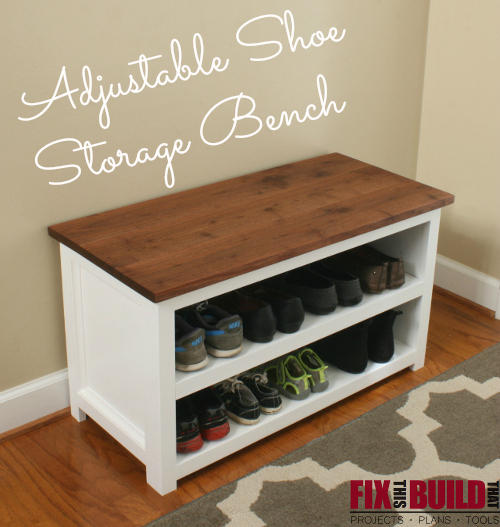
Adjustable Shoe Storage Bench
Are shoes cluttering your foyer, mud room, or back hallway? This Adjustable Shoe Storage Bench can help solve the clutter and add a spot to sit down while dealing with your kicks!
UPDATE: I’ve made a new version of this bench which is longer and has 2×2 legs. Check it out as well and see which version you like better. You can see it at my DIY Entryway Shoe Storage Bench post. I’m also including the video for this entryway shoe storage bench below as well!
I started asking my wife what would make her life easier…other than me doing all the cooking and cleaning. One of the things she mentioned was the constant battle for the front foyer. We have 3 little ones and they love to rip off their shoes when they come inside and toss them on the ground. Okay, okay…I’ve been known to do that myself a time or two or twenty. Having 5 people’s shoes chilling out in the foyer is hard to keep orderly and when company is over it really adds to the clutter.
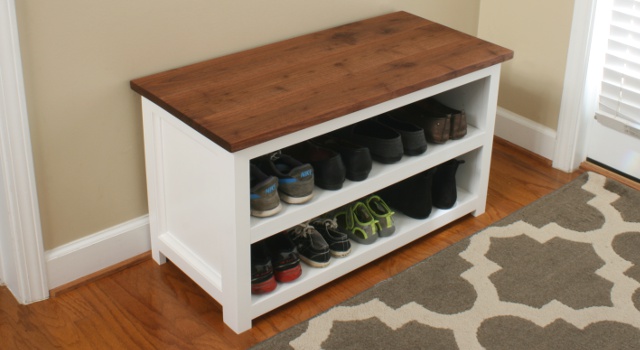
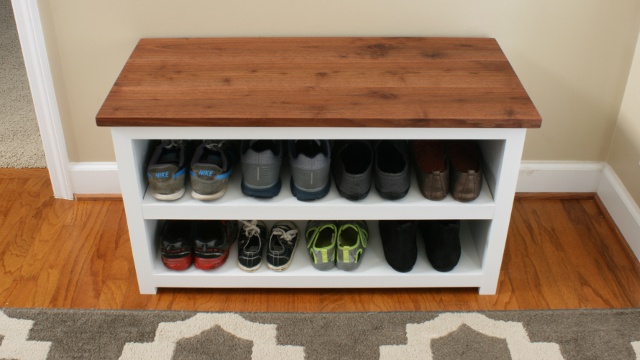
The Adjustable Shoe Storage Bench is what I came up with to solve that dilemma. It will hold 4 to 6 pairs of shoes per shelf depending upon your kiddo to adult ratio of shoes. The bench has an adjustable shelf that can be moved up and down about 5 inches. It’s a great solution to clean up the pile of shoes aggravating that special mother in your life!
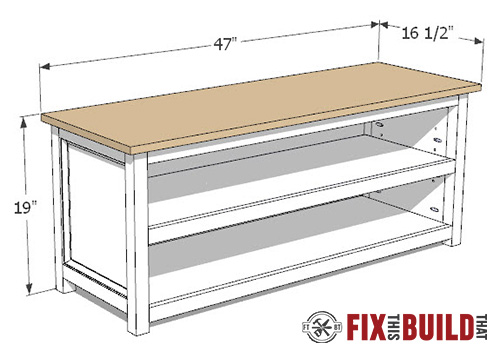
The top is solid walnut with an oil and varnish finish. This could easily be substituted for a different top from lumber available at the home center. The base and shelf are made from 3/4″ plywood and 1×2 poplar boards also available at your big box, though I milled my own. The pocket hole construction makes the assembly straight forward and easy. The bench measures 19″ tall, 34-1/2″ wide and 16-1/2″ deep. There are detailed plans available for this and the new version so you can build either one!
Tools
Materials/Supplies
- 48″ x 48″ piece of 3/4″ plywood
- (3) 34-1/2″ x 5-3/8″ x 3/4″ walnut boards
- or 9′ of 1×6 boards (if using dimensional lumber for top)
- 9′ of 11/16″ Cove Molding
- 1-1/4″ Pocket Hole Screws
- White Semi-Gloss Paint
- Polyurethane and/or oil/varnish blend
Affiliate links are used on this page. See my disclosure page for info on affiliate programs.

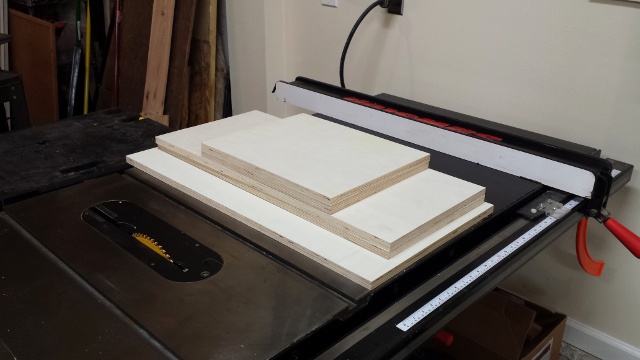
I started out with a 48″x48″ piece of 3/4″ plywood. This will make the carcass of the unit and the shelf. I cut the sides, back, bottom and shelf out of the piece with some left over.
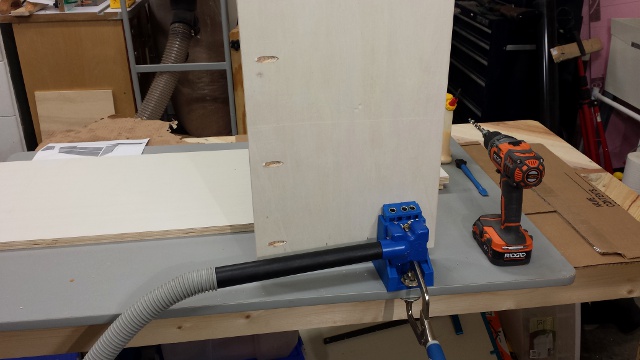
 Next I took the pieces over to the work table and started drilling the pocket holes in them. I used my Kreg K4 for this, but you can use any of their jigs to get it done.
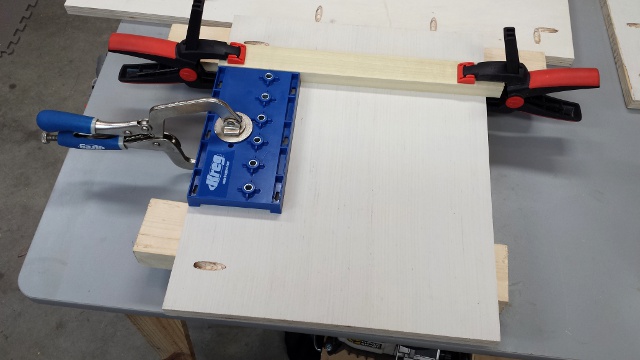
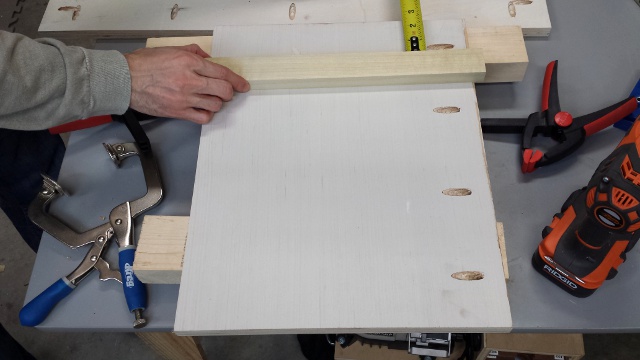
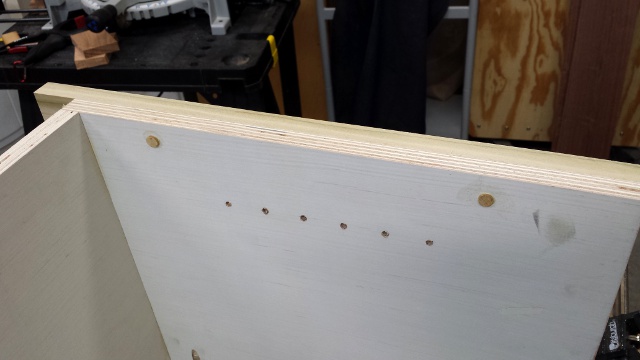
I wanted the shelf to be adjustable to add a little versatility to the bench. I used the Kreg Shelf Pin Drilling Guide for this and it worked out great. The jig allows you to put consistently spaced holes shelf pin holes in your project and gives quite a few ways to align and clamp the jig.
After some mind bending math and lots of fractions I figured out where to put my shelf pin holes to center the shelf at the middle setting. I clamped a scrap piece of wood straight across to register the jig for the holes on the other side. Then clamped the jig in place and drilled the holes.
I flipped the jig end for end and aligned it with the right edge and the board. This gives holes lined up exactly with the ones on the left side. Pretty sweet, eh?
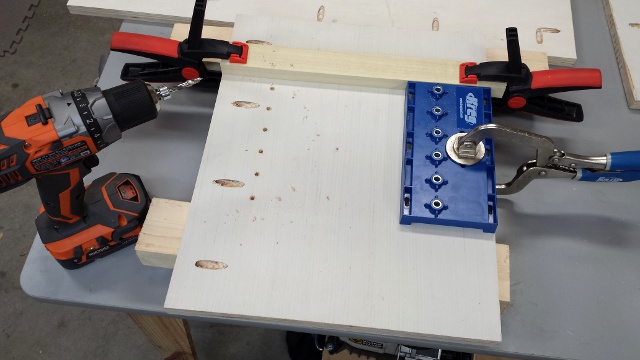
Then I repeated this same process on the next side piece. I measured the location of the scrap board and clamped it in the same location on the other piece. Just make sure the board is parallel with the top.
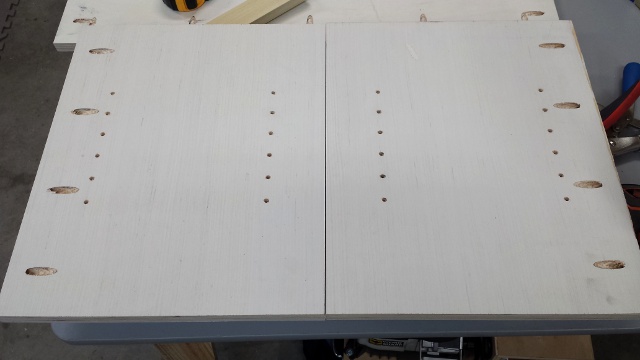
After drilling the holes in the 2nd panel I had two sides with perfectly aligned shelf pin holes. The thing I liked the most about the Kreg Shelf Pin jig was how easy it was to register and change where the holes would be. Much better than using a piece of pegboard as you can always reference the jig against a straight edge of the workpiece.
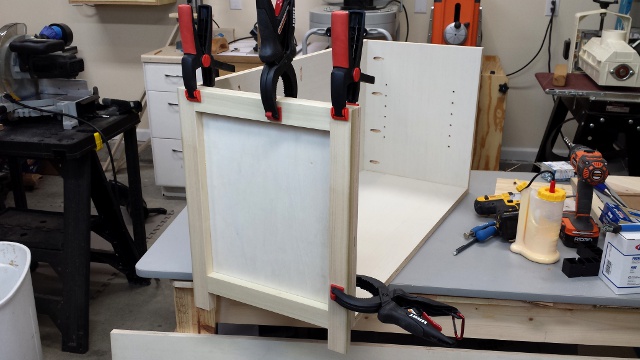
Now the assembly can begin! Hopefully you have nice and straight plywood…and a pony and a bag of cotton candy. I mean is plywood ever really straight??? Not many times in my experience.
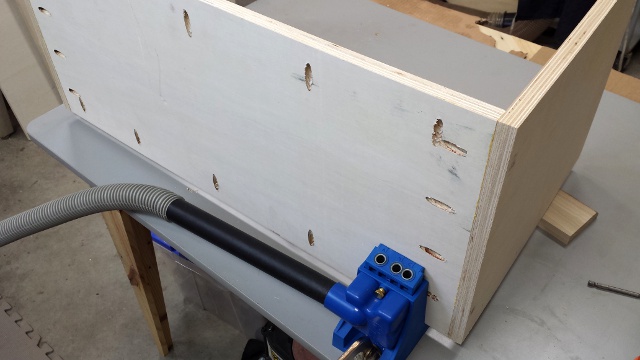
If your ply is a little wonky it helps to have 1 or 2 Kreg Right Angle Clamps to muscle things in to place. I attached the sides to the bottom first then moved on to the back. See those pocket holes at the top of the bottom board? Yeah, we’ll talk about those in a minute.
I glued and screwed each side into place with 1-1/4″ pocket hole screws.
Well if you are super observant you may notice what is wrong in the pic above. The pocket holes to attach the back are the wrong side of the bottom piece. You would expect to see the pocket holes in the side pieces peeking out in the top left corner of the pic if it was positioned right. Yeah, you don’t. Because I screwed it up and assembled it backwards.
The crazy part is that I was actively thinking about alignment during dry assembly and even in glue up. For some reason my brain just thought this was right until it was clear it wasn’t. Whoops.
But one of the great things about woodworking is that typically whatever you jack up you can fix. In this case it was an easy fix. I just had to put pocket holes in the other edge of the bottom. And in case you were wondering, yes you can clamp a partially assembled carcass in your K4. Just use support shims to keep it level and flat.
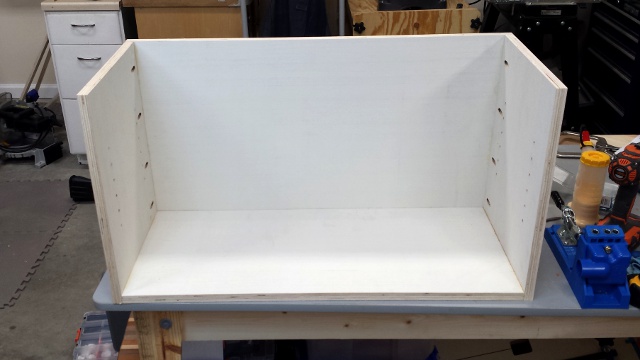
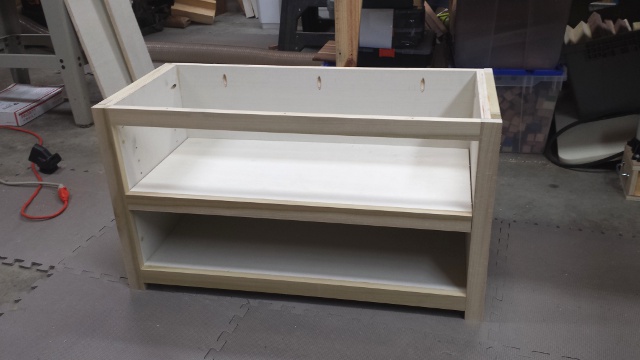
Now I put the back underneath the carcass and attached it. It’s easier to attach the bottom to the back first and then the sides.
This “open box” makes up the core of the bench. I filled the visible pocket holes later on before final painting.
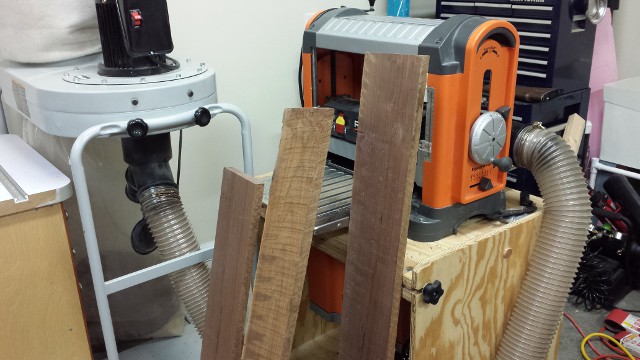
Next up I made the sides and leg assemblies out of poplar. So here is a great opportunity to introduce some of you budding DIYers to a couple next level woodworking tools. The planer and jointer are two tools that work in tandem to turn rough lumber into dimensioned lumber like you buy at the big box. I’ll cover the planer here.
The planer has a spinning cutterhead that moves up and down sitting between a pair of rollers that feed the wood through the machine. You lower the cutterhead about 1/16″ or so with each pass until it’s at the desired thickness, flipping the board over at each pass to smooth both sides.
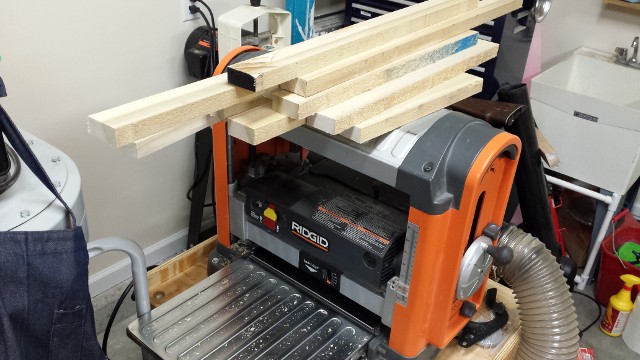
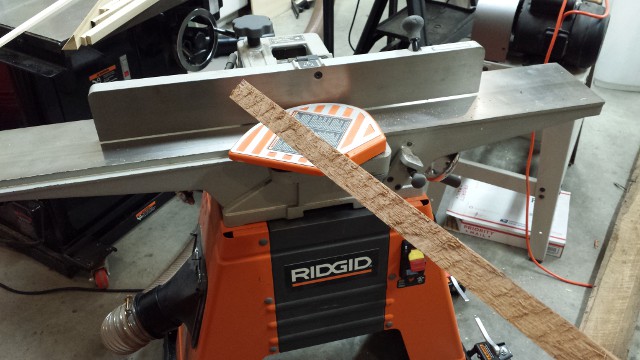
After the boards go through the planer you can rip the pieces to width on the tablesaw. Now you have a dimensioned piece just like you would buy at the home center. Here is the kicker…the poplar board on the left is a 3′ 1×2. This would cost you $0.98 per foot at my local borg, so $3.21 after tax here in TN.
The board on the right is the other half of the same board undimensioned. This rough lumber cost me…nothing! I picked it up as scrap from a local wood shop. You can find great deals on rough lumber on Craigslist or even find it free like I did if you look around a little.

By dimensioning my own lumber I was able to use a higher quality wood like poplar vs. pine. And instead of buying 26′ of it for about $28 I was able to make my own for free. Investing in a planer and jointer is a good chunk up front, but pays dividends every time you use them. Okay, back to the build!
I milled up all the pieces for the sides, the front frames, and the edge trim for the shelf. After cutting all these pieces to finished length I drilled 2 pocket holes in each rail and assembled the side frames with 1-1/4″ pocket hole screws and glue. I positioned the bottom rail so it was flush with the bottom of the carcass.
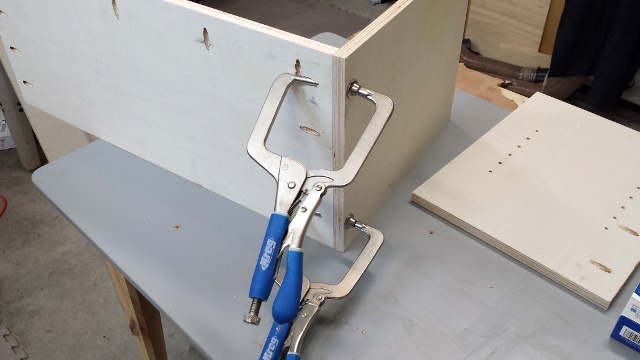
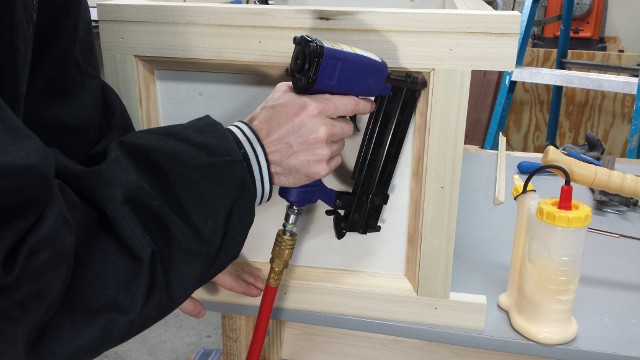
I attached the sides with brad nails, glue and some face clamps to start off.
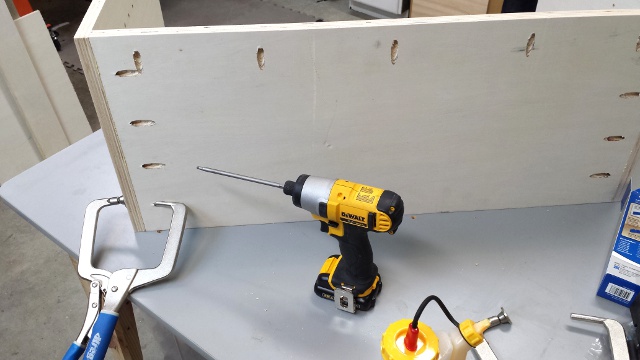
 After attaching both sides with glue and brads I added screws from the inside to make sure it would hold up to me and my dad sitting on it after Thanksgiving dinner. I used a countersink bit and 1″ screws to make sure I didn’t go through the frame. I set the bit first like so.
Then drilled the holes.

I put the 1″ screws in place and then filled the holes with little pieces of dowel rod and some glue to cover the screwheads. I flush cut them later with a pull saw and after sanding and painting you can never tell they are there. You can also just sand flush if you don’t have a fancy pants pull saw.
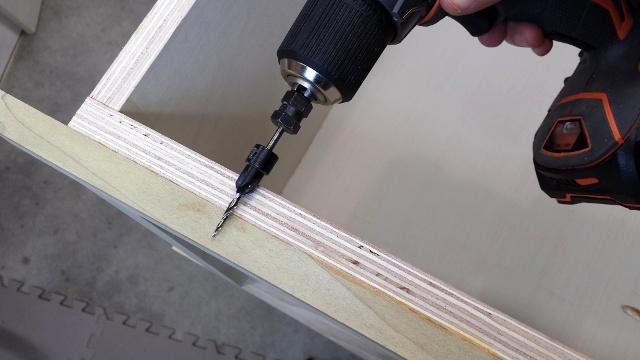
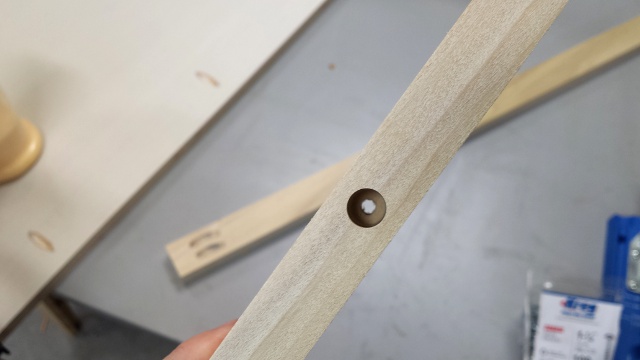
Next I moved to the front frame. The top rail of the front frame will also be used to hold the top in place with screws. I drilled some counterbore holes into the underside of the rail to allow for a 1-1/4″ screw to be used to attach the top.
After drilling the counterbore a pilot hole is drilled the rest of the way through the top rail, leaving a recessed hole where the screw will hide and secure the top to the front frame.
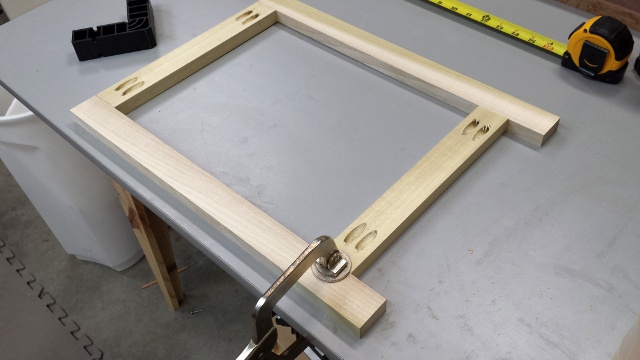
Then I assembled the top rail and legs of the front frame with 1-1/4″ pocket screws and glue. I left the bottom rail off and cut it to fit afterwards. This allows you to make sure the bottom rail is exactly flush with the bottom of the carcass.
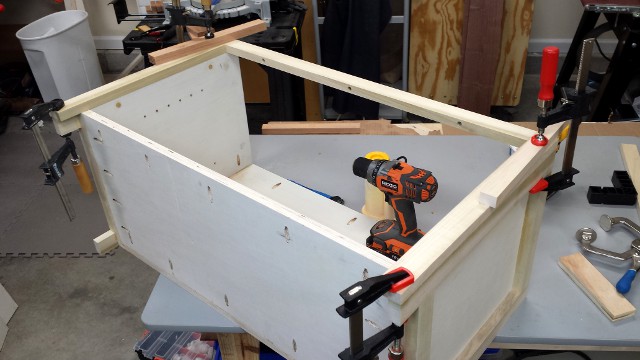
I used clamps and glue to attach the front frame. You could also just use brad nails, but I wanted a really good fit and I was being persnickety about not putting holes in the front.
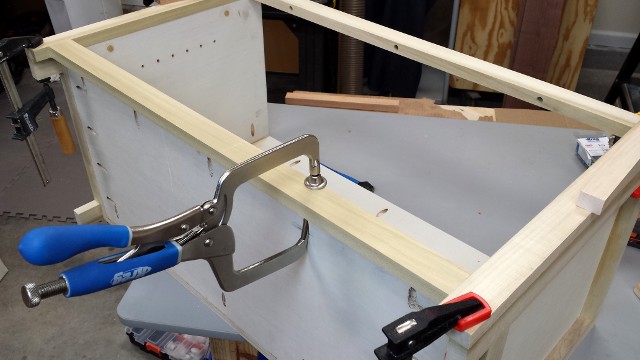
Next the bottom rail was attached with 1-1/4″ pockets screws and glue. When fitting this piece I suggest taking it to bench and getting a reference measurement vs. measuring with a tape. This will let you hit the size perfectly. Make sure the top of the trim and the bottom shelf are flush as you go. Using a right angle clamp here helps immensely.
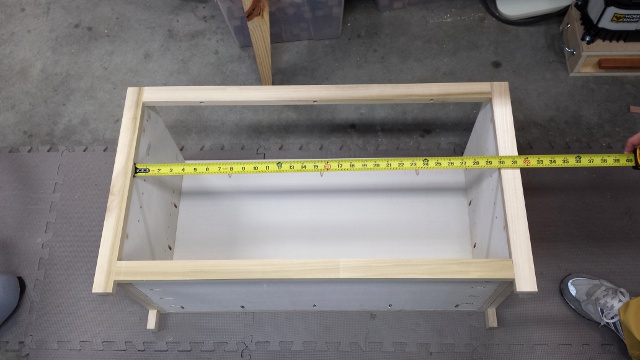
Now the shelf opening was established and I could get a final measurement for the shelf. Unless you are some kind of saint this won’t be 30″ exactly, so measure the opening and subtract 1/16″ from your measurement. The 1/16″ less gives you 1/32″ of play on each side of the finished shelf so you can wiggle it in and out.
Then I cut the shelf and edge trim to size and attached the edge trim with 1-1/4″ pocket holes. Lay the shelf upside down and use the work surface to get the tops of the pieces flush.
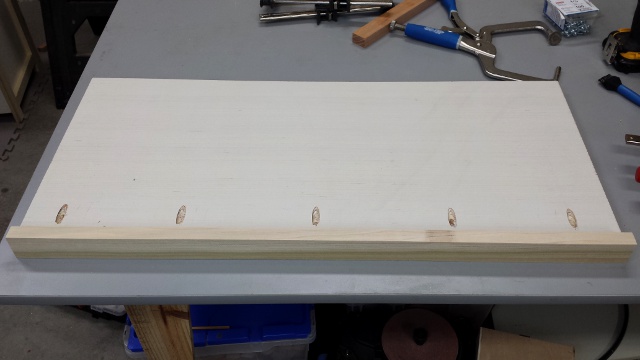
Of course at this point you have no choice but to install the pins and shelf and see what it looks like. Now things are getting exciting, almost there!
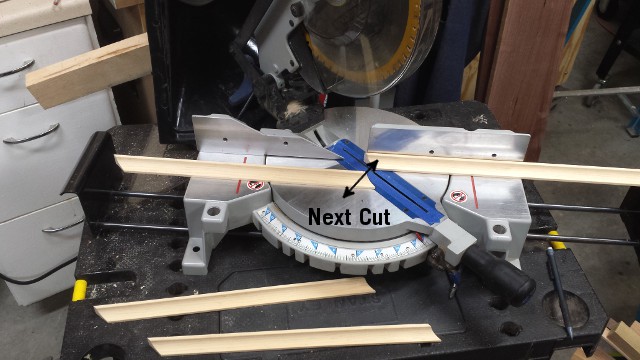
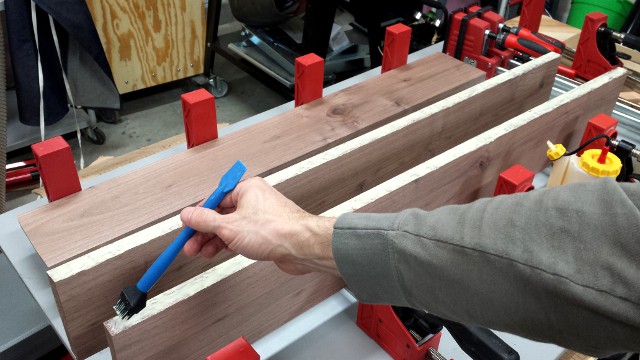
Next up I installed the cove molding in the end panels. I used the miter saw to cut all the cove molding. Here is a quick tip, don’t cut finished pieces one by one. That would mean swinging the miter saw back and forth every time to get the angles you need.
Instead, set the saw for a perfect 45 in one direction, then cut all the pieces to length at this setting like in the picture below. Make sure you are not cutting it too short. See my illustration of the “Next Cut” to visualize the measurement of the final piece. Then swing your saw the other direction and make all the other cuts, cutting each piece to fit.
After cutting and dry fitting all my pieces I installed the cove molding with a little glue and some brad pin nails.
The base of the Adjustable Shoe Storage Bench is now complete. I filled all the nail holes and visible pocket holes and moved on to the top.
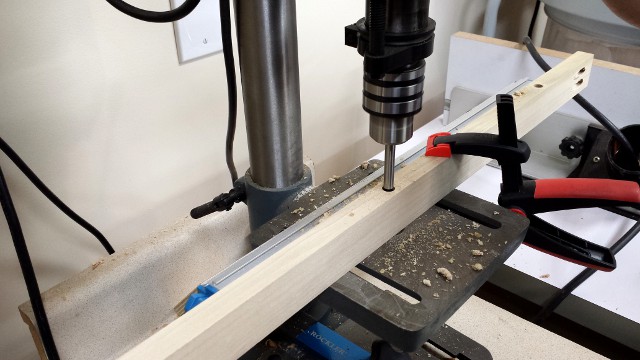
I made the top out of one long rough walnut board. I cut it into 3 pieces and sent them through the planer. Here is what they looked like midway through while bringing them down to a strong 3/4″ thick. Don’t have any walnut laying around? You can sub 1×6 boards for the top.
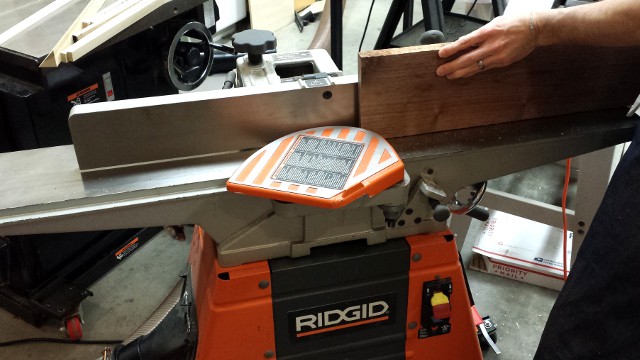
After getting the boards to the thickness I wanted I needed to get straight edges and rip them to width. Now let me introduce the jointer!
The jointer, like the planer, has a spinning cutterhead with 3 knives. But the jointer knives are mounted in the cast iron table. The table is split in two with the infeed table being before the cutterhead and outfeed table after the cutterhead. The infeed table is slightly lower than the outfeed table (I set mine at 1/32″) so as the wood passes along the infeed and then over the knives they take 1/32″ off the board each pass. It also leaves a straight edge for joinery.
Here is the rough edge before the jointer.
The flat face made on the planer is referenced against the vertical fence of the jointer. This fence is exactly 90 degrees to the tables. The board is pressed against the fence then pushed across the cutterhead as many passes as needed to get a clean edge.
Here is the edge after coming off the jointer. Perfectly flat and 90 degrees to the top!
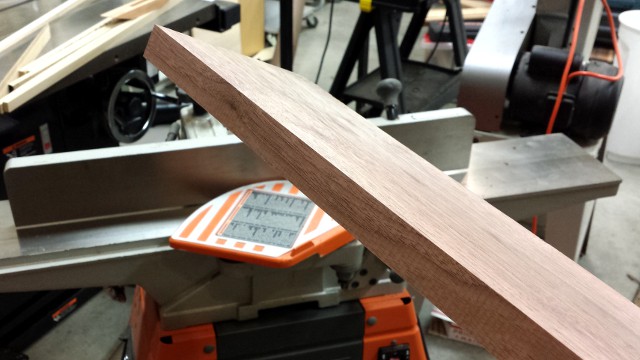
After you have one straight edge you can rip the pieces to width on the tablesaw. I made them all just slightly larger than 5-3/8″ wide to make a 16″ wide panel. Then on to the glue up.
I didn’t use any mechanical fasteners on the top, only Titebond II and some good clamping pressure.
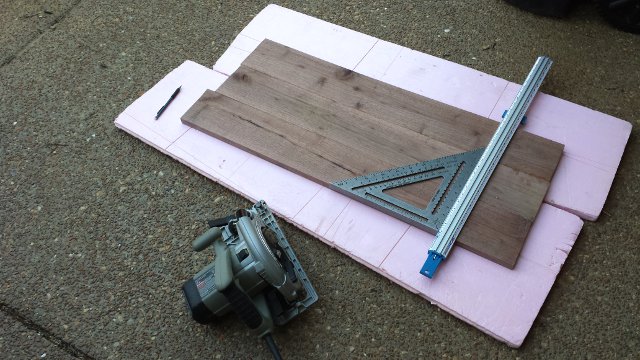
I let the top sit in the clamps for 24 hours then came back and cut the panel to final length. I like using 1″ rigid foam insulation as a backer and cutting the piece on top with a circular saw. Set the depth of cut to just deeper than the boards you are cutting and the cut is fully supported.
After I’m done I tuck the foam boards away when not in use. I also use this method to break down plywood.
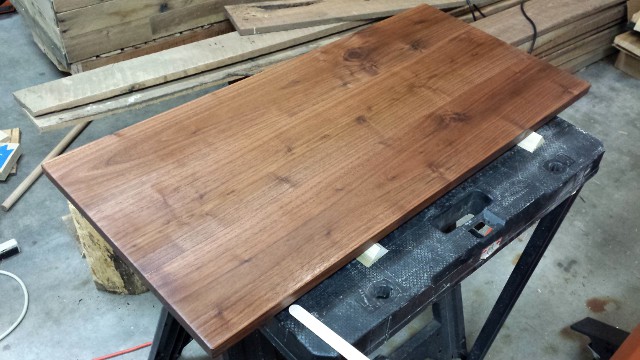
After cutting the top to final dimensions I sanded the whole thing with 100, 150 then 220 grit sandpaper. The finish I chose for the top was a mixture of boiled linseed oil (BLO), polyurethane, and mineral spirits in even portions.
I flood the surface with the mixture, let it sit for about 5 minutes then wipe it off. The oil gives the walnut a deep tone and the poly gives some protection. I did 4 coats of this and then a final coat of straight poly on the top for a little more protection.
After priming and painting the base it was time to attach the top. From the inside of the bench I drilled 3 pocket holes in the back of the base and 1 on each side piece. You can cut these at the beginning before assembly, but I used a Kreg Mini at the end and it did the job just fine.
I used these 5 pocket holes and the 3 counterbore holes in the top front rail to secure the top with 1-1/4″ pocket hole screws. The top isn’t going anywhere!
For More great furniture go to my Furniture Projects page.
Kreg Tool provided me with tools and/or monetary compensation for this build. They put no constraints around what I built or how I use and talk about their products. If I praise their product (or any other) it’s because I love using it and want to share it with you so you can enjoy it too!
Affiliate links to some products are provided throughout the post for your convenience. Purchasing through these links helps support the site and lets me build and share more projects and plans!


Instead of counter boring and pilot drilling, why not just use the bit from your pocket hole jig? Just put it in your drill press and lower the table. Use the collar for depth of course. Try it, I love it!!
The main reason I didn’t do that…is because I didn’t think of it! Great tip and I’ll have to check that out next time.Thanks! Braf
Interesting point. Will sealed wood, indoors, have that much movement?
Depends on many factors, but yes it could. Grain orientation, species, actual humidity variation and other factors all play into it. Sealing slows down water vapor transfer, but doesn’t stop it.Brad
In Minnesota the seasonal change in moisture content (5.5% – 9.5%) of Walnut will cause a dimensional change of a ~5.5″ wide plain sawn board of ~1/16″. The way I read how you attached the top to the base you left no way for that top to expand and contract with the seasonal moisture changes. If that’s the case you’re going to have a big problem!
I didn’t specifically call it out, but I reamed out the holes to well over the screw shank diameter on the front and back (direction of wood movement). This will allow for at least a 1/16 of expansion on both sides. It’s been successful for me on all my past projects. Good point to call out though as I see I didn’t put that in the final write up.Brad