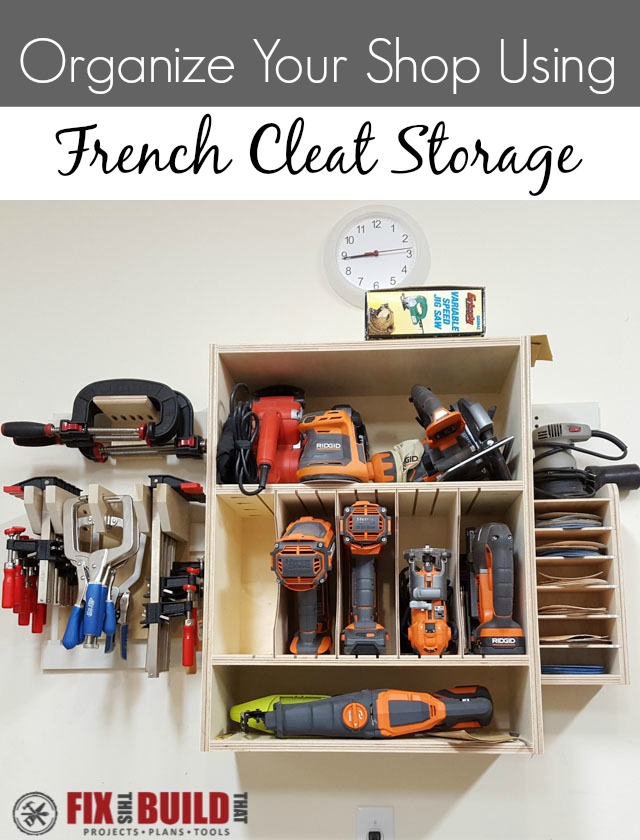
I recently reconfigured my shop with a French Cleat Wall and man what a game changer! It’s so easy to move all my shop cabinets and racks around. If you want some flexibility in your shop then you need to give the french cleat system a try!
Today I’m going to give you a quick primer on how to make the wood cleats and show you how I setup a couple sections in my shop. I’ll also show you some of the projects I’ve built that use the french cleat system and give you links to build those too. And I’ll also show you how easy it is to make a small tool holder.
Tools Used
- Tablesaw (or circular saw)
- Cordless Drill
- 4′ Level
Materials/Supplies
- 3/4″ Material (plywood, 1×3’s, etc)
- 3″ Wood screws
Affiliate links are used on this page. See my disclosure page for info on affiliate programs.
Here is a quick video which shows you how flexible this storage system is and how easily you can reorganize your shop!
How to Make a French Cleat Wall System
- Cut strips of wood for the cleats
- Make the bevel for the Cleat System
- Locate studs and mount the cleat
- Build tool storage options
- Mount storage on the cleats
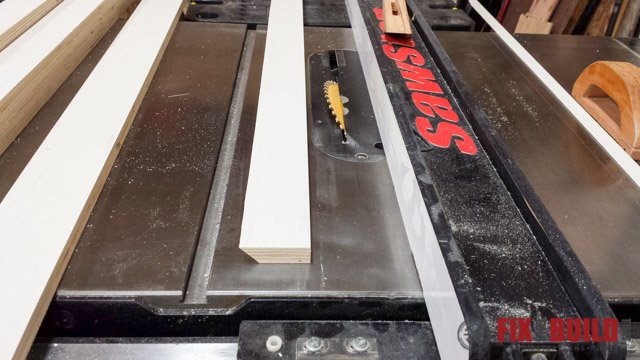
1. Cut Strips of Wood for the Cleats
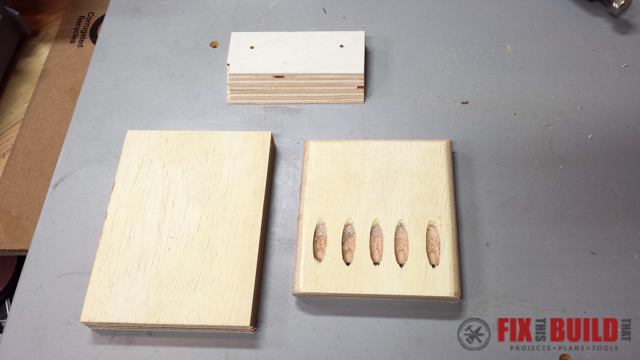
The heart of the french cleat system is a series of wooden strips which have a 45 degree angle cut on one side. The easiest way to get a lot of strips is to use a sheet of 4×8 plywood and rip it down into several strips. After that start making the wood cleat by cutting a sheet into a more manageable size to handle on the tablesaw.
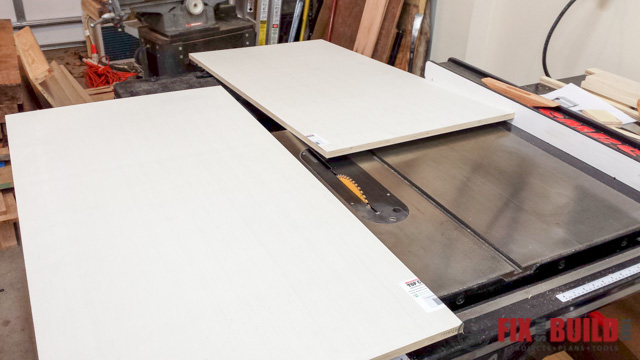
Then cut a series of 3″ wide 4′ long strips. The number you’ll need will depend upon how big you want your french cleat wall and how far apart the cleats are. So do some planning here to see what fits your needs. And remember, you’ll need a wood cleat to mount to the back of your racks and cabinets so you need to factor in for that as well.
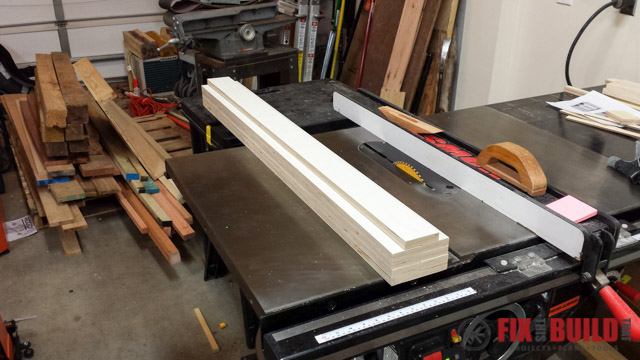
2. Make the Bevels for the French Cleat System
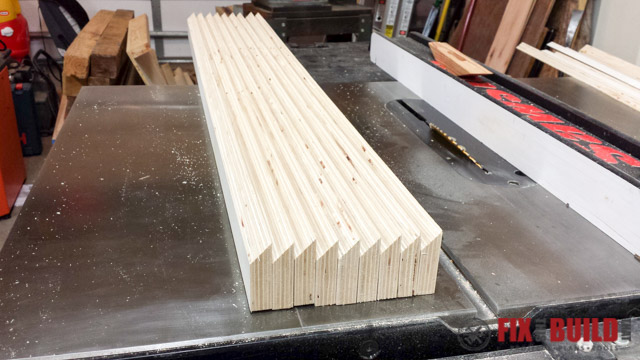
The interlocking french cleat angle is a 45 degrees. Set the bevel on your tablesaw blade to 45 degrees. After that cut a bevel along one of the sides of each strip for the french cleats.
You’ve quickly got a big stack of strips for your french cleat wall when you’re done!
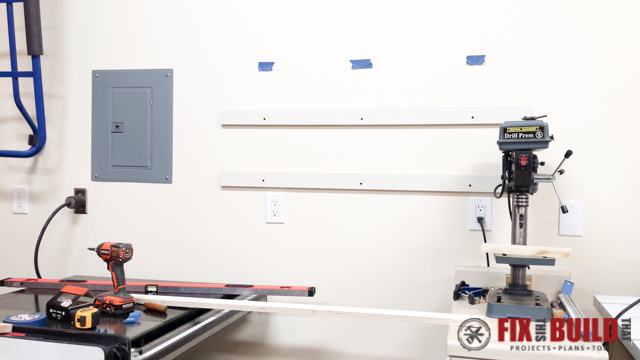
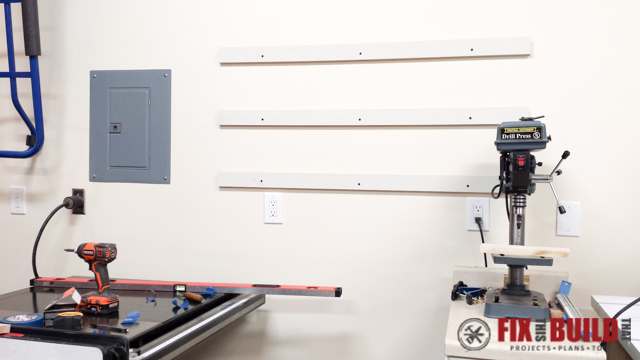
3. Locate Studs and Mount the Cleats
I decided to go with a 10″ gap between each cleat. This would allow me to span 30″ with 3 cleats and support a 30″ cabinet on my french cleat wall.
Do some planning and figure out the height you want the french cleats to be so the cabinets and tools will be at the right height for you. Then use a 4′ level and some 3″ wood screws and attach the french cleats into at least 3 studs.
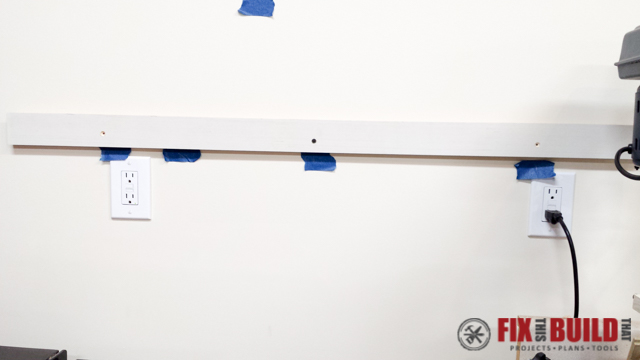
I used the blue tape to mark where the studs were as well as mark the level line I struck with the 4′ level.
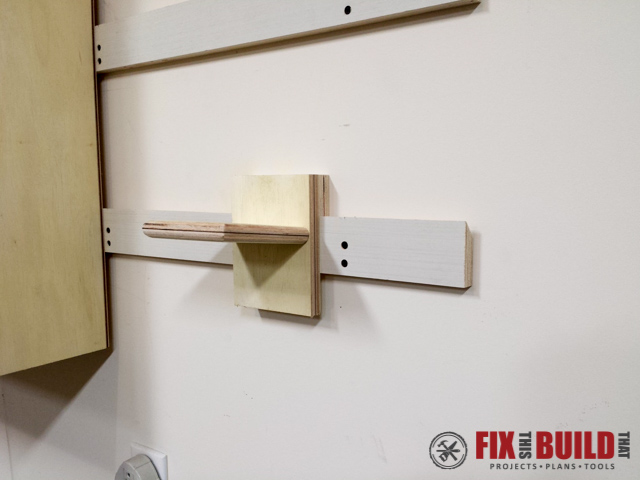
The 45 degree french cleat angle should be facing up and sloping down towards the wall. This is the key to the french cleat tool storage system because it gives it the strength.
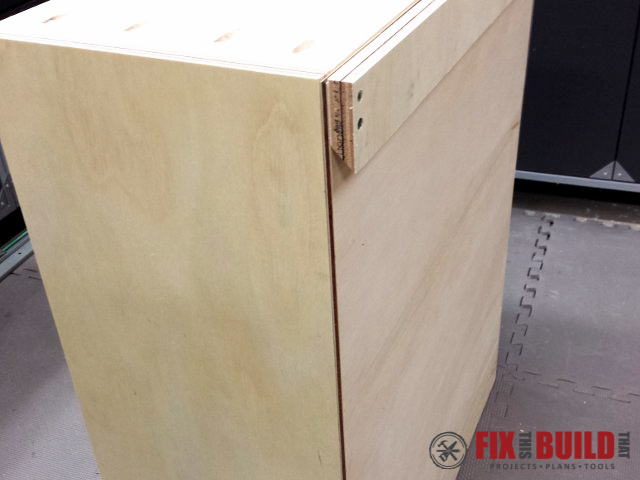
4. Build French Cleat Tool Storage Options
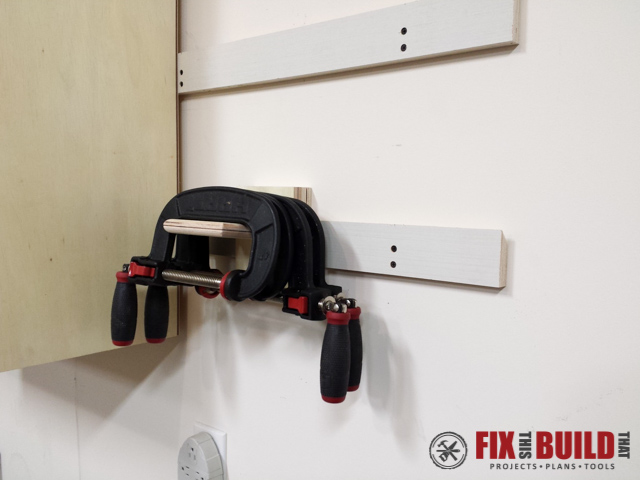
Alright, at this point the sky is the limit! Now you can make any number of french cleat tool storage options for any type of tool, cabinet or rack. Put a 3/4″ spacer on the bottom if you have a smaller project. You can see an example like this on my Wall Clamp Storage Rack. This will support it and hold it off the wall using just one french cleat.
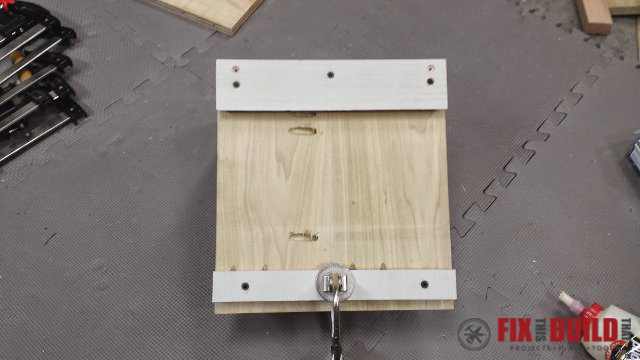
Also, for bigger projects I use 2 screws on each side of the wood cleat and attach them into the sides. I use 1-5/8″ or 2″ screws so it holds well.
Small Clamp Holder French Cleat Example
I’ll show you how easy it is to make a holder with an example to hold some c-clamps.
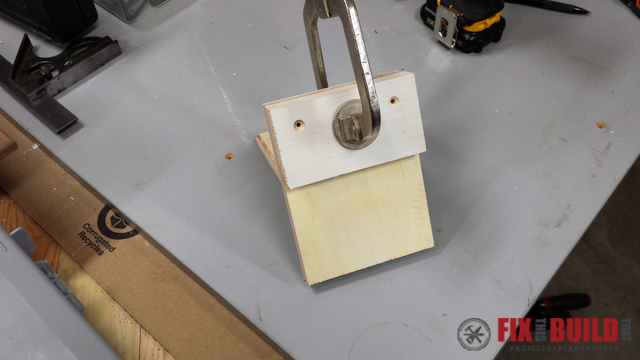
All you need is a 3/4″ backer, a piece to stick out and hold the tool and a cleat. I went a little crazy with the pocket hole jig on this one because these c-clamps are heavy and I wanted it to stay put 🙂
Cut a 5 degree angle on the projecting piece that will hold the clamps so gravity would want to pull them back to the wall. Secure the pieces together with 1-1/4″ pocket hole screws.
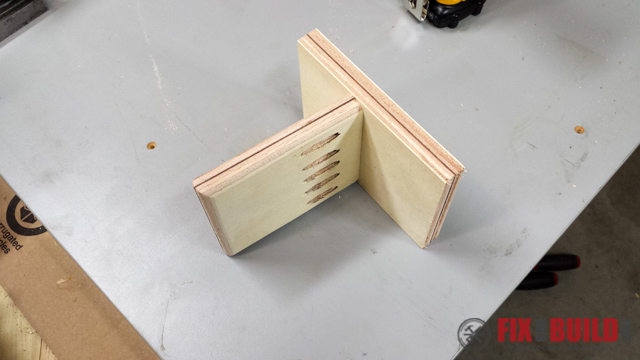
Then attach the french cleat to the top of the clamp holder with 1-1/4″ wood screws.
That’s it! Seriously, that’s all it takes. Now just slap that bad boy on the cleat wherever you want it because it can go anywhere.
5. Mount Storage Units on the French Cleat System
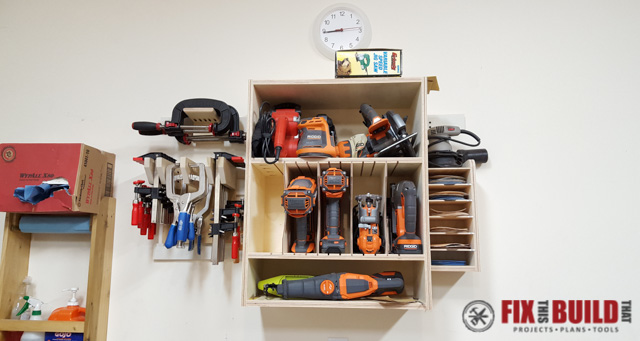
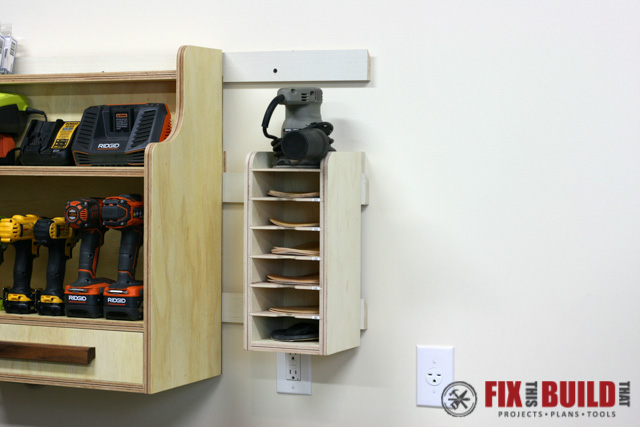
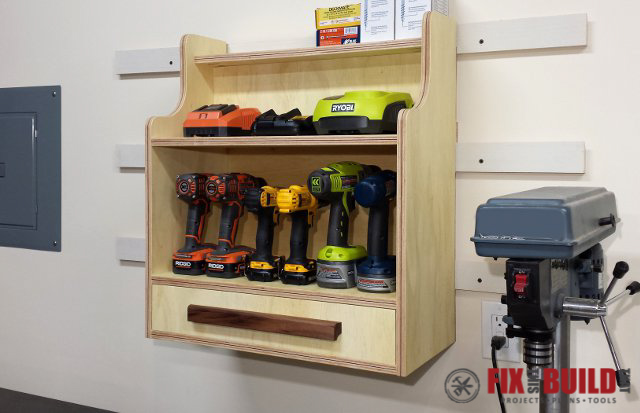
Use your imagination and come up with a completely flexible system unique to you shop needs. Here are some projects that incorporate wooden cleats. My Tool Storage Wall Cabinet, Wall Clamp Storage Rack, Cordless Drill Charging Center and Sandpaper Disc Storage Rack. They all hang easily on the french cleat system.
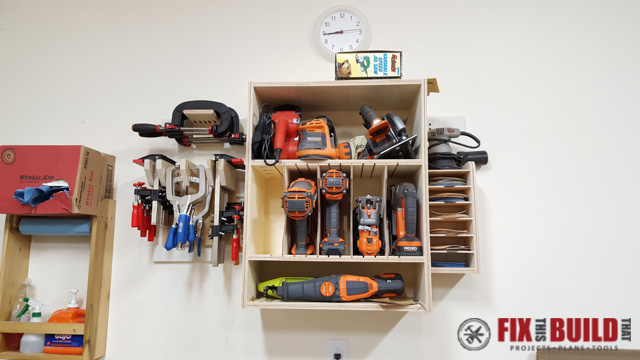
I’m sure you can see the possibilities really are endless with a french cleat wall. It’s definitely my favorite DIY tool storage system.
If you want to see some other great shop projects head over to my Shop Projects page and browse around. Have fun and get your shop in tip top shape!


I just recently found this site and already can’t wait to starting making some stuff, especially these cleat storage racks/system. Thanks Brad! Nice job!
That’s great! This is a great project to get started with!
Call me Jimmy-come-lately but if anyone is listening I have one important question relative to hanging cabinets on French cleats. In the example of hanging a 30″ cabinet on a three cleat wall system with cleats 10″ apart – would the cabinet need more than one cleat to attach to more than one wall cleat ? Or, would cabinet need just one cleat for attachment and then the purpose for other wall cleats woulds be for levelling/ spacing? Thank you for great idea.
James, the cabinet only needs 1 cleat at the top. And yes, the other cleats would just hold it off it the wall at that point.
Loving and making these, here’s mine so far. Can see the top of my bench now.
I have a concrete block wall to attach the cleat system too. What knid of fasteners do I need to do so?
You’ll need to drill holes into the concrete and then use an anchor and screw or a Tapcon screw.
I am definitely going to building some of these. Great ideas for tool storage.
Yes, they are so versatile!