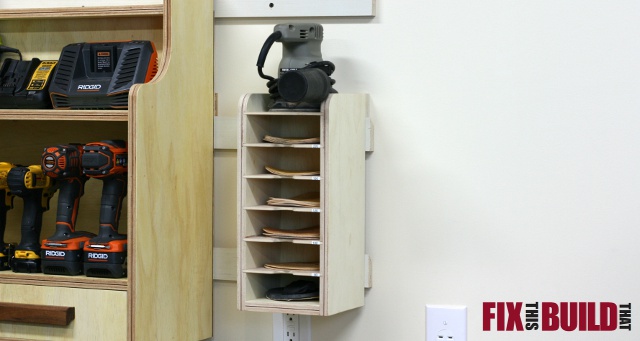
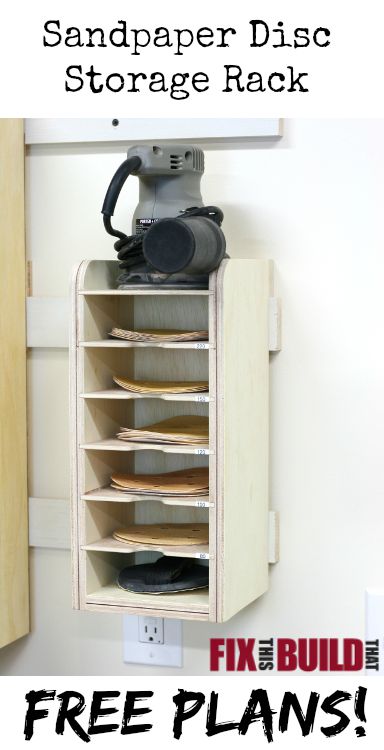
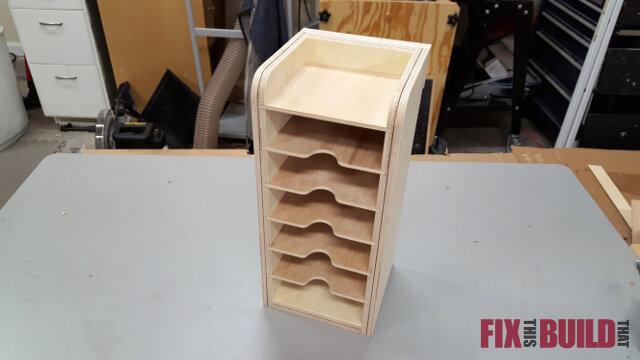
While cleaning my shop one day, I realized I needed a new solution for storing my random orbital sandpaper. I kept picking up these 5″ sanding discs all over the shop. By the time I was done I found 17 of them! That’s when I decided to make this Sandpaper Disc Storage Rack.
The sandpaper organizer is one place to store all your sanding discs, your sander and other various sanding items (I’m storing my velcro flexible sanding pad on the bottom). It’s a super easy project that you can knock out in a few hours and tame all those sanding discs around your shop.
The design I’m using works in conjunction with my french cleat storage system. The french cleat system allows you to move things around the shop along the cleats without having to drill new holes. Go check out my Cordless Drill Charging Center, Tool Storage Wall Cabinet, and Wall Clamp Storage Rack that also use this system.
Here is what you’ll need to build the Sandpaper Disc Storage Rack:
Materials/Supplies
- 24″ x 24″ 3/4″ plywood sheet
- 24″ x 24″ 1/4″ plywood sheet
- 1-1/4″ Pocket Hole Screws
- P-Touch labeler and labels
Affiliate links are used on this page. See my disclosure page for info on affiliate programs.

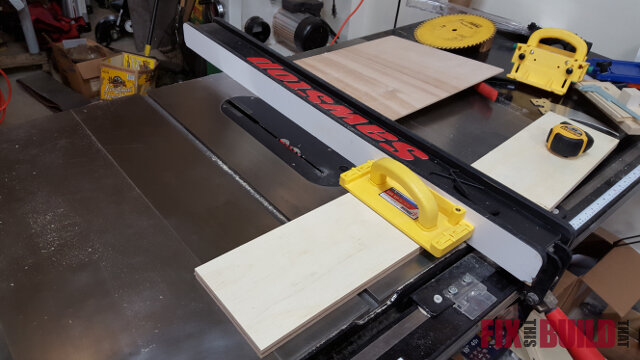
Let’s get started! Cut the sides, back and bottom from 3/4″ plywood.
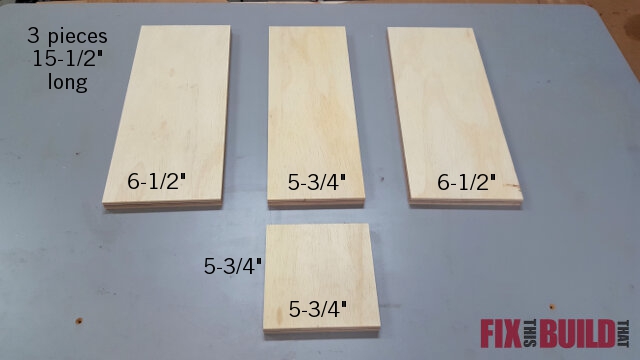
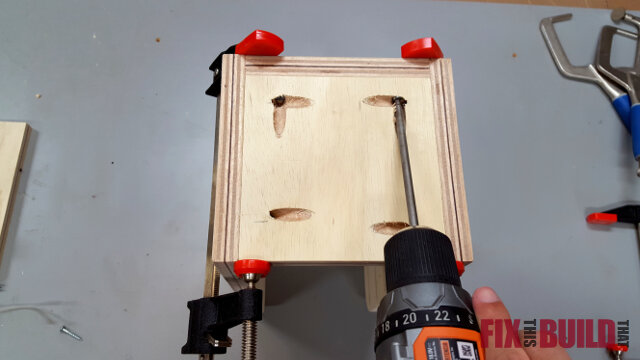
Drill 3/4″ pocket holes into back and bottom as shown. I used my K4 for drilling these holes, but the less expensive R3 and Mini would also work just fine.

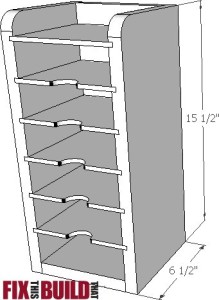
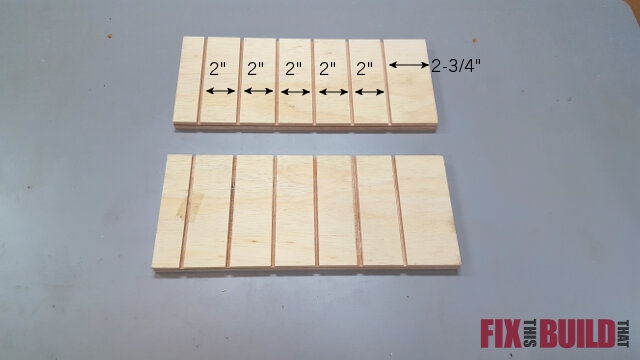
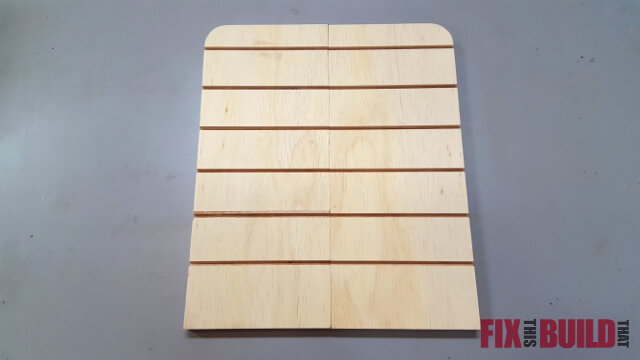
The shelves are 1/4″ plywood and 6 shelves for sandpaper and the top shelf for the sander. The shelves are held in place by 1/4″ deep dados. Cut the dados on the tables saw with a dado blade or multiple passes with a standard blade. Make cuts in both sides at each fence setting to make sure everything lines up right.
The shelves are spaced 2″ apart. The bottom dado starts 2-3/4″ from the bottom to allow for the thickness of the bottom piece. All other dados are spaced 2″ apart from edge to edge.
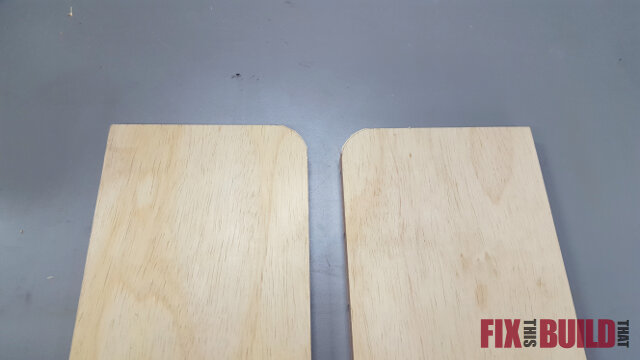
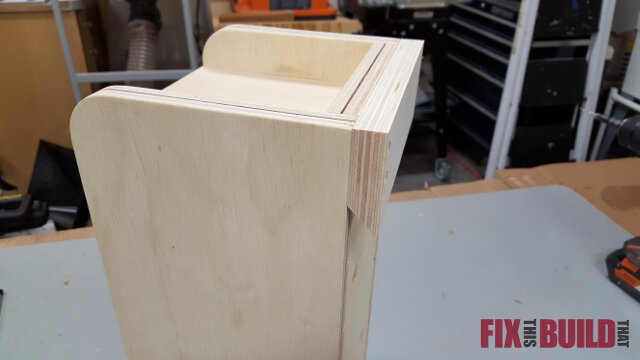
To give the sanding storage rack a cleaner feel, layout a 1″ radius on the top front corner of each side piece.
Cut the radius with a jigsaw and sand the curve smooth. You should now have complete sides ready for assembly.
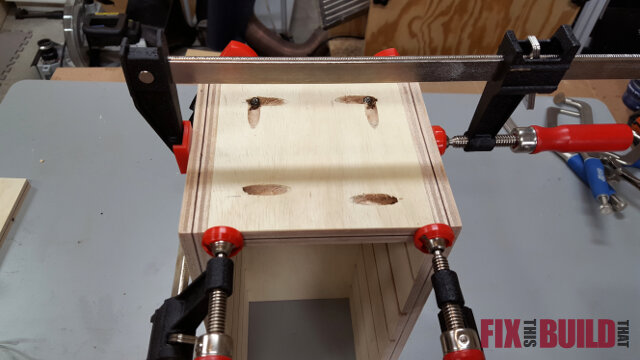
Attach the back to one of the sides with 1-1/4″ pocket hole screws. A Right Angle clamp is a lifesaver here.
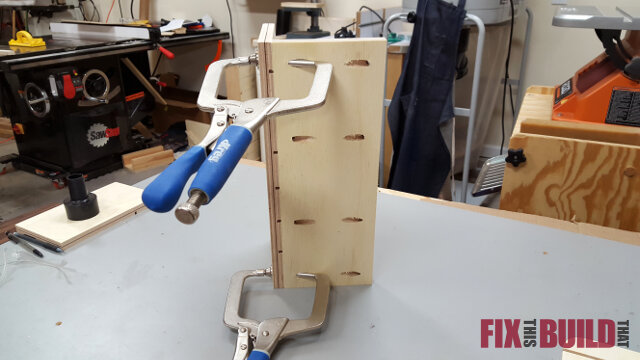
Repeat the same process with the other side.
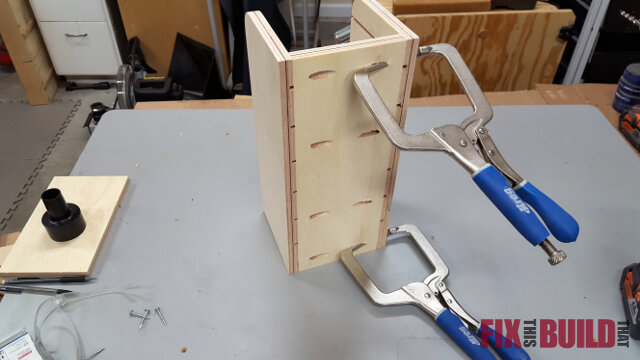
Flip the sanding station over on its top. Insert the bottom piece and clamp it in place from front to back. Attach the bottom to the back with 1-1/4″ pocket hole screws.
Add a clamp side to side and attach the bottom to the sides with 1-1/4″ pocket hole screws.
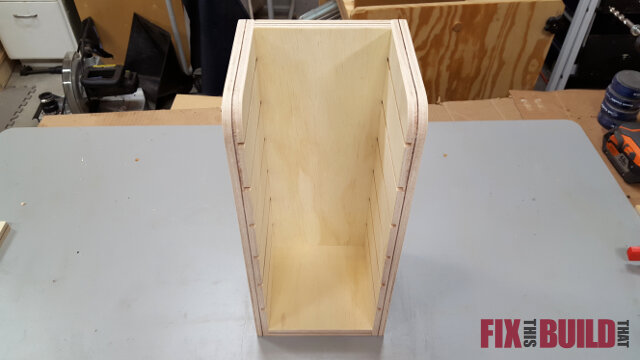
Now you have the body of the sandpaper disc storage rack.
Cut the shelves to size from 1/4″ plywood.
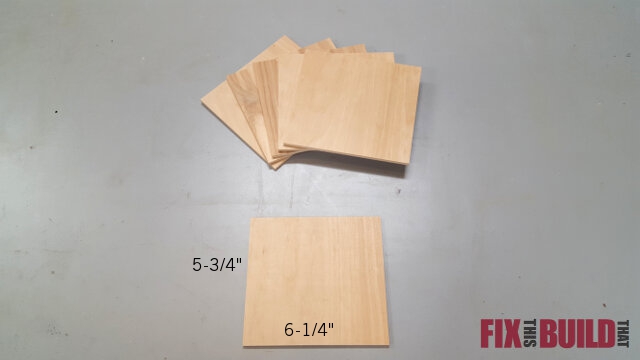
Measure and test fit as you go to account for any variation in the dados. If the fit is too tight you can sand the edges of the plywood to loosen things up.
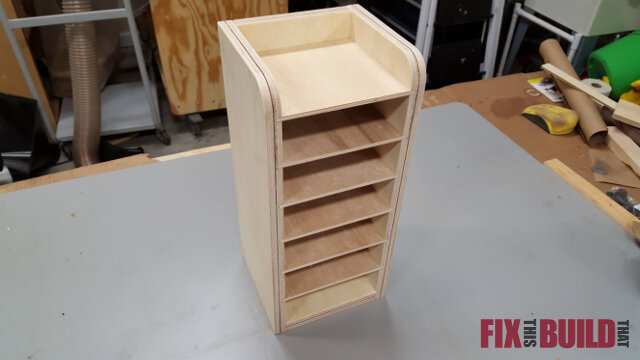
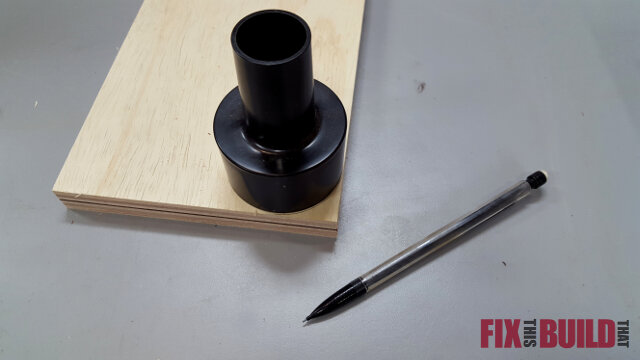
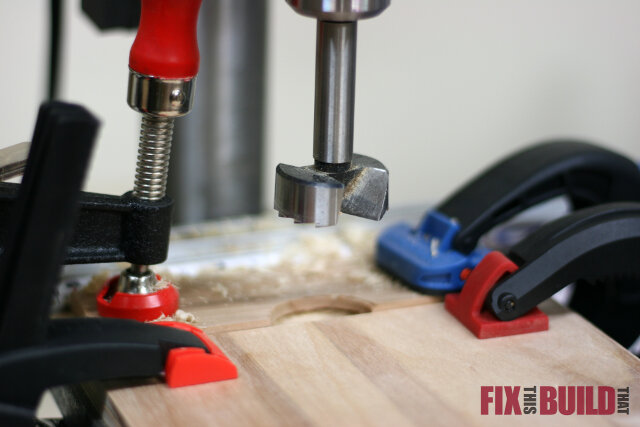
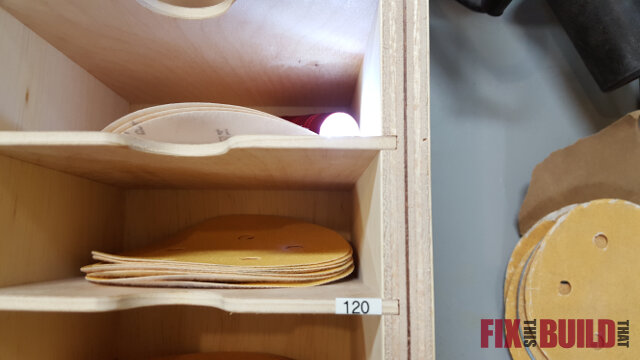
Remove the shelves after test fitting and using a forstner bit, drill a 1-1/2″ finger hole in the front of each shelf. The center of the hole should be just slightly in from the edge to allow the center spur of the forstner bit to dig into the wood and stay steady.
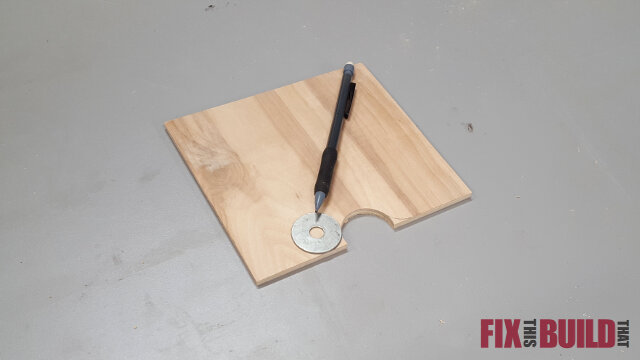
Instead of leaving the hole as is I wanted a smoother transition for the finger holes. Use a washer to layout a small curve between the front edge and each side of the finger hole.
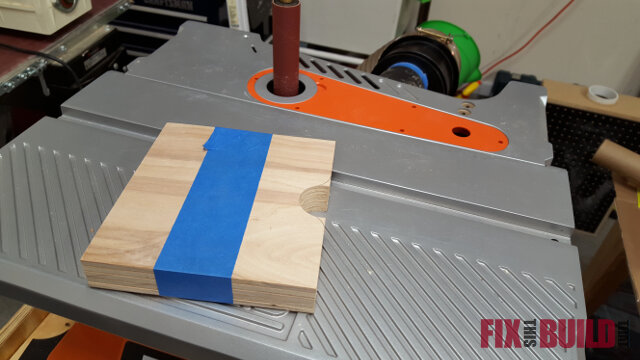
Sand away the wood using a sander. If you have the luxury of an Oscillating Spindle Sander (OSS) like I do then you can tape all the pieces together and batch sand them all at once. If you don’t have this OSS then put it on your Christmas list. It is one of my favorite tools that touches most of my projects.
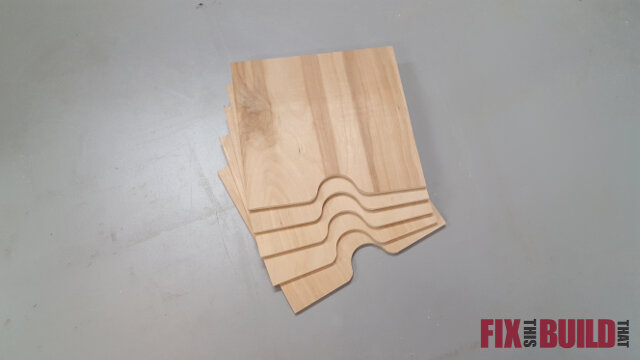
After sanding the nice curve on the shelves they should come out like this.
Sand all the edges smooth then reinstall the shelves in the sandpaper rack to prepare for labeling.
You can label each shelf to know what grit sandpaper is on it. I used my P-Touch labeler and printed out labels for each grit.
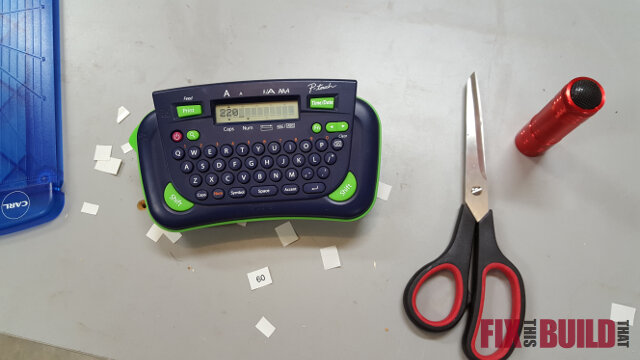
I started at the bottom with 80 grit then went 100, 120, 150, 220. I typically skip 120 in my sanding schedule, but I have a bunch of discs so I’ll use them some time. I put a little flashlight in the cubby shining up and it helped me position the label by illuminating where the shelf was…yes, I know I’m anal for doing that.
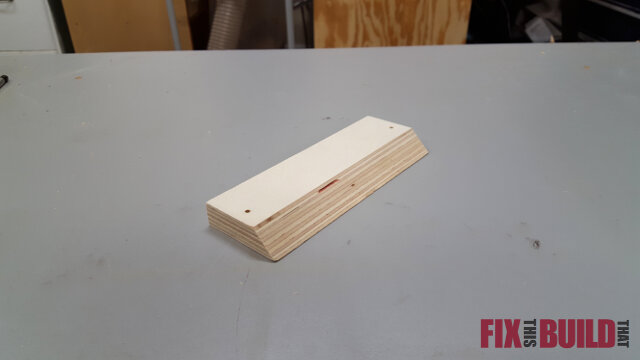
The last piece I did was to put a french cleat on the back for mounting. You could also screw it to the wall through the top of the back. Here is the french cleat I cut and screwed on.
Now just load it up with all your sandpaper discs and your random orbital sander and enjoy a more organized shop! Want to see more of my Shop Projects?


I like it! Simple and functional.I would recommend not storing your sander on the pad as the hooks will flatten over time and you will have to replace it. Ask me how I know about this! 😉