I just finished up with a video editing computer build and there was a ton of interest in it. So I decided to write a post to document all the parts I used along with some reasoning of why I chose them. My main goal was to increase my editing speed and also be able to easily edit 4K footage. I’ll go through all the parts I used and show you some benchmarking at the end to see the improvements.
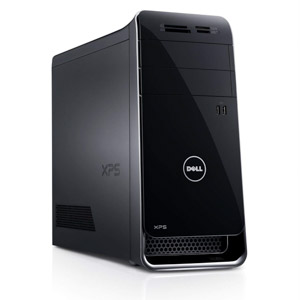
First let me show you what I was upgrading from. I bought a Dell XPS 8900 in November 2015 during a Black Friday Sale. I was just starting to use Adobe Premiere Pro to edit videos for my YouTube channel (feel free to subscribe if you haven’t already 🙂 and wanted more computing power. It was a big upgrade from my previous computer. I would still recommend this system if you want a budget plug and play computer with some decent horsepower. I edited all my videos from 2016-2018 on this computer. Here are a few of the specs:
- CPU – Intel i7-6700K
- RAM – 16GB DDR4 2133MHz (8GBx2)
- Graphics – NVIDIA GeForce GT 730 2GB DDR3
- Storage – 1TB 7200 rpm Hard Drive
- OS – Windows 10 Home OEM 64bit
- Case – Stock Dell 8900
- CPU Cooler – Stock
- Power Supply – 460W Stock Supply
Total Cost – $764.74 (computer only, no monitor)
Although this computer did an admirable job, I found myself waiting too often during an edit. Some of the common functions like speeding up a large clip, importing a new file, or rendering an effect would slow me down for 5-10 seconds while the computer thought about things. And sometimes it was more like 30-90 seconds for multiple file imports, rendering a whole timeline, or generating audio file peaks. On top of this even at 1/4 playback resolution I would freeze and drop frames on playback when clips were over 500% speed. All these things added up to minutes and hours of lost time every day, week and month. So I decided to upgrade and shoot big with my components to really make an impact.
New Computer Parts and Selection Criteria
One of the things that really kicked me in the pants was seeing this video by Destin from Smarter Every Day about building a 4K video editing rig.
He partnered with Puget Systems to build a real screamer. Puget Systems is a custom computer builder and they have a ton of awesome research and information on their site. I modeled my build heavily on their recommendations for a Premier Pro editing rig and I highly recommend checking out their page.
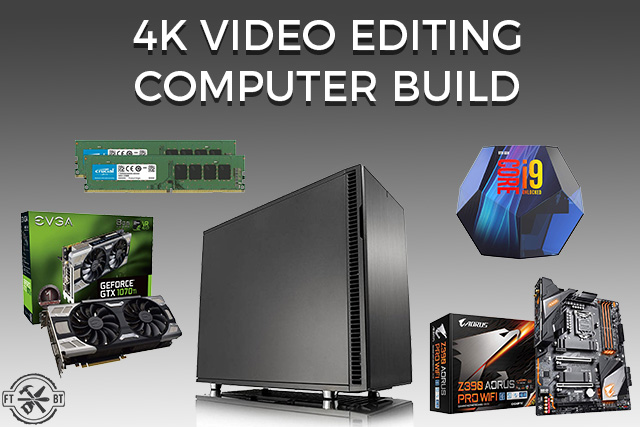
I’ll jump in and give an overview of my video editing computer build with a parts list. Then I’ll go into details on each part, why I chose it and what other parts/brands/options I considered.

Hardware Used
- CPU – Intel i9-9900K
- CPU Cooler – Noctura NH-U12S
- Motherboard – Gigabyte AORUS Pro
- RAM – 64GB (16×4) DDR4 2666mhz
- Graphics – EVGA Nvidia 1070ti
- Storage 1 – Samsug 500GB SSD
- Storage 2 – Samsung 1TB SSD
- Case – Fractal Design Define R6
- Power Supply – EVGA 750W
- Optical Drive – Asus 24X
Software Used
- OS – Windows 10 Pro Retail
- Video Editing – Adobe Premiere Pro
- Photo Editing 1 – Adobe Lightroom
- Photo Editing 2 – Adobe Photoshop
- Podcast Editing – Adobe Audition
- Graphics Editing – Adobe Illustrator
- Office Apps – Office 2016 Pro
Affiliate links are used on this page. See my disclosure page for info on affiliate programs.
Computer Parts List Details
I’ll list out each of the parts with the price I paid for them and some reasoning on why I picked them. At then end I’ll total everything up for the entire build. I bought everything off Amazon other than the graphics card which I got off a Black Friday deal on Newegg.
CPU
Intel Core i9-9900K – Paid $512.05

I went with the i9-9900K after a bit of research and seeing how other processors performed. The 9900K has 8 cores with dual threads for 16 logical processors. The i7-9700K is actually a good alternative that is a bit lower priced, but it is only single threaded for 8 logical processors. And the rendering that slows me down is mostly driven by computing cores so that dual threading made a big difference in benchmarking and the extra $112 I paid will easily pay itself back in wasted time.
CPU Cooler
Noctua NH-U12S – Paid $57.99
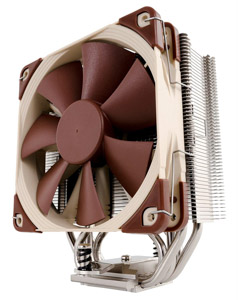
The 9900K does not come with a cooler/heat sink and it is known to run a little hot, so it definitely needs one. A huge consideration in my build was quietness as you’ll hear more about later. I did some research and found the Noctura cooling fans are among the most quiet and best performance. I opted for the NH-U12S which can also take another fan on the backside if more cooling power is needed.
Motherboard
GIGABYTE Z390 AORUS PRO WiFi – Paid $181.07
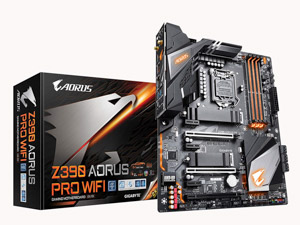
The motherboard of a build is mainly driven by the chipset you’ll be using. Since I went with the i9 9900K I needed a motherboard with that would take the Intel LGA115x chipset. Make sure you do your research here and get the correct motherboard for you chip. I landed on the AORUS PRO WiFi almost exclusively from the Puget Systems recommendations. It has a ton of features and allows for up to 64GB of RAM and has slots for M.2 NVMe storage (really fast storage that installs direct to the motherboard). They make a non-wifi version that is usually a few bucks cheaper, but I opted for the wifi even though I don’t need it at the moment since I’m hardwired. It’s always nice to have options.
The most important things to think about are what size graphics card will a motherboard fit and what kind of inputs and outputs does it have. This one is stacked with all kinds of options and will take anything I throw at it.
RAM
(2) Crucial 32GB Kit (16GBx2) DDR4 2666Mhz – Paid $465.48
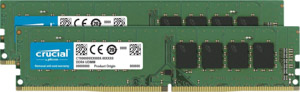
These days RAM can be a fashion accessory for a build with designs that have crazy heatsink, LEDs, and wild designs. But I just want performance, so I opted for the Crucial 16GB sticks which I could put 4 of them in my motherboard for a total of 64GB of RAM. If you don’t want to splurge on 64GB and just do 16GB or 32GB I’d still recommend using 16GB sticks. If you buy 4 sticks of 8GB RAM to get 32GB then you’ll have to buy all new RAM to get to 64GB later. But if you buy 2 sticks of 16GB then you’ll have 2 bays open for expansion later. It’s a little more, but gives you upgradability and options which you can tell by now I’m a fan of that!
Graphics Card
EVGA GeForce GTX 1070 Ti 8GB FTW ULTRA SILENT – Paid $330.00
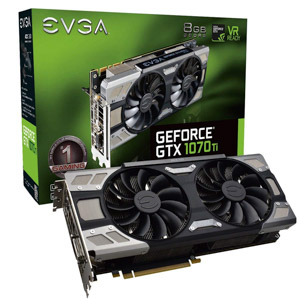
The graphics card selection was one of the biggest question marks for me. These things are expensive and there are a ton of options. I was looking at everything from 1050 ti on the low end to the new RTX 2080 cards. I wanted to stay with Nvidia because they tend to work better with Premiere in the benchmarking I saw. The 1070 ti seemed to be the best value for what I could get and though the new RTX 2080 looked amazing it was also $800. If I could have got my hands on a 1080 ti I might have done that, but they all got scooped up by Bitcoin miners apparently and are very hard to find new. But with 8GB of RAM and the Ultra Silent nature of this specific EVGA card, the 1070 ti made the cut for me.
Storage
Samsung 860 EVO 500GB SSD – Paid $86.99
Samsung 860 EVO 1TB SSD – Paid $162.99
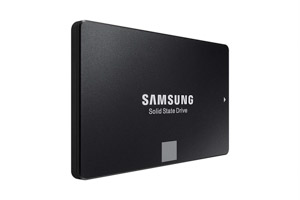
One of the biggest upgrades you can make for video editing is going to a SSD (solid state drive) vs a traditional platter drive. The read and write times are much faster which is a typical bottle neck. Also having separate drives with your operating system and applications on one and your project files and cache on another made huge improvements in benchmarking. I had planned and making this upgrade alone to my XPS 8900 before biting the bullet on a new system. You’ll see the improvement it would make vs. a single 7200RPM platter hard drive later in the benchmark results.
I ended up getting a 500GB Samsung 860 EVO for my operating system and apps. The working project files will go on the 1TB version of the same drive. I did consider getting the EVO PRO, but it seemed like the regular version would fit my needs and the PRO just gave more write cycles. Check out this video by Puget Systems if you want more details on the setup.
Case
Fractal Design Define R6 ATX PC Case – Paid $146.12
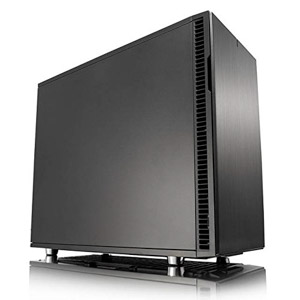
The case was another contention point of my build. I wanted something that would be almost silent if not completely silent. The Define R6 by Fractal Design was another recommendation from Puget Sound. And after I researched it more it looked like an amazing case. Not cheap, but definitely had tons of options, 3 quiet 140MM fans for cooling, and some great cable management options. I must admit I never even looked at the dimensions of it and when it showed up this thing is HUGE! For me that’s fine since it’ll be under my desk, but if you want low profile this isn’t the case for you. The nicest part about the size though is that the build was a breeze. The was tons of room to work and room for a ridiculous amount of hard drives and it’s setup for water cooling too.
Power Supply
EVGA Supernova 750 P2, 80+ Platinum 750W – Paid $99.99
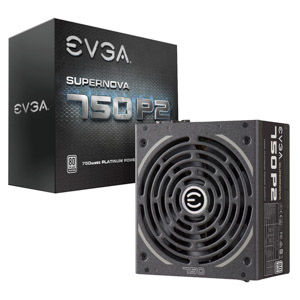
For the power supply I went with the platinum version of the EVGA Supernova 750W. They have a Gold Edition which is a little cheaper, but the Platinum version is more efficient which will lead to less heat and less noise.
Optical Drive
Asus 24x DVD-RW Optical Drive – Paid $21.98
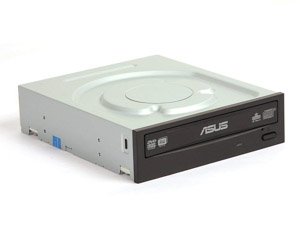
Nothing special or fancy here. Just a OEM DVD drive for listening to all my old 90’s burnt CD mixes 🙂
Total Build Cost
Now let’s get to the brass tacks, what did this beast cost to build. To save you from adding up everything above, here is the total breakdown.
- CPU – $512.05
- CPU Cooler – $57.99
- Motherboard – $181.07
- RAM – $465.48
- Graphics Card – $330.00
- Storage – $249.98
- Case – $146.12
- Power Supply – $99.99
- Optical Drive – $21.98
Pre Tax Total – $2,251.76
Taxes & Shipping – $243.10
Total Delivered – $2,494.86
I wasn’t trying to hit a set budget of $2,500 for this 4K video editing computer but it sure worked out that way. After putting the computer together and getting it going I’m happy with the investment so far. I spec’d out this exact system at Puget Systems and it would run $3,568.74 (before tax) so building it myself definitely saved a big chunk of change.
Benchmark Comparison
So what did I get out of this upgrade? Well I haven’t gotten into a head to head workflow and rendering comparison in Premiere Pro yet. But I did get a benchmarking tool that is well regarded called Novabench. I ran benchmarking on my old XPS8900 as well as the new 4K Editing Rig. Here are the results and how they stack up against some counterparts.
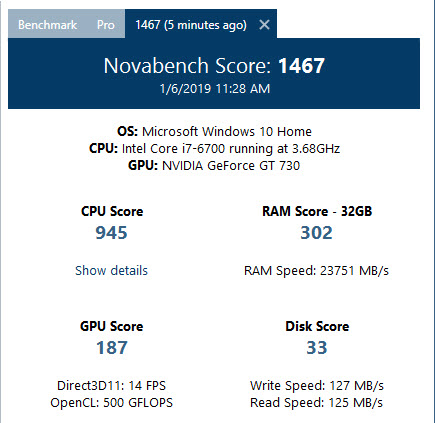
XPS8900 Benchmark Results
The results for my Dell were pretty underwhelming. But a few things really stood out to me. First was the GPU score and that I only got 14 FPS (frames per second) in a 3D benchmark…that’s really bad. Second was the read and write speeds of the disk. At 125 mb/s I knew that was way slower than the rated speeds of my new SSDs.
4K Editing Build Benchmark Results
And for the moment of truth…I was pretty happy! The CPU score doubled, which should be expected as I doubled the cores. I was a little surprised the RAM score only went up about 25% after doubling it as well. But the GPU score…my goodness the GPU score. It went up 650% over my old one and was able to do 15x the FPS. Clearly this was a massive upgrade. And the Disk Score went up 3x with my read and write speeds being 4x faster.

What this tells me is that my prior inclination was probably spot on. If I had just replaced the GPU and hard drives in my Dell I would have gotten some massive performance improvements. I already had a pretty nice processor and a good amount of RAM. So take that as food for thought. Run some benchmarks and see where your current weak points are before deciding to go whole hog.
Notable Computer Comparisons
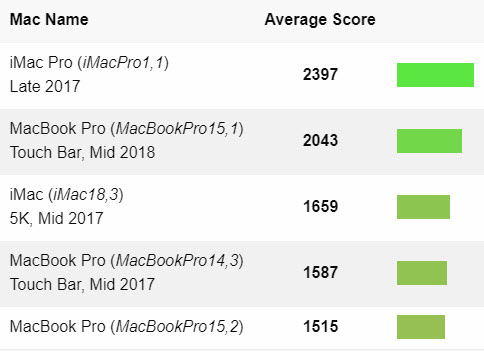
And just for funnsies I thought I’d compare the Novabench scores of some of the Mac computers to see how they stacked up. I’ve always shied away from Mac due to sticker shock and lack of upgradability. Seems like this is true in aces when speaking strictly of performance…though I do admit they are super user friendly and more stable than PCs. I don’t know any of the details behind these systems, this is just what was on Novabench’s site. And it would suggest my build is 2x as fast as a iMac 5k which spec’d out with similar components is the same price (albeit with a super sexy 5K display). But just food for thought.
All in all I’m very happy with my build and looking forward to getting a lot of hands on experience and a lot of hours back out of it. And if you want to see all the other equipment I use in my video production head over to My Tools Page to get all the info.