
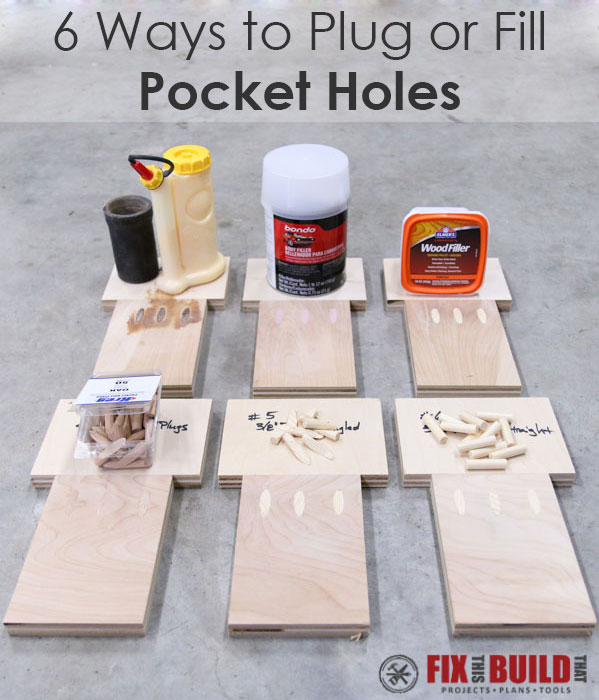
If you use pocket screws in any of your projects, this post is for you! I’m going to show you 6 Ways to Plug or Fill Pocket Holes. I use pocket holes in many of my projects and I typically put them in places where they’ll be hidden like the underside or backside of an inner piece. But filling and plugging pocket holes really comes in handy when I’m making pieces that will be painted, like I did in my DIY Sideboard and DIY Shoe Storage Bench projects. I covered the pocket holes and it leaves a smooth surface that becomes totally hidden when painted.
I’m going to show you two different types of strategies for covering the pocket holes, filling and plugging. The filling will rely on some type of hardening filler material and the plugging will use solid wood plugs. I’ll show you 3 types of fillers and 3 different types of wooden plugs. I’ll also talk about the pro’s and the con’s of each one and which one is my favorite. And as a little bonus I’ll show you how to make a quick jig to make my favorite method even faster!
Before we get started, make sure to follow me on YouTube to keep up with all my latest builds and free project videos!
Here is what you’ll need for the project:
Materials/Supplies
Affiliate links are used on this page. See my disclosure page for info on affiliate programs.
I applied all these fillers and plugs first them came back and sanded them all with 150 grit sandpaper at the end. But I’ll go ahead and show you each method in it’s entirety to make it more concise and easy to follow:
6 Ways to Plug or Fill Pocket Holes
- Filling Pocket Holes with Wood Filler
- Filling Pocket Holes with Sawdust & Glue
- Filling Pocket Holes with BONDO!
- Plugging Pocket Holes with Store Bought Plugs
- Plugging Pocket Holes with 3/8″ Dowels Angled-Cut
- Plugging Pocket Holes with 3/8″ Dowels Straight-Cut
Filling the Pocket Holes
The first 3 methods involve filling the pocket holes with some type of hardening material. The material sets up then you sand it back flush to the surface of the wood for a smooth transition.
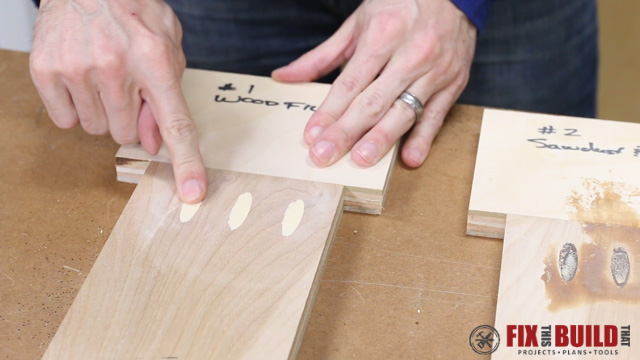
1. Filling Pocket Holes with Wood Filler
The first filler method is traditional wood filler or wood putty. This one is pretty straight forward as most people are familiar with some type of wood filler. The application is very easy, I just filled the holes to the brim with wood filler then set it aside to dry.

With such a deep hole to fill I ended up having to wait overnight for the wood filler to dry. I was worried it would crack or shrink, but the filler did a great job. After sanding it was very smooth and ready for paint.
Pro’s: Smooth finish, easy to apply, sands quickly
Con’s: Long drying time, uses a lot of filler per hole
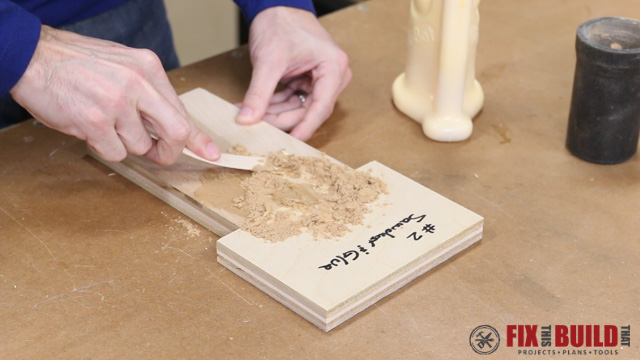
2. Filling Pocket Holes with Sawdust & Glue
The second filler method is using sawdust and glue. This was a tip I got from Instagram when I asked folks their favorite way to cover pocket hole screws. I’m not sure I got the mixture right, but I just dumped out the dust from my orbital sander and mixed it with glue into a paste.

Then I slathered it into all the pocket holes and made a huge nasty mess. This stuff was pretty hard to spread.
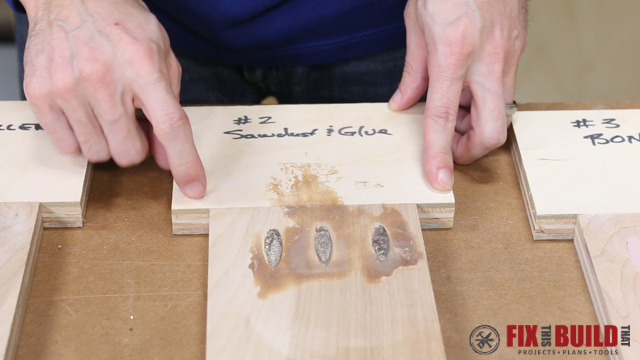
I let this one dry overnight as well and it was actually still rubbery the next day almost 24 hours later. I tried sanding it and it turned into a big mess and totally gummed up my sandpaper.
Pro’s: Ummm, I guess it’s the cheapest
Con’s: Everything else, this one was bad
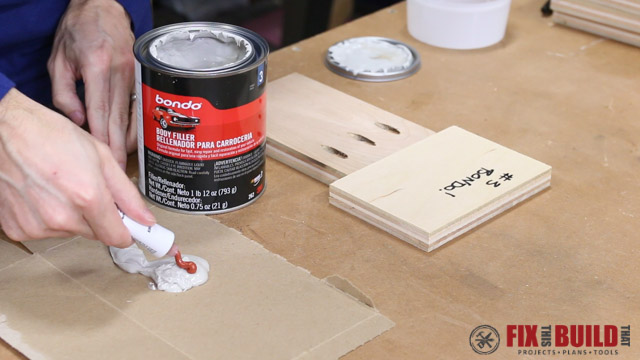
3. Filling Pocket Holes with Bondo
The third filler I used also came from the Instagram community, BONDO! I was a little surprised by this suggestion but it came up several times so I wanted to give it a go. The bondo has a putty and a hardener you mix together. I followed the directions on the can and stirred it up until it was an even salmon color.
 Then I copiously filled the pocket holes with the bondo. I overfilled the holes to make sure it would be flush when I sanded it back. It took a little to get used to the thick consistency but wasn’t too bad to work with, though it did have a somewhat strong smell.
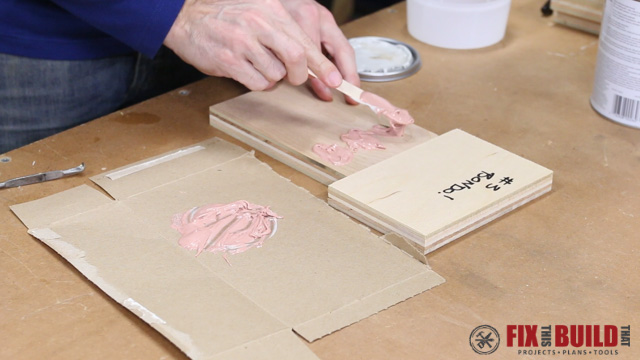
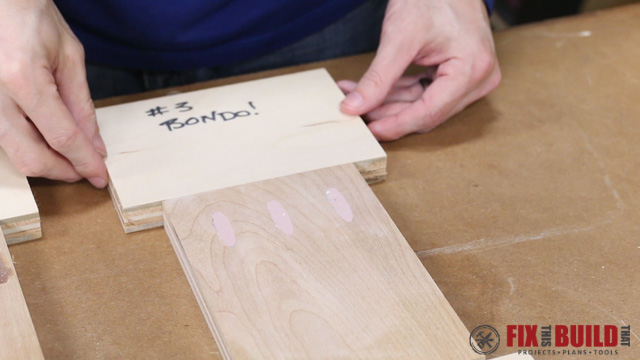
The bondo dried much faster than first two fillers and was ready to sand in about 2 hours. It also sanded way faster than I thought it would. It only took 10 or 15 seconds more than the wood filler to sand. And the finish was glassy smooth, even better than the wood filler.
Pro’s: Super smooth finish, dries faster than other fillers
Con’s: Bad smell, needs to be mixed before use, any material mixed but not used is wasted
Plugging the Pocket Holes
The first 3 methods were all about filling with some material, and the next 3 are all about plugging the holes with real wood. I will be talking about 3 different types of plugs to use. Store bought plugs, angle cut 3/8″ dowels and straight cut 3/8″ dowels. And yes, my fingers hate the angled dowels. If you don’t know why then watch the YouTube video.
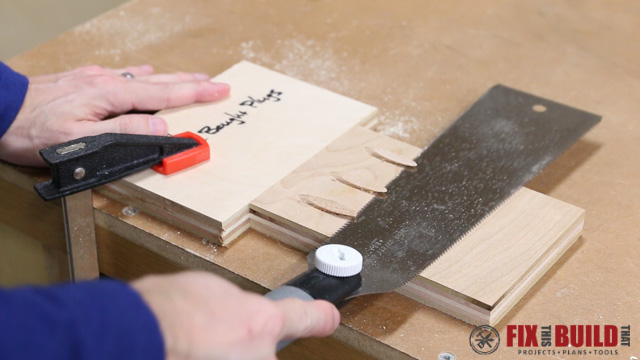
Each of these can be cut flush with a flush cut saw (very creative name). The saw I use is double sided with a crosscut (fine) and rip (coarse) side. You can get a less expensive flush cut saw that has just one fine side and works just as well.
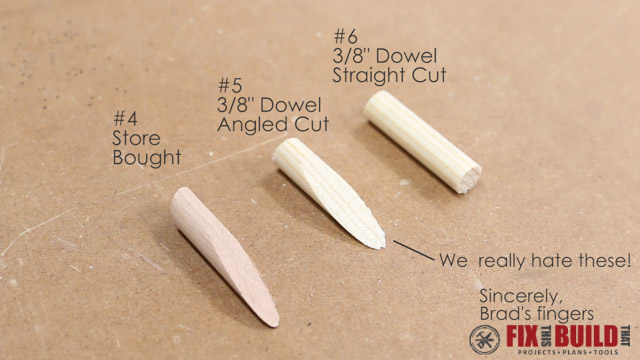
4. Plugging Pocket Holes with Store Bought Plugs
The next method is to use store bought plugs to plug the pocket holes. These plugs are sold by a few different manufacturers and are precut to fit into the holes. The ones I used for the test were oak but they come in several varieties. You just put some glue in the pocket hole then push in the plug.
The fit on these plugs was pretty loose for me so I had to let the glue dry for about 30 minutes before flushing cutting with my flush cut saw.
Pro’s: ready off the shelf, available in different wood species
Con’s: inconsistent fit, more expensive
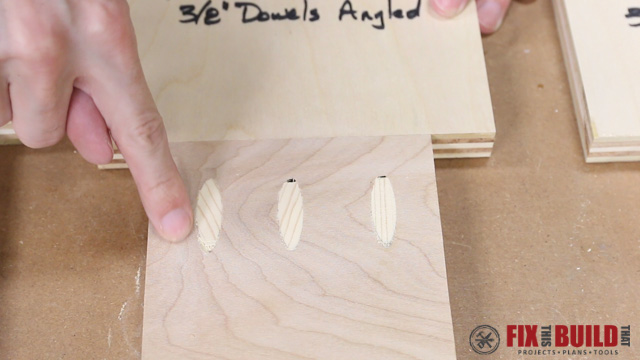
5. Plugging Pocket Holes with Angled Cut Dowels
The next way to plug pocket holes is to basically recreate the store bought plugs using a 3/8″ dowel and a little jig. Basically you just drill pocket holes in a scrap piece then insert a 3/8″ dowel into the hole and cut it flush on the bandsaw or with the flush cut saw. This gives you a plug that looks just like the Kreg ones.
The problem lies in the installation. I had a really hard time getting these installed. I tried using a rasp and also the Kreg Mini Jig which has a little spot for pushing the plugs in. Neither of those worked great and I ended up not getting the plugs set totally flush. Plus I busted up my fingers trying to push the plug in with the Kreg Mini (thus the note from my fingers).
I let the glue set for about 5 minutes, since it was a tight fit the plugs were pretty secure, and then cut them flush with my flush cut saw.
The angled dowels left some gaps that would need to be filled since I wasn’t able to fully seat them. But other than that they did a good job.
Pro’s: most efficient use of material, uses inexpensive dowels
Con’s: hard to install, finger busters
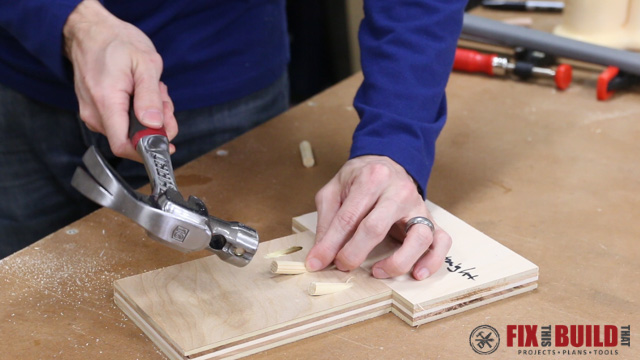
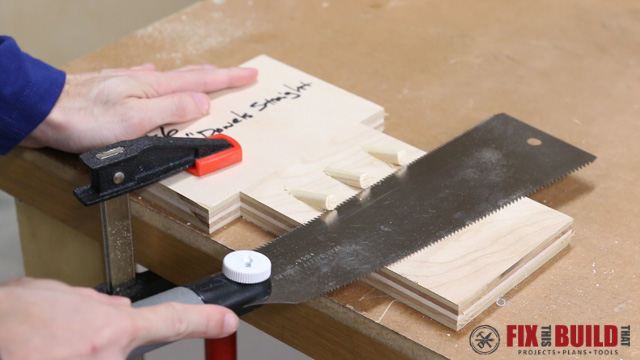
6. Plugging Pocket Holes with Straight Cut Dowels
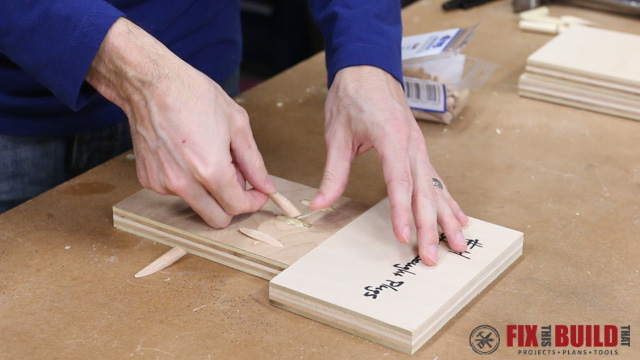
The final way to plug pocket holes happens to be my favorite. I use straight cut dowels to fill most of the holes when trying to cover pocket screws before paint. The idea is the same as the angled plugs except you cut the plugs into 1.5″ sections. Then you just apply your glue and use a hammer to tap the plugs into place. No rasp, no Kreg Mini, no busted knuckles. Just a few easy taps with the hammer and you’re ready to go!
You can cut these flush almost immediately, but I do wait about 5 minutes just to be sure. Then cut them with the flush cut saw.
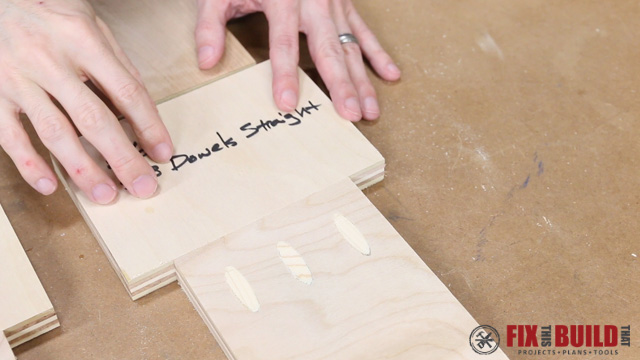
The surface left behind is very good save for a few minor little gaps in the far right plug that can be filled in with glue and sawdust (which is actually good in very small amounts) or with wood filler if wanted. And with these small gaps they could almost be sanded out as well.
Pro’s: easiest installation for plugs, tight fit so minimal waiting for glue to dry, uses inexpensive dowels
Con’s: uses more material than angled dowels
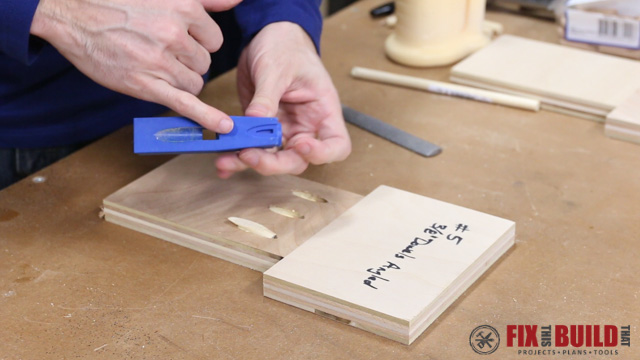
A Simple Dowel Jig
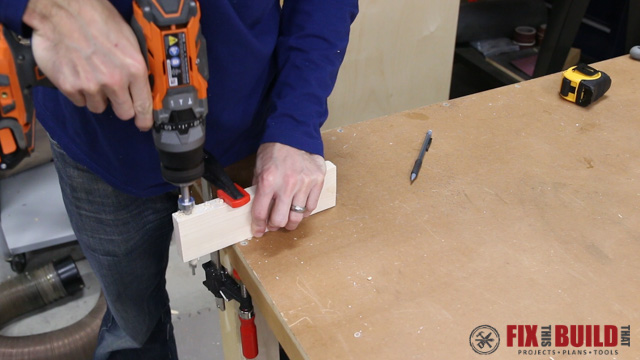
And here is the bonus info for this post! I came up with a super simple way to quickly cut your 1.5″ dowels. This method is faster than using power tools and leaves a cleaner cut since it’s a zero clearance fit.
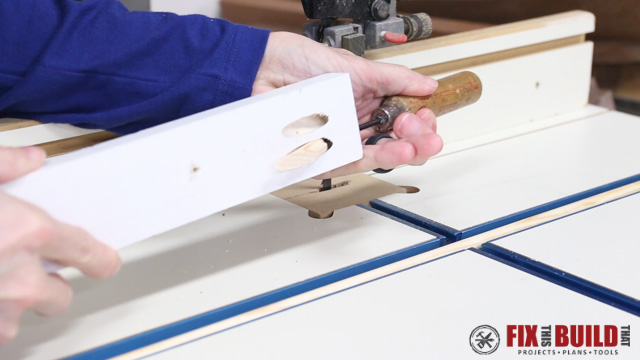
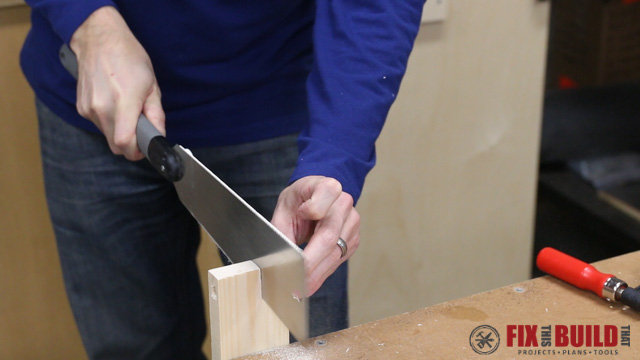
Start with a short section of 1×3 scrap (anything over 2″ wide will work). Drill a 3/8″ hole through the edge of the board with your pocket hole drill bit. Wiggle the bit around a bit to make the hole oversized.
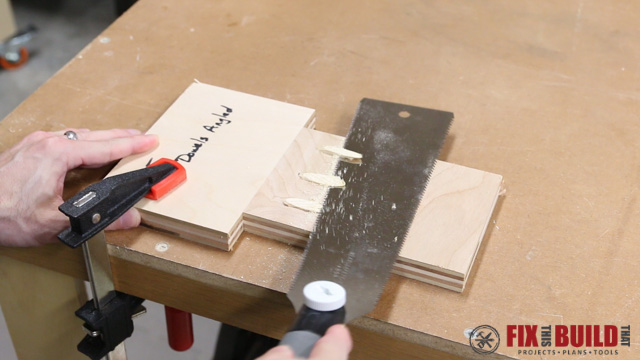
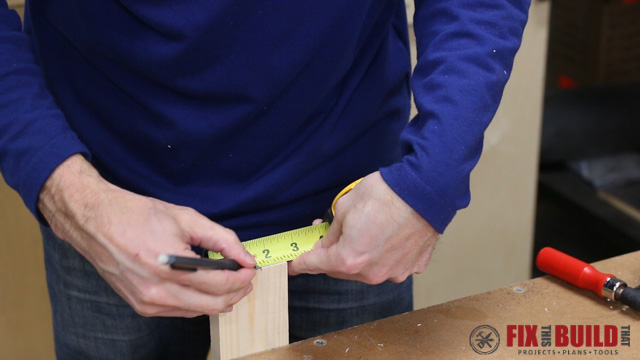
Clamp the board to the side of your bench and measure a line 1.5″ from the right edge (left edge if you are left handed). Then use a flush cut saw to saw down the line through the hole you just drilled.
That’s it, you’re done! Now to use the jig you insert the long dowel rods into the jig with your non-sawing hand. Push it out the other side a bit then push it back with your sawing hand and flush the dowel up with the outer edge.
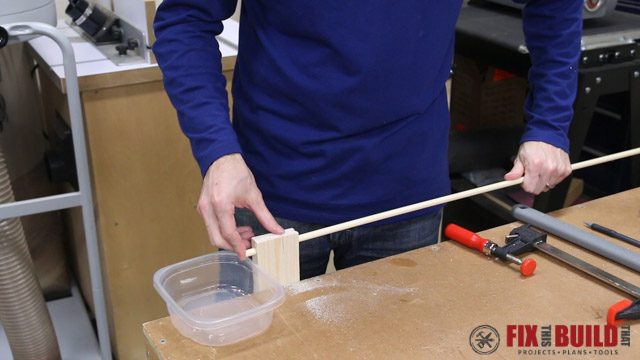
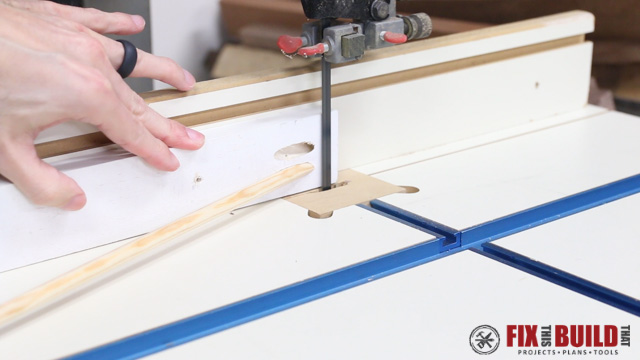
Now just cut down the saw kerf you already made. It only takes a few strokes.
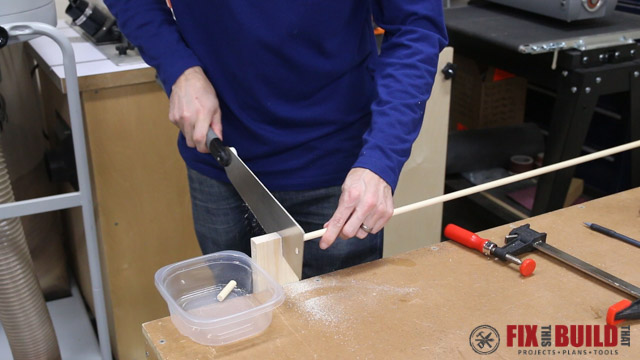
After you’re done cutting push the long dowel piece through to position it for the next cut. As you do this it will eject the 1.5″ dowel you just cut. And if you put a little container there you’ll have a bowl full of dowels in just a minute or two. You can watch the YouTube video to see it in action.
I hope you learned some new techniques to fill or plug pocket holes and that they will make your building a little easier. You can head over to my Projects page for some projects that have painted bases and you can use this method on them.
Let me know below if you have other ideas on how to fill pocket holes too!


Brad, have you used the Kreg Plug Cutter? I would be interested in that since you can match wood better while staining.
Your suggestions with pictures are easy to follow, but my problem is I want to paint the bookcase and then remove the hole covers to fit the shelf holders.
Cool..(Y)
Awesome tests!!!!
I’m using the straight cut dowel technique, but I’m not precutting the plugs. I stick the whole 36″ dowel in the first hole with some glue and saw while wet. The fit is snug enough that it doesn’t move around while sawing. It’s a cheap saw so I don’t mind getting a little glue on it. Then I snip the angled end off with miter snips and move to the next hole. Overall it probably wastes less material than your technique because I’m not precutting. This is for the underside of a table. If the plug were visible, I’d use a different joining technique (biscuits or mortise and tenon).
According to other sites, Durham’s Rock Hard Water Putty is one to consider. You mix what you need. It sets fast. It sticks well to oil free surfaces, does not shrink. Can be sanded, painted, stained etc like wood. I’ve used it and like it better than other methods. It appears to be the same material they use to fill knot holes in plywood. A 4lb can is about $5 – $8 depending upon where you buy it.
Sounds like a great option, thanks!
Great demonstration video, Brad. I have always used the wood filler method, trying the store-bought method just once. Too expensive when you have many holes to fill. I like the idea of the straight dowel and appreciate you showing how to make the jig. Looks very simple. On my way to purchase a flush cut saw. Thanks again!
Thanks, Linda!