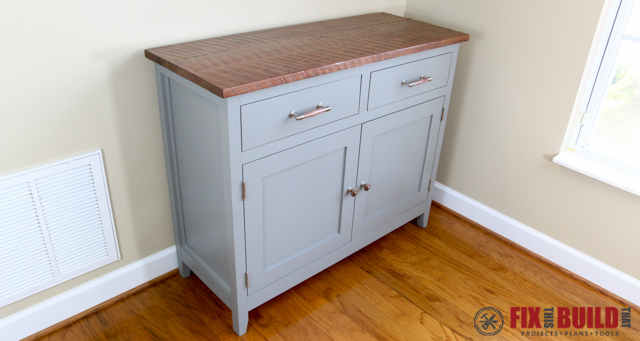
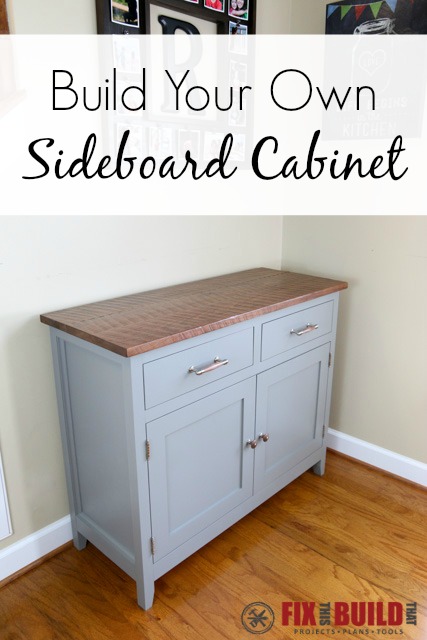
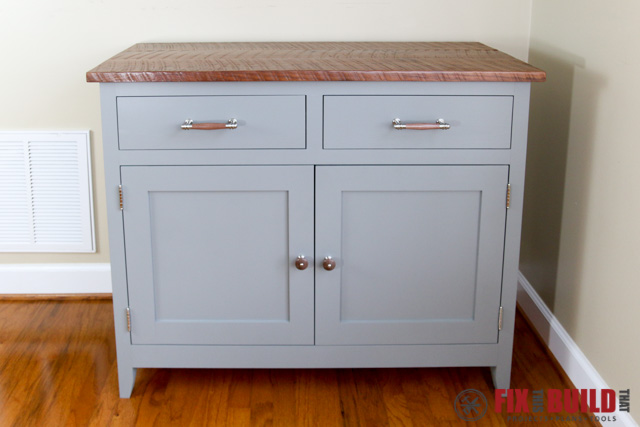
Today I’m sharing with you the second and final part of the DIY Sideboard Cabinet build. If you haven’t read the first part about how I made the carcass, then you probably want to go check out Part 1 first. We completed the main body of the sideboard in Part 1, now we’ll focus on all the details like the top, doors, drawers, finish and hardware. This is where the final look of the piece comes together and where the details make everything. So let’s check it out and get building!
Materials/Supplies
- (1) 8′ x 4′ 3/4″ Plywood
- (1) 4′ x 4′ 1/4″ Plywood
- (2) 8′ x 6″ x 3/4″ Hardwood
- (1) 8′ 1×6 poplar/pine board
- (1) 10′ 1×3 poplar/pine board
- (1) 8′ 1×3 poplar/pine board
- (3) 8′ 2×2 poplar/pine board
- (1) 8″ 1×2 poplar/pin board
- (2) 8′ 7/16″ cove molding trim
- (4) Door Hinges
- (2) Magnetic Door Catches
- (2) Door Knobs
- (2) Drawer Handles
- (6) Table top fasteners
- (2) 14″ Full Ext Drawer Slides
- 2″ Pocket Hole Screws
- 1-1/4″ Pocket Hole Screws
Affiliate links are used on this page. See my disclosure page for info on affiliate programs.

In Part 1 we assembled the carcass. Part 2 will kickoff with making and mounting the drawers into the carcass.
Making the Drawers
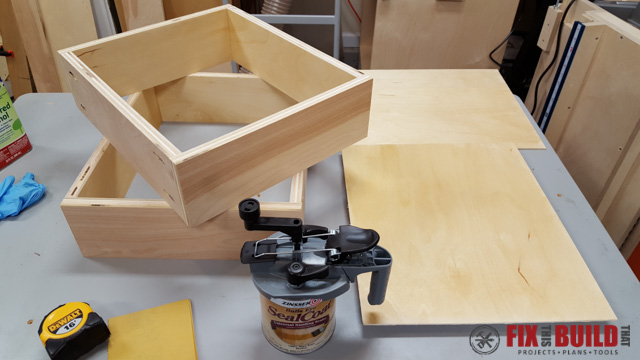
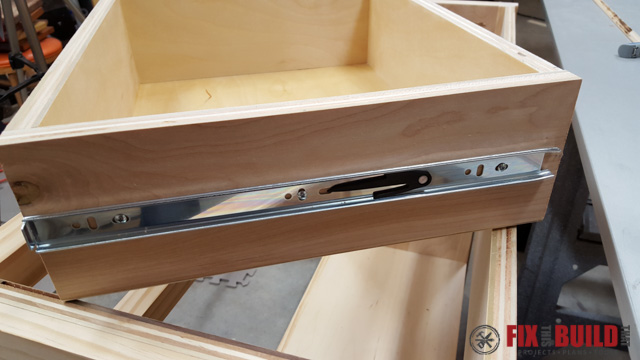
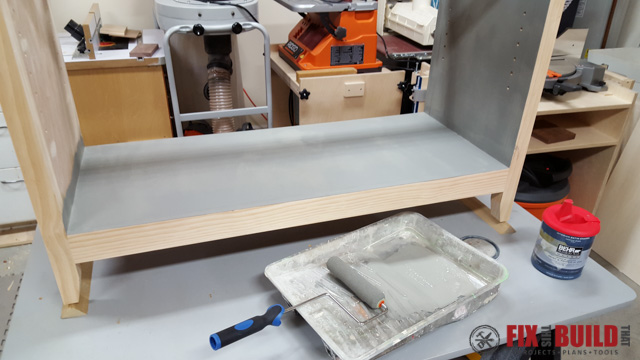
The drawers are made from 3/4″ plywood from the full sheet you made the carcass from. I used Purebond Plywood for this project. It takes paint great and it’s made here in the US which is a plus.
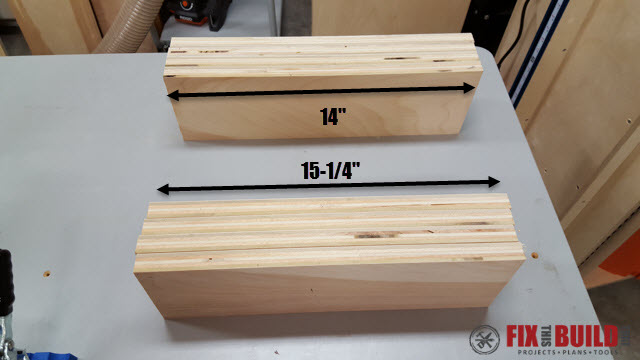
For each drawer cut 2 sides at 14″ by 4-1/2″ and a front and back at 15-1/4″ by 4-1/2″.
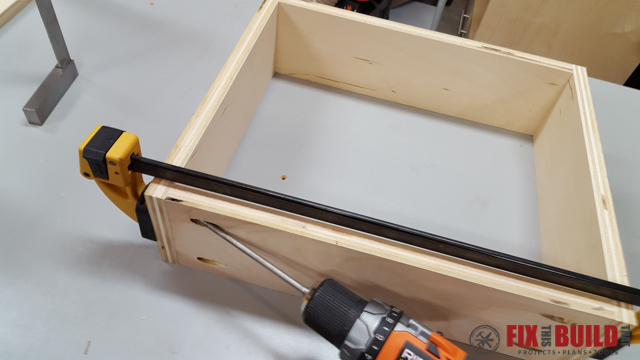
Drill pocket holes into the ends of the outside faces of the front and back, and join the drawers with 1-1/4″ pocket screws. I use a stand alone pocket hole jig to do this and it works great.
Apply a finish to the drawers before installing the bottom. I used shellac sanding sealer and put 2 coats on, sanding with 320 between them.
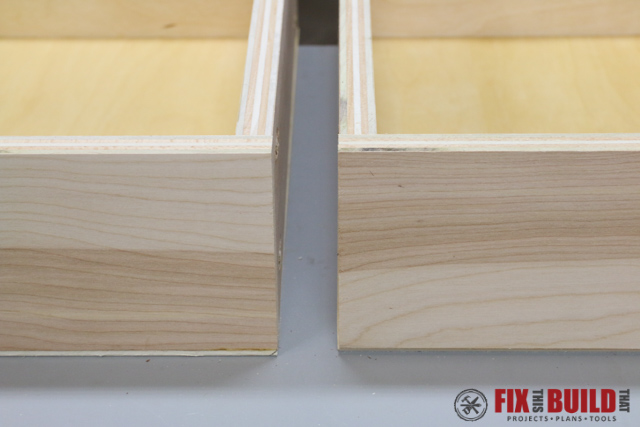
Cut the drawer bottom to size and glue and nail or staple it to the bottom of the drawer. Now here is the super secret trick to make that plywood bottom disappear. Put a chamfer on the plywood bottom with either a chamfer router bit or a block plane.
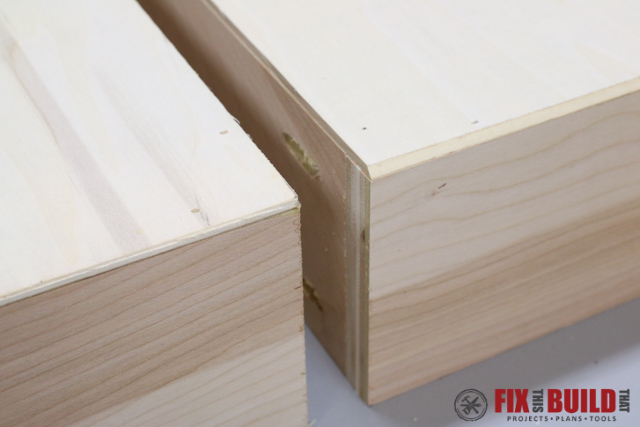
Here is the result from the bottom and side view. You can see it’s much more attractive when viewed from the side as you can’t tell the plywood bottom is there. Win-win…fastest construction method I know and it looks great!
Mounting the Drawers
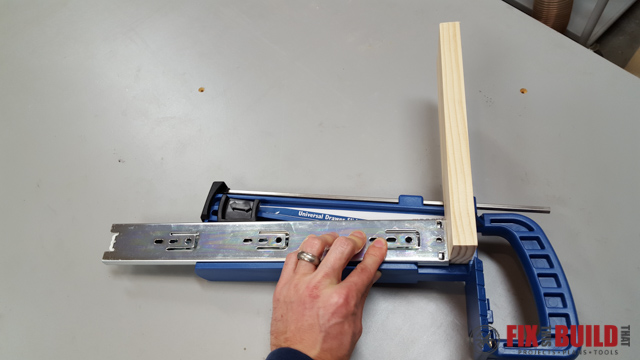
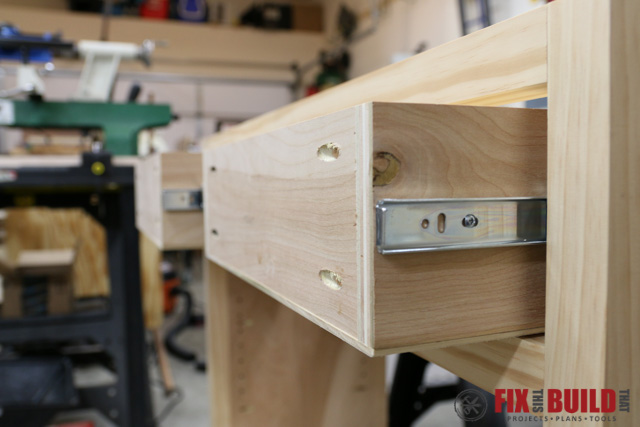
The drawers are mounted with 14″ full extension drawer slides. I used the Universal Drawer Slide Mounting Jig from Rockler to take the guess work out of mounting the drawer slides…which is fine by me, because I always seem to mess them up.
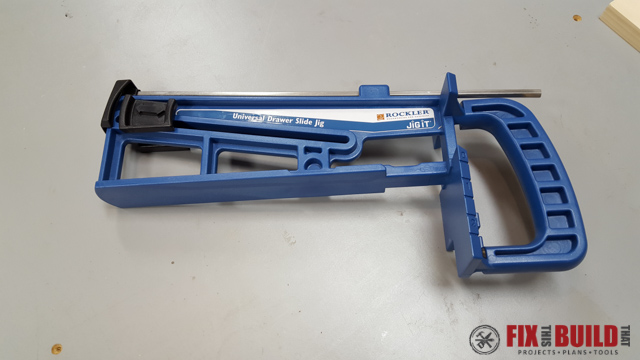
The jig holds the drawer slide while you position it in place and attach the slide. It also has reference marks and guides to let you repeatedly position the slides at the same height.
I’m using a false drawer front, so I put a cutoff of the drawer front in the jig to give the slide the proper setback. I then locked the slide in by sliding the locking tab down.
I referenced the bottom of the jig with the bottom of the lower drawer stretcher. There is also an indexing rod you can use to do this, but I didn’t need to as I had a great reference point already. I clamped it in place with a face clamp and this let me use two hands to predrill and attach the slides with screws.
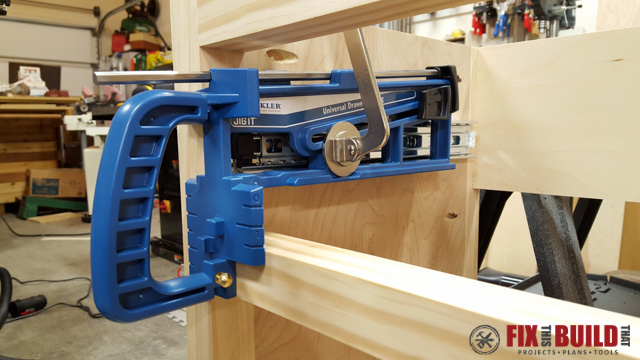
Repeat this process on the other side of the drawer opening.
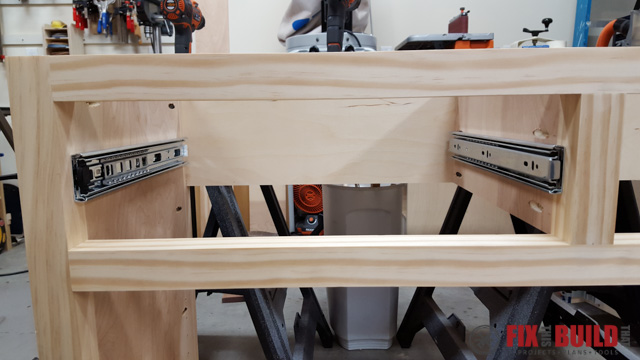
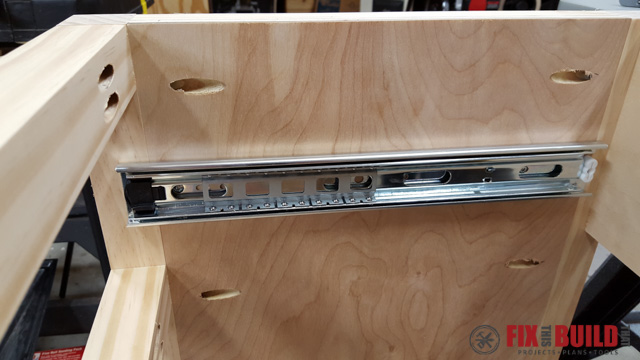
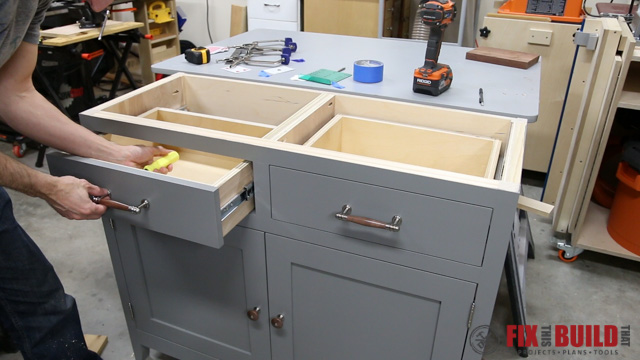
Put two 1/8″ spacers on the lower drawer stretcher and place the drawer halfway into the opening on top of these spacers. Pull the slides out until the end is flush with the front of the drawer. Secure the slides to the drawer with a screw on each side.

Now pull the drawer outward until the next set of mounting holes is revealed. Secure these with a screw as well.
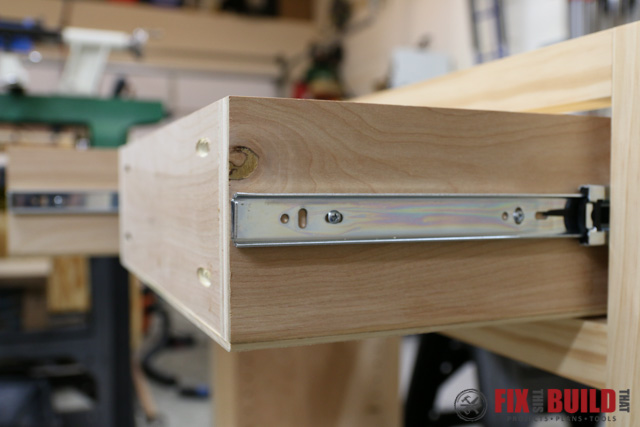
Pull the drawer all the way out with removable slides attached and secure the 3rd screw into the back portion of the slides and reinstall your drawers.
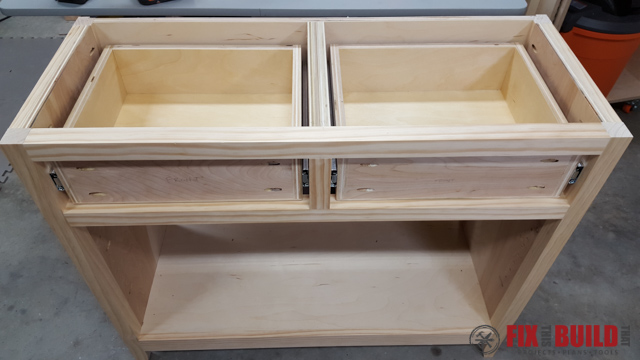
Cut two false drawer fronts from a 1×6 and size them so there is a consistent 1/16″ or 1/8″ reveal around the drawer front and the drawer opening.
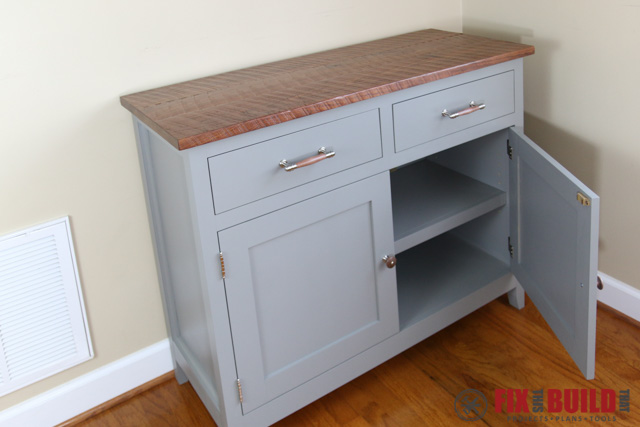
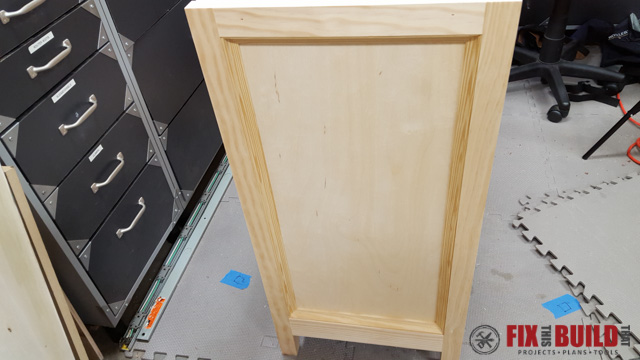
Making the Doors
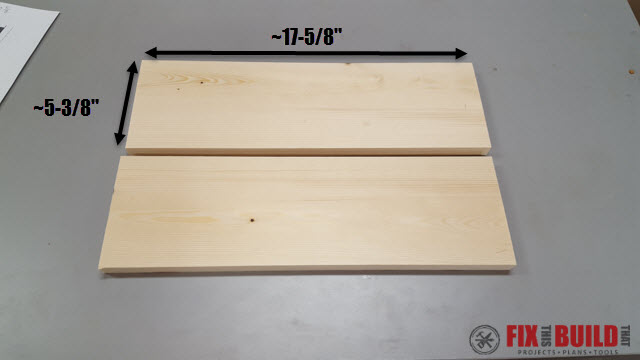
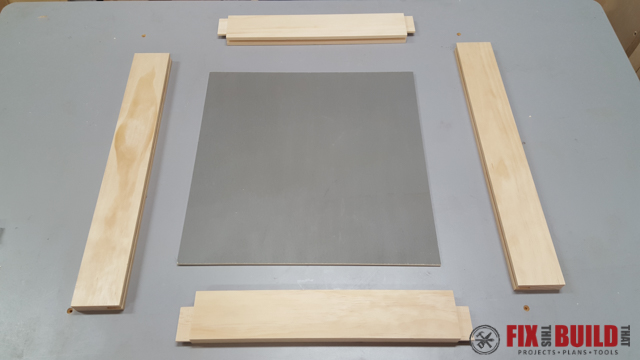
The doors are made from 1×3 frames and a 1/4″ plywood panel. The panels are held in a groove inside the frame, this is called a frame and panel door…creative name huh?
Cut two rails (the horizontal pieces) to 15″ and two stiles (the vertical pieces) to 18-3/4″ per door. Err on the side of having the doors slightly bigger as you can always trim things down later if needed (I did).
Cut grooves in one edge of all the pieces. The grooves should be sized so your 1/4″ plywood slides in snugly (use the panel from Part 1 you cut and painted). Take two passes on the tabelsaw with the blade raised 3/4″. Flip the board around end for end after the first pass to center the groove. Use some scrap pieces to fine tune the position of the blade, it’ll take some test cuts to get it just right.
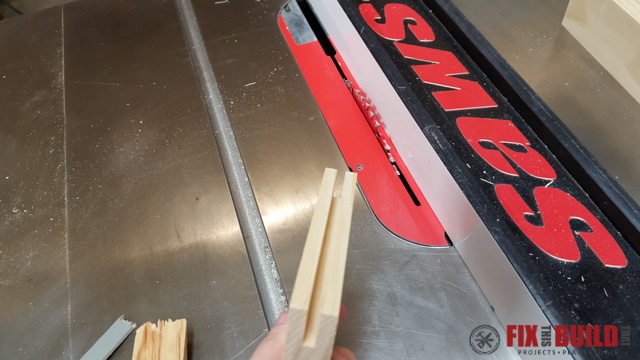
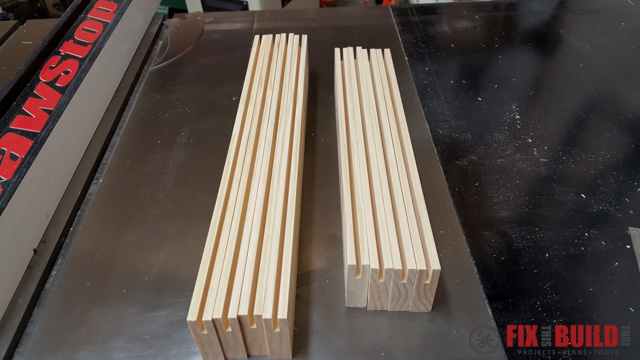
To make the tongues, set the fence to 3/4″ away from the farthest side of the blade. Raise the blade to a height equal to the walls on either side of the groove. The idea is that after making a pass on each side of the board, the remaining “tongue” will be the same thickness as the groove. It’s much easier to do than to explain 🙂
Cut the tongues with multiple passes, inching the board towards the fence a blade width each pass until it hits the fence. Flip the board over and do the same thing on the other side.

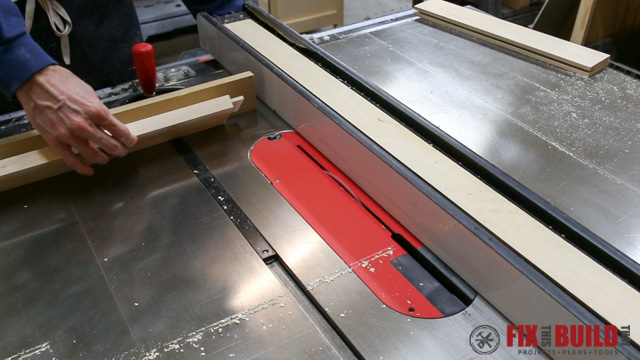
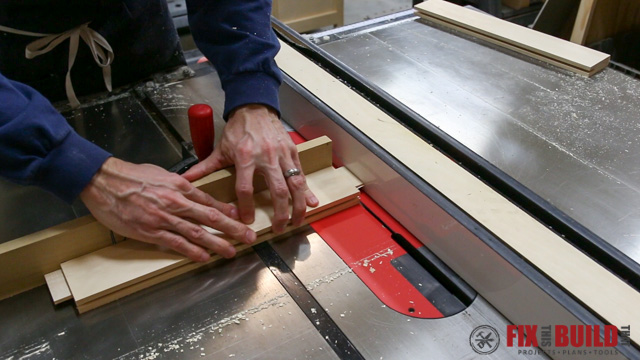
Use test pieces here as well, but after it’s all tuned in you should have a tongue that fits right into your grooves. Repeat this on the other end of the board and for all other rails.
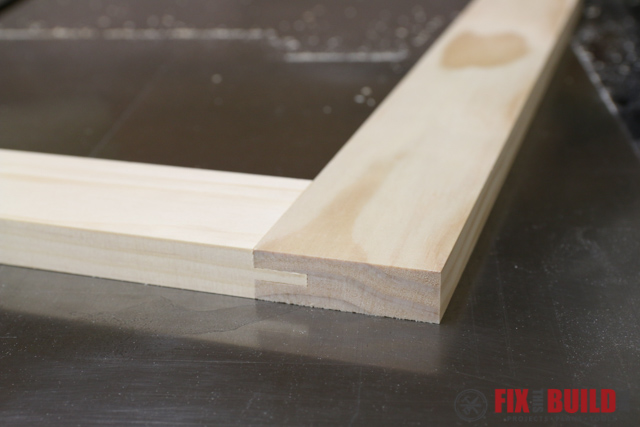
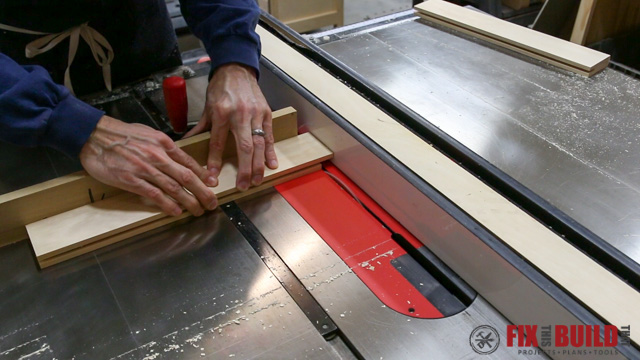
To assemble the doors, cut your prepainted panel sheet into two 14-7/8″ by 14-5/8″ door panels, this will give ~1/8″ of play on all sides. Use glue on the tongues and let the panel float free as you assemble the doors. Clamp in place and let dry for at least an hour.
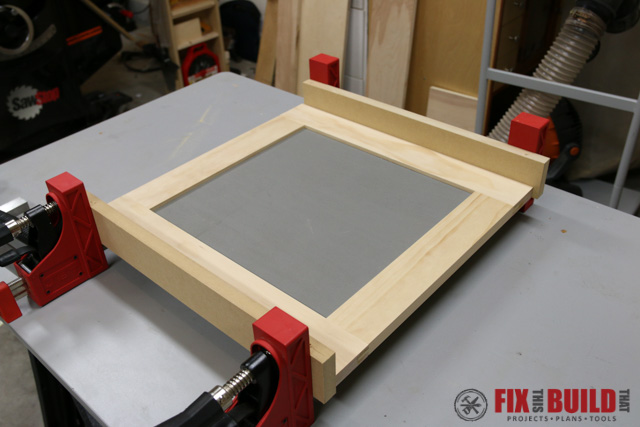
After the glue is dry, you can test fits the doors in the cabinet and make any adjustments to them to get the reveal you want around the edges.
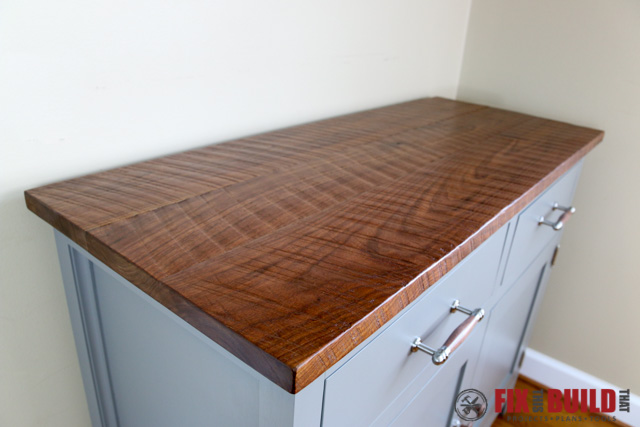
Build the Top for the Sideboard
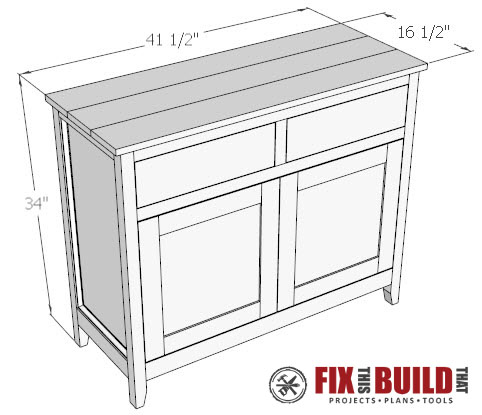
This was probably my favorite part of the build because I got to use more of that awesome old circular sawmill cut walnut. The top measures 42″ by 16.5″, and can be made from three 1×6 boards. If you don’t have access to hardwoods then you can use pine or poplar and stain it to your liking.
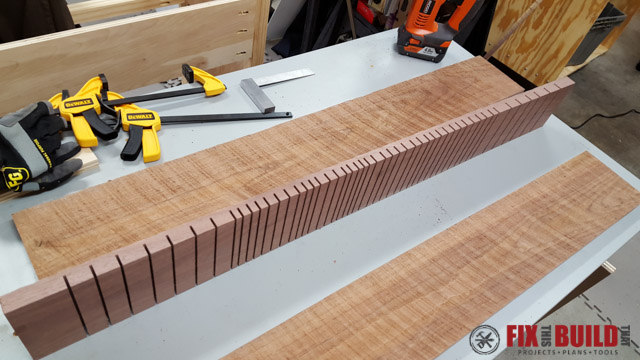
If you have reclaimed or rough hewn boards like I did then you’ll need to joint and plane one side to get it flat while keeping the character on the top. My middle board had some severe twist to it which I couldn’t correct without milling the sawmarks off. So I made a series of deep kerfs on the underside which made the board flexible enough to get it straight in the clamps.
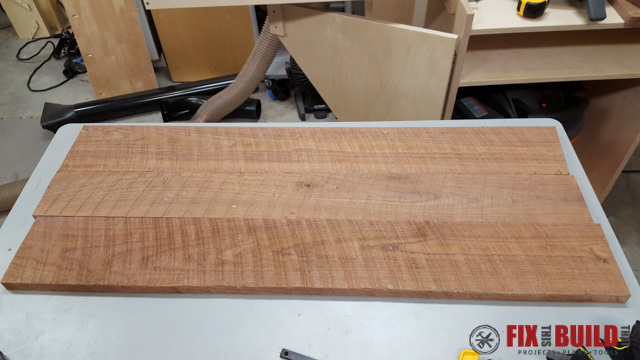
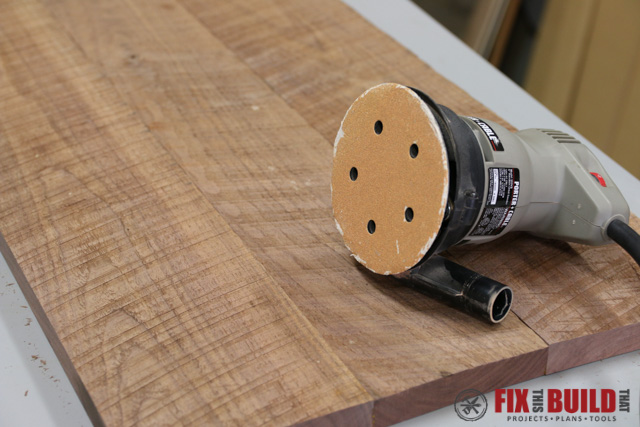
Glue and clamp up your table top assembly and then cut it to final size on the tablesaw or with a circular saw.

I sanded the saw marks with 80 grit then 150 grit and finished it with 3 coats of Helmsman Spar Urethane in Satin.

Apply Cove Trim and Paint
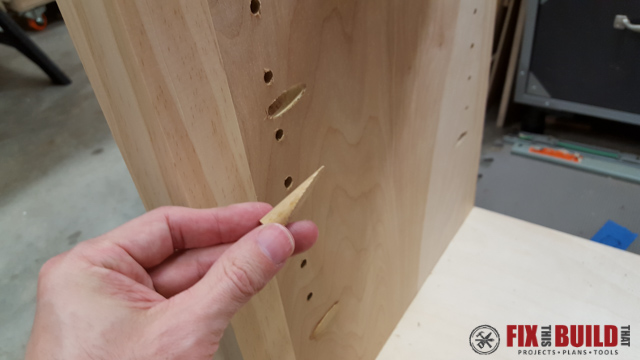
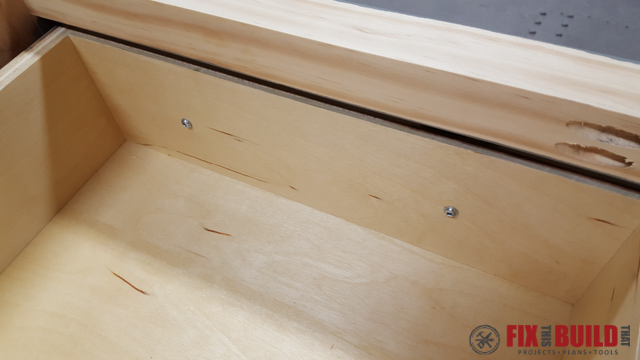
Before we paint, we need to take care of a few details. I went back and filled the lower pocket holes on the interior of the cabinet with wood plugs glued in place.
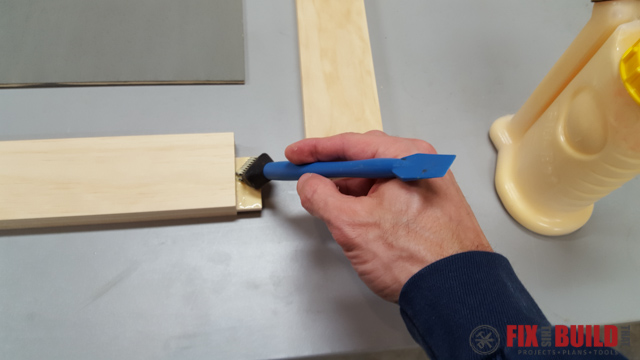
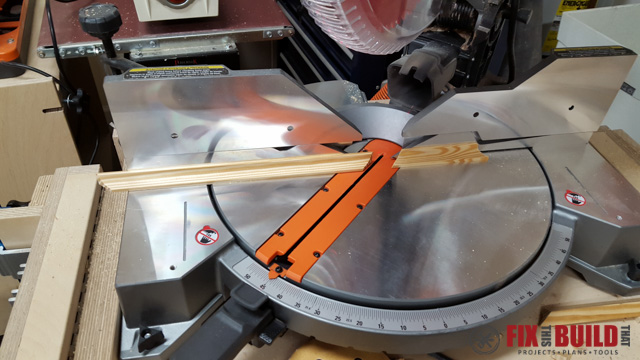
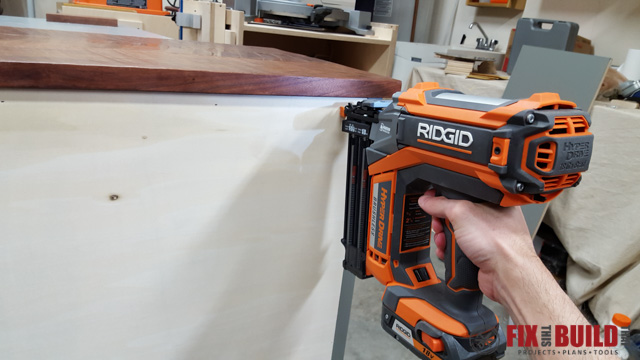
The side panels of the base were a little bland, so I added some cove trim to the sides of the base assembly. Cut the trim to fit and miter the ends to fit in the panel. Attach with a brad nailer or pin nailer.
Fill any nail holes with wood putty then sand everything with 150 grit sandpaper to ease the edges and remove any rough spots.
I used a foam roller and paint brush and applied 3 coats of Behr Ultra Premium Plus Satin Latex in Gray Pepper (that’s a mouthful) to all the pieces. Sand with 320 grit paper in between coats.
Mount the Doors and Drawer Fronts
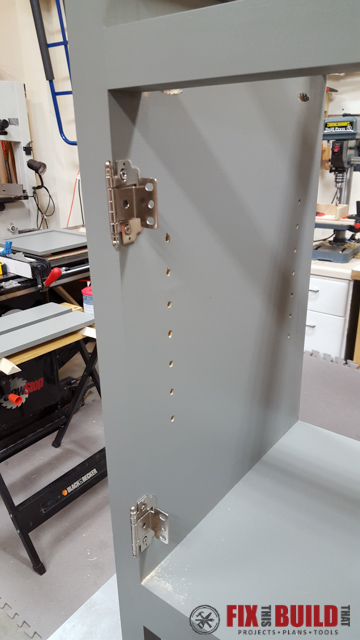
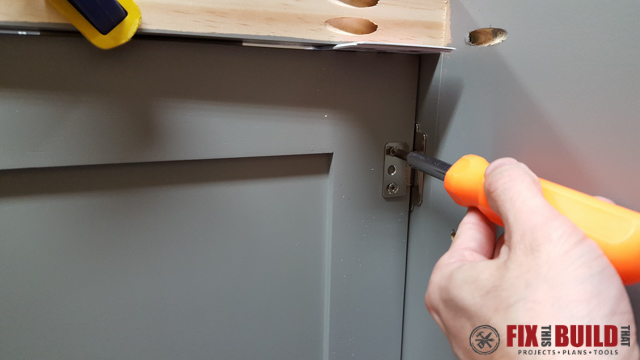
The doors are mounted with partial wrap ball tip hinges. They are easy to mount because you don’t have to cut out any mortises, you just screw them in place.
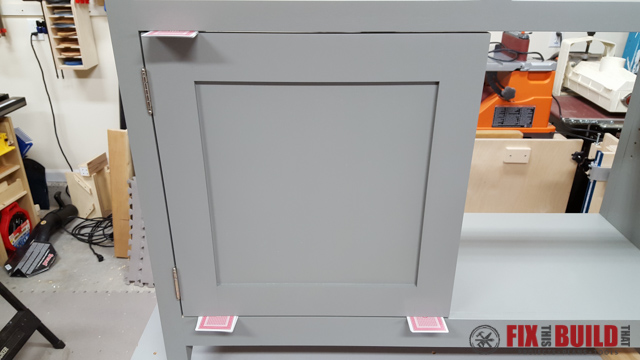
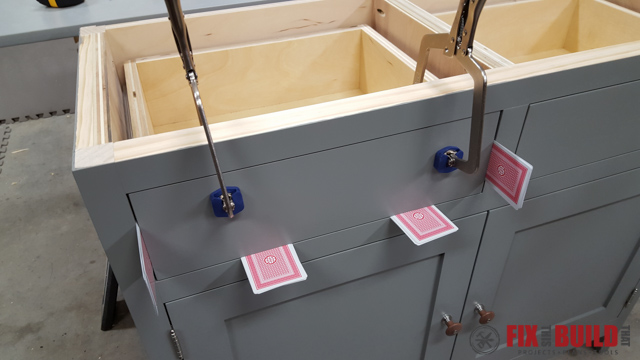
Here is a trick I use to get the right gap on all sides of the doors. Rest the door on the bottom of the cabinet and fill the gap between the top of the door and the frame with as many playing cards as you can.
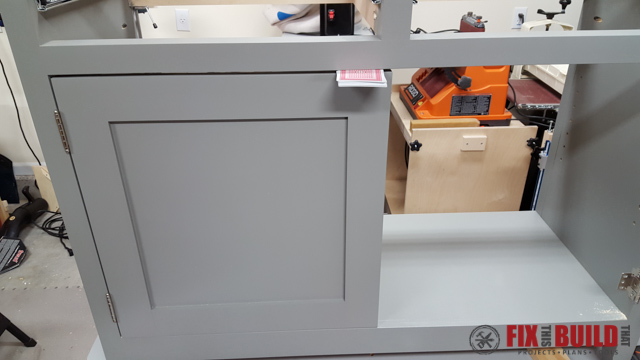
Now for the perfect reveal, remove the cards and count how many you have. Use a stack of half that amount to shim the door on all four corners. My door took 14 cards, so I used a 7 card stack in each corner. Easy and no math!
Mount the hardware with the included screws. I installed the hinges 3″ from the top and bottom of each door.
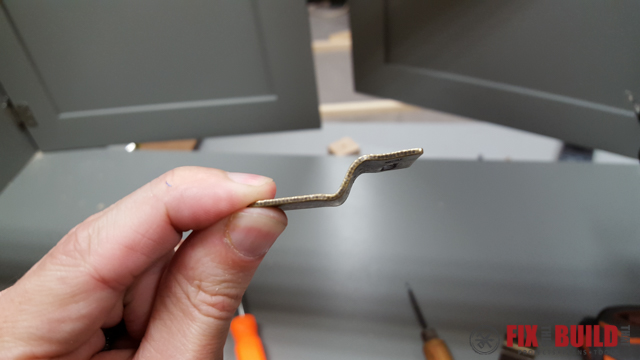
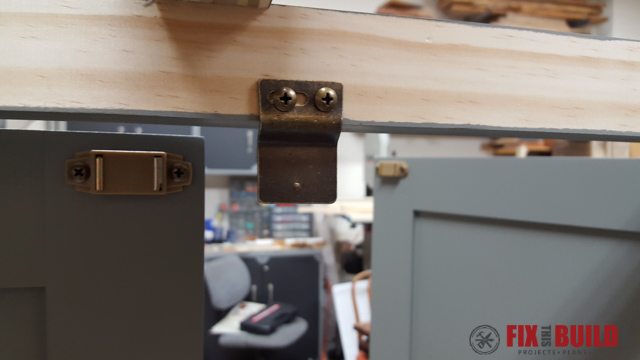
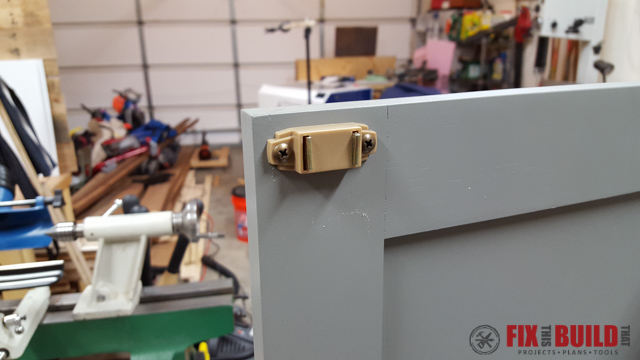
 Install magnetic door catches on the doors and upper frame to align and hold the doors shut. Because the upper frame is 1-1/2″ thick I had to slightly modify (bang the mess out of it with a hammer) the tabs that mount to the frame to get the right angle.
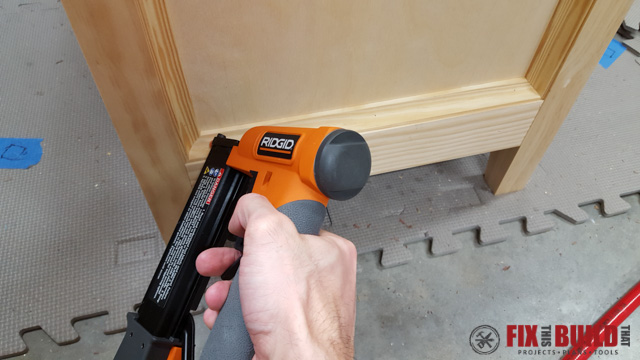
 Fasten the false drawer fronts with 1-1/4″ pocket screws, adjusting the reveal with the same process as above.
 Next install the door knobs and drawer pulls. I made my knobs and pulls from Rockler turning kits using the same walnut as the top. I have posts on how to make each of them here: Making Knobs & Making Pulls
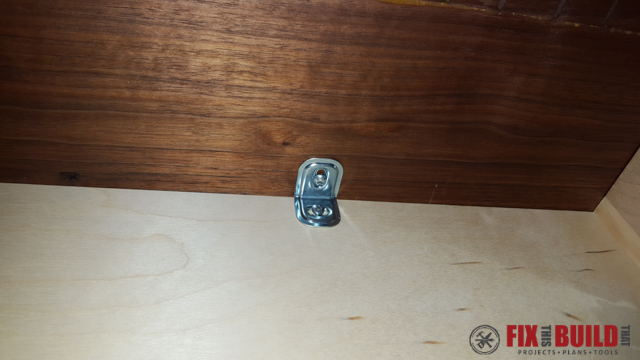
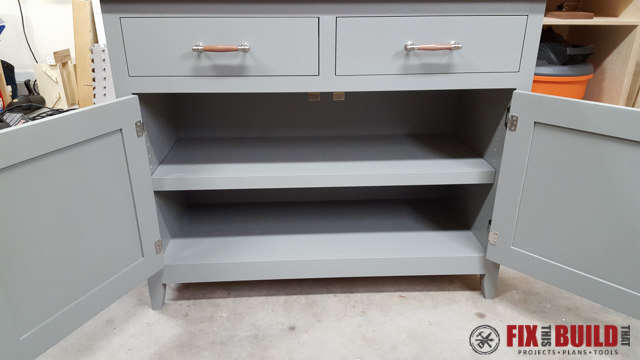
Install the Top, Back and Shelf
Alright, we are in the home stretch now! The top is mounted to the sideboard cabinet with some L-brackets.
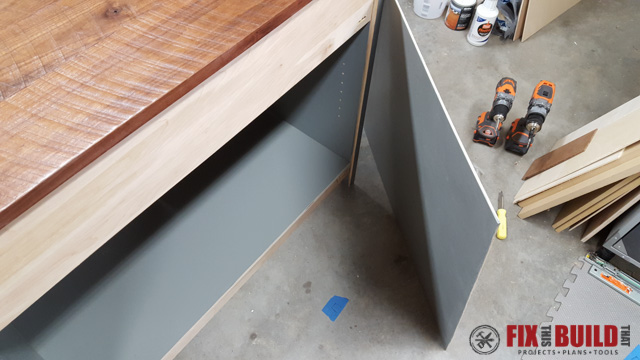
After attaching the top, you can secure the back to the cabinet with a brad nailer.
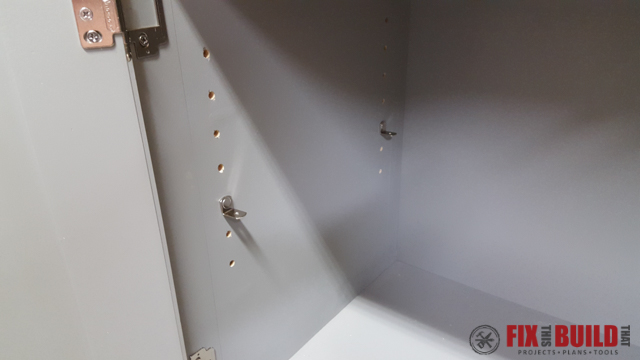
Install 1/4″ shelf pins and then the shelf and you’re done!
The DIY Sideboard Cabinet is a great addition to our house and gives a ton of extra space to our dining room. If you want to see more great furniture projects you can check out my Furniture Projects page.
Rockler provided me with product and/or monetary compensation as a sponsor of this build. All opinions are my own and are not filtered by the sponsor.


Anyone have a suggestion of how I could do the doors a different way. Same look but not having to use the tongue and groove style joints?
I am going to build another one with a top piece with two glass doors. Thanks again I did learn a lot. 10% of the work is building it all and 90% goes into the finish. Over all ias real happy with how it turned out.
What kind of l brackets are those? Where can I find them?
What kind of clamp pads are you using with the Kreg face clamps? There are some blue pads in the shot with the false drawer front. I have been Googling for Kreg-branded clamp pads but have come up short.
Max, those are actually Irwin clamps, not Kreg. I got them at Lowe’s I believe and they are way cheaper than the Kreg ones. 2 for $20.
I would love a tutorial on how to get saw marks like that. I’ve seen and dealt with some lumber that was rough sawn from the mill, but if the planer doesn’t get rid of them, sanding certainly does. How do you keeps the rough saw marks but keep it as smooth as you did? Hard to believe 80 grit didn’t wipe it away! Thanks!
Awesome job, Brad! Gotta love the look of that walnut!