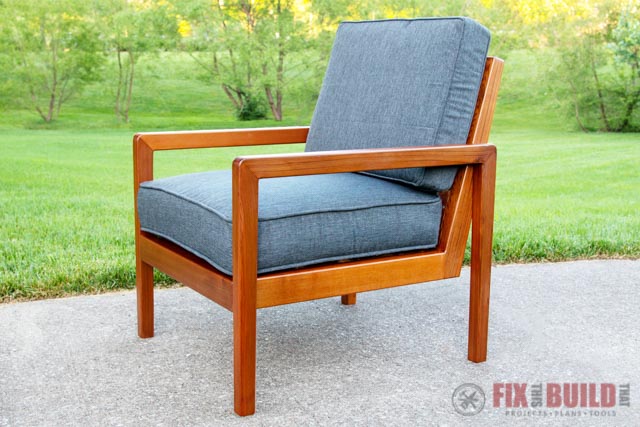
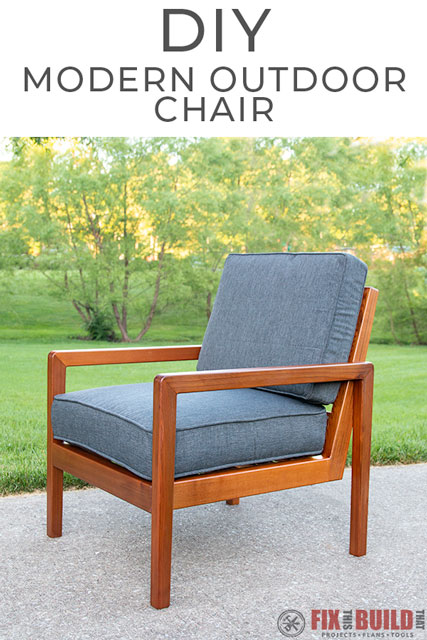
I’m really excited to share my DIY Outdoor Chair from 2×4 Cedar with you today. This project has been on my to do list for a long time, and I love how it turned out. My goal was to make a refined outdoor chair with a timeless mid century modern look, and I think it’s spot on.
You can build your own DIY Outdoor Chair using my easy to follow detailed plans. All you’ll need is some cedar 2×4’s and 1×4’s for material. You can get the outdoor chair plans here to save time and have an easy build.
I designed the Modern DIY Outdoor Chair to match my DIY Modern Sofa; Make them both for a matching set.
Another beautiful outdoor chair option is my 2×4 Modern Outdoor Chair. Pair it with my Modern 2×4 Outdoor Sofa for a complete set. And everything looks good with the DIY Concrete Top Outdoor Coffee Table and the DIY Outdoor Side Table.
Tools Used
Materials/Supplies
- (4) 8′ Cedar 2×4
- (3) 8′ Cedar 1×4
- 2:1 Epoxy TotalBoat (10% off code: FIXTHISTB)
- Lust Spar Urethane- TotalBoat (10% off code: FIXTHISTB)
- Wood Sealer
- 2-1/2″ Exterior Pocket Screws
- 2-1/2″ Exterior Deck Screws
- 1-1/4″ Exterior Deck Screws
Affiliate links are used on this page. See my disclosure page for info on affiliate programs.

How To Build a DIY Outdoor Chair
- Cut Parts and Assemble Seat
- Cut and Taper the Legs and Armrest
- Join the Legs and Armrest
- Shape the Chair Parts
- Attach Cleats for the Chair Slats
- Apply Finish to the Chair
- Connect Chair Body to Legs
Start with your outdoor cushions
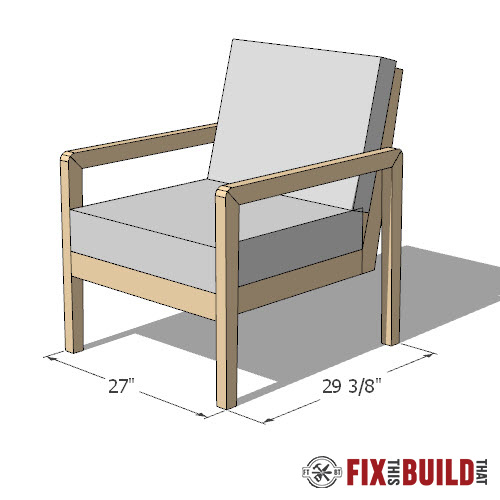
Before you start building your chair, it’s important to buy your outdoor cushions. I designed the Modern DIY Outdoor Chair to fit a seat cushion that measures 24.0″ L x 6.0″ H x 25.0″ W. I bought this extra deep outdoor seat cushion, in Vernon Granite.
My seat back cushion measures 24.0″ L x 4.0″ H x 18.0″ W. I bought one similar to this but also in Vernon Granite.
Here are more seat cushion options and seat back options that would fit the Modern DIY Outdoor Chair. If you decide to use cushions that are a different size you’ll need to adjust the plan accordingly.
1. Cut Parts and Assemble Seat
Make Seat Base
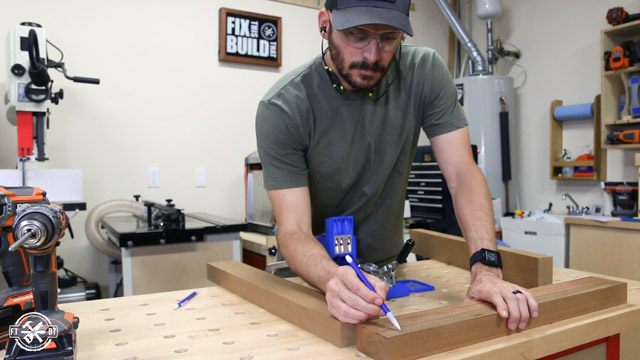
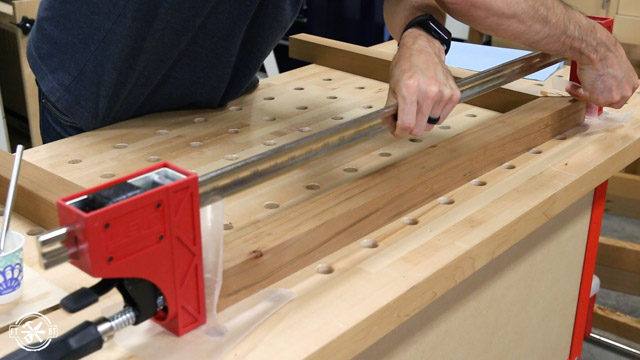
I began by cutting the two sides pieces and the front piece for the seat of the chair. I’m using pocket hole joinery for most of this project using my Kreg K4 Pocket Hole Jig. The legs will be joined to the seat front with pocket screws so I made sure to offset where the sides join the front. If you centered the pocket holes on both pieces the screws would run into each other.
 I attached the sides the front of the seat with 2-½” exterior pocket screws.
Shape Parts for Seat Back
The back of the seat tapers from the bottom to the top for a sleek look and reclines at 15 degrees. I’ll be using a combination of a simple tapering jig on my tablesaw and an angle cut on my miter saw to make the cuts.
I started off by making the long taper on the back. The piece will be square at the top and taper to full width near the bottom. After marking the cut lines I clamped the piece down on the tapering jig.
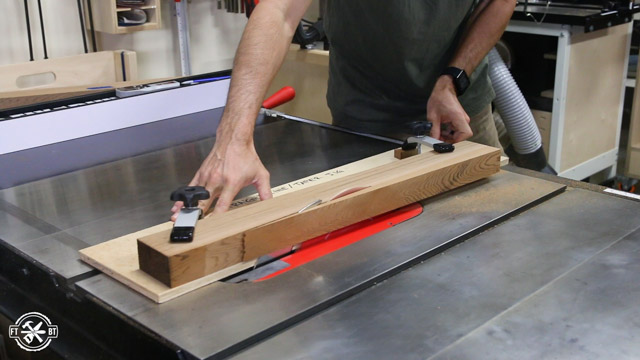
Once it was clamped down I hot glued a reference block at the bottom and along the long edge. This will let me make four identical parts for the two chairs. I ran one board through and was satisfied with the cut so I ran the other boards as well.
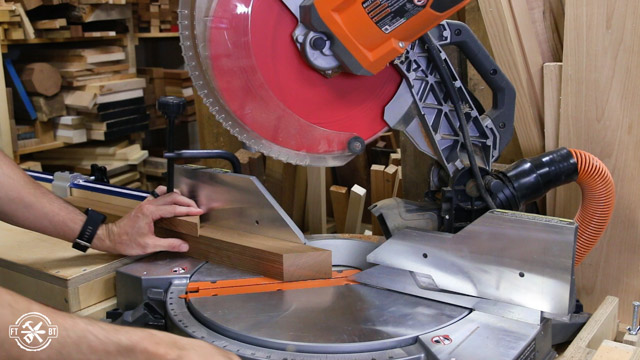
Next I took the parts over to the miter saw and set the blade at 15 degrees for the base cut. I set the stop on my fence to define the length of the back and get repeatable cuts on the pieces.
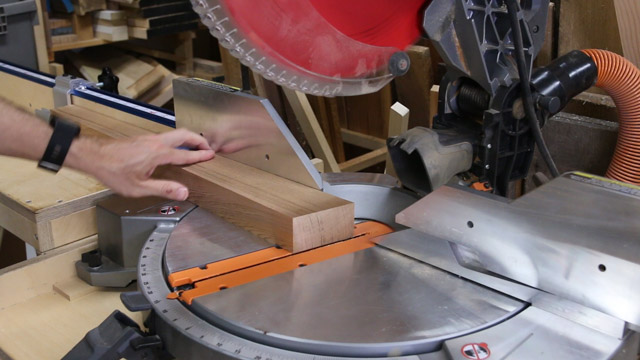
The last cut on the leg is to make the flat face that will join up with the seat sides. Don’t worry, this will all make sense in just a second.
I used the tapering jig again and clamped the back in place then hot glued the reference blocks on the bottom and long edge.
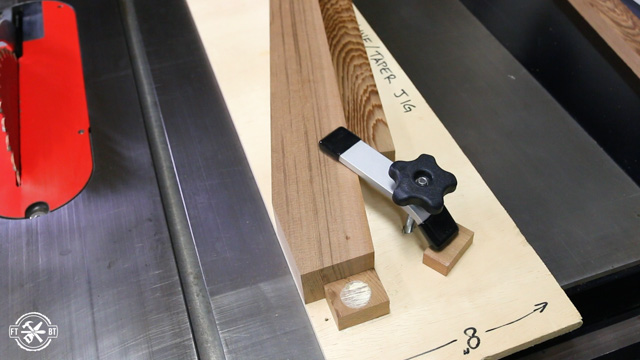
After making the cut you can see how this will join with the sides and give the back a 15 degree recline.
Assemble the Back and Join the Seat
I cut the rails to size for the top and bottom of the back that will join the pieces together. And while I was at it I cut the cleats that will hold the slats for the seat and the back.
The rails on the top and bottom of the back are connected with pocket holes. Again I offset the lower rails holes to make sure they wouldn’t interfere with the screws coming in from the side pieces.
To assemble the back I started by clamping the top rail in place and securing it with 2-½” screws. It took a little finesse since it’s rotated 15 degrees to match the slant of the back, but I got it in there.
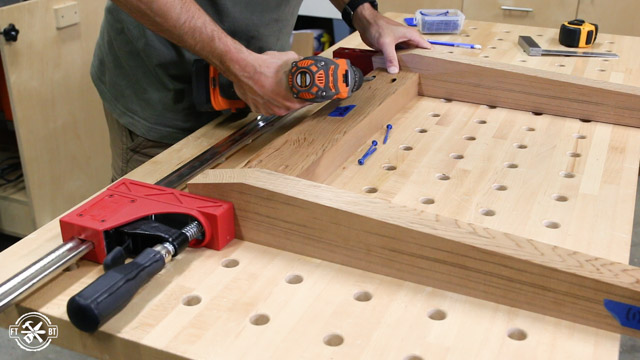
The lower rail is really easy to attach since it sits flush with the back. None of these screw holes will be visible once the chair is assembled and in use so I didn’t bother filling them.
Speaking of finesse, attaching the back REALLY took some. Having a second set of hands would have been pretty ~handy~ here. But between a face clamp and using the wedge shaped offcuts from the taper jig I was able to hold the pieces in place to secure them.
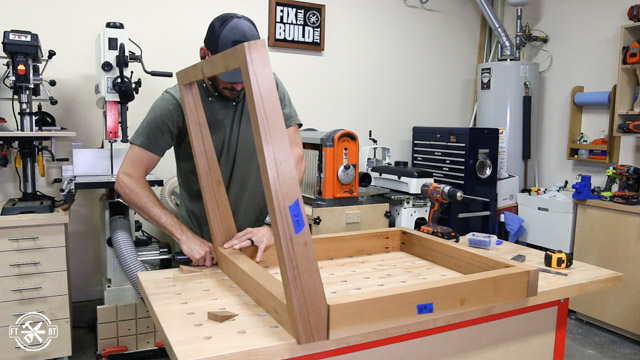
You can also see here how that final taper cut made a perfect sized flat face for the sides to connect.
I finished up the parts for the seat by cutting slats for the seat and back from 1x4s.
2. Cut and Taper the Legs and Armrest
Next I moved on to making the legs. The legs are a simple modern design with two tapered legs connected by an armrest.
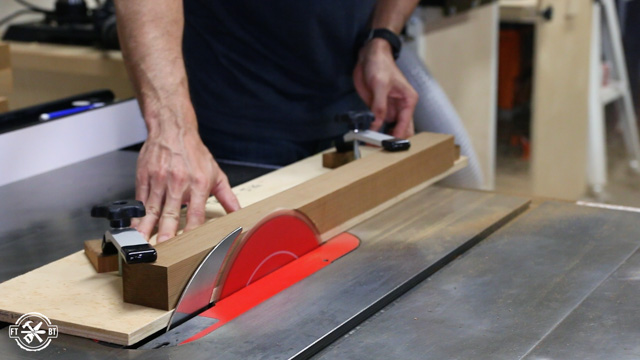
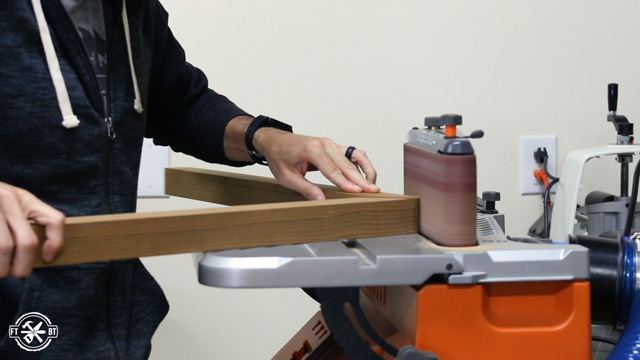
The legs taper from 1.5” at the bottom to 2” at the top. I went back to the tapering jig for this cut. I’m using parts several inches longer than the final legs. I’ll cut miters on them next to define the length.
 The chair legs join up with the armrests so I went with a 24” leg for a nice comfortable arm rest heights. I set my miter saw to 45 degrees and set my stop block for a 24” cut.
The tapers go on the inside of the legs. So I made sure to register the smaller end on the block and the uncut edge on the fence.
After cutting the legs to size I grabbed the arm rest blanks to cut them to size with matching miters on each end.
I cut one end of each part with a 45 degree miter. Then I set the stop block for the final length of the armrests and cut the complimentary miter on the other side. Double check your setting here to make sure you don’t cut it the wrong way.
If you want to build your own chair get the plans that give you a full cut list, materials sheet, and step by step instructions!
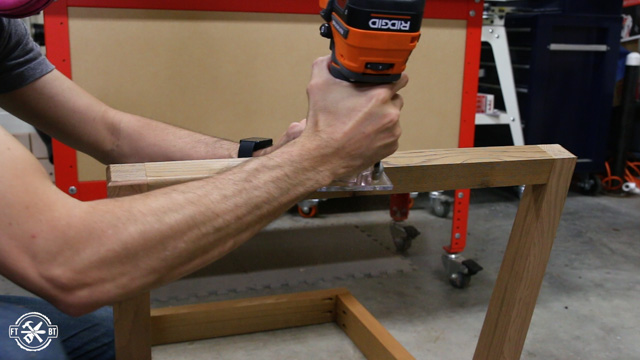
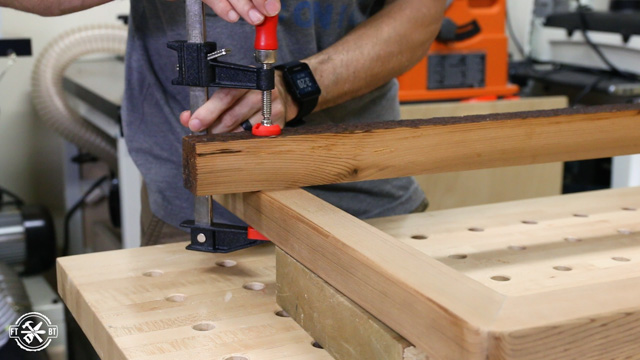
3. Join the Legs and Armrest
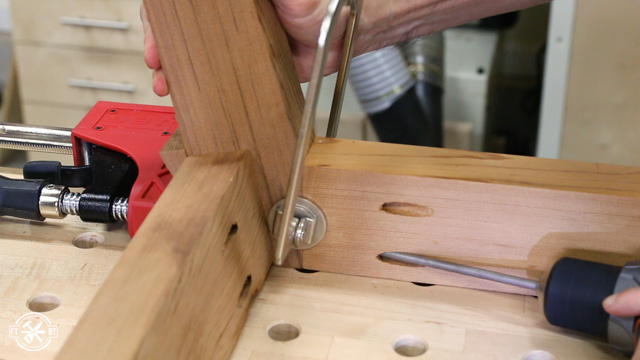
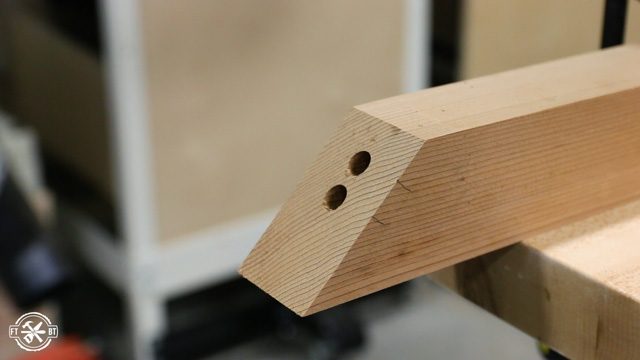
Since the leg joints will be exposed on all sides I’m going to use a hidden dowel joinery. I matched up the miter joints on each leg and marked two lines across the joint. This will be where the dowels will end up.

Next I used those layout lines to register my self-centering dowel jig on the legs and drilled two holes in each leg.
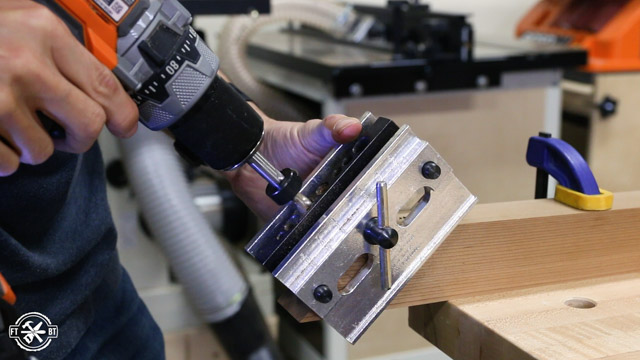
The jig has different sized holes for each dowel size and an alignment mark for each one so it makes it pretty easy.
The reason you need this reinforcement is because end grain sucks up glue and epoxy like a thirsty camel. So before the final assembly I mixed up a batch of epoxy with a fast hardener and coats all the mitered ends. Once it dries it stops the end grain from soaking in the liquid during final assembly. You can do the same thing with a mixture of glue and water too.
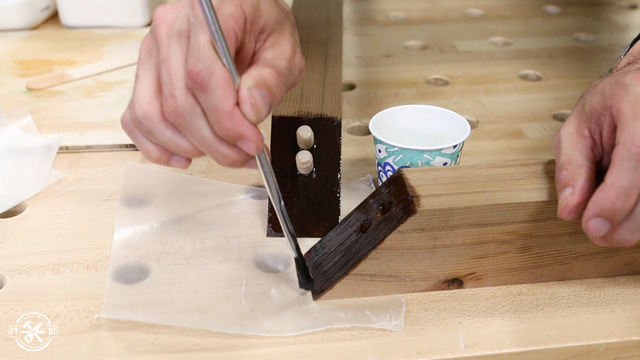
After the epoxy had dried I came back for the final assembly. I coated the dowels and put the three parts together then applied a clamp across the whole thing to squeeze it tight and let it dry.
4. Shape the DIY Outdoor Chair
With the legs together I wanted to soften the angles a bit and give it a nice rounded modern feel. I used a cap to draw out an arc across each corner. Then I went to the bandsaw and cut the bulk of the material off before sanding to the line. If you don’t have a bandsaw you can just go straight to the sander since it’s not a lot of wood to remove.
I wanted to soften the rest of the rest of the chair so I put a 3/16” roundover on all the exposed edges. The router table made short work of the legs and I used a handheld router for the base.
While I had the router table setup I went ahead and rounded over all the sides of the seat and back slats too.
5. Attach Cleats for DIY Outdoor Chair Slats
The slats are joined to the seat and back using a couple ¾ x ¾” cleats. I cut the cleats to size then drilled countersunk pilot holes in them for mounting.
I put a couple slats in the seat opening to help position the cleats. When the top of the slats were flush with the seat I clamped the cleat in place and secured it with 1-1/4 screws. I used the same process for the back as well.
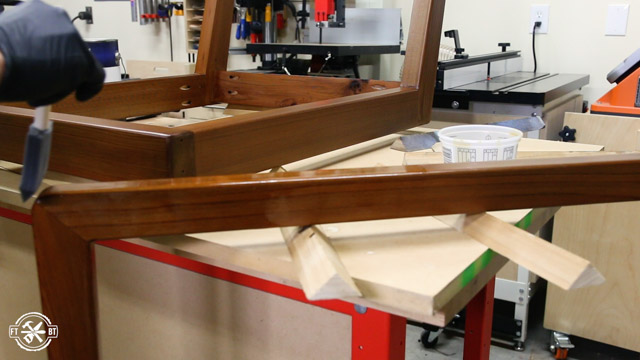
At this point I started assembling the chair, but if I had to do it again, I would’ve finished the parts separately. I assembled the chair and started to put the finish on, realized I had a problem with the finish and took the chair apart to strip the finish off.
The lesson learned, was always test a new finish exactly as you plan on applying it on the same material you’ll be applying it to. Once I stripped the finish and adjusted my application (which I’ll cover below) it looked beautiful.
6. Apply Finish to DIY Outdoor Chair
I wanted to use a strong outdoor spar urethane for protection on these chairs. Total Boat sent me a matte outdoor finish for the job called Lust. I applied two base coats of wood sealer and then two coats of the matte gloss to finish.
7. Connect Chair Body to Legs
Setting Up Chair for Assembly
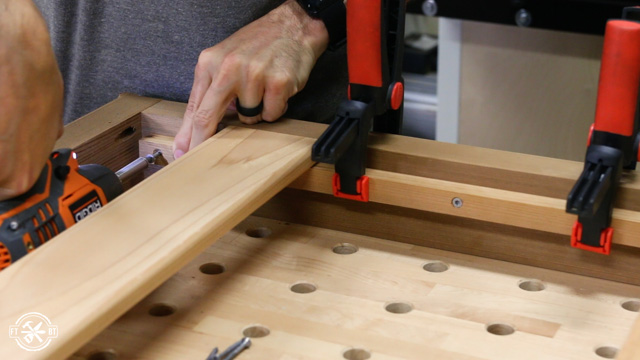
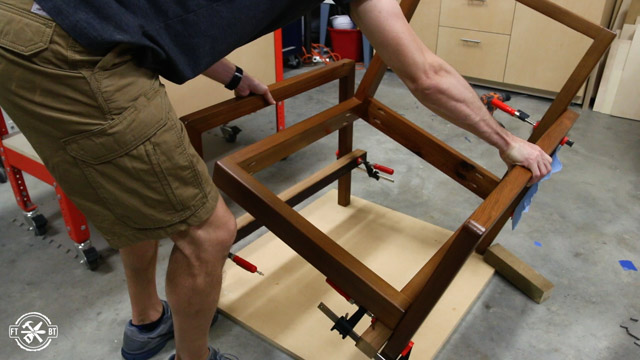
Now let’s jump back to 3 days earlier when I was prepping for assembly. I measured and made a mark on the inside of each leg where the seat base should rest. Next I propped up the leg and clamped a straight offcut across the side to both legs. I also did the same for the other legs.
Next I moved to the floor and propped up the leg on a scrap of MDF which I’m using as a reference surface. I tipped the seat on its side and set it flush with the front of the leg and registered it against the board I’d clamped on.
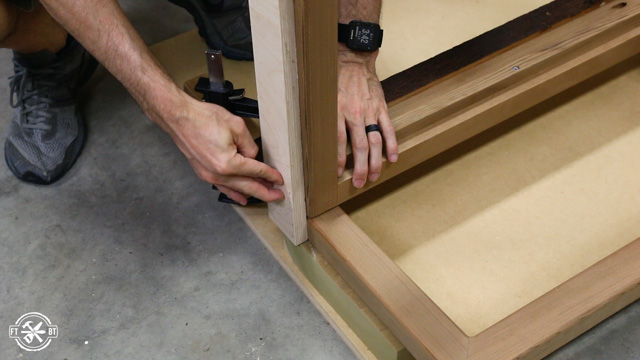
Next I clamped the seat to the leg to hold it in place.
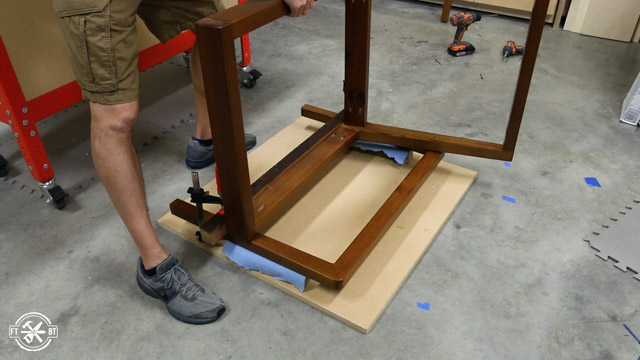
I rotated the seat up and brought in the other leg assembly to support the seat. I flushed up the front of the seat and the legs then clamped them in place.
Secure Chair Legs to Body
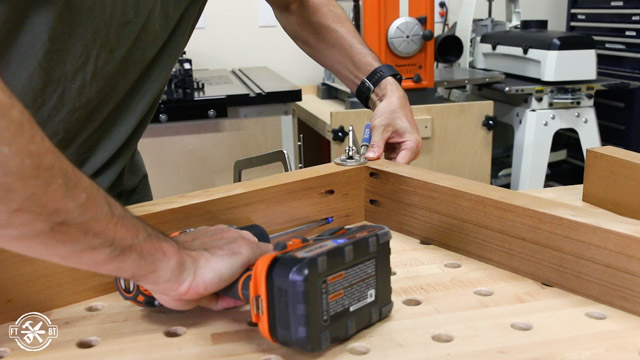
Next I secured the front of the chair legs to the front of the seat with 2-½” pocket screws in the holes I drilled earlier.
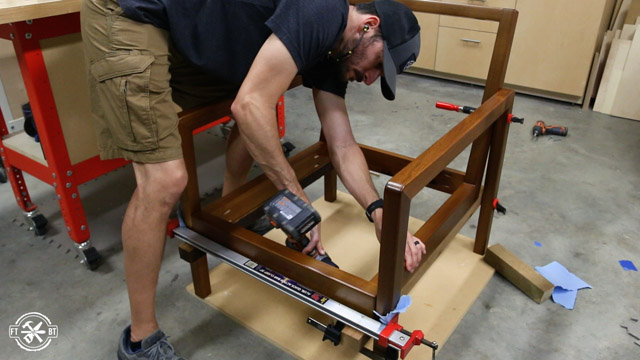
For the attachment to the back legs it’s a bit different. The slanted back passes right over the corner of the leg. I laid out two screws that would be covered by the slats and go into the leg. I predrilled and countersunk the holes making sure I was lined up with the leg on the other side.
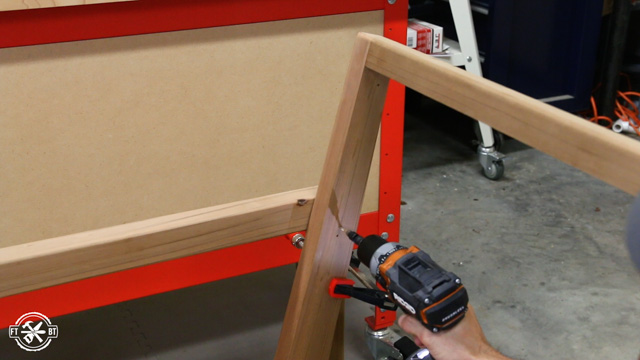
Then I used 2-½” deck screws to join the pieces together.
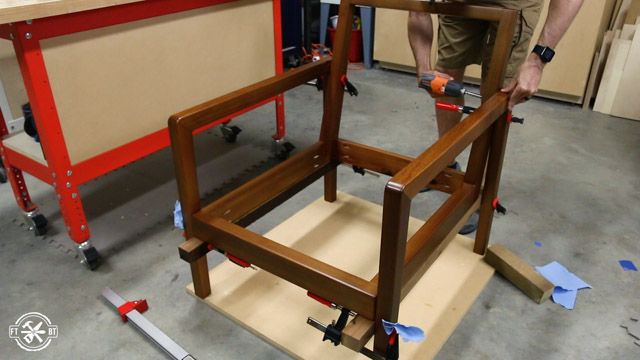
With the pieces joined I reattached the cleats and installed the slats on the seat and back. I cut some small 1” spacers and used them to make the slat install quick and easy.

And with that, my DIY Outdoor Chair was complete! I really love how it turned out. Get the detailed plans with complete cut list and step-by-step instructions so you can make your own chairs!
Check out more of my DIY Outdoor Furniture as well! I have plans for everything from outdoor sofas to coffee tables and more.
Diablo and Total Boat provided me with product and/or monetary compensation as a sponsor of this build. All opinions are my own and are not filtered by the sponsor.