Today I’m going to show you the easiest way to build a DIY Acoustic Panel for less than $20 each! They are cheap to make versus buying commercial ones for over $150. I needed some soundproofing and absorption in my shop because it’s a huge box with concrete floors. These DIY sound panels were the perfect solution.
If you need acoustic sound panels and you don’t want to pay tons of money, this is the project for you!
Thanks to The Home Depot for sponsoring this post. Check out the tools I used for this build linked below.
Before we get started, make sure to follow me on YouTube, Facebook, and Instagram to keep up with all my latest builds!
If you want more home DIY projects, check out some of my favorites. These basic and straightforward directions will make these projects easy.
How To Remove a TV Niche
DIY Small Bathroom Remodel
DIY Loft Bed/How To Build
Here is what you’ll need for the project:
Materials/Supplies
- 2 sheets 3/4″ MDF
- Rockwool Safe and Sound
- 108″ Wide Solid Fabric
Affiliate links are used on this page. See my disclosure page for info on affiliate programs.
4 Easy Steps on How to Build DIY Acoustic Panels
- Build the frames
- Add fabric to frames
- Add insulation and backing
- Hang acoustic panels
1. Build the Frames for DIY Acoustic Panels
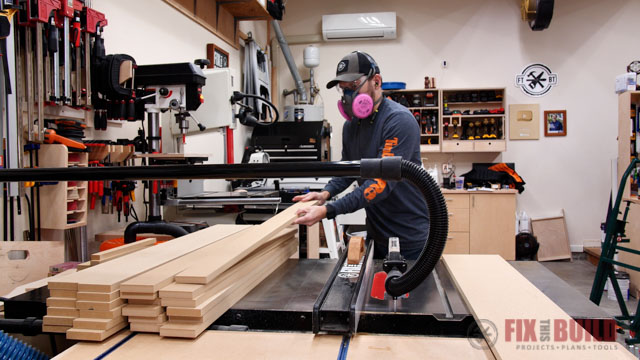
The first step of this DIY Acoustic Panel project is to make a frame to go around the precut insulation. The wooden frame is sized to fit the Rockwool Safe and Sound insulation, which is 15-1/4″ wide by 47″ long. You can use other insulation types, such as mineral wool, which is in the Rockwool. It is widely considered the most cost-effective and best type. The insulation comes in a pack of 12, so I am going making 12 sound panels.
Using MDF to build the frames makes them stable and gives them a smooth surface. That’ll be important later on when I wrap fabric tightly around the whole frame. You could also use plywood if you choose.
I cut 24 sides at 47″ long and 24 ends at 16-3/4″ long. All pieces are 3-1/2″ wide.
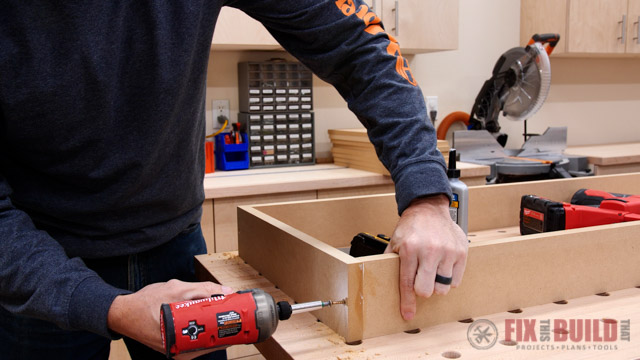
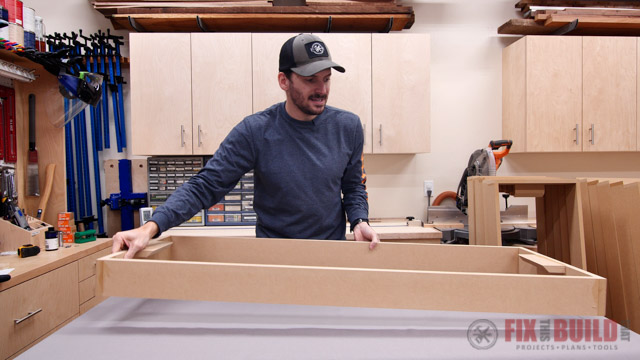
The frames will go together easily with butt joints. Wood glue and a few brad nails with a screw in the middle were helpful. Use screws if you don’t have a brad nailer. I have a strong, stable wooden frame to go around the insulation.
Adding some mitered cleats onto my frames for a unique mounting method, which you can see in the video above. But for a simpler version, you can stop here.
2. Add Fabric to the Frames
Finding the right fabric for sound panels was a mystery for me when I was doing my research. Everything I read said to use “breathable” fabric, but nobody said what type they were using other than Guilford of Maine, which is crazy expensive.
At the local fabric store, I found these rolls of 108″ Wide Solid 100% cotton fabric. It’s called Wide Solid and comes in lots of solid colors.

3 yards of fabric were needed for the front of the panels, and it was perfect to get 12 pieces out of it. Each piece was cut to 27″ x 60″, which I could then lay the panel on top of and curl it up over the sides.
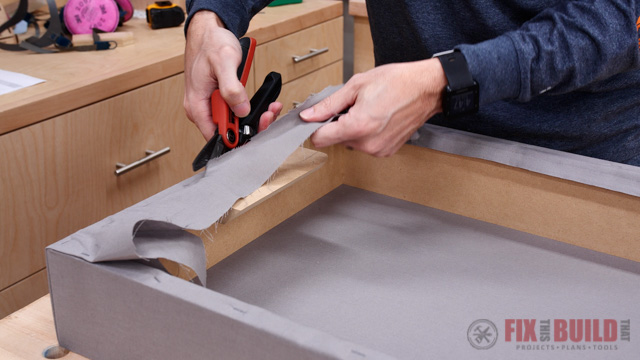
The fabric is secured to the frames with T50 staples, which you can put in by hand. It’s MUCH easier to use a pneumatic stapler. The key is to start in the center of each long side and work your way outward, keeping the fabric stretched tight as you go.

Repeat the process on the short ends, and fold up the corners into a straight edge and staple them in place.

Once you’ve got the fabric stapled in place, trim off the excess. Since my wife doesn’t let me use her nice fabric shears in the shop, I used the Wiss 7in Utility Shears. They’re great for tasks like this and a lot more heavy-duty than office scissors. After you’re done cutting fabric, you can easily cut tubing, sandpaper, or even metal flashing.
It’s as simple and easy as that! Now just repeat that 11 more times 🙂
3. Add Insulation and Backing
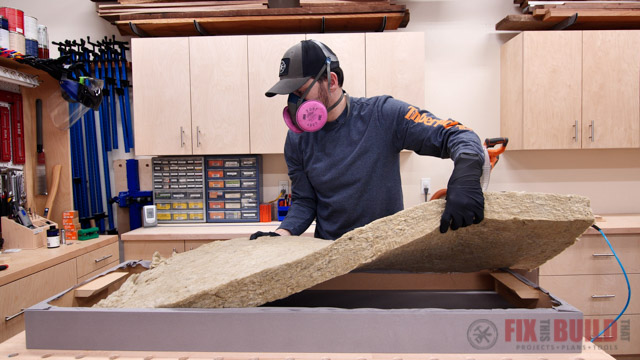
Protect Yourself from Insulation
At this point, gear up to work with insulation. Even though mineral wool isn’t quite as bad as fiberglass insulation, you don’t want it getting on your skin or in your lungs. So gear up with long sleeves, gloves, and a quality respirator.
Since the frames are perfectly fit for the insulation, this step is a breeze as well. Slide the Rockwool into the DIY acoustic panel frame and softly push it into place. You don’t want to compress the batting; just get it settled in.
Add more fabric to cover the insulation
Once it’s in the frame nicely, you want to cover it up. Leaving the backs exposed will give the insulation a chance to blow out of the frames and get into the air, which you don’t want. So I cut a small piece of fabric (the same wide solid material, just a different color) to cover the insulation. I nailed it into the sides at 3 or 4″ increments, which will provide a good barrier.
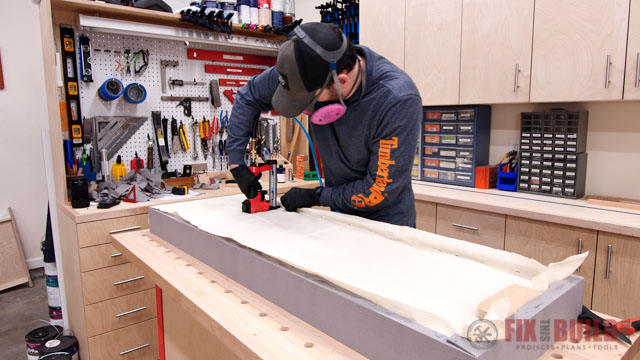
After that, I trimmed off the excess fabric with the utility shears again and repeated the process 11 more times.
4. Hanging the Acoustic Sound Panels
My DIY acoustic panels were made for the ceiling in my shop. I opted for a French cleat or sliding dovetail hanging method. Hanging them this way makes the installation so much easier. All design credit goes to Alexandre Chappel. My DIY acoustic panels are based extremely closely on his. Make sure to check out his video and see how he made his sound panels and mounted them.
Use Eye Bolts and J-Hook
But most people opt to hang them with eye bolts and a J-hook on the ceiling. This method takes longer, but you don’t need a fancy saw or to figure out how to make mitered cuts like you do in the method I used.
Either way, you want to mount the acoustic panels into the ceiling joists where you can. You can go directly into the drywall, but make sure you’re using a specialty anchor designed for that application.
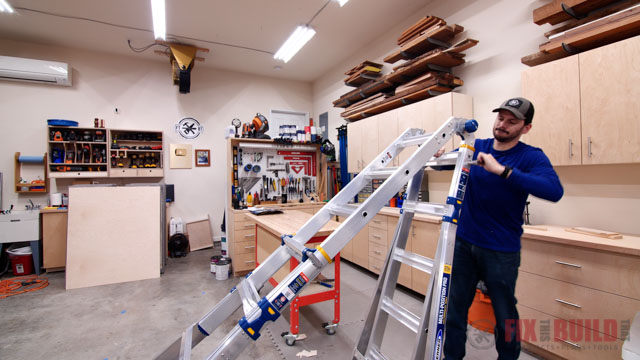
My ceilings are 11′ tall, so the Werner 22′ Multi-Position Pro ladder was exactly what I needed to reach them safely. It’s 5 ladders in 1 and can be put into 32 different positions to help you get your jobs done.
Use a Stud Finder
Using the traditional A-frame configuration and I could easily reach the 11′ tall ceilings. I marked the locations of the joists on my ceiling using a stud finder.
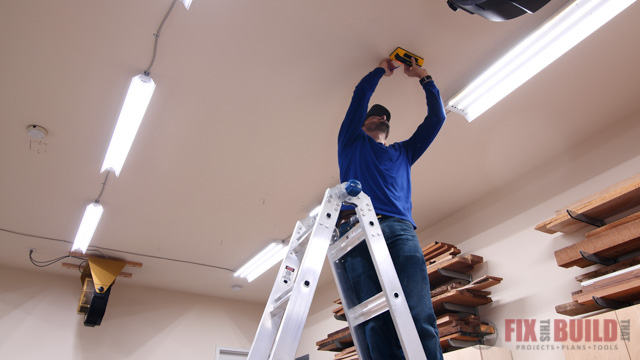
After marking out all the locations, I attached my mounting cleats with 3″ wood screws. You could attach the eye bolts the same way.
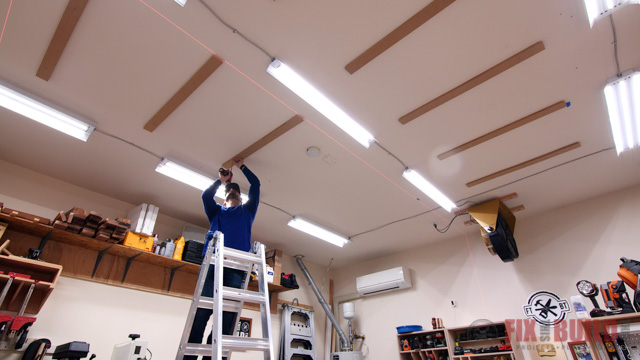
Then I could slide the acoustic panels on the mounting cleats and work my way around the shop on the ladder.
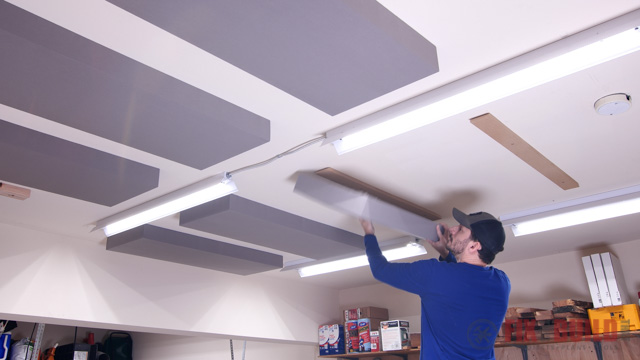
When I was done, it looked like this!
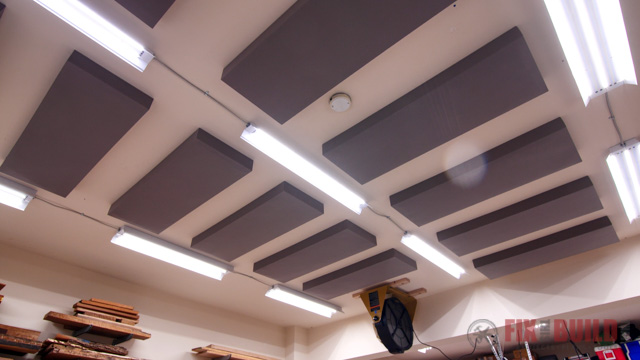
These DIY acoustic panels have made a huge difference in my shop. You can hear the before and the after sound treatment in the video to hear for yourself!
Now you know how to make your DIY Acoustic Panels, you will enjoy the difference as mine do!
The Home Depot provided me with product and/or monetary compensation as a sponsor of this build. All opinions are my own and are not filtered by the sponsor.
Did you know that I sell bundle plans for Home DIY Projects? Right now, you can BUY 2 PLANS – GET 1 FREE! Click HERE!
These bundle plans give you detailed instructions for all of your home projects! No better time for home builds than NOW!
Check out the plans on How to Make a Cutting Board from Any Wood. Click HERE for all of the details.
Have you ever thought about building a Daybed with storage drawers? I have plans for that too! Click HERE!
Looking for new Outdoor furniture and shocked by the price? Making your own Outdoor Furniture Bundle Plan can be SO easy! Click HERE for the plans.