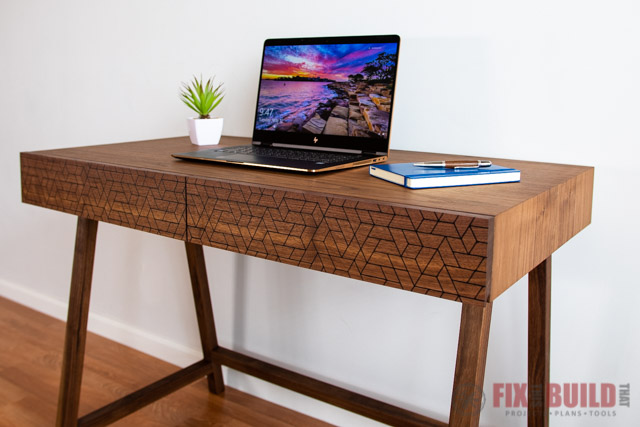
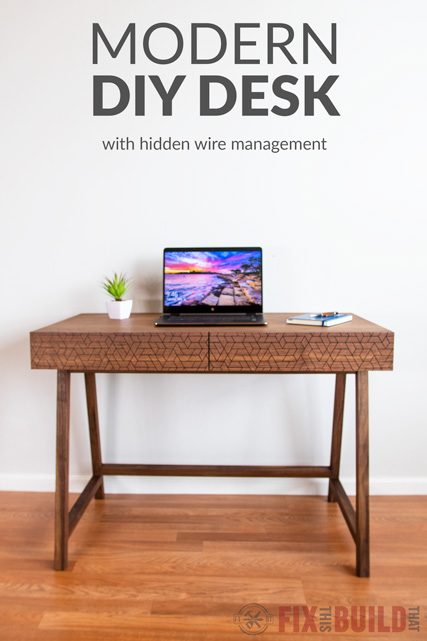
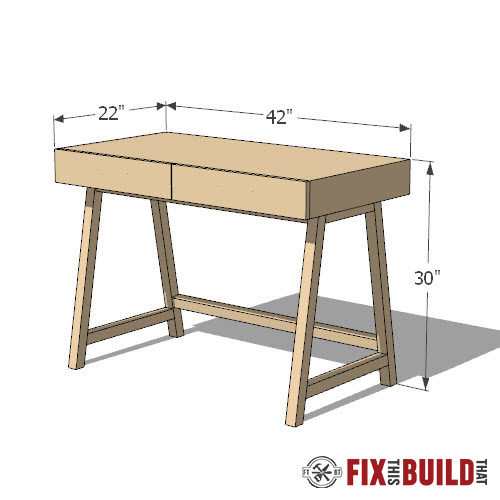
This Modern DIY Desk has clean modern lines and a hidden wire management compartment in the back. Two drawers add a place to keep all your desk essentials and keep the desk top clean. The joinery is straight forward and can use your choice of pocket holes, dowels or floating tenons. Make the desk from hardwood like I did or substitute dimensioned big box lumber for a less expensive alternative. The desk is 42” long, 22” deep and 30” tall.
Tools Used
- Table Saw
- Circular Saw
- Miter Saw
- Pocket Hole Jig
- Cordless Drill
- Doweling Jig
- Router (optional)
- 3/8” Rabbet Bit
- 1-3/4” forstner / spade bit
- 1” forstner / spade bit
- Woodriver Panel Cart
- ISOtunes Bluetooth Earbuds
Materials/Supplies
- (4) 8’ Harwood 2×2
- (1) 4’ Hardwood 1×6
- 1-1/4” Pocket Screws
- Dowel Pins
- (2) Pair 16” Drawer Slides
- Edge Banding
- Cable clips
Affiliate links are used on this page. See my disclosure page for info on affiliate programs.

How to Make a Modern DIY Desk
- Cuts and Assemble Legs of Desk
- Connect Desk Legs with Rails
- Assemble DIY Desktop
- Glue Up Desktop and Add Edge Banding
- Make Drawers
- Add Wire Management to Desk
The base for this DIY desk is made from solid walnut. I milled rough walnut boards down to get the parts to 1.5” by 1.5.” But if you don’t have access to milling machines you could use off the shelf 2×2’s instead.
1. Cut and Assemble Legs of Desk
Cut Parts for Legs
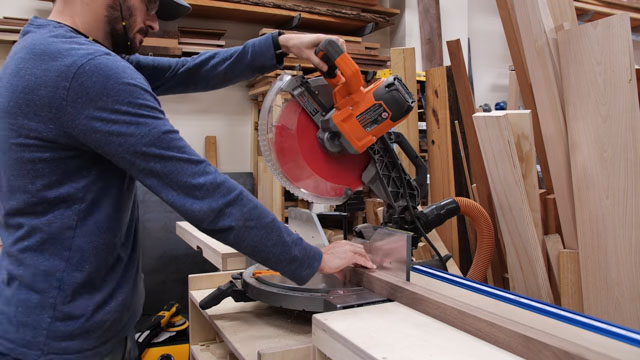
The base is an a-frame style with the legs angling out from the top. I set my miter saw for the angle I needed and cut the ends off of the legs. But don’t throw away those offcuts, we’ll use them in just a minute.
Next I marked the legs to length and cut them on my miter saw. Then I used the offcuts to make the upper and lower rails of the side assembly. I cut everything to size, then it was time for some joinery.
Build Legs with Dowel Joinery
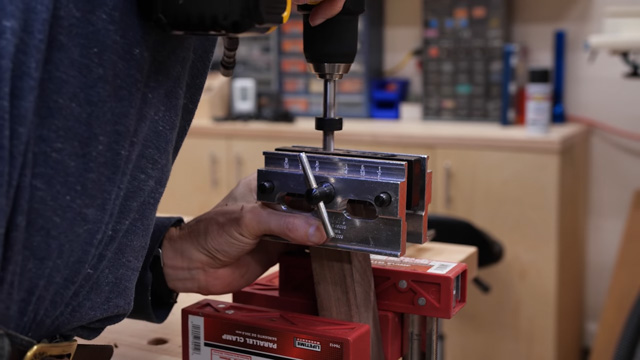
Next I laid out the pieces I’m using for each side and marked where I needed to add dowels. Once that was done I used my poor man’s vise, two parallel clamps clamped together, to hold the rail steady. Then I was able to easily drill the holes in the end of each piece using my self-centering dowel jig.
Next I put the top rail together and clamped it in place. Then I slid the lower rail up until it fit snug and measured to make sure the sides were parallel to the bottom. After that I marked where I’ll be adding dowels to the lower rail. 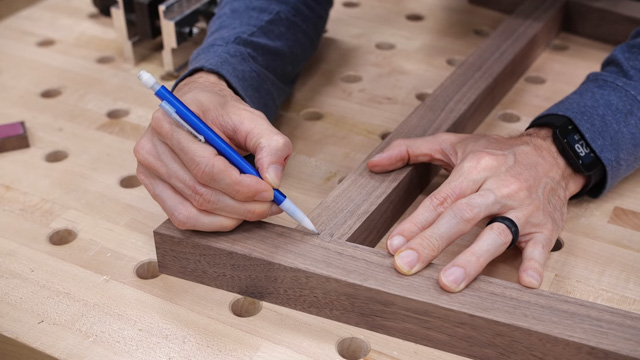
Finally I could drill the holes in the lower rail and the legs to finish off the joinery for the side assembly. The last step is to add glue to the dowels and then the leg assembly is done. Then I came back and sanded all the joints flush and removed any dried glue so it wouldn’t affect the finish later.
2. Connect Desk Legs with Rails
Attach Lower Rail
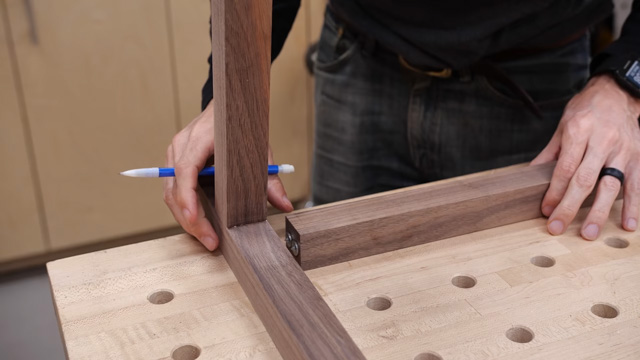
The sides are joined by two top rails and a lower rail in the back. After cutting all three pieces to length I started by attaching the lower rail. I used dowels for the joinery so I started by drilling holes on the ends of the rail. Then I used dowel points to figure out where the holes should line up on the leg assemblies.
I drilled ⅜” holes on those spots with my drill press and added the dowels with glue. After clamping the stretcher in place and letting the glue dry I was done with the bottom stretcher.
Attach Upper Rails
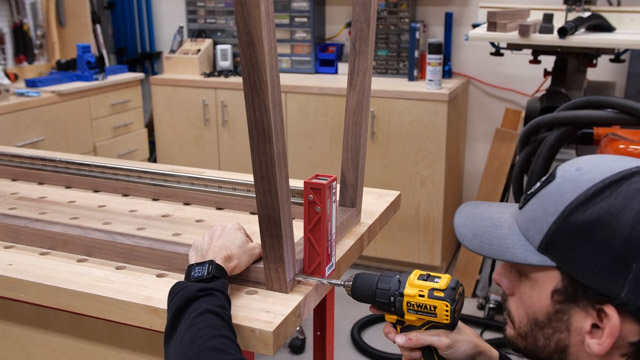
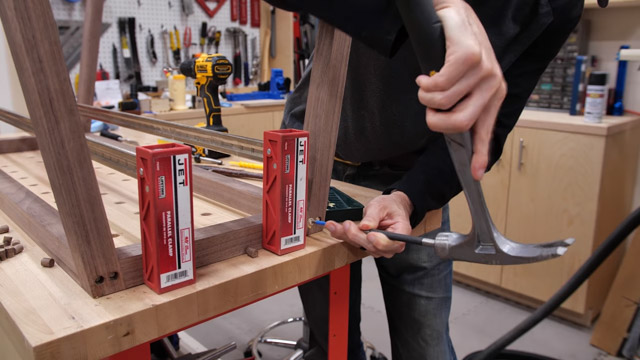
I planned to use pocket holes to attach the top stretchers but quickly realized my pocket hole screws weren’t the right length. Instead I decided to add dowels from the outside of the leg assemblies.
I started by laying out marks for two dowels at each joint. To drill the holes I clamped everything together and drilled straight through both pieces at the same time.
 Then I put some glue on the dowels and hammered them into place. I used a punch with a piece of tape marked on it to put them exactly halfway between the sides and the stretchers.
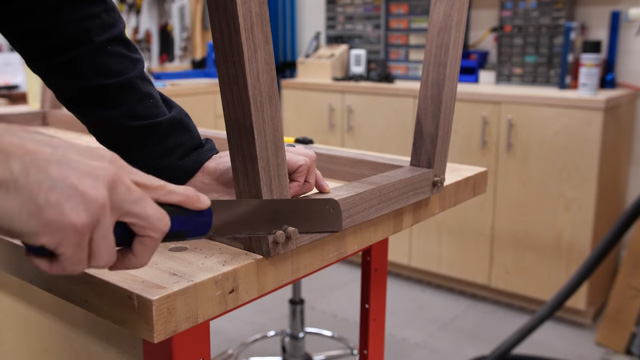
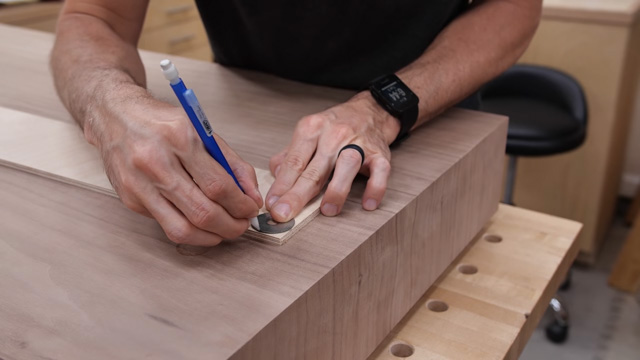
To make sure the plugs really blend in I cut some custom walnut plugs using a plug cutter in my drill press.
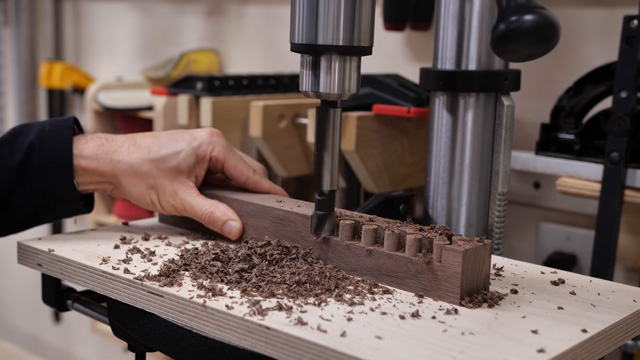
I put the plugs in as far as they would go then I finished up by cutting the plugs with a flush trim saw. The matching the grain direction on the plugs makes them almost disappear.
3. Assemble DIY Desktop
Cut the Miters
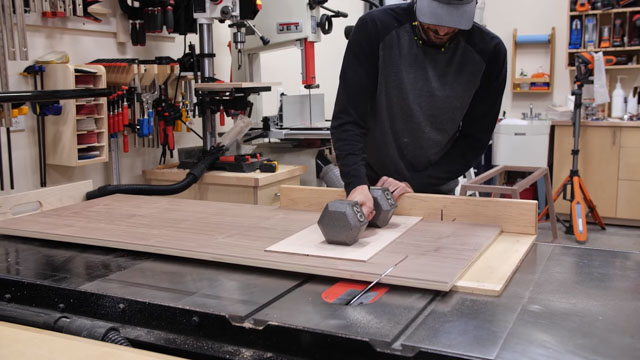
I made the top of the desk using ¾” walnut plywood. After ripping the top and bottom pieces to width I started making the miters for the box. I’m using the tablesaw and my old sled to make the angled cuts, but you could also use a track saw or the router table as well.
I left the piece for the top long so I could cut it exactly to size and have enough material on the offcuts to make the left and right sides. This will give me a continuous or waterfall grain around the sides which looks really awesome. The dumbell is on top of the plywood to make sure it’s laying flat along the whole cut so my miters will be tight.
 I’m going to be reinforcing the miters with a spline of ¼” plywood. Check out How to Make Splines for more information on how I make my splines along with tips and tricks.
Make Cuts for Drawers
The top has two drawers separated for a center divider and I’m using dados cut in the top and bottom to hold the divider in place. After a few test cuts to dial in the right sized dado for my plywood I ran the top and bottom through the saw.

Next I cut a center divider from the offcut of the bottom piece and trimmed it shorter than the depth of the desk. Leaving it short is the first part of the chase for the wire management. Finally I cut a long piece the length of the inside of the desk that will go behind the divider to close off the drawer section and make that hidden area.
4. Glue Up Desktop and Add Edge Banding
Dry Fit Desktop
Before I glued up the desk I did a dry fit to make sure everything lined up properly. I also added some pocket holes to the long divider so I could easily attach it during assembly. When you do your glue up make sure to use a slow setting glue for this glue up (which I didn’t do, it was a little crazy).
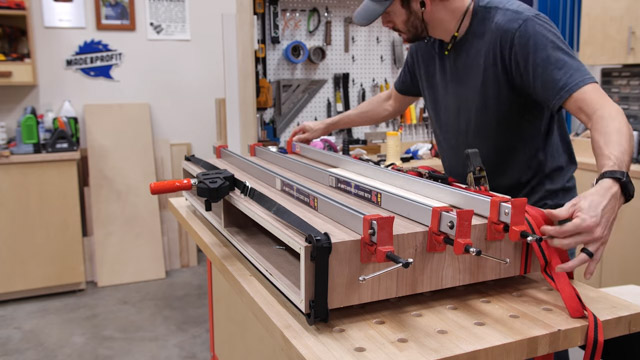
Glue Up Desktop
When you start the glue up make sure to start from the bottom and put the center divider in place. Then screw down the long piece across the back of the desk.
 Finally you’ll add the mitered splines. A good web clamp is perfect for this glue up. How to Make Splines has more details on how to glue up this desktop as well.
Add Edge Banding
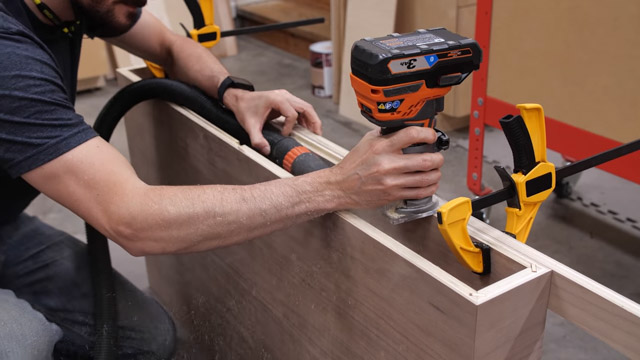
To cover the plywood edges on the front I milled up some small walnut strips from the boards. I made the edge banding just slightly larger than the plywood at ⅛” thick.
I mitered the trim to go around the outside of the box and attached it with glue and 23 gauge pin nails. The pin nails leave very small holes that can be filled later with sawdust and glue. But I think just clamping the trim on with some painters tape and letting it dry would be a good option too.
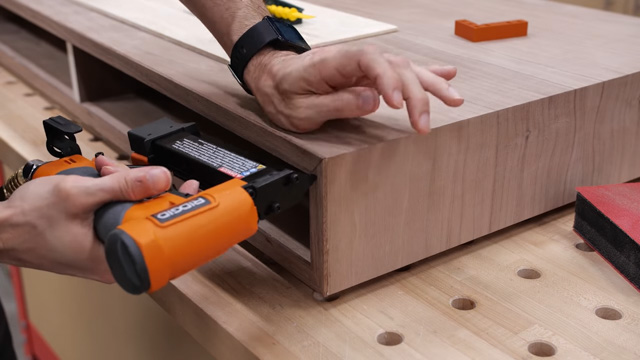
Finally I cut a small piece to fit on the center divider then came back after an hour and sanded all the trim flush with the box on the inside and outside of the drawer openings.
5. Make Drawers for DIY Desk
Build the Drawers
Next I measured and cut the drawer parts for the desk. I’m using full extension soft close slides and adjusted my measurements to fit the hardware.
I made the drawers for the DIY desk following the method I explain in How To Make Drawers in 6 Easy Steps, with one big difference. I used ½” baltic birch instead of the ¾” I usually use. This wasn’t an issue when I screwed the sides together, but it was a bit tricky to attach the bottom with brad nails or staples. I had problems with both of them blowing out and also spacing the nails far enough from the edge so I could chamfer the bottom and not hit one. 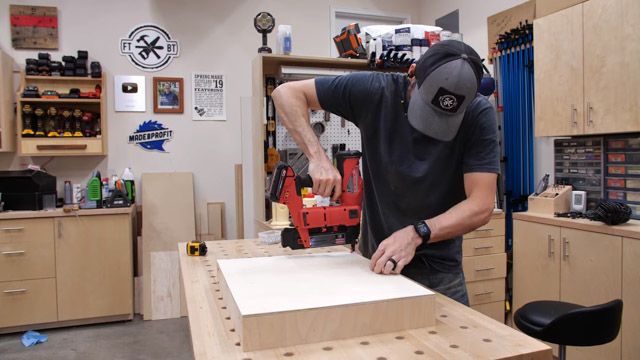
So If you go with ½” ply I’d recommend a floating bottom panel instead. And to finish off these drawers I wanted to make some unique drawer fronts with my CNC.
Cut Detail on Drawer Fronts
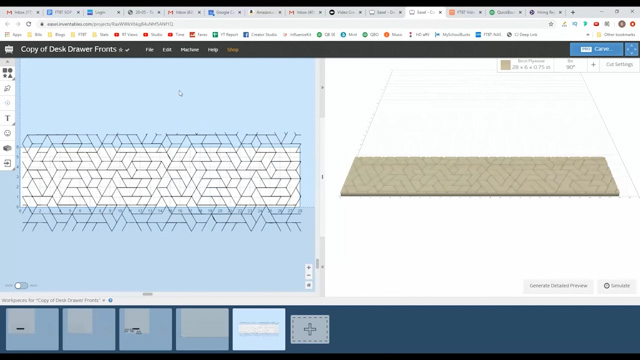
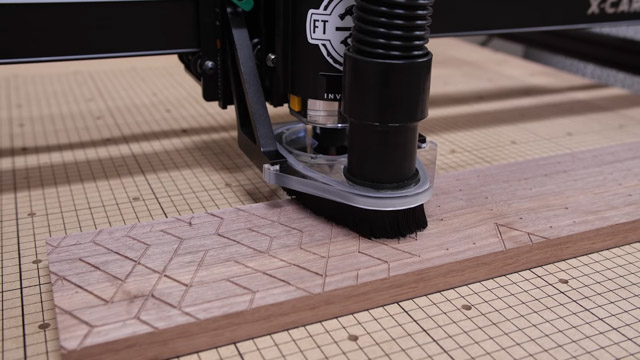
I’m using my X-Carve to add detail to the drawer fronts on my DIY desk. The design I’m using actually came from a wallpaper I saw online. I took a picture of it and traced it in Illustrator then imported it into Easel, which is Inventables’ design and cutting software for the X-Carve.
Then I secured the drawer front to the CNC work surface, using tape and CA glue so I could carve the entire surface. I used a 60 degree v-bit to cut out the design about ⅛” deep, and I did leave the fronts oversized so I could cut them to an exact fit later on.
Add Colored Epoxy to Drawer Fronts
After cutting both pieces I gave them a quick sanding and wrapped the edges in tape so I’d be ready to add colored epoxy. To do this I mixed up some Total Boat high performance epoxy with a fast setting hardener and added in black pigment to the mix. I found it was easiest to apply the epoxy almost like you put grout on a tile floor.
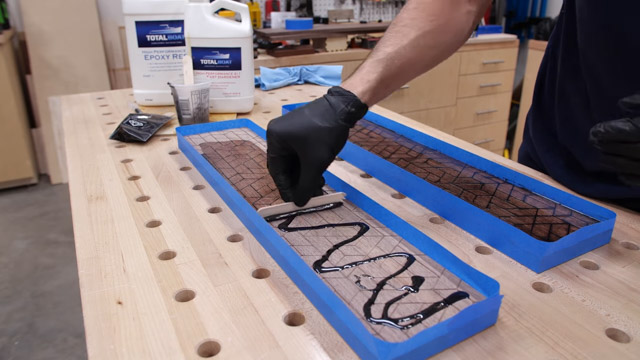
Then I backfilled the lines with a syringe to get the epoxy above the wood where needed. This was actually really fun to do.
The next day I sanded away all the epoxy on the surface until I got back down to raw wood and it looked awesome! This was exactly what I was hoping for.
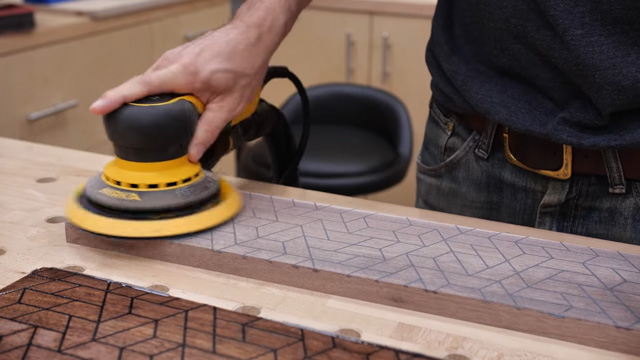
I cut the fronts to final size and it gave me clean epoxy edges on the outside. It also let me line up the designs on the drawer fronts so I had a seamless transition between them. Finally I used my router table to route finger pulls on the underside of the fronts.
6. Add Wire Management to Desk
Make Panel for Back of Desk
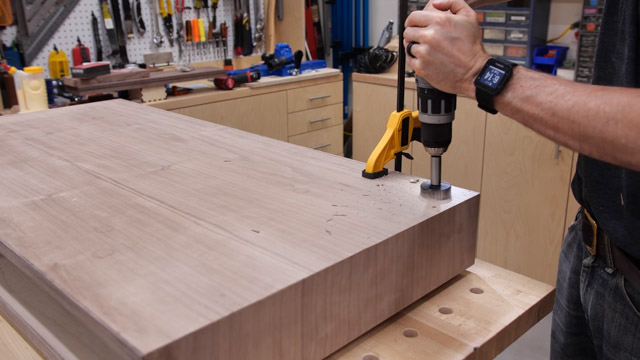
The last piece of the puzzle was to trick out the wire management for the top. I started by routing a rabbet in the back to hold a ¼” plywood panel.
The whole purpose of the chase is to get a lot of wires into it and send fewer wires out. I’ll have a USB hub in there as well as a power strip, but we’ll still have some wires that need to go out.
I drilled holes on the bottom in the back corners and positioned them so they were inline with the legs.
Though I’d probably move them in a little further if I built this again. And if you want plans for this desk I have those available and they include all my changes I’d make.
To enclose the chase I cut down a piece of ¼” plywood using referential measurements a.k.a putting it in place and marking it. But referential measurements sound way more fun.
I could have squared the corners of the rabbet on the back with a chisel but instead I decided to round the corners of the back panel. It was fast and easy to do using a fender washer to make the curve and sanding it to the line on my oscillating belt sander.
Next I decided to route the wires from the monitor and table top elements through a slot I added in the removable panel. I also used some cable clips on the back of my monitor to tame the wires. Then I drilled finger holes in the panel to make it easy to remove. I also decided to attach the removable panel with magnets which worked well. Check out the full video for this project for more details on how I did this.
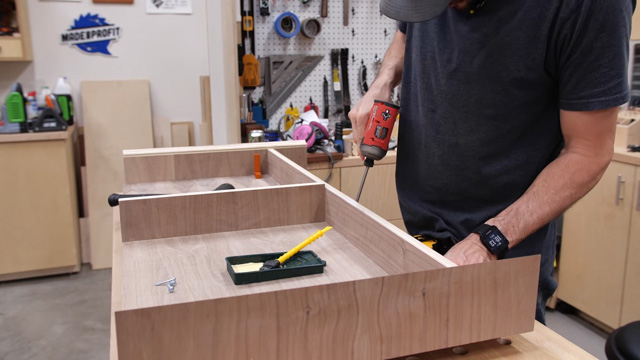
Mount Drawers and Add Finish
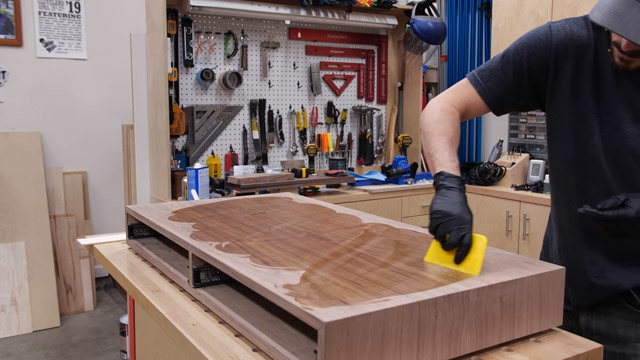
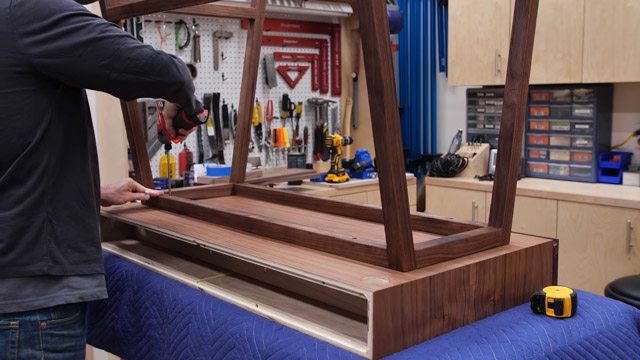
Finally I mounted the drawer slides in the box and added the finish to the DIY desk. I used Rubio Pure for the finish and I love the way this stuff goes on. It’s by far the easiest finish I’ve ever used. I applied it to the top, base and drawer fronts and it really made those fronts pop.
After that I installed the fronts and mounted the top on the base with counterbored screws.
 And just like that the DIY Desk was done! I really love how modern and clean DIY Desk looks, it’s just what I was going for. And the wire management keeps all the cords under control which adds to the clean look. If you’re looking for more desk ideas check out my Hidden Wireless Charging Desk and my DIY Desk with Drawers.
JET and Woodcraft provided me with product and/or monetary compensation as a sponsor of this build. All opinions are my own and are not filtered by the sponsor.


